Packed out lower steering column mount
67 posts
• Page 4 of 5 • 1, 2, 3, 4, 5
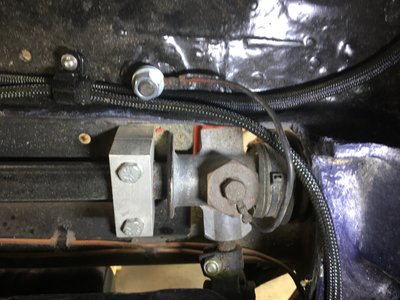
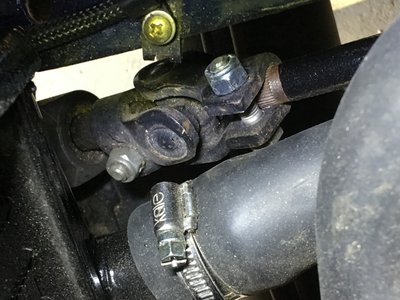
My original joint had some sort of flexible rubber canvas middle plate, I?ve replaced it with a proper uj as in the photo below. Looks very similar to the one you found on eBay but came with the bolts nuts and washers.
Also took a pic of the solid rack mounting showing it on my Spyder chassis. Nothing stamped on chassis about bump steer shims, if I remember correctly there was a label wired to the mount stating the shim thickness required. But it?s unlikely the mounts are far out unless the chassis has been damaged. I?ve only got a thin shim under one mount and nothing on the other one.
Also took a pic of the solid rack mounting showing it on my Spyder chassis. Nothing stamped on chassis about bump steer shims, if I remember correctly there was a label wired to the mount stating the shim thickness required. But it?s unlikely the mounts are far out unless the chassis has been damaged. I?ve only got a thin shim under one mount and nothing on the other one.
Change is inevitable, except from a vending machine!
- Bigbaldybloke
- Fourth Gear

- Posts: 889
- Joined: 16 May 2017
Well, I have taken another look. At last, some good news, I think. The bottom joint spline is loose! I can see the flexible joint sliding up and down on the pinion. However, the nut on the securing bolt is done up tight. I'm not sure, but it looks as if there is a thread in the clamp, meaning the nut is a lock nut only - is that right? Looks like I can undo it from below without taking the rad off; result (if I'm successful)!
Anyway, I will easily be able to slide the steering shaft back to make the necessary adjustment now.
..hopefully..
Whilst I was on MEV's site, I also ordered new top ball joints and trunnions, plus new rubber rack mounts and steering column bushes, because they were all at good prices. Nothing like taking the bull by the horns. I now need front wishbone bushes and bolts, then I can overhaul the front suspension (I'll leave the anti-roll bar bushings for now, they can be done later).
[Edit: And I have ordered a proper U/J for the steering column lower joint. Do it properly!]
Last edited by JonB on Thu Nov 30, 2017 3:46 pm, edited 2 times in total.
-

JonB - Coveted Fifth Gear

- Posts: 2371
- Joined: 14 Nov 2017
A small note regarding jacking.
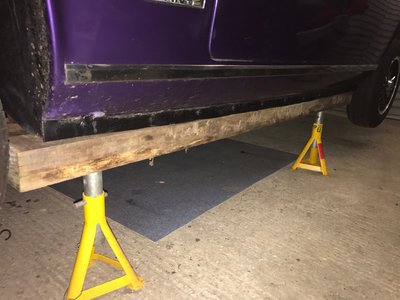
The guy from Spyder Engineering said they always use two post lifts to jack up Elans, with a 6" square spreader plate at each lifting point. These are at the ends of each of the sills, and given that my car has healthy inner sills, I think this will be OK. I'm proposing to run a stout beam along each side of the car (under the sills, but inside the bottom lip of the body) and put axle stands at each corner.
Comments?
-

JonB - Coveted Fifth Gear

- Posts: 2371
- Joined: 14 Nov 2017
I have a quickjack lift and use 2 * 2*4" planks under each sill with foam top. Works fine just need to be careful to place under strong area of the, e.g. not the flat bits.
'73 +2 130/5 RHD, now on the road and very slowly rolling though a "restoration"
- mbell
- Coveted Fifth Gear

- Posts: 2640
- Joined: 07 Jun 2013
Yes, Mark. The lower clamp isn't threaded, so it was loose but the bolt was torqued up really well. Bugger that, I have ordered a proper U/J.
So.. took a chance and jacked it up on hardwood posts laid along the edge of the floor by the sill.
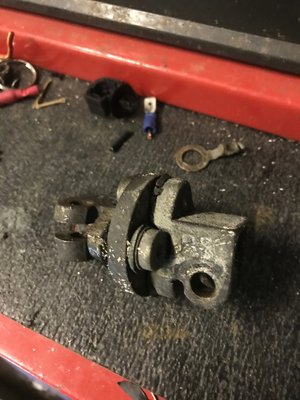
Same both sides. Seems OK, so I went under the car on a creeper to see if I could get the flexi joint off the steering shaft and column. Long story short...
I must say, it's not very flexible!
Next up, I thought I'd have a go at bleeding the clutch slave cylinder. Access was tricky but I got the bleed pipe fitted in the end, and loosened the nipple enough. New DOT4 synthetic fluid flushed through and no black soot in the reservoir. Result.
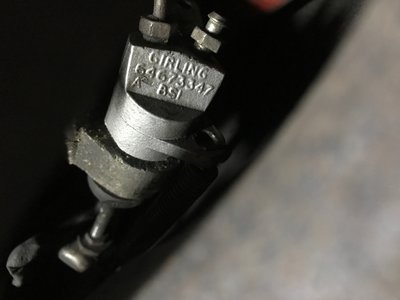
I took a picture of the slave cylinder markings.
Anyone know what diameter the cylinder bore is from these casting marks?
Anyway, this is me with a big cheesy grin on my face:
Getting it up on stands made all the difference. I can lie on the creeper and get under there easily. Wish I'd done it sooner, but I was concerned about jacking it up on the bodywork. Seems it is strong enough after all, like the guy from Spyder said.
-

JonB - Coveted Fifth Gear

- Posts: 2371
- Joined: 14 Nov 2017
OK, I have checked and it's 7/8" bore - the correct part. Bit of a relief, as the cylinder was overhauled only a couple of years ago. (Yeah, I know: why all the black crud in the fluid, eh?)
Meanwhile, I discovered that my clutch line is metal, then flexible, then metal; so no problems with plastic pipes. I'll deffo fit a heat shield though.
Meanwhile, I discovered that my clutch line is metal, then flexible, then metal; so no problems with plastic pipes. I'll deffo fit a heat shield though.
-

JonB - Coveted Fifth Gear

- Posts: 2371
- Joined: 14 Nov 2017
Hi Jon
Great work, making real progress now. Looks like it should be really stable with the stands where they are.
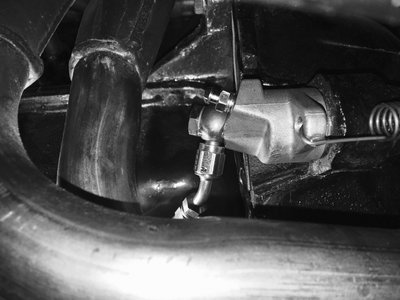
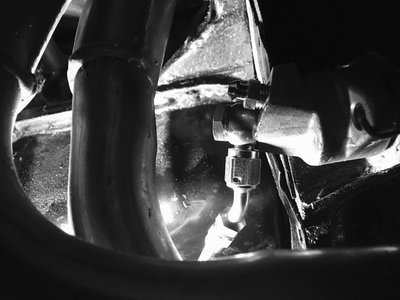
Regarding the clutch slave cylinder, I?ve ended up replacing mine, but while doing it I fitted an aeroquip type flexible line all the way from the master cylinder to the slave cylinder, but the sneaky bit was I changed the connection on the slave cylinder to a banjo type which enabled me to route the pipe well clear from the exhaust which was proving difficult with the solid line as I couldn?t get a tight enough bend without kinking the line, can send you pictures and part no?s if you are interested. Would still work with your existing setup with uses a combination of solid lines at each end and a flex in the middle, all you would need to do is change the short piece of solid pipe at the slave cylinder end and make up a new one to go into the banjo which has a 3/8? unf thread as standard.
I think it?s the heat from the exhaust that carbonises the fluid so keeping the pipe well away from the exhaust will really help.
Cheers
Simon
Change is inevitable, except from a vending machine!
- Bigbaldybloke
- Fourth Gear

- Posts: 889
- Joined: 16 May 2017
Thanks, Simon.
My slave cylinder was replaced about a year ago by the PO so I will leave it for now. Would still like to see pictures and part numbers of yours if you have time. Kelvedon do a braided clutch line with a banjo for ?32.50+VAT; I might get one, because I like the idea of changing out the flexible bit of the existing pipe (it's looking a bit old). PLus, all the brake flexies are already braided so it's match.
They also have a much more expensive concentric clutch kit but I've no way of knowing how that will affect the clutch feel. Anyone tried it? Engine out to fit of course!
-

JonB - Coveted Fifth Gear

- Posts: 2371
- Joined: 14 Nov 2017
Jon
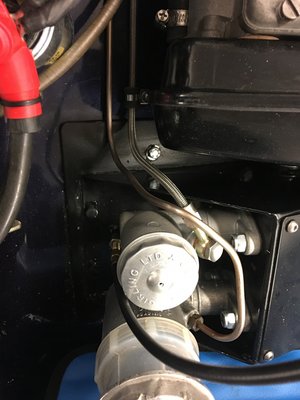
I?ve fitted the Kelvedon clutch hose, but what I did was fit the supplied banjo end to the master cylinder then buy a second one for the slave cylinder end. Difficult to get pictures but my best attempt is attached. The slave cylinder is threaded 3/8? unf, can?t find the part numbers at present but will look online for the details.
I?ve fitted the Kelvedon clutch hose, but what I did was fit the supplied banjo end to the master cylinder then buy a second one for the slave cylinder end. Difficult to get pictures but my best attempt is attached. The slave cylinder is threaded 3/8? unf, can?t find the part numbers at present but will look online for the details.
Change is inevitable, except from a vending machine!
- Bigbaldybloke
- Fourth Gear

- Posts: 889
- Joined: 16 May 2017
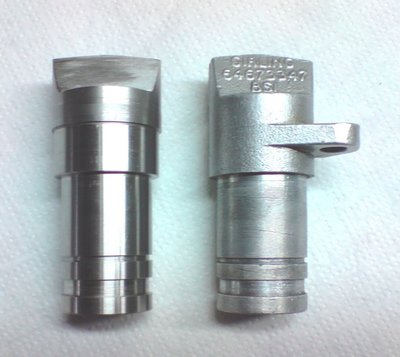
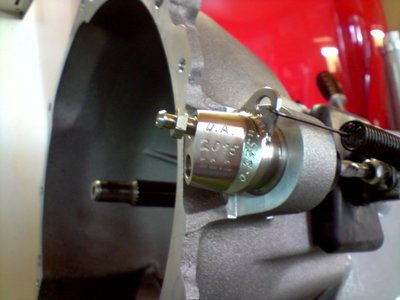
The Zetec conversion also included a concentric throw out. I used a Mondaeo/Contour unit. Went a bit deep in that I made a new bearing retainer for the gearbox, spacing the unit out to the pressure plate. This could be done with spacers and long bolts. Clutch feel is identical to the S2. I also extended the bleed screw from inside the bell housing up to in between the clutch and brake masters. This being the high point in the system allows me to bleed the slave via gravity. Just open the bleed screw, pour fluid into the master and the fluid will seek the same level at the bleed as in the master. The slave was clocked so the bleed port was at the highest point. Rather than route the flex lines through the old arm hole, I drilled two (2) holes in the upper left side of the bell housing and routed the lines through the new holes, leaving no low spot for air to be trapped.
The only negative with the new slave is, the bearing is spring loaded towards the pressure plate. In its original use, this places the bearing under pressure agains the clutch fingers. Which means the bearing must be depressed back far enough to allow enough travel to release the driven plate. The spring is quite stiff, which makes attaching the bell housing to the engine a bit of a pain as you try to depress the bearing. As I am using a Mondaeo/Countour pressure plate, this method of clutch operation, with constant pressure on the fingers, is a standard lash up. If I were to use the normal pressure plate for the TC, I would have chosen a different concentric slave that did not preload the bearing.
The only negative with the new slave is, the bearing is spring loaded towards the pressure plate. In its original use, this places the bearing under pressure agains the clutch fingers. Which means the bearing must be depressed back far enough to allow enough travel to release the driven plate. The spring is quite stiff, which makes attaching the bell housing to the engine a bit of a pain as you try to depress the bearing. As I am using a Mondaeo/Countour pressure plate, this method of clutch operation, with constant pressure on the fingers, is a standard lash up. If I were to use the normal pressure plate for the TC, I would have chosen a different concentric slave that did not preload the bearing.
Rob Walker
26-4889
50-0315N
1964 Sabra GT
1964 Elva Mk4T Coupe (awaiting restoration)
1965 Ford Falcon Ranchero, 302,AOD,9",rack and pinion,disc,etc,etc,etc
1954 Nash Healey LeMans Coupe
Owning a Lotus will get you off the couch
26-4889
50-0315N
1964 Sabra GT
1964 Elva Mk4T Coupe (awaiting restoration)
1965 Ford Falcon Ranchero, 302,AOD,9",rack and pinion,disc,etc,etc,etc
1954 Nash Healey LeMans Coupe
Owning a Lotus will get you off the couch
- prezoom
- Coveted Fifth Gear

- Posts: 1192
- Joined: 16 Mar 2009
[quote="JonB"........The trunnions are dry and there is a soapy residue of dried out grease around the joints and rust at the seals.They have obviously been lubricated with grease, not EP90 (bad, because I am firmly in the "EP90" camp as regards trunnion maintenance). To be fair, I did expect this.
[......[/quote]
Hi Jon
I think you really meant to say the trunnions had not been lubricated with grease for a long time
If the had not been lubricated with EP90 for a long time they would have filled with water and worn out even quicker
cheers
Rohan
[......[/quote]
Hi Jon
I think you really meant to say the trunnions had not been lubricated with grease for a long time
If the had not been lubricated with EP90 for a long time they would have filled with water and worn out even quicker
cheers
Rohan
-

rgh0 - Coveted Fifth Gear

- Posts: 8407
- Joined: 22 Sep 2003
67 posts
• Page 4 of 5 • 1, 2, 3, 4, 5
Total Online:
Users browsing this forum: No registered users and 30 guests

