Spyder rear seat belt kit
8 posts
• Page 1 of 1
Thought as it's a nice day I would have a go at fitting the rear seat belts...
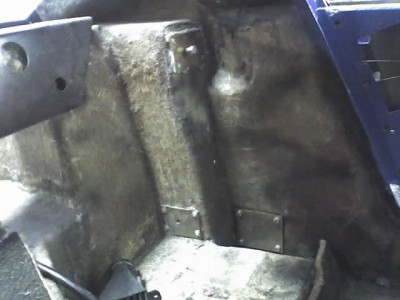
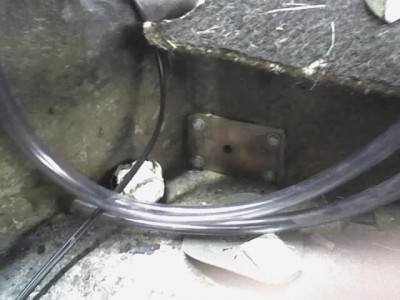
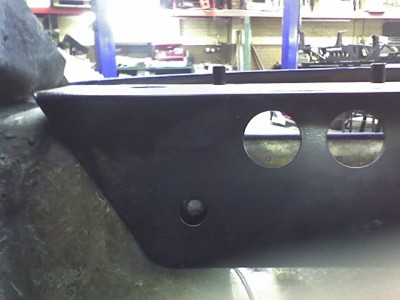
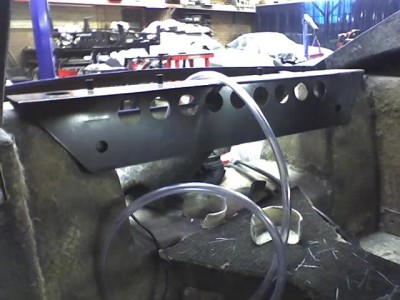
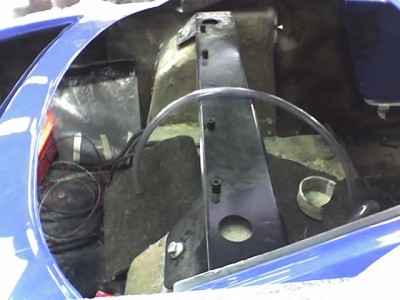
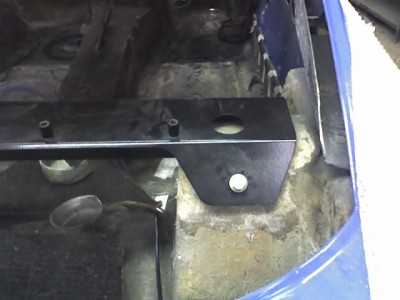
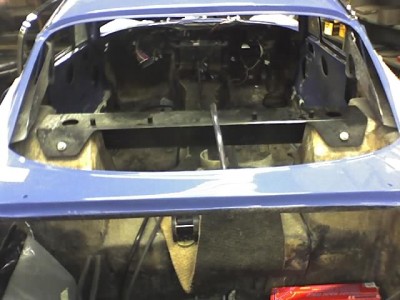
Does anybody have an idiot's guide ? I've removed the rear seat backs, and the parcel shelf (very interesting wiring underneath, must sort that out) and the stock rear brace, but I can't work out how the new brace fits. There are some fittings on the back, i.e. where it slopes back down into the boot, they look like seatbelt fittings, but why ? Surely the harnesses fit on the 4 black barrels on the top ? They would be under the parcel shelf anyway once it's all back together, I can't see what they are for.
Just checked their website and they are closed sat afternoons... looks like I won't get it done this weekend after all.
1968 Plus Two
2020 Royal Enfield Continental GT 650
2020 Royal Enfield Continental GT 650
- Shiny_kit
- Second Gear

- Posts: 87
- Joined: 24 Feb 2009
OK, think I am getting somewhere. Found some pics of the Spyder brace installed, looks like the 2 fittings I was worried about fit into the back of the wheel arch somehow. No hole though to fit them in at present, might be interesting drilling one in situ without taking the rear screen out. Still think I will need to give them a call on Monday though, unless some kind soul who's already done this can help me out with some guidance. Once I have sussed it all out I will post a step-by-step guide, I think.
1968 Plus Two
2020 Royal Enfield Continental GT 650
2020 Royal Enfield Continental GT 650
- Shiny_kit
- Second Gear

- Posts: 87
- Joined: 24 Feb 2009
Yes, you've correctly worked out that the rear-facing folded-down part attaches to the body. I managed to drill the holes without removing the screen. I did it by hand using short drill bits & a cloth - it is only fibreglass but it is quite thick here so it needs patience & makes your fingers hurt... 
 Matthew
- ppnelan
- Fourth Gear

- Posts: 691
- Joined: 16 Sep 2003
I was looking at this option. Sean at Spider sent me the following pics in response to some queries. I'll been keen to see your write up of the fitting experience - especially that drilling problem.
Exceedingly yellow '68 +2
Todays top tip: create a spooky lighting effect by forgetting to switch off and remove your torch from the nose area before refitting the grille.
Todays top tip: create a spooky lighting effect by forgetting to switch off and remove your torch from the nose area before refitting the grille.
-

yandy - First Gear

- Posts: 47
- Joined: 20 Nov 2007
I installed the Spyder kit last year, and struggled with the "reverse" drilling into the rear of the wheel arches.
In the end I used a battery hand drill with a right-angled drive attachment (meant really for hex-head screwdriver bits I think) and a hex-head hole-cutter. The hole-cutter worked well compared to a drill-bit, needed a lot less pressure. I think Andy recommended it to me.
Even when I've got all this crap together, I still found it sweaty and awkward. The bit + fat attachment was rather too long to go under the rear window and it was hard to stop knocking the window while I was at it.
But I persevered and once I had the holes cut, the fitting itself was a doddle.
I actually found in inboard lower mounting plates very awkward, as there's very little clearance to the chassis and my help on the day was six years old .
.
Anyway, in the end it was worth it. The kids love the novelty of the four-point "racing" harness.
Good luck!
In the end I used a battery hand drill with a right-angled drive attachment (meant really for hex-head screwdriver bits I think) and a hex-head hole-cutter. The hole-cutter worked well compared to a drill-bit, needed a lot less pressure. I think Andy recommended it to me.
Even when I've got all this crap together, I still found it sweaty and awkward. The bit + fat attachment was rather too long to go under the rear window and it was hard to stop knocking the window while I was at it.
But I persevered and once I had the holes cut, the fitting itself was a doddle.
I actually found in inboard lower mounting plates very awkward, as there's very little clearance to the chassis and my help on the day was six years old
Anyway, in the end it was worth it. The kids love the novelty of the four-point "racing" harness.
Good luck!
68 +2 Carnival Red
- dgently
- Second Gear

- Posts: 72
- Joined: 21 Apr 2008
You're not kidding - how on earth are you supposed to get the 4 corner bolts in, when the back plate barely fits between the body and the chassis ? One, maybe, where it's clear of the chassis, but not 4. Wishing I hadn't started this job now... and just noticed that one of my doughnuts is looking very dodgy, while I was under there. I knew trying to do this on Mother's day was a bad idea !
1968 Plus Two
2020 Royal Enfield Continental GT 650
2020 Royal Enfield Continental GT 650
- Shiny_kit
- Second Gear

- Posts: 87
- Joined: 24 Feb 2009
The rearmost pair of the four bolts isn't too bad, but I had to cut the front pair to around 1", and got my assistant to start turning the bolts inside the care when I had positioned the nuts over the holes as best I could with a straight ring spanner.
My assistant learned a lot of new words that day.
My assistant learned a lot of new words that day.
68 +2 Carnival Red
- dgently
- Second Gear

- Posts: 72
- Joined: 21 Apr 2008
8 posts
• Page 1 of 1
Total Online:
Users browsing this forum: No registered users and 10 guests

