Tightening flexible brake pipes.
25 posts
• Page 2 of 2 • 1, 2
Here's an alternative tool. Called a Crowfoot. I have found them very useful for tight spaces.
http://www.ebay.com/itm/Snap-on-Tools-1 ... 75&vxp=mtr
Paul
http://www.ebay.com/itm/Snap-on-Tools-1 ... 75&vxp=mtr
Paul
- PBrown60
- First Gear

- Posts: 32
- Joined: 19 Sep 2011
bmcman.ie wrote:i always use the blade of a screwdriver to wedge in the side or top clearance between bracket and pipe, and tighten the hard pipe, works every time! ian.
Yes, my way, too. I believe the 'legs' of the tab is to keep the tab from flexing and breaking off.
Greg Z
Greg Z
45/0243K Sprint
45/7286 S3 SE DHC
45/0243K Sprint
45/7286 S3 SE DHC
-

gjz30075 - Coveted Fifth Gear

- Posts: 3028
- Joined: 12 Sep 2003
Hi Bill
On reflection, and it takes time these days! I tightened this part of the flexible first by sliding a ring spanner along the length of the pipe to hold the flexible to tighten the nut, I then slid the ring spanner off and tightened the flexi to the bracket at the other end using normal spanners where the accessibility is far better - hope this makes sense to you.
Regards
John
-

c42 - Third Gear

- Posts: 313
- Joined: 10 Sep 2009
bmcman.ie wrote:i always use the blade of a screwdriver to wedge in the side or top clearance between bracket and pipe, and tighten the hard pipe, works every time! ian.
Tried that it didn't hold well enough, to satisfy me.
c42 wrote:Hi Bill
On reflection, and it takes time these days! I tightened this part of the flexible first by sliding a ring spanner along the length of the pipe to hold the flexible to tighten the nut, I then slid the ring spanner off and tightened the flexi to the bracket at the other end using normal spanners where the accessibility is far better - hope this makes sense to you.
Regards
John
Makes perfect sense but alas I opted to use banjo ends at the calliper end and a 9/16 ring spanner won't pass over the banjo.
~~~~~~~~
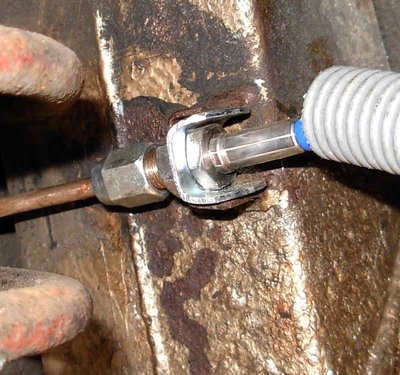
However I have decided that trying to create the ultimate ultra-thin flange spanner is going to be a lost cause and I am going to take a totally different approach. In fact I'm going to do what it seems Lotus might have been trying to do, i.e. make the fitting such that the hex end of the flexible hose CANNOT turn, because it will be too tight a fit in the bracket.
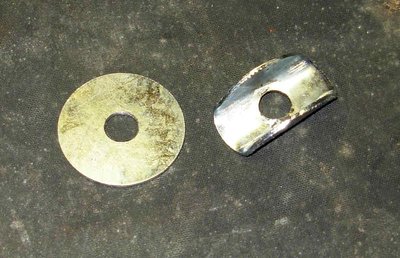
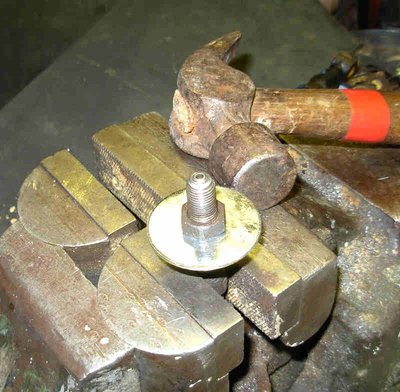
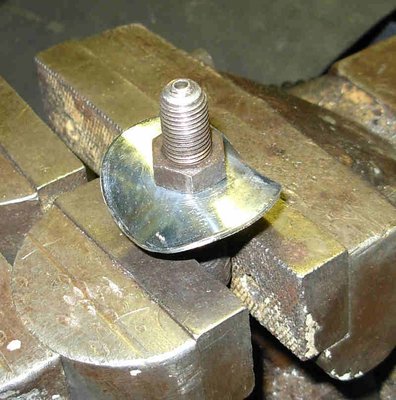
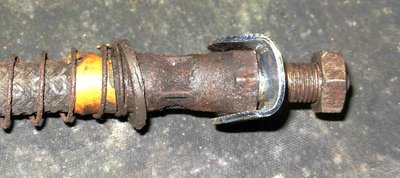
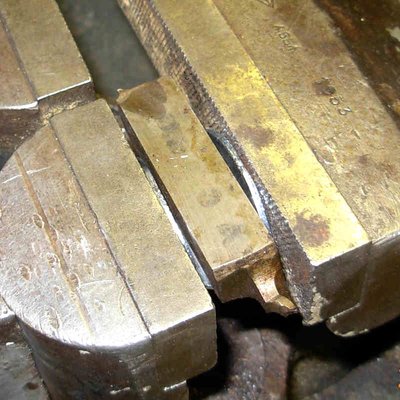
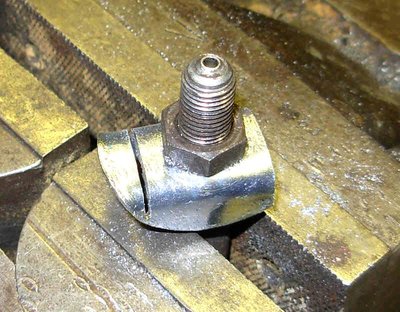
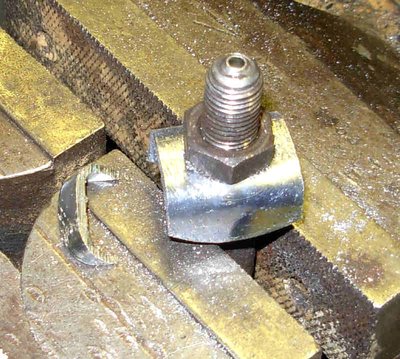
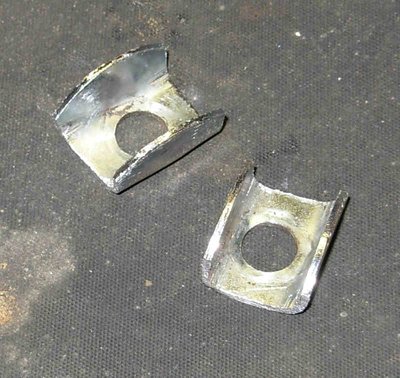
To do this I have made my first 2 (of 4) saddle washers which will fit inside the chassis bracket and will tightly surround two flats of the hex end, so that it cannot turn. I've made these two prototypes by bending 'penny' washers that are 30 mm diameter. and about 0.75 mm thick, into a saddle shape.
I took a lot of photos while making them, but it's too late to post them tonight, so hopefully I will post the pictures tomorrow.
Bill Williams
36/6725 S3 Coupe OGU108E Yellow over Black.
36/6725 S3 Coupe OGU108E Yellow over Black.
- billwill
- Coveted Fifth Gear

- Posts: 4408
- Joined: 19 Apr 2008
The continued saga of fitting these washers to my car will be continued in my main re-fitting topic.
"Getting OGU roadworthy again"
lotus-elan-f19/getting-ogu-roadworthy-again-t26101-90.html#p188493
"Getting OGU roadworthy again"
lotus-elan-f19/getting-ogu-roadworthy-again-t26101-90.html#p188493
Bill Williams
36/6725 S3 Coupe OGU108E Yellow over Black.
36/6725 S3 Coupe OGU108E Yellow over Black.
- billwill
- Coveted Fifth Gear

- Posts: 4408
- Joined: 19 Apr 2008
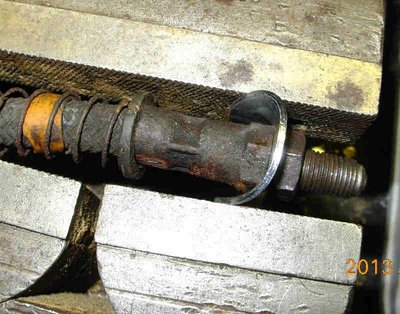
The saddle washers definitely do the trick.
In some of the brackets I used an old flexible brake pipe first to pull the washer into the U bracket, then took that out to fit the new pipe.
In the case of the steel bundy pipes (which I retained at the front, because I could not easily unscrew the other end from the 5-way junction), had it not been for the saddle washer, I don't think I would have been able to tighten the flare nut hard enough to stop brake fluid leakage at high pressure.
The Kunifer brake pipes at the rear were new and did not need such high torque on the flare nut to achieve a good seal.
I found my new set of Flare nut spanners were not really of much use as there is not enough clearance between the pipe fittings and the chassis to get then in place.
Bill Williams
36/6725 S3 Coupe OGU108E Yellow over Black.
36/6725 S3 Coupe OGU108E Yellow over Black.
- billwill
- Coveted Fifth Gear

- Posts: 4408
- Joined: 19 Apr 2008
billwill wrote:In the case of the steel bundy pipes (which I retained at the front, because I could not easily unscrew the other end from the 5-way junction), had it not been for the saddle washer, I don't think I would have been able to tighten the flare nut hard enough to stop brake fluid leakage at high pressure.
The Kunifer brake pipes at the rear were new and did not need such high torque on the flare nut to achieve a good seal.
The recommended torque for the flare nut is only 8-10 lb/ft ..... barely more than "nipped-up". Be careful not to overtighten it or you may split the flare or crack the pipe at the base of the flare.
Roger
S4 DHC
S4 DHC
- oldelanman
- Coveted Fifth Gear

- Posts: 1927
- Joined: 02 Jan 2008
25 posts
• Page 2 of 2 • 1, 2
Total Online:
Users browsing this forum: No registered users and 24 guests

