Anyone have a pic of brackets for fitting Lockheed Servo?
13 posts
• Page 1 of 1
Merry Christmas to everyone here.
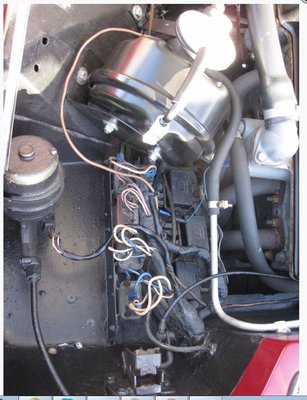
Sorry to post even more on the Lockheed / Girling swap. My car is single servo UK Plus 2. I just received the replacement Lockheed unit but can't see how to fit it.
Clearly goes in a different orientation, but does anyone have a pic of the bracket they made / used? The original mounting position for the Girling is a flat area with a steel reinforcement plate glassed in. I'm not sure if drilling fresh holes in the inner wing would make a strong enough mount.
I know many people have done this so would be most grateful for details of the mountings.
Many thanks
Simon
- rodsandyachts
- New-tral
- Posts: 12
- Joined: 15 Sep 2016
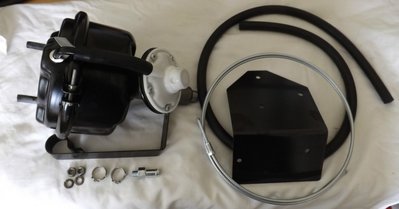
Thanks Bob and Dave. If you do have any pictures of the bracket Dave that would be great. I found this one on the web which should work for my RHD car.
Just wondering if I can simply drill mounting holes and use washers either side of the fiberglass, or if I need to reinforce the inner wing? The original mount has a steel plate insert.
Thank for all the advice.
Simon
Just wondering if I can simply drill mounting holes and use washers either side of the fiberglass, or if I need to reinforce the inner wing? The original mount has a steel plate insert.
Thank for all the advice.
Simon
- rodsandyachts
- New-tral
- Posts: 12
- Joined: 15 Sep 2016
My +2 had the two steel "backing plate, bracket, p/n: A050J0089" installed on the underside, not glassed in. I've deleted my servos. If one of those plates will work for you, I'll round it up and drop it in the mail to you.
If not, I would think that making a plate to match the footprint of the new bracket would be preferable to using even large fender washers to support the larger servo.
If not, I would think that making a plate to match the footprint of the new bracket would be preferable to using even large fender washers to support the larger servo.
Bud
1970 +2S Fed 0053N
"Winnemucca - says it all really!!"
1970 +2S Fed 0053N
"Winnemucca - says it all really!!"
- Bud English
- Fourth Gear

- Posts: 942
- Joined: 05 Nov 2011
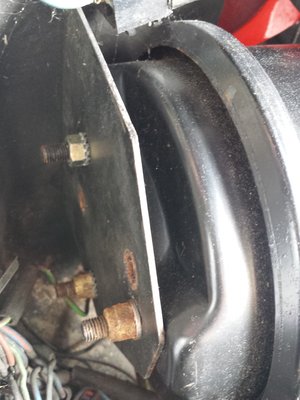
Here's the stock plate on my RHD Sprint.
Gary
'71 Sprint FHC
Miami, Florida
Gary
'71 Sprint FHC
Miami, Florida
-

archigator - Third Gear

- Posts: 447
- Joined: 15 Sep 2003
I could post an image of the plate tomorrow if this is of any use.
- vincereynard
- Coveted Fifth Gear

- Posts: 1071
- Joined: 12 Jan 2015
Thanks everyone for the advice. i'm going to make a custom bracket. If it's a success will post some detail pics to share.
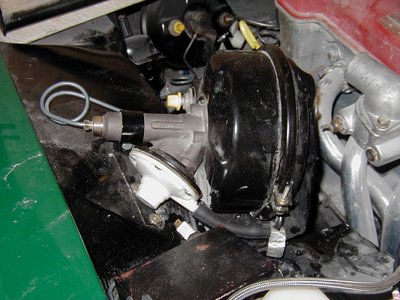
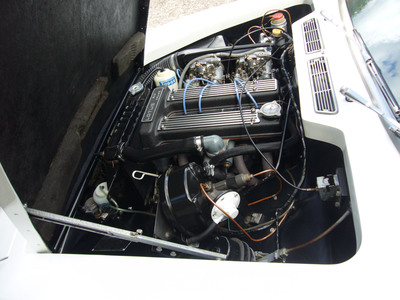
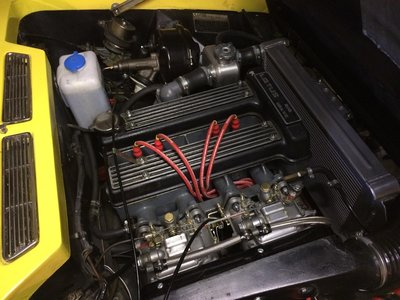
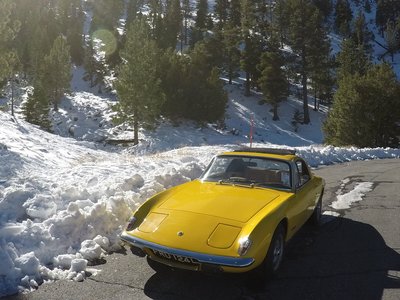
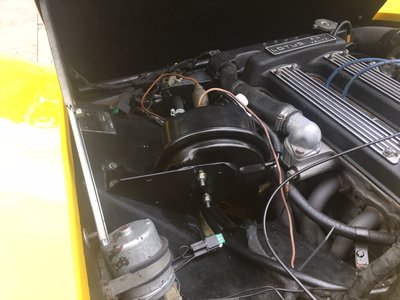
An interesting variety of solutions in terms of positioning for the Lockheed unit showed up:
1) Front to back with cylinder forwards (red car below)
2) Front to back with cylinder backwards (white car below)
3) Sideways like the original Girling fitment
4) In the nose
Happy Lotus driving this holiday.
Simon
- rodsandyachts
- New-tral
- Posts: 12
- Joined: 15 Sep 2016
The white car is mine. The servo is mounted using the original Girling bracket with an extra piece of aluminium to extend the mounting area, see pic. Apparently the orientation is supposed to be so that the outlet port is inclined upwards between 25 and 45 deg from the horizontal (see attached instructions)
- Attachments
-
 RemoteServo.pdf
- (1.1 MiB) Downloaded 1006 times
-

Robbie693 - Coveted Fifth Gear

- Posts: 1515
- Joined: 08 Oct 2003
Robbie that's great thanks. I will try the same solution.
Simon
Simon
- rodsandyachts
- New-tral
- Posts: 12
- Joined: 15 Sep 2016
No worries Simon, let us know how you get on
Robbie
Robbie
-

Robbie693 - Coveted Fifth Gear

- Posts: 1515
- Joined: 08 Oct 2003
Thanks to all for the advice. Thought I'd post how I fitted it in the end. I cut the flat plate off the bracket that came with the Lockheed servo and welded it to the original Girling mount in the car. I noticed people have used all kinds of different positions and mounts!
Not sure why the parts specialists don't offer a custom bracket with the Lockheed swap? Back on the road the difference to braking is massive. Maybe three times more effective than running without the servo.
Now I've moved on to a radiator swap. Got one shipped with plastic fan attached very quickly from Paul Matty. Guess what? It's too wide and the mount tabs need trimming. No big deal but I'm getting to realise my Plus 2 is half hotrod !
Can't wait to take it back to the Angeles Crest, this time with brakes AND cooling.
- rodsandyachts
- New-tral
- Posts: 12
- Joined: 15 Sep 2016
13 posts
• Page 1 of 1
Total Online:
Users browsing this forum: No registered users and 9 guests


