Dundonian JPS
Hi all,
I bought my JPS 3 years ago now as a restoration project after my 1st year at Dundee University. I have had several threads on the forum but have never had one continuous "build thread" this is something which I regret now! However even though I am in the finishing stages of my restoration I plan to use this thread to tie most of my build posts together (excluding my endless silly questions).
It is quite funny looking back at my posts 3 years ago and I cringe at how naive I was then (and for the old timers don't worry I am deffinitely still a rather naive 22 yr old but maybe one that has started learning the hard way from my previous mistakes!)
Even more ridiculous was that when I bought it summer 2009 I told my dad I'd have it finished by the following year, he laughed at me then and now I am starting to realise why.
A couple of mini threads of what has gone on -
Inital tasks
elan-plus-f13/jobs-while-body-off-the-chassis-t20024.html
Engine + video
elan-plus-f13/engine-rebuild-complete-t20227.html
New paint
elan-photos-f18/jps-paint-t22464.html
Different JPS badge on my car, anybody shed any light on that old thread?
elan-plus-f13/correct-jps-badge-t22791.html
A lesson learnt about being a naive fool
elan-f15/big-oops-t24780-15.html
The car is coming along very well, I have done a lot of work on it since these last posts and will give some updates of what routes I have gone down in my restoration since. I must put a big thanks out to both my dad (who is very patient and good at correcting me when I'm completely wrong but think I'm right) and his pal who own's a TTR prepared S4 (now BRM 26RR) which has kept me motivated to finish (via shear jealously) but is also a great source of information. Sadly neither use this forum.
I now have a deadline which the car must be finished by which is next summer when I graduate (I am now in my final, 5th year of studies at Dundee University).
I will leave you with some pictures now as it's getting late and to be honest you guys probably only came to look at the pictures anyway!
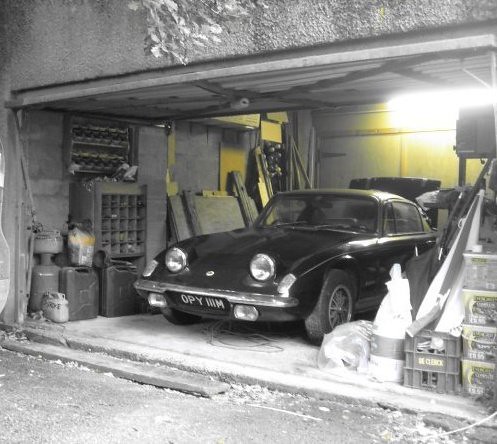
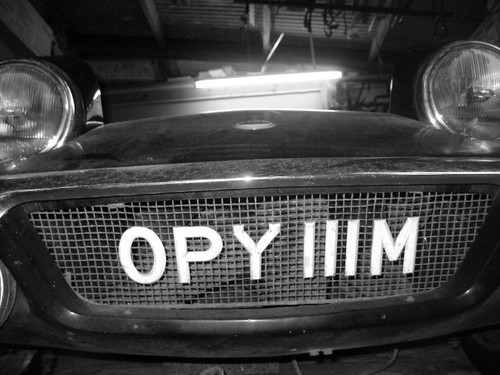
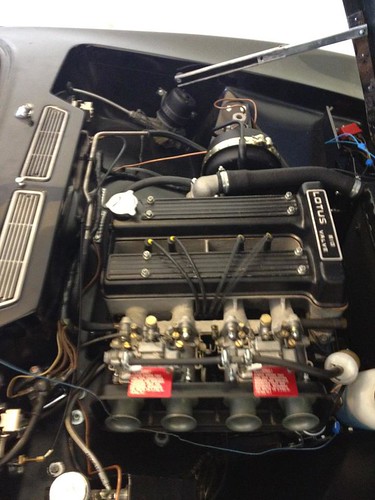
Started with standard airbox = asthmatic
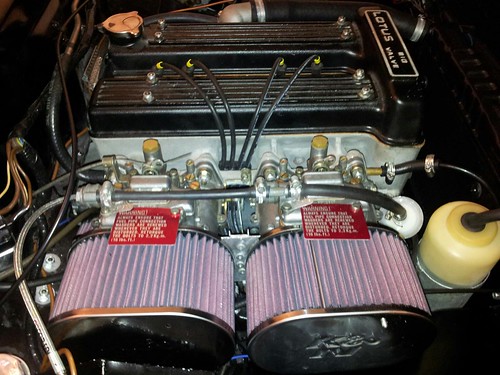
K&N's on
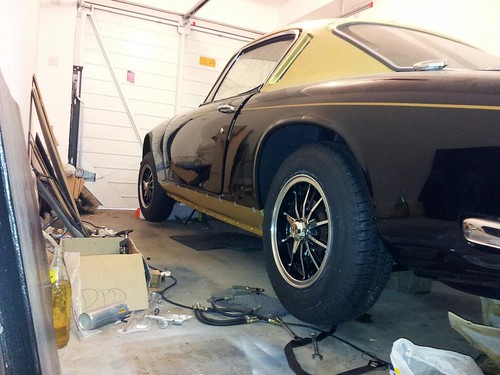
Love the JPS paint
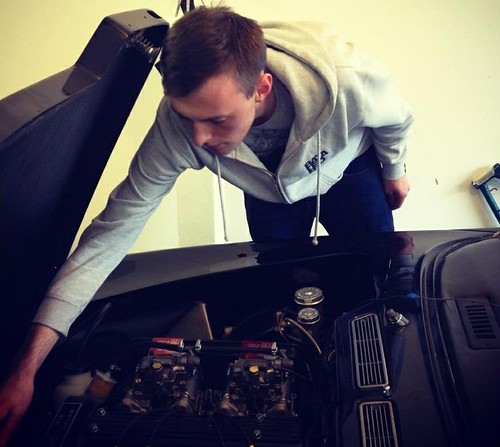
Vvrooom Vroom!
Regards,
Innes
I bought my JPS 3 years ago now as a restoration project after my 1st year at Dundee University. I have had several threads on the forum but have never had one continuous "build thread" this is something which I regret now! However even though I am in the finishing stages of my restoration I plan to use this thread to tie most of my build posts together (excluding my endless silly questions).
It is quite funny looking back at my posts 3 years ago and I cringe at how naive I was then (and for the old timers don't worry I am deffinitely still a rather naive 22 yr old but maybe one that has started learning the hard way from my previous mistakes!)
Even more ridiculous was that when I bought it summer 2009 I told my dad I'd have it finished by the following year, he laughed at me then and now I am starting to realise why.
A couple of mini threads of what has gone on -
Inital tasks
elan-plus-f13/jobs-while-body-off-the-chassis-t20024.html
Engine + video
elan-plus-f13/engine-rebuild-complete-t20227.html
New paint
elan-photos-f18/jps-paint-t22464.html
Different JPS badge on my car, anybody shed any light on that old thread?
elan-plus-f13/correct-jps-badge-t22791.html
A lesson learnt about being a naive fool
elan-f15/big-oops-t24780-15.html
The car is coming along very well, I have done a lot of work on it since these last posts and will give some updates of what routes I have gone down in my restoration since. I must put a big thanks out to both my dad (who is very patient and good at correcting me when I'm completely wrong but think I'm right) and his pal who own's a TTR prepared S4 (now BRM 26RR) which has kept me motivated to finish (via shear jealously) but is also a great source of information. Sadly neither use this forum.
I now have a deadline which the car must be finished by which is next summer when I graduate
I will leave you with some pictures now as it's getting late and to be honest you guys probably only came to look at the pictures anyway!


Started with standard airbox = asthmatic

K&N's on

Love the JPS paint

Vvrooom Vroom!
Regards,
Innes
Innes
1965 Elan S2 (26/4681)
1973 Elan+2S 130/5 JPS
1965 Elan S2 (26/4681)
1973 Elan+2S 130/5 JPS
-

innesw - Third Gear

- Posts: 265
- Joined: 23 Aug 2009
very nice ----we share your sense of accomplishment having started with a pile of bits also ---ed
dont close your eyes --you will miss the crash
Editor: On June 12, 2020, Edward Law, AKA TwinCamMan, passed away; his obituary can be read at https://www.friscolanti.com/obituary/edward-law. He will be missed.
Editor: On June 12, 2020, Edward Law, AKA TwinCamMan, passed away; his obituary can be read at https://www.friscolanti.com/obituary/edward-law. He will be missed.
-

twincamman - Coveted Fifth Gear

- Posts: 2463
- Joined: 02 Oct 2003
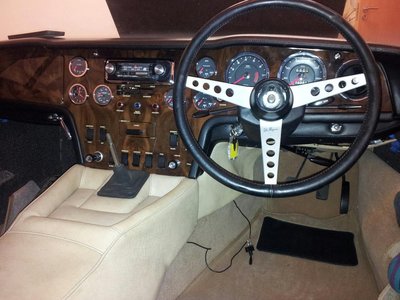
Finished the dash and electrics and started trimming the interior with carpet last week, that is all now done, windscreen will be bonded in by the end of the week.
Had a small delay with a leaking electric fuel pump in the boot, guess it's always going to smell of petrol in their now...
Innes
Had a small delay with a leaking electric fuel pump in the boot, guess it's always going to smell of petrol in their now...
Innes
Innes
1965 Elan S2 (26/4681)
1973 Elan+2S 130/5 JPS
1965 Elan S2 (26/4681)
1973 Elan+2S 130/5 JPS
-

innesw - Third Gear

- Posts: 265
- Joined: 23 Aug 2009
Well done Innes. The car looks fabulous...
Can't wait to see it around.... This year?
Alex....
Can't wait to see it around.... This year?
Alex....
Alex Black.
Now Sprintless!!
Now Sprintless!!
-

alexblack13 - Coveted Fifth Gear

- Posts: 2076
- Joined: 17 Oct 2007
Looking good Innes! 
Cheers,
Pete.
http://www.petetaylor.org.uk
LOTUS ELAN flickr GROUP: https://www.flickr.com/groups/2515899@N20
flickr: http://www.flickr.com/photos/16096573@N02/sets/72157624226380576/
https://www.flickr.com/photos/16096573@N02/
Pete.
http://www.petetaylor.org.uk
LOTUS ELAN flickr GROUP: https://www.flickr.com/groups/2515899@N20
flickr: http://www.flickr.com/photos/16096573@N02/sets/72157624226380576/
https://www.flickr.com/photos/16096573@N02/
-

elansprint71 - Coveted Fifth Gear

- Posts: 2636
- Joined: 16 Sep 2003
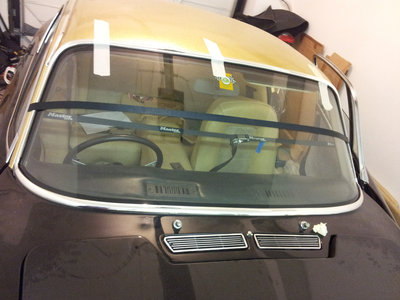
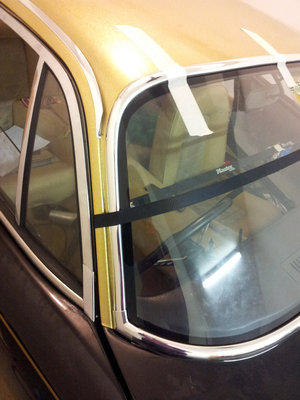
Finished bonding the windscreen in today, very very pleased with the result. 
The job has been looming over me for a long time! I also got some very helpful advice from Paul Matty himself over the telephone about bonding it in, I'll be happy to have a long talk with anybody who wants advice before they fit their on windscreens in the future.
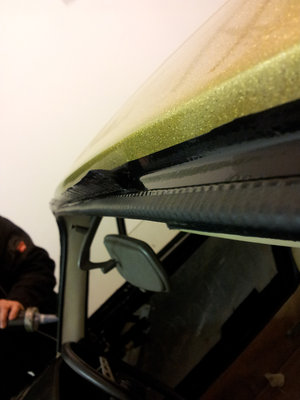
I used the trim that Paul Matty sells, I also got a sample from Susan Miller but prefered the trim that PM does, I think it looks better. Although neither trim are the same as the original.
1. First the window frame and plastic chrome trim need "body primer".
2. The edge and inside surface of the windscreen need "glass primer".
3. Chrome trim is then cut, shaped (with gentle heat) corner pieces added then bonded on to the windscreen taped in place and then left over night to cure.
4. Windscreen is then left in window frame for at least 24hrs for trim to re-shape and mould to widow frame.
5. Windscreen is finally bonded in place, windscreen taped and pushed in place to hold it while the bond cures over 24hrs.
Being in Scotland, unfortunately I couldn't just get a practised garage to do the whole job for me (like PM's local windscreen fitter).
I cost me ?50 for it bonded in, I bonded the trim to the windscreen myself (?6 windscreen bonding kit for the trim).
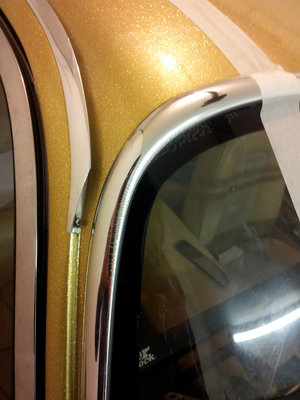
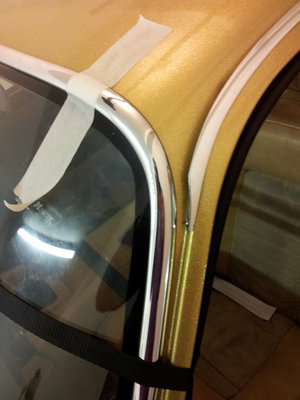
The Chrome trim takes a VERY long time to mould to the windscreen without getting any wrinkles in the foil. I have some very small wrinkles in both top corners but I am very happy with the result as I did it my self, the windscreen fitter I used (Kevin from Tay Glaze, Perth) was recommended to me by a member of my local classic car club and a classic restoration business. He was very impressed by the job I did fitting the trim!
The tape and the strap is to keep it in place as it sets as the weight of the screen tends to make it to want to slide down and out of the window frame.
Think I can start to see light at the end of the tunnel! Alex, hopefully finished for this summer, any local shows in Angus/Fife you enjoy?
Innes
Innes
1965 Elan S2 (26/4681)
1973 Elan+2S 130/5 JPS
1965 Elan S2 (26/4681)
1973 Elan+2S 130/5 JPS
-

innesw - Third Gear

- Posts: 265
- Joined: 23 Aug 2009
Salut Innes
Your car looks fantastic and great job on the windshield.
Not sure I'll ever see it in the flesh (unless you plan to travel through France) so I'd love to see more photos.
@+
Vernon
Your car looks fantastic and great job on the windshield.
Not sure I'll ever see it in the flesh (unless you plan to travel through France) so I'd love to see more photos.
@+
Vernon
-

vernon.taylor - Fourth Gear

- Posts: 683
- Joined: 05 Nov 2010
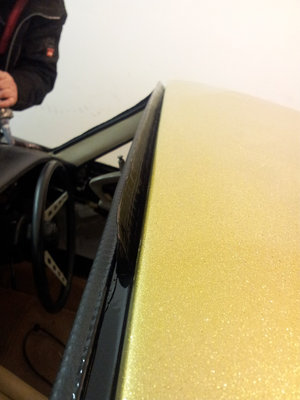
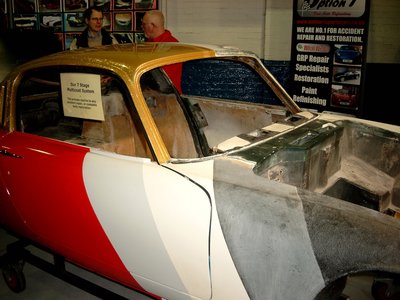
Yeh Frank is very good at metal flake, I did the paint removal myself by sanding the whole body apart from the original metal flake for Frank to match it up. I think he has got an absolute perfect match to how my metal flake was from the factory (apart from the hap-hazard patchy-ness). He even matched up the shape and size of the flakes to the original.
The pictures above aren't the best quality though, it is not as "yellow" is it appears above.
There was a car with completely different "style" metal flake in Option 1 when I dropped off my car, (red and gold) was that yours Jeremy? (Bigger flakes with a rainbow of colours in the reflection from the gold.) 2011?
Innes
Innes
1965 Elan S2 (26/4681)
1973 Elan+2S 130/5 JPS
1965 Elan S2 (26/4681)
1973 Elan+2S 130/5 JPS
-

innesw - Third Gear

- Posts: 265
- Joined: 23 Aug 2009
My car hasn't been back to Options since some accident repairs in 2010 (rear ended - invisible repair), although you are describing my car. My car was repainted in the 70's with the red & gold MF, so this is what I was after. Lotus MF is more restrained! Your finish is much closer to original.
I know Frank sprayed up a demo shell for Donnington a few years back (see pic). I wonder if that made it back onto the road as well. There must be more red & gold +2s than I thought.
Jeremy
I know Frank sprayed up a demo shell for Donnington a few years back (see pic). I wonder if that made it back onto the road as well. There must be more red & gold +2s than I thought.
Jeremy
-

JJDraper - Fourth Gear

- Posts: 923
- Joined: 17 Oct 2004
Hi innes,
Were did you get the chrome windscreen surround? I need a new windscreen, but I am reluctant to get one as I understand the crome trim is not available in it's original form. I have also ben told that the reproduction available is not that good.
great looking car BTW.
Kind regards
Jeff 72+2
Were did you get the chrome windscreen surround? I need a new windscreen, but I am reluctant to get one as I understand the crome trim is not available in it's original form. I have also ben told that the reproduction available is not that good.
great looking car BTW.
Kind regards
Jeff 72+2
-

jeff jackson - Third Gear

- Posts: 365
- Joined: 31 May 2004
Looking great Innes! Very nice job.
Could you tell me what the differences are between the Miller trim and the Matty one?
Cheers
Robbie
Could you tell me what the differences are between the Miller trim and the Matty one?
Cheers
Robbie
-

Robbie693 - Coveted Fifth Gear

- Posts: 1515
- Joined: 08 Oct 2003
Hi Jeff & Robbie
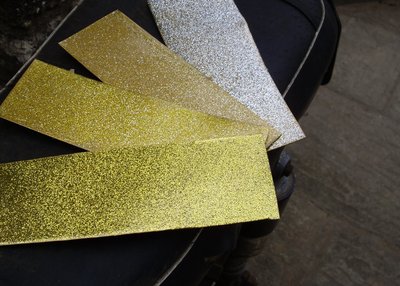
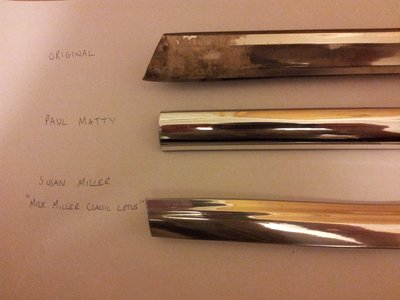
Here are some pictures of the three trims (original, Paul Matty and Susan Miller).
Both new trims are different to the old big ugly one, they both do not have bevelled edges but instead both are curves but the Susan miller trim has a sort of "wave" on the outside edge.
The differences between the Paul Matty trim to the Susan Miller trim are:
1. PM one is stiffer than SM trim which is floppier (easier to crease the chrome foil by accident and hard to keep in a straight line/edge)
2. In the PM trim the foil is much closer to the surface making it look more "chrome like" and less "plasticy", in the SM trim the foil lies deeper in the plastic.
3. PM trim grabs the glass edge better, aiding fitting.
(but stiffer trim potentially makes fitting harder??)
4. PM trim has a better appearance, SM trim has two "waves" in the foil on the outside edge, hard to see in the picture.
5. PM trim overlaps more of the glass edge than the SM trim and is more similar to the orginal trim in that sense.
Both need a little adjustment with my friend Mr Stanley to fit the corner pieces and both cost the same I think... Usual chat that I live in the middle of no-where/Scotland and have no affiliation to either company and have happily used both for multiple parts on my car blah blah blah.
Hope that helps.
Sorry if that's too boring and in depth, most people including classic car owners probably wouldn't notice it at all, too busy looking at the bigger picture. Just us owners know every every imperfection of our own cars.
Innes
Innes
1965 Elan S2 (26/4681)
1973 Elan+2S 130/5 JPS
1965 Elan S2 (26/4681)
1973 Elan+2S 130/5 JPS
-

innesw - Third Gear

- Posts: 265
- Joined: 23 Aug 2009
Total Online:
Users browsing this forum: No registered users and 26 guests

