69 Plus 2S Project
53 posts
• Page 3 of 4 • 1, 2, 3, 4
.....and having fitted the long front to rear brake line, I now think that I've carefully threaded it through the guide holes for the handbrake cable. B*GG*R - I am an idiot.....
Matthew Vale - Classic Motoring Author
1968 Plus 2 - Somewhat cosmetically and mechanically modified
1969 Plus 2S - Currently undergoing nut and bolt restoration
Visit me on matthewvale.com
1968 Plus 2 - Somewhat cosmetically and mechanically modified
1969 Plus 2S - Currently undergoing nut and bolt restoration
Visit me on matthewvale.com
-

Matt Elan - Fourth Gear

- Posts: 598
- Joined: 27 Oct 2011
Since my last posting I've been doing all those odd jobs that are required before I drop the body back on the rolling chassis. The handbrake cable and mechanism is now in situ and flapping around at the front end, and the new fuel pipe from Sue Miller is firmly affixed to its banjo at the rear - I'm still sorting out how to join it to the fuel pump, but I'll take a gander at my white car to see how Lotus did it.
So I've just got to sort out my errant engine mounts (that's another thread) having worked out I'd one them wrong, and then I can drop the body on. Then I can see if the mounts line up, redo any bobbins which are out of position (the chassis has been used on another body and is already drilled). So being an eternal optimist I'm hoping that Lotus's vaunter 'QR' regime was good enough to be consistent in the placing of the body bobbins, but I suspect that there may be a few which don't fit....... Then I can tidy up the front left corner where it's had a new bit grafted on to repair the fire damage, sort out a few other areas needing repair, get the remaining paint off and start prepping for paint. Doesn't sound much if I say it quickly.......
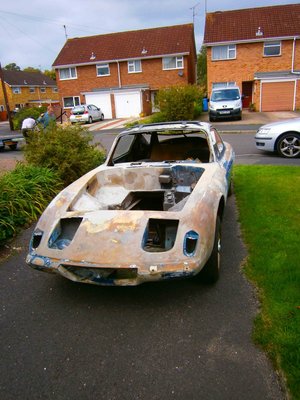
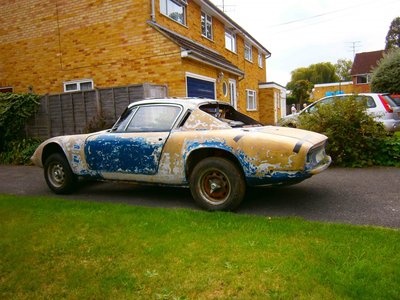
A couple of shots to show the body's condition:
Matthew Vale - Classic Motoring Author
1968 Plus 2 - Somewhat cosmetically and mechanically modified
1969 Plus 2S - Currently undergoing nut and bolt restoration
Visit me on matthewvale.com
1968 Plus 2 - Somewhat cosmetically and mechanically modified
1969 Plus 2S - Currently undergoing nut and bolt restoration
Visit me on matthewvale.com
-

Matt Elan - Fourth Gear

- Posts: 598
- Joined: 27 Oct 2011
One step forwards, two steps back. PeterK and I reversed my engine mounts today so there are the correct way round with the rubber mounts were bolted to the chassis, the engine mount spacers installed and the Spider solid mounts bolted to the engine as per instructions from Rohan, Spyder etc.
This did not fix the engine/gearbox alignment problem so I'll have a rummage around with the gearbox mount to see if that is now out of alignment, and I found one of the new engine mounts had delaminated as well.
Update to follow!
This did not fix the engine/gearbox alignment problem so I'll have a rummage around with the gearbox mount to see if that is now out of alignment, and I found one of the new engine mounts had delaminated as well.
Update to follow!
Matthew Vale - Classic Motoring Author
1968 Plus 2 - Somewhat cosmetically and mechanically modified
1969 Plus 2S - Currently undergoing nut and bolt restoration
Visit me on matthewvale.com
1968 Plus 2 - Somewhat cosmetically and mechanically modified
1969 Plus 2S - Currently undergoing nut and bolt restoration
Visit me on matthewvale.com
-

Matt Elan - Fourth Gear

- Posts: 598
- Joined: 27 Oct 2011
Hmmmm.... had a fiddle with the gearbox mount, but it didn't make any difference. I'm waiting for a new engine mount to replace the failed one. Once that arrives I'll have another fiddle. I may try disconnecting the prop shaft and wheeling the chassis backwards and forwards to see if the engine and gearbox will 'settle' into the correct position.
Anyway, I've decided to start to get the old paint (and filler, muck, primer, and god knows what else) off the body before it goes in the garage (so I don't fill the garage with dust).
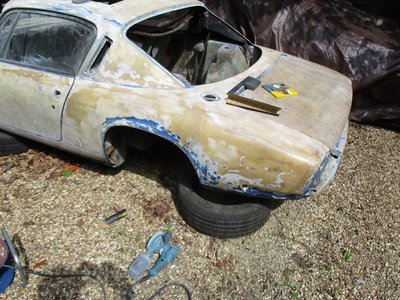
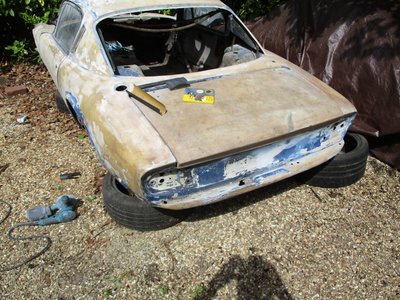
Started off at the left hand corner, and after trying various grades of wet and dry, found that 120 grit was the only stuff that worked. I got bored with the time it was taking to get large areas cleaned off back to gel, so started using my dual action sander. It didn't touch the surface until I went down to 80 grit, at which point things progressed very well. The blue topcoat came was definitely softer and easier to remove than the very light grey primer. It was interesting to see that the roof was painted silver at some stage over the original blue.
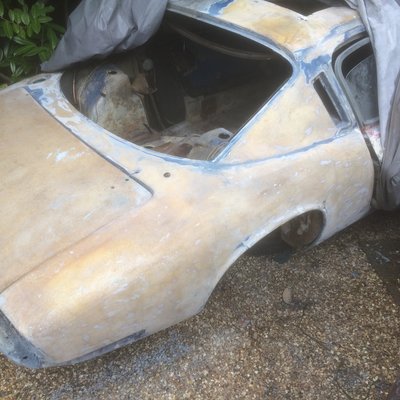
So here is the paint and filler free (ish) rear quarter:
Closeup of the roof/rear wing join - bit more fine detail work needed to get all the paint off of the join:
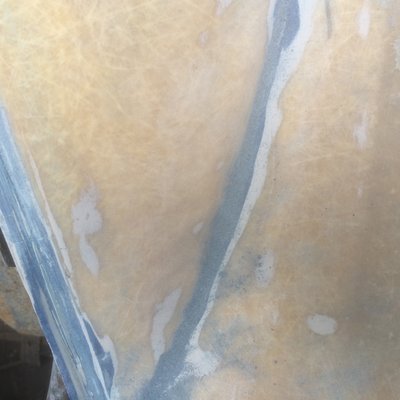
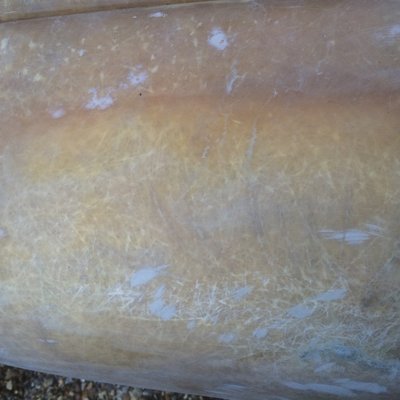
There are some stress cracks on the top of the wing:
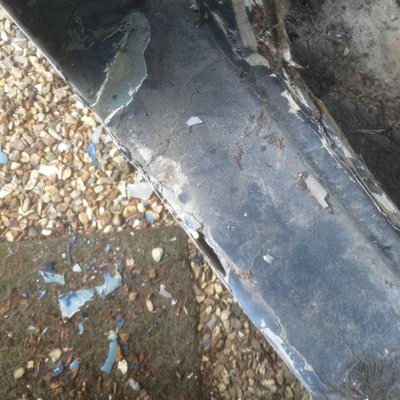
And finally as I trundled towards the door shuts there were some er... interesting... issues appearing
....and then it started raining so I retired indoors.
Plan is to get the paint off the whole body, then start on the glass repairs. Stand by for a dusty driveway, followed by a smelly driveway
Matthew Vale - Classic Motoring Author
1968 Plus 2 - Somewhat cosmetically and mechanically modified
1969 Plus 2S - Currently undergoing nut and bolt restoration
Visit me on matthewvale.com
1968 Plus 2 - Somewhat cosmetically and mechanically modified
1969 Plus 2S - Currently undergoing nut and bolt restoration
Visit me on matthewvale.com
-

Matt Elan - Fourth Gear

- Posts: 598
- Joined: 27 Oct 2011
Looking good Matt, I'd like to drop by some time and have a look
Simon
Simon
==================
1968 +2S 130 50/1189
1959 Frogeye Sprite
1968 +2S 130 50/1189
1959 Frogeye Sprite
- frogeyesimon
- Second Gear

- Posts: 69
- Joined: 12 Jun 2014
Hi Simon - you are welcome anytime I'll PM you with my address / tel no
Matthew Vale - Classic Motoring Author
1968 Plus 2 - Somewhat cosmetically and mechanically modified
1969 Plus 2S - Currently undergoing nut and bolt restoration
Visit me on matthewvale.com
1968 Plus 2 - Somewhat cosmetically and mechanically modified
1969 Plus 2S - Currently undergoing nut and bolt restoration
Visit me on matthewvale.com
-

Matt Elan - Fourth Gear

- Posts: 598
- Joined: 27 Oct 2011
Onwards and upwards - or rather sideways and backwards....
Most of the paint is now off the body with just the fiddly bits to do, like the rear panel which I have to do by hand with wet and dry and so progress is slow. Still need to sort out the gearbox chassis interface as well - the new engine mount has been in the garage for three months now.....
So once the alignment issue is sorted I'm planning to drop the body onto the chassis, check the bobbin alighnment and reposition any errant bobbins as the chassis is drilled and threaded already and the body needs some work so watch this space
Matthew Vale - Classic Motoring Author
1968 Plus 2 - Somewhat cosmetically and mechanically modified
1969 Plus 2S - Currently undergoing nut and bolt restoration
Visit me on matthewvale.com
1968 Plus 2 - Somewhat cosmetically and mechanically modified
1969 Plus 2S - Currently undergoing nut and bolt restoration
Visit me on matthewvale.com
-

Matt Elan - Fourth Gear

- Posts: 598
- Joined: 27 Oct 2011
Just seen JR44 and Shauns posts on getting their Plus 2's up and running - I'm going to have to pull my finger out and get going on mine. I retire at the end of this month so should have some time to work on it now! Anyway well done you guys - I'm inspired!
Matthew Vale - Classic Motoring Author
1968 Plus 2 - Somewhat cosmetically and mechanically modified
1969 Plus 2S - Currently undergoing nut and bolt restoration
Visit me on matthewvale.com
1968 Plus 2 - Somewhat cosmetically and mechanically modified
1969 Plus 2S - Currently undergoing nut and bolt restoration
Visit me on matthewvale.com
-

Matt Elan - Fourth Gear

- Posts: 598
- Joined: 27 Oct 2011
Matt, just read all your thread, I wish you well with your restoration.
It certainly helps being retired.
Also the very nature of restoring a Lotus, needs the continued postings of completed cars, to re motivate you back from the dark side.
It certainly helps being retired.
Also the very nature of restoring a Lotus, needs the continued postings of completed cars, to re motivate you back from the dark side.
Trevor
1968 Elan +2 50/0173
1968 Elan +2 50/0173
-

TeeJay - Fourth Gear

- Posts: 540
- Joined: 30 May 2007
The stop start restoration continues - I retiredin October 2016, but have only just managed to find the time to do some work on the Plus 2, having had to finish a book on TVR's a couple of months sooner than originally planned.....
So earlier this week I fitted the alternator to the rolling chassis, and today it was sunny, so I unwrapped the car and decided to get the rest of the paint off:
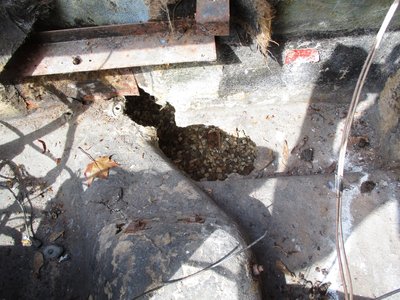
Got some mouse damage on the boot floor:
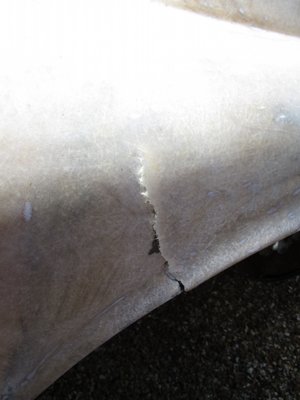
And a nasty couple of tears on the rear wing:
So will be honing my glass fibring skills in the next few weeks - ready to get sticky and smelly!
Matthew Vale - Classic Motoring Author
1968 Plus 2 - Somewhat cosmetically and mechanically modified
1969 Plus 2S - Currently undergoing nut and bolt restoration
Visit me on matthewvale.com
1968 Plus 2 - Somewhat cosmetically and mechanically modified
1969 Plus 2S - Currently undergoing nut and bolt restoration
Visit me on matthewvale.com
-

Matt Elan - Fourth Gear

- Posts: 598
- Joined: 27 Oct 2011
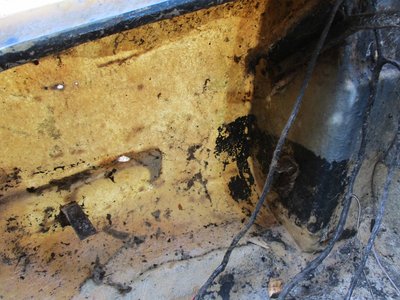
Been a bit quiet, but I've been gently removing the remains of the paint on the body shell, and today broke out the pressure washer to try to clean up the inside of the body and the underside and the bonnet. With a couple of drain holes drilled in the rear of the cabin and the spare wheel well phase 1 went to plan. I now need to dry it all out (its nice and sunny today) then give it another going over. I was surprised how easily the pressure washer took off the various layers of black paint, blue paint, dirt, grime, old insulation felt and glue and the shell is looking a lot better. It also helps me to see where repairs are needed.
Matthew Vale - Classic Motoring Author
1968 Plus 2 - Somewhat cosmetically and mechanically modified
1969 Plus 2S - Currently undergoing nut and bolt restoration
Visit me on matthewvale.com
1968 Plus 2 - Somewhat cosmetically and mechanically modified
1969 Plus 2S - Currently undergoing nut and bolt restoration
Visit me on matthewvale.com
-

Matt Elan - Fourth Gear

- Posts: 598
- Joined: 27 Oct 2011
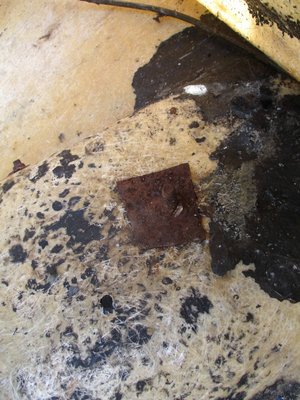
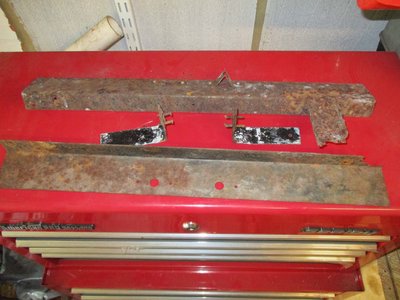
Bit of a dremel frenzy day today - having jetwashed the shell, I'm now getting all the metalwork out, starting at the back. So a fine selection of rusted up bolts and self tappers, along with some impressivly corroded bits of pressed steel.
A couple of the boot floor supports - left hand side of boot:
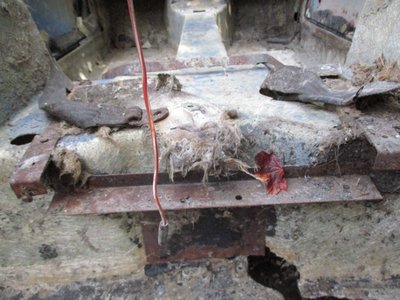
Fuel tank straps - which are scrap and the rear boot floor support - probably recoverable - both firmly rusted in place! Top bolts removed by drilling out and cutting off with chisel; the bolts holding on the boot support sucummed to the spanners......
The top deck support bar - still in situ as my dremel overheated as I'm hacking through the bolt heads....
And finally some of the parts ready to go to Unimet in Reading for blasting and stove enamaling.
Next job once the top deck support if off is to get the final boot floor supports out, then start on the rusty remains of the sills - I'm anticipating a lot of Dremelling to get the remains of the inner plates out....
Matthew Vale - Classic Motoring Author
1968 Plus 2 - Somewhat cosmetically and mechanically modified
1969 Plus 2S - Currently undergoing nut and bolt restoration
Visit me on matthewvale.com
1968 Plus 2 - Somewhat cosmetically and mechanically modified
1969 Plus 2S - Currently undergoing nut and bolt restoration
Visit me on matthewvale.com
-

Matt Elan - Fourth Gear

- Posts: 598
- Joined: 27 Oct 2011
Well its been a while, and home life and my writing has been keeping me busy, but a quick update. I've been aiming to buy some tyres and have decided to go with Blockleys, so I needed to get a set of wheels sorted. I've decided to put alloys on the ALD, and have eight of them lying around - four on the car, four in the shed, plus another two I recently 'won' on ebay. So I dragged the set out of the shed and took them up to my local tyre place to get the ancient (1980s from the date codes) rubber off - it did tax the guys there somewhat as they were rock hard - luckily I don't understand Hungarian as there were of lot of interesting expletives being uttered!
So wheels home and then I noticed that one had a single drive peg in one of the drive holes and another had three! Odd, and they would not come out despite loads of penetrating oil and lots of heat. So it was over to my mate Pete's this morning to weld nuts onto the pegs and try to get them out. This worded on one, leaving four still in place. I eventually got them out by drilling and collapsing the pegs to break to corrosion holding them in but I'm still wondering how or why they were in the wheels....
Anyway now I can spray up the wheels and get them over to Blockleys for them to fit a set of nice tyres.....
Matthew Vale - Classic Motoring Author
1968 Plus 2 - Somewhat cosmetically and mechanically modified
1969 Plus 2S - Currently undergoing nut and bolt restoration
Visit me on matthewvale.com
1968 Plus 2 - Somewhat cosmetically and mechanically modified
1969 Plus 2S - Currently undergoing nut and bolt restoration
Visit me on matthewvale.com
-

Matt Elan - Fourth Gear

- Posts: 598
- Joined: 27 Oct 2011
Oh - I forgot to mention that I 'borrowed' my mate Dave's blast cabinet to get all the old paint etc off the wheels....
Matthew Vale - Classic Motoring Author
1968 Plus 2 - Somewhat cosmetically and mechanically modified
1969 Plus 2S - Currently undergoing nut and bolt restoration
Visit me on matthewvale.com
1968 Plus 2 - Somewhat cosmetically and mechanically modified
1969 Plus 2S - Currently undergoing nut and bolt restoration
Visit me on matthewvale.com
-

Matt Elan - Fourth Gear

- Posts: 598
- Joined: 27 Oct 2011
53 posts
• Page 3 of 4 • 1, 2, 3, 4
Total Online:
Users browsing this forum: AshleyPark, rideaway and 23 guests

