69 Plus 2S Project
54 posts
• Page 2 of 4 • 1, 2, 3, 4
Evening All
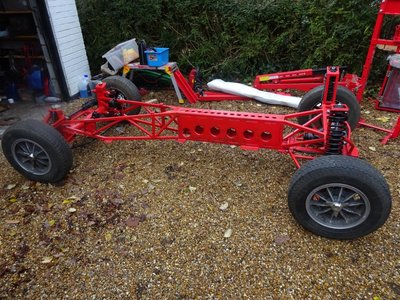
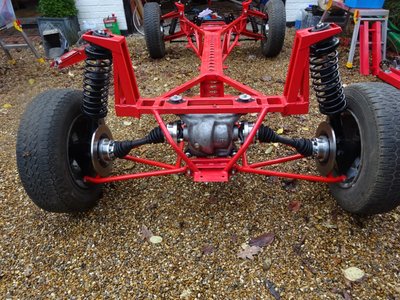
Just spent the best part of today with my mate Pete (PeterK of this forum) getting the Plus 2 Rolling chassis rolling. This did involve a certain amount of de-cluttering the garage, before we could get the wheels on and have a ceremonial roll out: pictures:
The plan was to fit the engine and gearbox. I'd put the clutch on the engine, and renewed the oil seals on the input and output shafts of the gearbox. Pete mate then fitted the clutch arm and associated gubbins and bolted the bell housing to the box, while I prepped some UNC bolts to fit the engine mounts to the engine. We got the engine off the engine stand using Pete's hoist, and then, after a bit of faffing about were fitting the gearbox to the engine. It was a bit tight, so I used the big rubber mallet to help it to fit. This may have been a mistake as while we pulled the bell housing onto the engine by winding in the bolts I noticed a big crack on the side of the casting. Doh. Luckily I have a spare housing which I'll be cleaning and painting this weekend, before stripping out of the old housing all the nice new bits to re-fit; then I can drop the engine and gearbox back in and get some room back in my garage.
Moral of the story - don't use the really big rubber mallet, just the big one; although I'm not convinced that the crack wasn't already in the bell housing before we started to fit it.......I didn't hit it that hard
Matthew Vale - Classic Motoring Author
1968 Plus 2 - Somewhat cosmetically and mechanically modified
1969 Plus 2S - Currently undergoing nut and bolt restoration
Visit me on matthewvale.com
1968 Plus 2 - Somewhat cosmetically and mechanically modified
1969 Plus 2S - Currently undergoing nut and bolt restoration
Visit me on matthewvale.com
-

Matt Elan - Fourth Gear

- Posts: 598
- Joined: 27 Oct 2011
before you fit the bellhousing to the gearbox you can put the gearbox to the flywheel to centralise clutch friction plate. Locate gearbox input shaft in friction plate before tightening pressure plate. That way the friction plate is perfectly central.
When you fit bellhousing to gearbox don't forget to put sealant on the screw with a through hole into gearbox
Alan
When you fit bellhousing to gearbox don't forget to put sealant on the screw with a through hole into gearbox
Alan
Alan.b Brittany 1972 elan sprint fhc Lagoon Blue 0460E
- alan.barker
- Coveted Fifth Gear

- Posts: 3754
- Joined: 06 Dec 2008
Hi Alan - I made up a dummy first motion shaft in my lathe line up the clutch plate so alighnment was good. More importantly thanks for the reminder about the bolt which passes into the box which holds the (new) bell housing on it will had a good dollop of Welseal on it. Sunday will be spent cleaning and painting the 'new' bell housing......
Matthew Vale - Classic Motoring Author
1968 Plus 2 - Somewhat cosmetically and mechanically modified
1969 Plus 2S - Currently undergoing nut and bolt restoration
Visit me on matthewvale.com
1968 Plus 2 - Somewhat cosmetically and mechanically modified
1969 Plus 2S - Currently undergoing nut and bolt restoration
Visit me on matthewvale.com
-

Matt Elan - Fourth Gear

- Posts: 598
- Joined: 27 Oct 2011
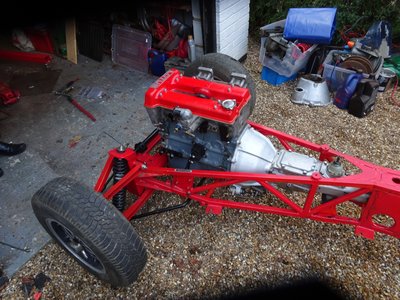
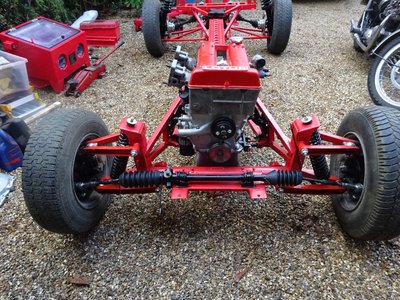
...and post Christmas and another hand from my mate Pete the engine and gearbox are in......
Just need a large diameter (13.75 cm) cover for the starter motor end as its bigger on my 105E bell housing than it was on my broken bell housing...
So just need to add the prop shaft and that the rolling chassis buttoned up and then its on to the body....
Just need a large diameter (13.75 cm) cover for the starter motor end as its bigger on my 105E bell housing than it was on my broken bell housing...
So just need to add the prop shaft and that the rolling chassis buttoned up and then its on to the body....
Matthew Vale - Classic Motoring Author
1968 Plus 2 - Somewhat cosmetically and mechanically modified
1969 Plus 2S - Currently undergoing nut and bolt restoration
Visit me on matthewvale.com
1968 Plus 2 - Somewhat cosmetically and mechanically modified
1969 Plus 2S - Currently undergoing nut and bolt restoration
Visit me on matthewvale.com
-

Matt Elan - Fourth Gear

- Posts: 598
- Joined: 27 Oct 2011
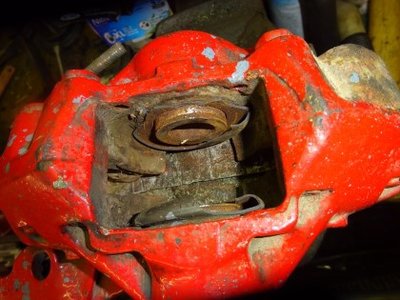
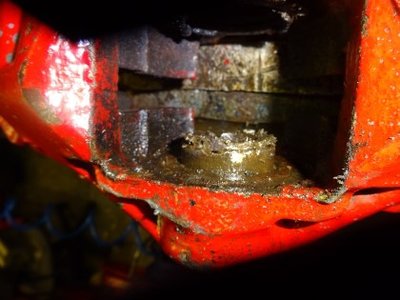
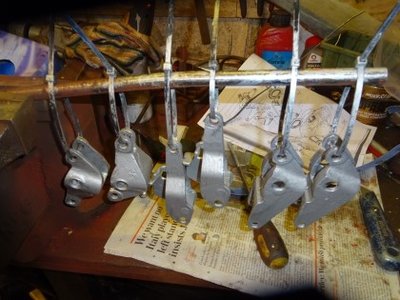
When I said 'I just......' I had, of course forgotten a few minor details. Likes the rear brake calipers. These had been painted bright red (very nice) in the past but were a bit scruffy, with various bits of handbrake mechanism still attached and pistons which had seen better days. So, I thought, easy; get the pistons out, get the paint off, remove the handbrake bits and clean them up, replace the missing bits, new pistons and seals and and repaint and rebuild the calipers. Easy. Not.
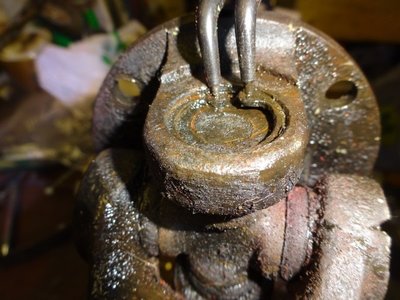
Firstly the handbrake mechanism came off relatively easily (its still awaiting paint removal and refurbing mind), and Sue supplied me with all the missing bits and new pistons and seals. Getting the pistons out was interesting; an assortment of light heat, pipe spanners, compressed air, brute force and ignorance eventually freed them off. On a couple I had to cut a slot in the top of the piston, and drill a small hole in the piston's side to enable me to use a rod to lever the piston around to break the obviously strong bond between the pistons rusty surface and the old seal. They all succumbed eventually....
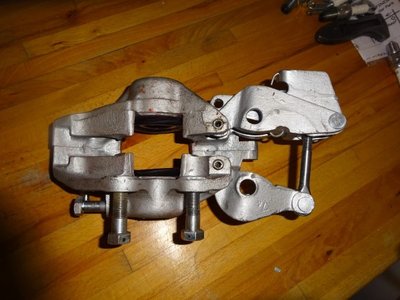
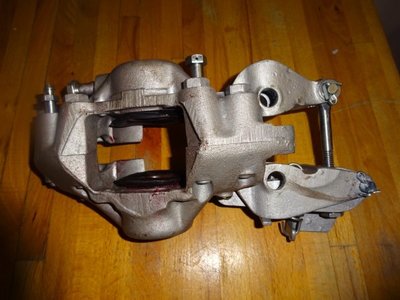
Then the paint. Well, I tried, I really tried. Nitromores, super strong paint stripper, brake fluid, thinners, a mixture of the previous, painting on the stuff and wrapping the calliper in cling film and leaving for a day of two....nothing worked. So it was back to the big rotary wire brush, craft knife and dremmel, which got rid of the paint. Eventually. And covered my workshop bench and me in old powdered paint and bits of wire brush. I would love to know what the paint was, as it was really tenacious and tough. Then a dose of the flu kicked in, and a week later I got back into the workshop and painted the callipers in silver smoothite, and fitted the new pistons and seals - after reading up on the process in these forums they went in pretty easily. Thank goodness! Now I just need to refurb the handbrake mechanism and fit the brake lines and the rolling chassis will be finished; then I'll turn my attention to the heater unit which is looking a bit sorry for itself.......
Matthew Vale - Classic Motoring Author
1968 Plus 2 - Somewhat cosmetically and mechanically modified
1969 Plus 2S - Currently undergoing nut and bolt restoration
Visit me on matthewvale.com
1968 Plus 2 - Somewhat cosmetically and mechanically modified
1969 Plus 2S - Currently undergoing nut and bolt restoration
Visit me on matthewvale.com
-

Matt Elan - Fourth Gear

- Posts: 598
- Joined: 27 Oct 2011
Great to see the progress, Matt.
I'm dragging along way behind, but at least it means you'll be expert in more things when I need your help!
Still haven't got the body off. Need to make space for the dashboard. Which means finishing the brakes. And the carbs... I need another garage, basically.
Ned
I'm dragging along way behind, but at least it means you'll be expert in more things when I need your help!
Still haven't got the body off. Need to make space for the dashboard. Which means finishing the brakes. And the carbs... I need another garage, basically.
Ned
+2S 1969 50/2283
-

NedK - Second Gear

- Posts: 99
- Joined: 31 Aug 2015
Hi Ned - I'll have to try to get over to Twikkers to view!
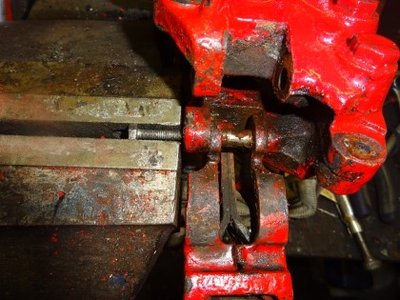
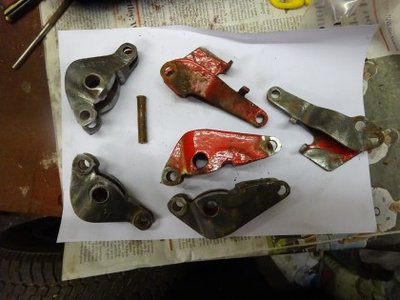
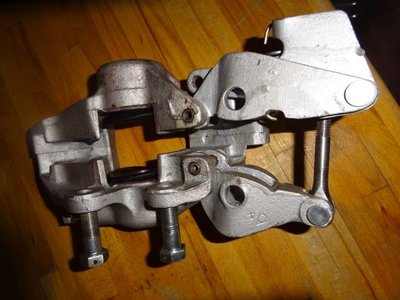
I've stripped down, removed the red paint, cleaned up, and re-painted the handbrake mechanism pieces. What a state they were in, virtually every pivot was stiff or seized, every clevis pin was rusty and knackered and all the parts were chipped and rusty. It's no wonder most handbrakes don't work! I painted them in silver today, and they will be ready tomorrow to reassemble (with lots of new fiddly bits, springs, clevis pins, sprung wotsits, knurled nuts and eye bolts) and refit to the shiny callipers and then I can fit them to the chassis.
Hurrah.... Pics to follow....
Calliper with stuck piston:
Handbrake mechanism - it will come off the calliper:
Handbrake bits being cleaned and then painted:
Matthew Vale - Classic Motoring Author
1968 Plus 2 - Somewhat cosmetically and mechanically modified
1969 Plus 2S - Currently undergoing nut and bolt restoration
Visit me on matthewvale.com
1968 Plus 2 - Somewhat cosmetically and mechanically modified
1969 Plus 2S - Currently undergoing nut and bolt restoration
Visit me on matthewvale.com
-

Matt Elan - Fourth Gear

- Posts: 598
- Joined: 27 Oct 2011
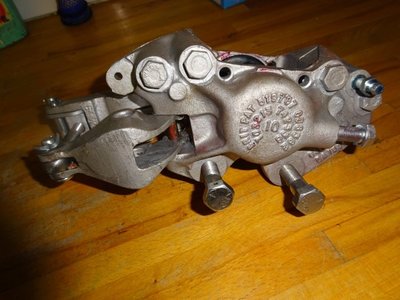
.... newly refurbed rear calliper at last - just needs to be bolted on....
Matthew Vale - Classic Motoring Author
1968 Plus 2 - Somewhat cosmetically and mechanically modified
1969 Plus 2S - Currently undergoing nut and bolt restoration
Visit me on matthewvale.com
1968 Plus 2 - Somewhat cosmetically and mechanically modified
1969 Plus 2S - Currently undergoing nut and bolt restoration
Visit me on matthewvale.com
-

Matt Elan - Fourth Gear

- Posts: 598
- Joined: 27 Oct 2011
Heater is on the bench. New uj's for the prop shaft ready to install and brake pipes ready to cut, flare and fit - aiming for a busy weekend
Matthew Vale - Classic Motoring Author
1968 Plus 2 - Somewhat cosmetically and mechanically modified
1969 Plus 2S - Currently undergoing nut and bolt restoration
Visit me on matthewvale.com
1968 Plus 2 - Somewhat cosmetically and mechanically modified
1969 Plus 2S - Currently undergoing nut and bolt restoration
Visit me on matthewvale.com
-

Matt Elan - Fourth Gear

- Posts: 598
- Joined: 27 Oct 2011
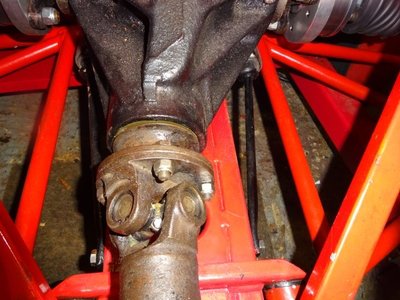
Propshaft now has a pair of new UJs and is firmly bolted onto the diff........
Old ones out......
New ones in......
Bolted to the diff:
An unusual view.......
Tomorrow its the heater's turn.......
Old ones out......
New ones in......
Bolted to the diff:
An unusual view.......
Tomorrow its the heater's turn.......
Matthew Vale - Classic Motoring Author
1968 Plus 2 - Somewhat cosmetically and mechanically modified
1969 Plus 2S - Currently undergoing nut and bolt restoration
Visit me on matthewvale.com
1968 Plus 2 - Somewhat cosmetically and mechanically modified
1969 Plus 2S - Currently undergoing nut and bolt restoration
Visit me on matthewvale.com
-

Matt Elan - Fourth Gear

- Posts: 598
- Joined: 27 Oct 2011
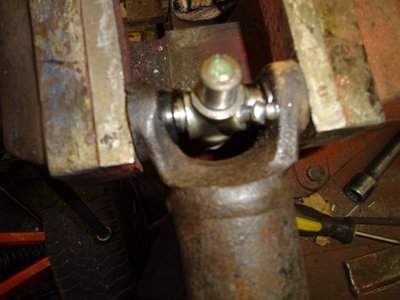
The propshaft yoke has had been subjected to a light touch of bodgery before my time. It looks like a previous owner had some 'issues' getting the circlip out and resorted to a chisel. Can't say I'm too worried about it as the hole is still round, and there plenty of metal there still
Matthew Vale - Classic Motoring Author
1968 Plus 2 - Somewhat cosmetically and mechanically modified
1969 Plus 2S - Currently undergoing nut and bolt restoration
Visit me on matthewvale.com
1968 Plus 2 - Somewhat cosmetically and mechanically modified
1969 Plus 2S - Currently undergoing nut and bolt restoration
Visit me on matthewvale.com
-

Matt Elan - Fourth Gear

- Posts: 598
- Joined: 27 Oct 2011
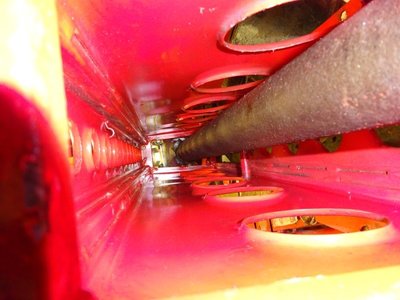
Quick update. I've dismantled my heater box and painted it, lubed the cables and am about to replace the foam on the flaps. And while I've been waiting for the paint on the box to dry I've been making up the brake lines. Now back to the Chinese Grand Prix replay. Pictures to follow........
Matthew Vale - Classic Motoring Author
1968 Plus 2 - Somewhat cosmetically and mechanically modified
1969 Plus 2S - Currently undergoing nut and bolt restoration
Visit me on matthewvale.com
1968 Plus 2 - Somewhat cosmetically and mechanically modified
1969 Plus 2S - Currently undergoing nut and bolt restoration
Visit me on matthewvale.com
-

Matt Elan - Fourth Gear

- Posts: 598
- Joined: 27 Oct 2011
Hi Matt
All looks fantastic!
Wonder if I might ask where you got your steering rack clamps from? I seem to be having some trouble with mine!
Very many thanks.
Andy
All looks fantastic!
Wonder if I might ask where you got your steering rack clamps from? I seem to be having some trouble with mine!
Very many thanks.
Andy
Where, then, lies the answer? In choice. Which shall it be: bankruptcy of purse or bankruptcy of life?
Plus 2S
BLL 315H in white.
Plus 2S
BLL 315H in white.
- EPC 394J
- Third Gear

- Posts: 225
- Joined: 07 Feb 2014
Hi Andy
One of the clamps came with the car, the other I got from either SJS or Sue Millar - forgot which but probably Sue. /i've used polybushes in them which were a bit of a squeeze but clamped down OK eventually......
Regards
Matt
One of the clamps came with the car, the other I got from either SJS or Sue Millar - forgot which but probably Sue. /i've used polybushes in them which were a bit of a squeeze but clamped down OK eventually......
Regards
Matt
Matthew Vale - Classic Motoring Author
1968 Plus 2 - Somewhat cosmetically and mechanically modified
1969 Plus 2S - Currently undergoing nut and bolt restoration
Visit me on matthewvale.com
1968 Plus 2 - Somewhat cosmetically and mechanically modified
1969 Plus 2S - Currently undergoing nut and bolt restoration
Visit me on matthewvale.com
-

Matt Elan - Fourth Gear

- Posts: 598
- Joined: 27 Oct 2011
54 posts
• Page 2 of 4 • 1, 2, 3, 4
Total Online:
Users browsing this forum: Pastapesto, Sea Ranch and 15 guests

