Another newbie to the forum.
37 posts
• Page 2 of 3 • 1, 2, 3
i think u have a point there john! Engine mounting on RHS is possibly at fault
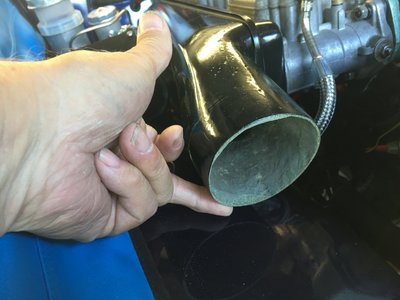
looks to me like there might be very little clearance between the inner wing and the airbox?
I had the same problem after my rebuild and replaced the engine mounting with a beefed up one which solved the problem ... and made it sooo much easier to access the weber bolts etc
looks to me like there might be very little clearance between the inner wing and the airbox?
I had the same problem after my rebuild and replaced the engine mounting with a beefed up one which solved the problem ... and made it sooo much easier to access the weber bolts etc
-

RichC - Fourth Gear

- Posts: 741
- Joined: 28 Apr 2009
Great story and your restoration is looking good! Keep the faith, your close to being back on the road. I know the feeling of driving a car you have personally restored, it is extremely satisfying and will add a new dimension to every drive.
Glen
05 Elise - Back where I started
65 Elan S2 - 26/4055
72 Europa - 74/2358R
69 Elan S4 - 45/7941
64 Elan S1 - 26/0379
12 Colin 30 - Lotus Racing Kart
07 Exige S - Wicked Road/Track Car
07 Exige S - Fast Road/Track Car
06 Elise - Track pack
05 Elise - Back where I started
65 Elan S2 - 26/4055
72 Europa - 74/2358R
69 Elan S4 - 45/7941
64 Elan S1 - 26/0379
12 Colin 30 - Lotus Racing Kart
07 Exige S - Wicked Road/Track Car
07 Exige S - Fast Road/Track Car
06 Elise - Track pack
-

Certified Lotus - Coveted Fifth Gear

- Posts: 1076
- Joined: 04 Aug 2014
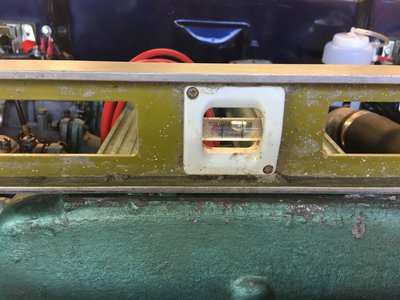
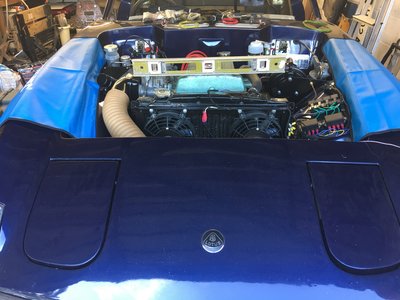
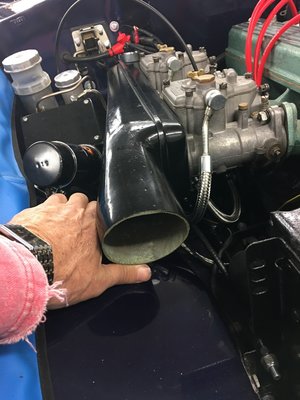
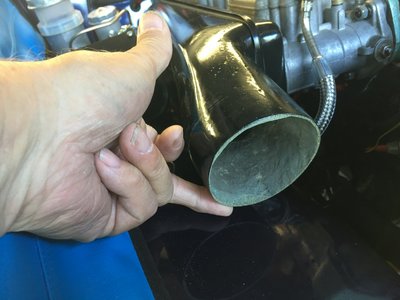
I'd like to compliment John Clegg on his eyesight. I've double checked and the engine is indeed not level. This became more obvious once I had the carbs and airbox finally fitted and found minimal clearance between the airbox outlet and the inner wing. The car is level on axle stands so the attached pictures of the spirit level show how far it is out. New engine mounts on order, might as well do both as they are the same age. Question though, what clearance have people typically got between a standard airbox and the inner wing.
In general work is progressing well, if a little slower than anticipated!
In general work is progressing well, if a little slower than anticipated!
Change is inevitable, except from a vending machine!
- Bigbaldybloke
- Fourth Gear

- Posts: 889
- Joined: 16 May 2017
Progress update. Good day today, diff dropped out, diff brace fitted and all reinstated, just over two hours. It went easily, bearing in mind the car was already up on stands and all bolts were new and nicely coated in copper slip. To ensure the diff was at the right height I milled approx 1.5mm off the bottom end of the sleeve in the frustacone to compensate for the additional thickness of the brace. These sleeves were originally 41mm and only one washer was originally installed, which I reinstated. Fitted the new alloy tank having slid heat shrink over the tank securing straps to ensure they didn't mark it. I've asked elsewhere which way the filler cap should go, hinge to the front or the rear? Only downside was that while hand turning the drive shafts to get clearance to drop the bolts down through the frustacone, the donuts made a tearing sound and started to come unbounded in places, but they had been sat near full droop for a considerable time and are around 20 years old although they have never driven the car in that time, so they'll be out soon and replaced with cv joint shafts - more expense! Need a few small parts too, washers for the tank banjo fitting and I'm going to fit an earth braid strap to the tank.
Also adjusted the front wheel bearings and fitted the calipers and new pads and pins. Rear calipers look sad so will be looking to exchange them for a reconditioned set. Rear bumper and roof gutters should be back from Derby Plating soon so I can fit them and other bits of trim when they arrive. Target completion of November is looking unlikely now as there is still all the interior trimming to do.
Also adjusted the front wheel bearings and fitted the calipers and new pads and pins. Rear calipers look sad so will be looking to exchange them for a reconditioned set. Rear bumper and roof gutters should be back from Derby Plating soon so I can fit them and other bits of trim when they arrive. Target completion of November is looking unlikely now as there is still all the interior trimming to do.
Change is inevitable, except from a vending machine!
- Bigbaldybloke
- Fourth Gear

- Posts: 889
- Joined: 16 May 2017
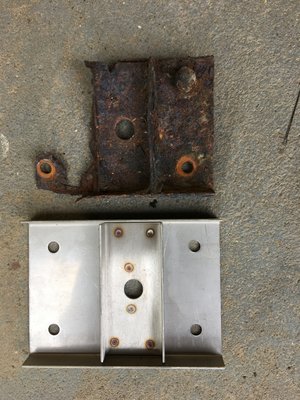
Another update. CV drive shafts collected and fitted, struggled a bit with the first one but the second one went on the easily. Decided to fit the closing plates in the wheel arches while under the car. While cleaning up in the rear arches I noticed the seat belt mounting bracket looked a bit rusty, understatement! Photos below show just how bad it was, but it didn't really look too bad initially. Probably worth people checking these out if they are replacing the sill members, anyway nice new stainless ones now fitted. Noticed that before fitting the rear ones I needed to fit the door catch, which is proving a problem, as so far I haven't located them in the various boxes of car bits around the garage, and mine are the very early type that no one seems to stock 
Hopefully I'll find them. Anyway front ones all fitted, I decided to use good quality black silicon to seal them in place with and I have fitted a u shaped rubber edge strip to the new alloy plates where they but up against the inside of the wing. Pleased with the final result even if I do say so myself. Next job is to grovel under the car to replace the engine mounts with uprated ones to hopefully get the engine level again then it's finish the wiring including transferring everything to the nice new dashboard currently hiding behind the wardrobe!
Hopefully I'll find them. Anyway front ones all fitted, I decided to use good quality black silicon to seal them in place with and I have fitted a u shaped rubber edge strip to the new alloy plates where they but up against the inside of the wing. Pleased with the final result even if I do say so myself. Next job is to grovel under the car to replace the engine mounts with uprated ones to hopefully get the engine level again then it's finish the wiring including transferring everything to the nice new dashboard currently hiding behind the wardrobe!
Change is inevitable, except from a vending machine!
- Bigbaldybloke
- Fourth Gear

- Posts: 889
- Joined: 16 May 2017
My OE plates looked very similar to the dark brown one shown..
Are you refitting the original Irwin dynalock retractors (if this is what you have) ? [on my +2] There is another thick plate that sits in the wheel-arch and the central bolt passes through (I assume the load in an accident might rip the bolt through the mounting in the picture).
If not the Irwin reels, I'd be interested to know what you are fitting. I am currently looking into options.
Adrian
1968 Elan plus 2 - project
2007 Elise S2 [modified with a Hethel 70th sticker (yellow)]
2000 Elise S1 - Sold
2007 Elise S2 [modified with a Hethel 70th sticker (yellow)]
2000 Elise S1 - Sold
- wotsisname
- Third Gear

- Posts: 452
- Joined: 24 Jun 2015
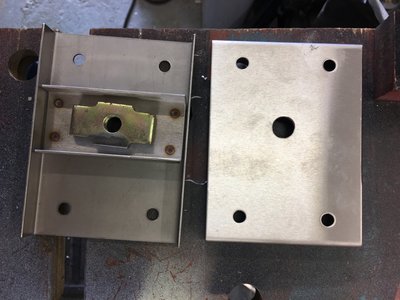
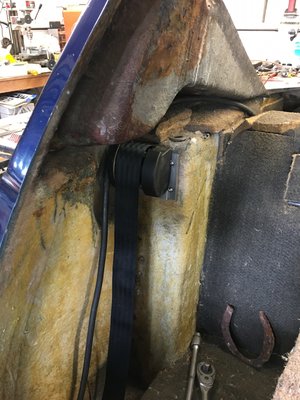
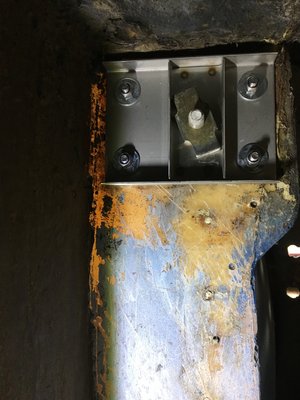
I'm fitting Securon seat belts, not sure if they are the originals, I suspect not. Some clearer pictures of a belt mounted in position, showing the plate and bolt in place in the wheel arch, the two new inner and outer reinforcing plates and the belt temporarily in place. I needed to make a 3mm thick spacer plate so the belt assembly cleared the plate securing bolt heads. You can see the special belt securing nut which is unlikely to pull through the reinforcing plates
Change is inevitable, except from a vending machine!
- Bigbaldybloke
- Fourth Gear

- Posts: 889
- Joined: 16 May 2017
Added the wrong picture above, this is the plate in place in the wheel arch
Change is inevitable, except from a vending machine!
- Bigbaldybloke
- Fourth Gear

- Posts: 889
- Joined: 16 May 2017
This is another job on my todo list. My car has the original plates and belts in currently. The original plates just use a nut in the wheel wheel to secure the belt to the outer plate. I suspect that it may originally have been welded to the plate but doesn't seem to be now. Those fastener nuts look like a better solution to me.
'73 +2 130/5 RHD, now on the road and very slowly rolling though a "restoration"
- mbell
- Coveted Fifth Gear

- Posts: 2643
- Joined: 07 Jun 2013
Progress update, the car is 50 years old today! Was hoping to run the engine today but not quite ready.
Had a battle replacing the right hand side engine mounting with a heavy duty one to try to level the engine up a bit and increase the clearance between the intake housing and the inner wheel arch. Had to remove the carbs, starter motor and cable and heater hose to get decent access to the mounting bolts. Removing the old mounting was then straightforward, but getting the new one on was a real battle to lever the engine into position to be able to get the bolts back in. Took about 4 hours in total! Bled the brakes and clutch, had just fitted reconditioned rear calipers. Fitted the handbrake lever and completed the connection of the linkage, still needs final adjustment. Had a delay due to a missing passenger door catch plate but a member on here provided me with one which is now fitted nailing me to fit the wheel arch closing plate too. Installed the speedo cable but found the angle drive adaptor that fits at the gearbox end was damaged and unusable so have ordered a replacement. Rechromed rear bumper fitted and rear lights in place and new boot floor supports made and installed. Original floor boards are warped so will use them as templates to make new ones. Went to the Classic car show at the NEC and picked up a few parts, got a new alloy rear number plate and individual digits to fit to the grill for the front number plate, and a new original Lucas indicator switch at a bargain price. Also picked up a proper Lucas bullet crimping tool not the cheap imitation ones available online that only put a flat on the bullet not a hexagon as original. Once the engine has been run the next challenge is the dashboard, I have the replacement but need to transfer everything to it and tidy up the wiring as I do it, plus change the ammeter for a volt meter as I now have an alternator.
Just need to find someone to do the retrimming for me as that?s a skill I don?t have, the main decision is do I go for black vinyl as near original as possible or change to leather, probably in a different colour? Suggestions / recommendations on trimmers most welcome.
Change is inevitable, except from a vending machine!
- Bigbaldybloke
- Fourth Gear

- Posts: 889
- Joined: 16 May 2017
Bigbaldybloke wrote:Good day today, diff dropped out, diff brace fitted and all reinstated, just over two hours. It went easily, bearing in mind the car was already up on stands and all bolts were new and nicely coated in copper slip. To ensure the diff was at the right height I milled approx 1.5mm off the bottom end of the sleeve in the frustacone to compensate for the additional thickness of the brace. These sleeves were originally 41mm and only one washer was originally installed, which I reinstated.
Could you post a picture of the diff brace in situ, please? I have to do the same to mine (CVs and brace).
Cheers
JonB
-

JonB - Coveted Fifth Gear

- Posts: 2359
- Joined: 14 Nov 2017
JonB
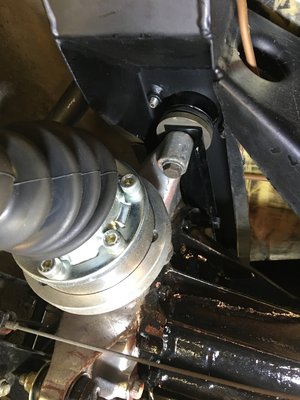
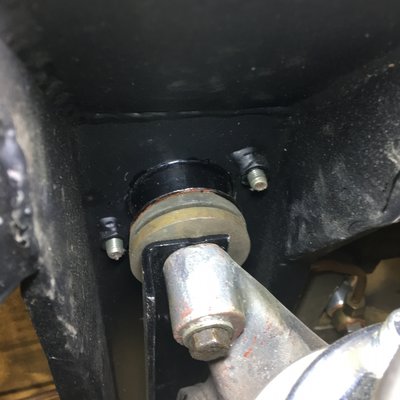
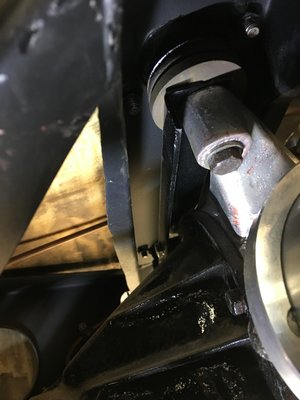
Some pictures of the diff brace attached. Quite straightforward to fit but need to check the clearance between the bottom of the diff and the chassis. Mine didn?t have washers I could remove so I milked 1.5mm off the central tube through the frustacone.
Some pictures of the diff brace attached. Quite straightforward to fit but need to check the clearance between the bottom of the diff and the chassis. Mine didn?t have washers I could remove so I milked 1.5mm off the central tube through the frustacone.
Change is inevitable, except from a vending machine!
- Bigbaldybloke
- Fourth Gear

- Posts: 889
- Joined: 16 May 2017
37 posts
• Page 2 of 3 • 1, 2, 3
Total Online:
Users browsing this forum: No registered users and 8 guests

