Stromberg Rebuild
43 posts
• Page 2 of 3 • 1, 2, 3
Bent another jet while pressing it into the 2nd carburettor, so on hold while awaiting another. The main section of the new jets appear to be about a half a thou larger than the ones I removed. I polished this one as I did the one I got into the first carb, but perhaps not quite enough. It was within 50 thou of its final position when I bent it. I may also try to find and fit a bit of a nail shank into the pickup end of the jet, just to add some rigidity when pressing it in.
In the meantime, a few things learned along the way that may be useful to future Stromberg rebuilders...
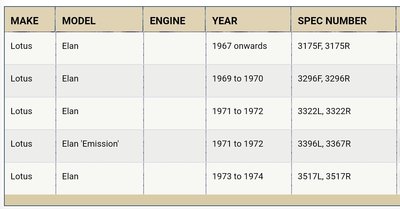
Stromberg 17CD2S spec numbers for our Elans:
The spare set I had are 3322s, so that is the spec I'm rebuilding to though my car is a 1969. I will likely rebuild the ones I pull off to the same spec, unless the variable needle gives me problems.
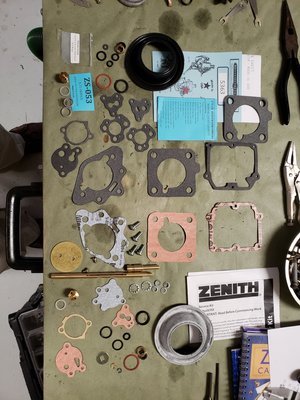
I had a pair of service kits from RD Enterprises, but decided to get a full rebuild kit from Burlens since I wanted to do a complete job. The Burlens kit is expensive, but has enough for 2 carbs. Following is a picture of what came in each kit (RD on the top, 1/2 of Burlens on the bottom)
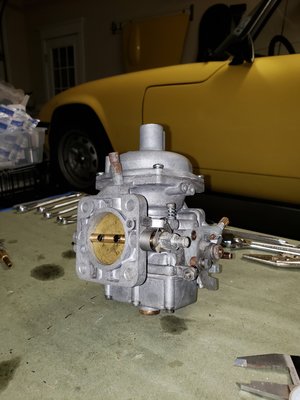
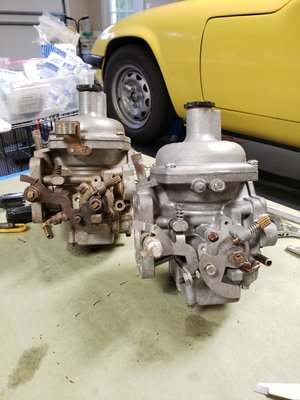
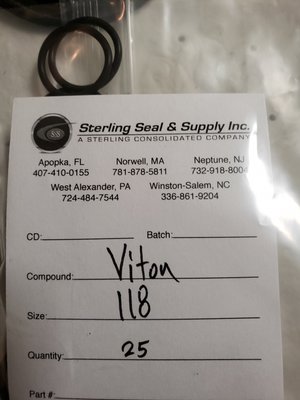
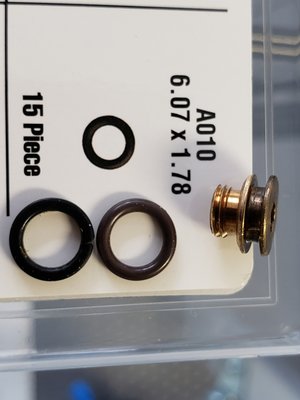
Couldn't find a reference to o-ring sizes for 2 rings, the ones for the balance bar and the ones that fit on the metering needle retainer to keep damper oil in the piston. See a picture below of each.
Henry
69 Elan S4
65 Seven S2
69 Elan S4
65 Seven S2
- SENC
- Coveted Fifth Gear

- Posts: 1016
- Joined: 30 Dec 2015
SENC wrote:Bent another jet while pressing it into the 2nd carburettor, so on hold while awaiting another. The main section of the new jets appear to be about a half a thou larger than the ones I removed. I polished this one as I did the one I got into the first carb, but perhaps not quite enough. It was within 50 thou of its final position when I bent it. I may also try to find and fit a bit of a nail shank into the pickup end of the jet, just to add some rigidity when pressing it in.
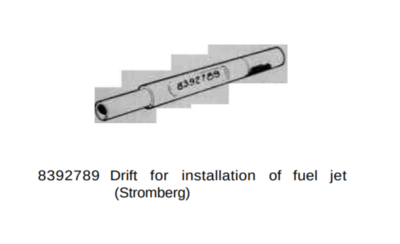
It's not a good idea to push on the end of the jet tube to press the jet into place, there is a special tool which fits over the tube and bears on the main body of the jet to avoid damage.
Alternatively you could press or drift the jet in from the top, the drift will still need a small centre drilling or countersink so you don't damage the jet orifice itself and you will need to be careful how you support the body of the carb to avoid damage to the float bowl gasket face...screwing in the brass jet cover and resting on that may be the answer.
Either way preheating the carb body in hot water and chilling the jet in the freezer should ease installation.
Good luck.
Roger
S4 DHC
S4 DHC
- oldelanman
- Coveted Fifth Gear

- Posts: 1928
- Joined: 02 Jan 2008
Made a suitable drift out of a piece of SS tubing and the replacement jet went in with no issues - thanks again Roger.
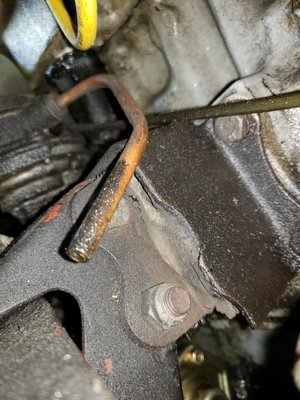
Finished the 2 carburetors, but as seems to be routine, hit another snag as I was removing the old carbs. I had a hint when I removed the airbox and found a telltale rub on the fiberglass beneath it - then noticed that the flange on the grp airbox had been ground down by the previous owner, presumably to eliminate this rub. I managed to get the carbs off with some struggle, and found that the jet cover on the bottom of the rear carb had actually worn through the fibergalss beneath it. Then I found that I couldn't get the rear adaptor plate off, it is stuck behind the fiberglass shelf. I maneuvered it just enough to get to the nuts that hold the adapter to the manifold, but again not enough space to actually get the adaptor or plate from behind the shelf.
This would seem to suggest that the right hand side of my motor is too low - and that I'll need to lift it a bit to finish the job. I'd appreciate your thoughts and recommendations.
Last edited by SENC on Sat Dec 15, 2018 10:02 pm, edited 1 time in total.
Henry
69 Elan S4
65 Seven S2
69 Elan S4
65 Seven S2
- SENC
- Coveted Fifth Gear

- Posts: 1016
- Joined: 30 Dec 2015
Mine were the same. Knocking a hole through the glass fibre doesn?t do much for the driving experience when it rains as your feet get wet. The previous owner had fixed the problem by screwing a sheet of aluminium across the shelf but the tapping drove me mad. I jacked the motor up on that side a few millimetres at a time (slot the engine mounts) until it stopped. You?ll know when you go too far as it?ll start tapping on the bonnet / hood instead. 
Stuart Holding
Thame UK / Alpe D'Huez France
69 S4 FHC
Honda GoldWing 1800
Honda CBX1000
Kawasaki H1 500
Yamaha XS2
Thame UK / Alpe D'Huez France
69 S4 FHC
Honda GoldWing 1800
Honda CBX1000
Kawasaki H1 500
Yamaha XS2
- 69S4
- Coveted Fifth Gear

- Posts: 1124
- Joined: 23 Sep 2004
SENC wrote:Looks like a failed motor mount. Assume the uprated ones from RD Enterprises and the like are the recommendation? Any tips for raising/supporting the engine (or things to be avoid/be aware of)?
Agree. Replace both though. I have an early set in my car Elan. They work great once I got them to fit. I had to horizontal slot the mount holes that mate to the chassis to make them fit.
Regards,
Dan Wise
There is no cure for Lotus, only treatment.
-

StressCraxx - Coveted Fifth Gear

- Posts: 1277
- Joined: 26 Sep 2003
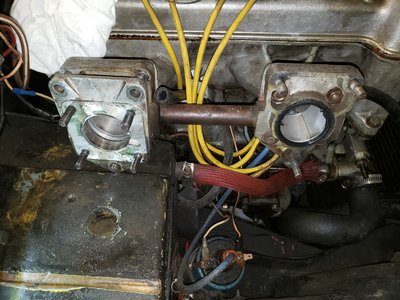
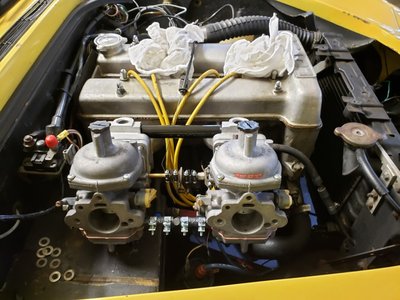
With the motor mounts replaced and the engine back in the correct position, and carb rebuild complete, I was able to do a dry fit today.
Not knowing the history of the distributor, while the carbs are out I put some thought and study to converting to electronic. Ultimately decided to stay with points and bought a NOS 23d4 from the distributor doctor (it seems he found and bought a stash a couple months ago), as well as some replacement points and condensors and plan to rebuild mine as a backup. When that arrives I'll share observations and pics in a new thread, then hopefully get on with finishing carb installation, balancing and tuning.
Not knowing the history of the distributor, while the carbs are out I put some thought and study to converting to electronic. Ultimately decided to stay with points and bought a NOS 23d4 from the distributor doctor (it seems he found and bought a stash a couple months ago), as well as some replacement points and condensors and plan to rebuild mine as a backup. When that arrives I'll share observations and pics in a new thread, then hopefully get on with finishing carb installation, balancing and tuning.
Henry
69 Elan S4
65 Seven S2
69 Elan S4
65 Seven S2
- SENC
- Coveted Fifth Gear

- Posts: 1016
- Joined: 30 Dec 2015
Testing day today. The good news is that it started right away, which was a risk given the carb rebuild and dizzie replacement. Have an electric pump so was able to fill the bowls and check for leaks before trying to turn it over - success, so I rolled it outside. The YouTube clip below is right after starting it, and you'll see I found a fuel leak - coming out of the cold start choke.
https://youtu.be/zEQ5ZPR-WQ0
After cleaning that up, I started it again and closed the choke - no leak. Ran it to warm watching for more leaks and didn't observe any, so something in that valve when open. Guess I'll have to pull the carbs again and rebuild the choke. I have a few spares from other carbs - any ideas for pressure testing off the car?
Started to work on the timing when I noticed the breather tube was pumping a lot of smoke. Historically I've run this into the airbox so don't have any context to compare against - normal?
Henry
69 Elan S4
65 Seven S2
69 Elan S4
65 Seven S2
- SENC
- Coveted Fifth Gear

- Posts: 1016
- Joined: 30 Dec 2015
There's a gasket that comes in the rebuild kit - it's the second up from the bottom left in the picture you posted back on 3rd Dec iirc. Any particular reason why you'd not want to use it?
Stuart Holding
Thame UK / Alpe D'Huez France
69 S4 FHC
Honda GoldWing 1800
Honda CBX1000
Kawasaki H1 500
Yamaha XS2
Thame UK / Alpe D'Huez France
69 S4 FHC
Honda GoldWing 1800
Honda CBX1000
Kawasaki H1 500
Yamaha XS2
- 69S4
- Coveted Fifth Gear

- Posts: 1124
- Joined: 23 Sep 2004
I did use it but as mentioned above had a leak from the cold start valve so looking for possible reasons and found several comments across the web about not using a gasket. Indeed, the exploded diagrams I can find (lotus workshop manual, lotus parts manual, buckeye triumphs article, etc.) don't depict a gasket, so had me wondering whether utilization of the gasket incorrectly might be part of the problem.
The leak did not appear to be coming from the perimeter of the valve, so I'm confident the gasket was doing its job keeping fuel from creeping along the carb body. Rather I think fuel was making it behind the disc and out of the small hole (presumably air hole) in the valve housing beside the spindle, or between the spindle and the housing. The only way I can see fuel getting there is by creeping around the disc (maybe weak spring or gasket raises cause it to be raised higher than designed) or a gap inside the disc. Plan to open it up this morning and will report back.
The leak did not appear to be coming from the perimeter of the valve, so I'm confident the gasket was doing its job keeping fuel from creeping along the carb body. Rather I think fuel was making it behind the disc and out of the small hole (presumably air hole) in the valve housing beside the spindle, or between the spindle and the housing. The only way I can see fuel getting there is by creeping around the disc (maybe weak spring or gasket raises cause it to be raised higher than designed) or a gap inside the disc. Plan to open it up this morning and will report back.
Henry
69 Elan S4
65 Seven S2
69 Elan S4
65 Seven S2
- SENC
- Coveted Fifth Gear

- Posts: 1016
- Joined: 30 Dec 2015
Check you've got the disc orientation correct and not 180degrees out as mentioned previously. The drillings should all be blanked off in the closed position.
Roger
S4 DHC
S4 DHC
- oldelanman
- Coveted Fifth Gear

- Posts: 1928
- Joined: 02 Jan 2008
43 posts
• Page 2 of 3 • 1, 2, 3
Total Online:
Users browsing this forum: pcarew and 4 guests

