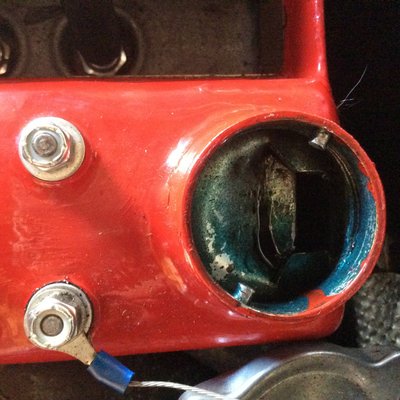
Oil filler cap/cam cover
15 posts
• Page 1 of 1
Hello, I alluded to this in another post but think it may be more appropriate to start a new one of my own.
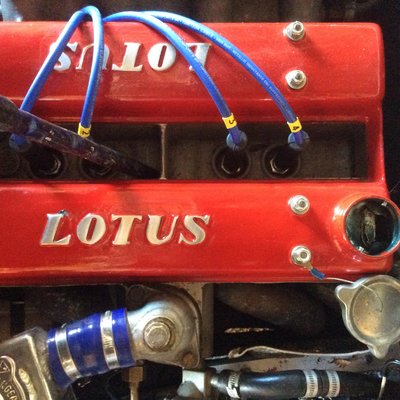
I'm having another go at fixing the leaks from the oil cap and have discovered a few things in the process.
First of all I removed the paint from the lip of the filler neck to try and achieve a flat surface for the rubber seal, this resulted, somewhat understandably, in the leak getting worse until I fitted a new seal. With the new seal fitted there was a slight improvement and a further one when I packed out the seal with a bit of cardboard between it and the cap. This resulted in the leak being reduced to the point where there is a just slight dribble from either side where the locking pins are.
So I tried to bend the tabs that engage with the pins but they just spring back again. Right, I think, looks like the tabs have gone soft, maybe I should try one of those machined-from-a-billet replacement caps that are now available. So I trundle off to Paul Matty.
45 quid lighter (ouch!) I fit new, very shiny - shiny helps a bit - oil cap. They use an 'O' ring to seal and come with two thicknesses of ring to try. Unfortunately, despite it's very shininess, the leak is exactly the same as with the old cap... hmmm, I just bought a 45 quid paper weight then.
So it would seem that the problem is the that tabs in the cam cover aren't pulling the cap down enough. I could try more packing and bending of the original cap but it would be nice to get the new (shiny) cap to work.
My question, finally, is, are the pins in the cam cover part of the casting or are they pressed in and could they be bent down a bit or will they just snap off?
Did I mention the new cap is nice and shiny?
Ta
Robbie
-

Robbie693 - Coveted Fifth Gear

- Posts: 1515
- Joined: 08 Oct 2003
Things that have worked for me:
With the cam cover removed, I measured (from a flat surface) the height of the cap sealing surface and carefully filed it flat and true. With a new gasket, this sealed one of my cam covers.
On another which looked to have already been filed, I had a machine shop press out the old pins (which are hardened steel and too short to effectively bend) and re-drill new holes slightly lower and 90 degrees rotated from standard. Old holes were filled with epoxy as I didn't want to risk warpage via welding.
Steve
Elan S1 1963-Bourne bodied
Elan S3 1967 FHC pre airflow
Formerly:
Elan S1 1964
Elan S3 1966 FHC pre airflow
Elan S3 1967 FHC airflow
Elan S4 1969 FHC
Europa S2 1970
Esprit S2 1979
Elan S1 1963-Bourne bodied
Elan S3 1967 FHC pre airflow
Formerly:
Elan S1 1964
Elan S3 1966 FHC pre airflow
Elan S3 1967 FHC airflow
Elan S4 1969 FHC
Europa S2 1970
Esprit S2 1979
- bitsobrits
- Third Gear

- Posts: 418
- Joined: 27 Apr 2011
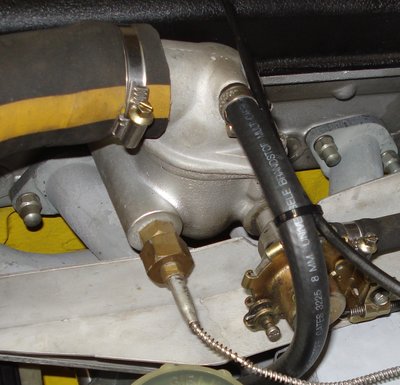
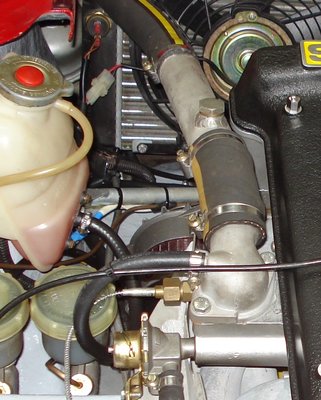
What you need is half an hour,some thin ali. plate and a few tools and fabricate a splash cover...
and in situ
John
and in situ
John
-

john.p.clegg - Coveted Fifth Gear

- Posts: 4533
- Joined: 21 Sep 2003
Hi Robbie and John. I used the same deflector style plate (only not as well made  ) and it worked a treat!
I've also looked at moving the pins and thought they were aluminium. I will check mine.
I've also been tempted to epoxy a threaded tube/neck and use a billet screw cap.
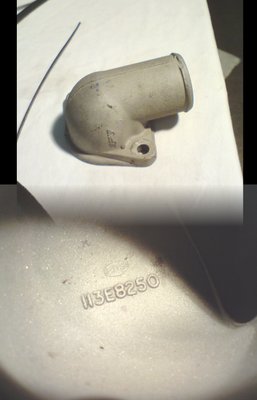
Sorry , as an aside, where did the thermostat housing come from, John?
Cheers, Lyn....
I've also looked at moving the pins and thought they were aluminium. I will check mine.
I've also been tempted to epoxy a threaded tube/neck and use a billet screw cap.
Sorry , as an aside, where did the thermostat housing come from, John?
Cheers, Lyn....
- Lyn7
- Second Gear

- Posts: 115
- Joined: 11 Jan 2010
Home made.....allows full filling.
John
John
-

john.p.clegg - Coveted Fifth Gear

- Posts: 4533
- Joined: 21 Sep 2003
We're going back a bit now but my best guess is the strengthning ribs on the cam cover?
John
John
-

john.p.clegg - Coveted Fifth Gear

- Posts: 4533
- Joined: 21 Sep 2003
Robbie
All is not lost with your shiny oil cap. I too, had the same problem with the one I got from Burton (probably out of the same machine shop as Matty's).
But it is oil tight if you add a flat rubber seal fitted loose under the cap and don't over tighten.
The flat washer was supplied from Sue Miller ''Oil filler cap gasket'' ?1.25+vat
Malcolm
1966 Elan S3 Coupe
1994 Caterham 7
1994 Caterham 7
- englishmaninwales
- Fourth Gear

- Posts: 710
- Joined: 26 Jul 2013
Lyn7 wrote:
Sorry , as an aside, where did the thermostat housing come from, John?
Cheers, Lyn....
Hi Lyn
Self made allows a nearly airless system.
Look here:
http://www.earlpartstore.co.uk/product_info.php?products_id=719
Cheers Urs
-

ElanDNA - Second Gear

- Posts: 117
- Joined: 31 Jan 2017
I've recently had a big increase in oil leaking from my cap.
While I had the cam cover off I investigated it and found the major leak was caused by the oil cap not seating correctly on both pins. Wear on the pins and tight tabs, meant that when fitted the cap would slide off one of the pins and only be clamped down on one side.
Losing up the tabs allows the cap to fasten to both pins which has significantly reduced the leak, I not sure it fixed yet thou. My next steps will be to pack out the seal more and fit a splash guard likes Johns.But if you are experiencing a significant leak I think its worth checking the cap is secured on both pins as a starting point.
'73 +2 130/5 RHD, now on the road and very slowly rolling though a "restoration"
- mbell
- Coveted Fifth Gear

- Posts: 2643
- Joined: 07 Jun 2013
john.p.clegg wrote:What you need is half an hour,some thin ali. plate and a few tools and fabricate a splash cover...
John
Very neat, John, but how easily can you pour oil into the engine with that in place?
Meg
26/4088 1965 S1½ Old and scruffy but in perfect working order; the car too.
________________Put your money where your mouse is, click on "Support LotusElan.net" below.
26/4088 1965 S1½ Old and scruffy but in perfect working order; the car too.
________________Put your money where your mouse is, click on "Support LotusElan.net" below.
-

Quart Meg Miles - Coveted Fifth Gear

- Posts: 1170
- Joined: 03 Oct 2012
Dead easy,it reminds one which oil to use and you can pour it in with the engine running if you wish.
John
John
-

john.p.clegg - Coveted Fifth Gear

- Posts: 4533
- Joined: 21 Sep 2003
I had the same problem some years ago and discussed this with the garage in our village. This was not your normal village garage but Richard Coles of Coltect Racing Engines who were previously Holbay Engineering so twin cam experts.
Richard welded a baffle plate under the filler cap and not had a problem since.
Richard welded a baffle plate under the filler cap and not had a problem since.
-

Coupe - Second Gear

- Posts: 144
- Joined: 28 Oct 2007
A few things to try there, thanks all. I guess I'll try Malcom's tip first and then move on to more adventurous options.
I have thought that the splash guard was the thing to do for a while but have been waiting until it was necessary to remove the cover for another reason
Cheers
Robbie
I have thought that the splash guard was the thing to do for a while but have been waiting until it was necessary to remove the cover for another reason
Cheers
Robbie
-

Robbie693 - Coveted Fifth Gear

- Posts: 1515
- Joined: 08 Oct 2003
15 posts
• Page 1 of 1
Total Online:
Users browsing this forum: No registered users and 31 guests

