Replacing the doughnuts
18 posts
• Page 1 of 2 • 1, 2
I did my doughnuts again Sept (2007) and now have a new technique to make it easier.
Remember in the final assembly ALL bolt heads are OUTboard.
trestle
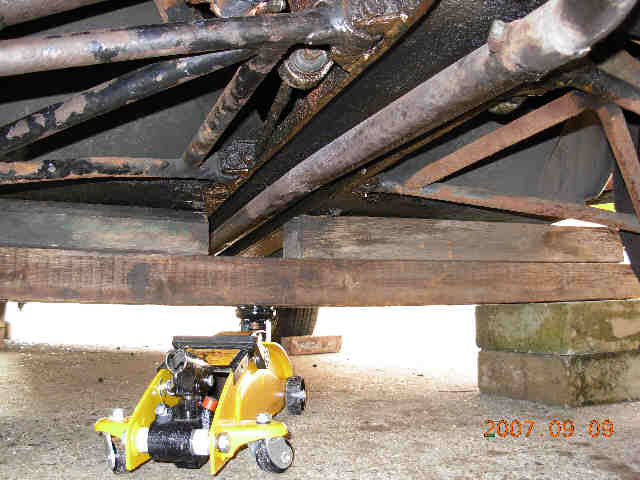
broken doughnut. Terrifying!
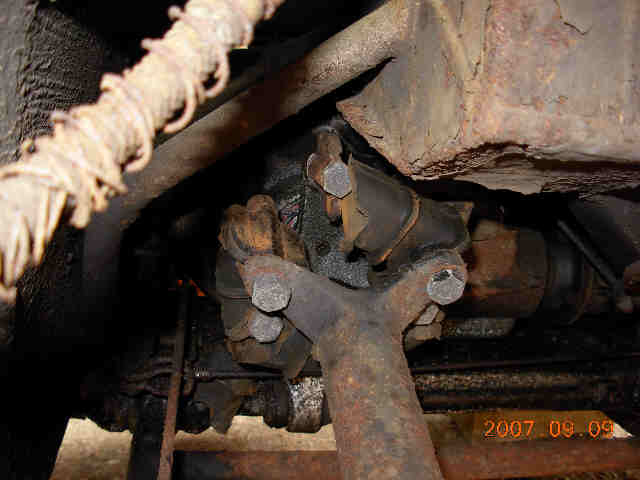
prepare halfshaft
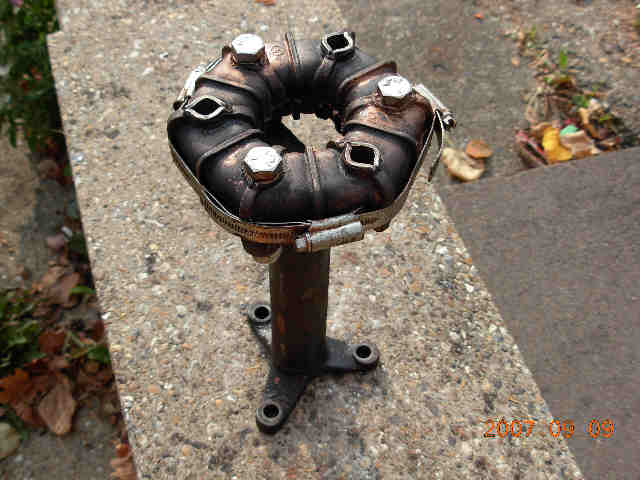
release bottom of suspension
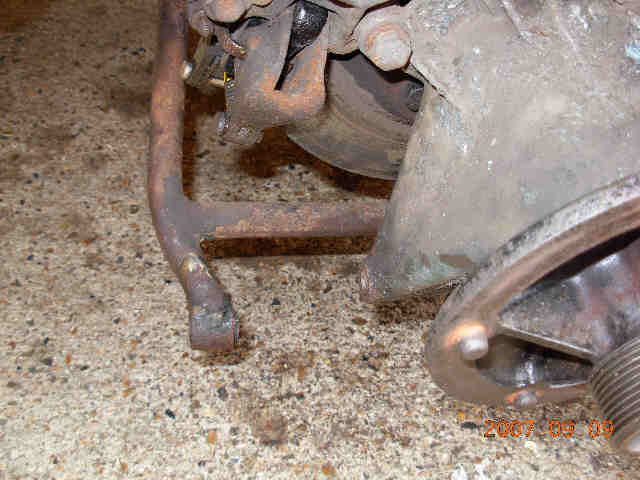
twist suspension to more easily get old doughnut off and new doughnut on
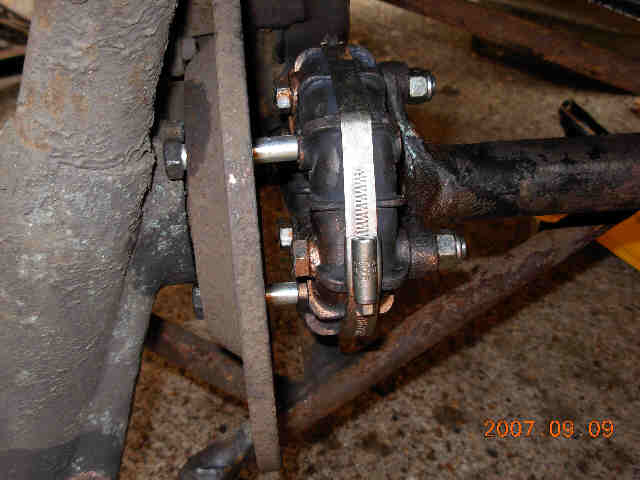
Tap in brake disk bolts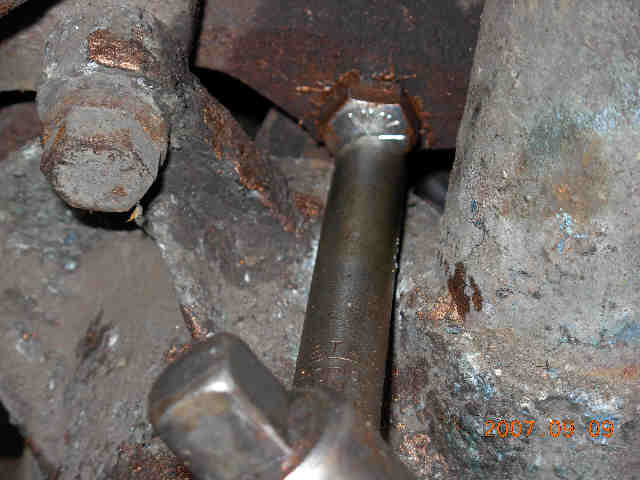
brake doughnut fitted but still loose
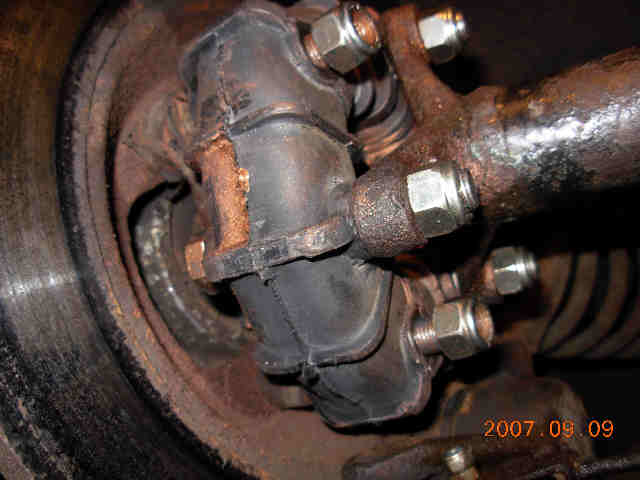
reattach lower suspension
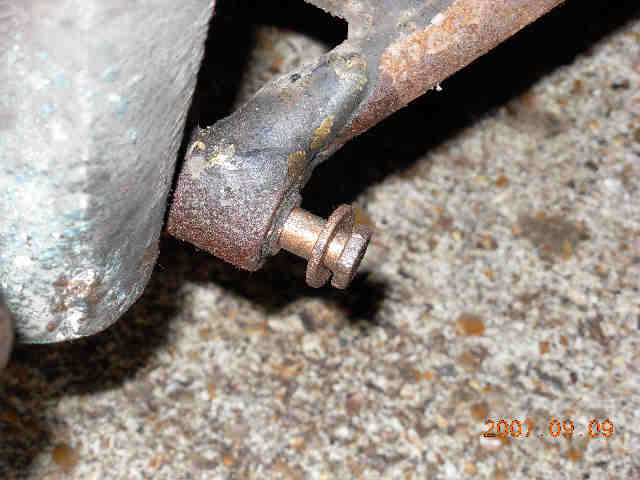
jack it high
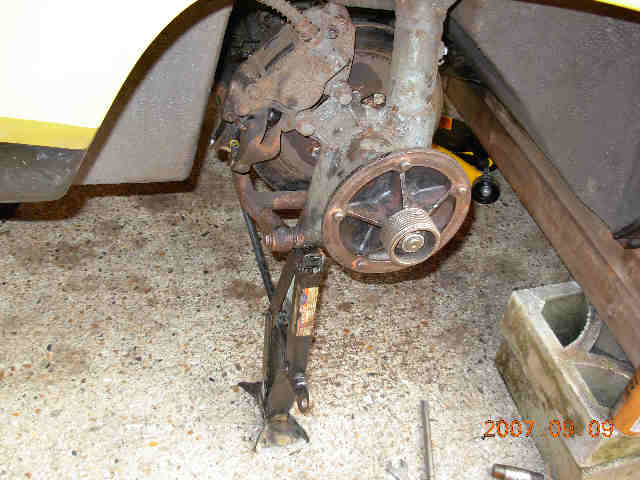
diff doughnut fitted but loose
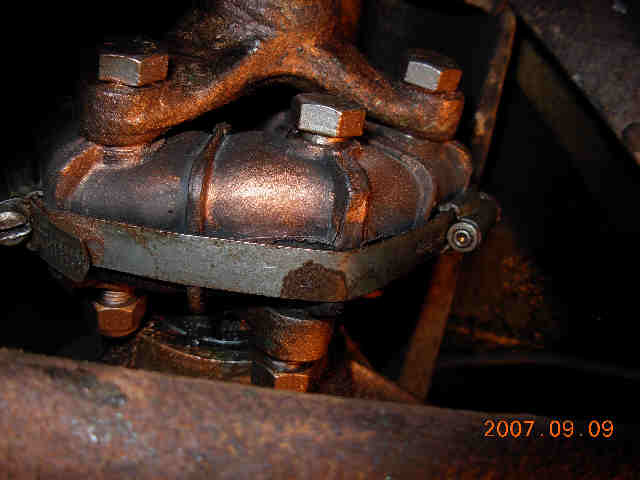
Remember in the final assembly ALL bolt heads are OUTboard.
trestle

broken doughnut. Terrifying!

prepare halfshaft

release bottom of suspension

twist suspension to more easily get old doughnut off and new doughnut on

Tap in brake disk bolts

brake doughnut fitted but still loose

reattach lower suspension

jack it high

diff doughnut fitted but loose

Last edited by billwill on Wed Apr 14, 2010 4:37 pm, edited 2 times in total.
Bill Williams
36/6725 S3 Coupe OGU108E Yellow over Black.
36/6725 S3 Coupe OGU108E Yellow over Black.
- billwill
- Coveted Fifth Gear

- Posts: 4417
- Joined: 19 Apr 2008
This website will not let me post this message in one go, so I have to break it into smaller messages!!!
Jack up the back of the car and support on secure fittings. I use a seven foot chunk of 4x4 timber with two three foot chunks of 4x4 fastened to it with a gap to clear the exhaust pipe. This goes across the underside of the car near the back and supported on concrete blocks outboard of the car.
1.replace the steel compression bands with 3 end-to-end jubilee clips (this give 3 places where you can adjust the doughnut. Offer up to the prongs of the halfshaft and adjust the jubilee clips so that all six holes of the doughnuts line up nicely to the prongs.
2. Fit the outer or both doughnuts to the half-shaft, easily done on the bench instead of crawling under the car. Torque these bolts up to their final value. Use copper grease on ALL the doughnut threads and bolt shafts so that you can get it apart more easily next time.
Bill Williams
36/6725 S3 Coupe OGU108E Yellow over Black.
36/6725 S3 Coupe OGU108E Yellow over Black.
- billwill
- Coveted Fifth Gear

- Posts: 4417
- Joined: 19 Apr 2008
3. Compress the rear suspension springs with spring compressors and then undo the lower suspension from the 'bicycle frame'. Disconnect the handbrake rod.
4. Put a jack under the bottom of the hub and raise it to a reasonable height, be very careful as there is nothing to stop it sloping outwards. You are ONLY dealing with the weight of the hub as the springs are held by the spring compressor.
5. Twist the hub sideways about 60 degrees and offer up the outer doughnut to the brake disk. Because the inner end of the half shaft is now almost clear of the 'bike-frame' it is relatively easy to get the outer doughnut into the right position. First put old bolts in from the inside outwards (i.e the WRONG way) in all three holes, then with your new bolts, rotate brake disc into postion and feed the bolt over the top of the hub in the V and tap it in gently, pushing out the temporary bolt. Fit the nuts but leave them loose.
Bill Williams
36/6725 S3 Coupe OGU108E Yellow over Black.
36/6725 S3 Coupe OGU108E Yellow over Black.
- billwill
- Coveted Fifth Gear

- Posts: 4417
- Joined: 19 Apr 2008
6. heave the half shaft up and inwards and twist the hub back into normal alignment. the diff end of the halfshaft will now be resting on the inner 'crossbar' of the 'bikeframe'.
7. with judicious use of the jack and a bit of heaving, get the bottom of the hub back into its position in the 'bike frame' & put the special thin-headed bolts back and secure them.
8. lower the jack to fit the inner doughnut if you did not do it on the bench. [It is easier to do the outer doughnut if the inner one is not there, but on the other hand fitting the inner doughnut later is a pain]
9. now jack up the hub as high as you can get it. You may be able to get the inner doughnut almost in line with the diff output shaft. Spin the brake disk until you can get at least one hole lined up, put a bolt through from doughnut to diff & put its nut on (on the diff side, leave it loose.
10. By rotating the disk/halfshaft, you should be able to relatively easily line up the other two holes in turn. I found this MUCH easier than any of my prior re-fits. Slide/tap the bolts in and fit its nut, loose.
11. Finally tighten up all the nuts to the right torque, and do the rest of the little bits like removing the spring compressors, re-fitting the handbrake rod etc.
Bill Williams
36/6725 S3 Coupe OGU108E Yellow over Black.
36/6725 S3 Coupe OGU108E Yellow over Black.
- billwill
- Coveted Fifth Gear

- Posts: 4417
- Joined: 19 Apr 2008
Neat thanks mate, see you used liberal amounts of molybdenum sulfide as well. Always works at treat if you own a car for along time 
- Leo Leentvaar
- Second Gear

- Posts: 107
- Joined: 22 Mar 2007
In this case the gold coloured stuff you see is copper grease that came in a spray can.
No molydenum sulphide in these pictures AFAIR.
I must get some Curust & paint on that under carriage....
No molydenum sulphide in these pictures AFAIR.
I must get some Curust & paint on that under carriage....
Bill Williams
36/6725 S3 Coupe OGU108E Yellow over Black.
36/6725 S3 Coupe OGU108E Yellow over Black.
- billwill
- Coveted Fifth Gear

- Posts: 4417
- Joined: 19 Apr 2008
Bill
Makes a nice change to see a car that is used (like mine)......
John
Makes a nice change to see a car that is used (like mine)......
John
-

john.p.clegg - Coveted Fifth Gear

- Posts: 4533
- Joined: 21 Sep 2003
john.p.clegg wrote:Bill
Makes a nice change to see a car that is used (like mine)......
John
Ah, true, but that doughnuts change was back in 2007 and she hasn't actually been used all that much since then, first due to needing to fix the front chassis struts and more recently the cracks in the cylinder head.
Not quite as rusty underneath as those 2007 pictures now.
Total mileage is around 210,000 UK miles, but I'm not quite sure as the speedo had to be changed in 1984 and I haven't on quick search found the MOT cert just prior to the change to see what the mileage was in 1983 just before the speedo was changed.
Bill Williams
36/6725 S3 Coupe OGU108E Yellow over Black.
36/6725 S3 Coupe OGU108E Yellow over Black.
- billwill
- Coveted Fifth Gear

- Posts: 4417
- Joined: 19 Apr 2008
I've had to replace these reinforced donuts many times on Davrians, and we use a different trick.
It's quite easy to do without a compression band. I think you'd use the band to attach the donut to the innermost spider, then remove it.
First attach to the innermost spider. You then attach two of the bolts finger tight to the outer spider, then turn the assembly so that the third point is facing down, and the trick is to use a ring-spanner on the head of the last bolt to go in, as a lever to point the bolt into the hole in the spider..
I did have a special written explanation of how to do this from Ian Sykes, the well-known Imp engine builder, but I can't find it at the moment, however that's the gist of the idea.
Use a good ring spanner to twist the bolts into the right orientation. Once you know it's possible, it's fairly easy.
I've not tried this 3 Jubilee clip method, so can't comment on which is best.
- Hal
- First Gear

- Posts: 44
- Joined: 11 Nov 2012
gjz30075 wrote:It's been many years since I bought donuts but when I did, they came already 'banded'. Is this no longer true?
Greg Z
Yes they come banded, but it's very rare that the tension is such that the holes actually line up. You get far better control with 3 end-to-end jubilee clips because it gives you 3 places to adjust the position of the holes.
Bill Williams
36/6725 S3 Coupe OGU108E Yellow over Black.
36/6725 S3 Coupe OGU108E Yellow over Black.
- billwill
- Coveted Fifth Gear

- Posts: 4417
- Joined: 19 Apr 2008
This post is ages old - but maybe someone will see my question???
If I use three Jubilee clips to go around the doughnut, what size clips should I buy to do this? 3x2" = the recommended 6" single but I bet they should be longer ones. Maybe 3x3"??
Thanks.
If I use three Jubilee clips to go around the doughnut, what size clips should I buy to do this? 3x2" = the recommended 6" single but I bet they should be longer ones. Maybe 3x3"??
Thanks.
- Hawksmoor
- New-tral
- Posts: 6
- Joined: 23 Sep 2019
18 posts
• Page 1 of 2 • 1, 2
Total Online:
Users browsing this forum: No registered users and 14 guests
