Tidying the boot
15 posts
• Page 1 of 1
Yay, another brief report about a completed job. This time, the boot.
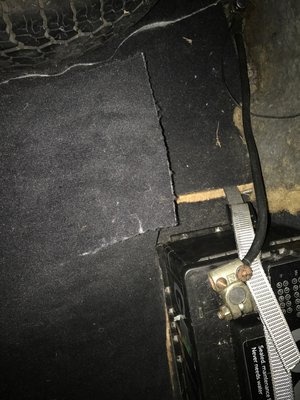
First order of business was to remove the battery, which typically is bigger than the standard issue model, and not tied down. It just bounces about when I go over speed bumps and the like, not good! Most of the work here was bodging up a platform out of a piece of ply and some home made brackets. It hooks under the battery flange at one side and bolts through the battery bobbin at the other, with a bracket. Lots of trial and error, bending over the boot and general cursing, but eventually I achieved a good fit. To secure the battery I laid some carpet on the platform, then put a strap around the battery and platform, tightened down well. That holds it securely. Reconnected the battery, managed to get a nice big spark by accidentally shorting the spanner out, duhhh....
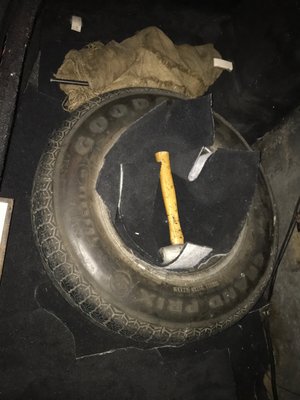
The boot floor is clean but has no soundproofing, so I put carpet down, then locked the spare wheel into place. More carpet in the wheel, then the hammer, it should not bounce about. Jack and handle in the hessian bag, rolled and jammed between the wheel and side wall.
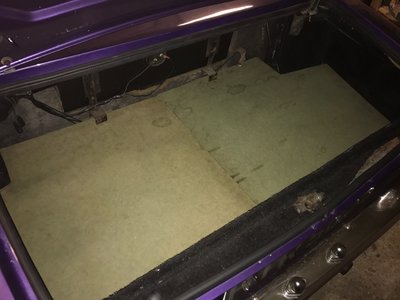
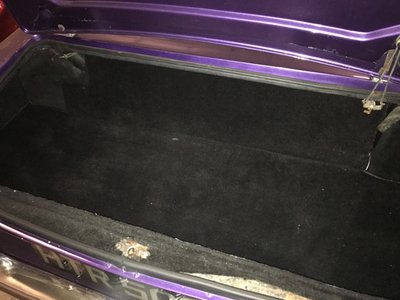
Finally, refitted the floor panels, back panel and carpet. Job done, but I'm pretty stiff now.
-

JonB - Coveted Fifth Gear

- Posts: 2359
- Joined: 14 Nov 2017
Sounds like a good outcome! I?m also trying to find a battery solution for my S3.
Please could you post a photo or two?
Best steve
Please could you post a photo or two?
Best steve
1967 S3 SE DHC
1970 +2S (RIP - went out in a blaze of glory in 2001)
1970 +2S (RIP - went out in a blaze of glory in 2001)
-

Stevie-Heathie - Third Gear

- Posts: 276
- Joined: 08 Dec 2015
Notes:
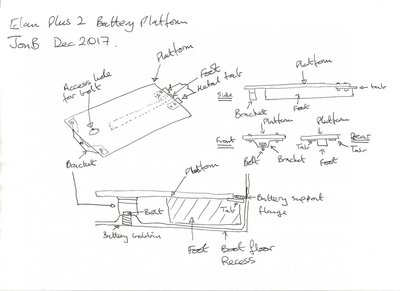
- Platform is a piece of plywood cut to size. I think mine is 12"x7", you should measure up for your battery.
- Bracket and tabs are aluminium strip, cut to size, bent as appropriate and bolted to the platform. Tabs must not protrude more than the flange sticks out from the boot side wall.
- The "foot" is just a piece of wood, I think 2" x 2". You need to choose something that fits between the tabs, bearing in mind these need to go under the battery retaining flange, and is the same height as the distance between the flange and boot floor.
- Don't forget to drill an access hole for the bolt.
You have to muck about quite a bit to get a good snug fit. It helps to bend the tabs up slightly so that they press against the flange when you tighten the bolt.
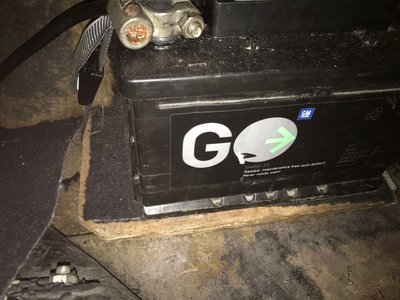
As there are bolts on top of the platform, I put some carpet on it to protect the battery underside. I used domed head machine screws - did not have any countersink type screws, which would have been much better. The battery is retained by a webbing strap (with a plastic "quick release" type buckle - must change it as I am not sure it's strong enough). You could just as easily attach a proper battery tray to the platform, but bear in mind it is under the boot floor and using up vertical space. In other words, be mindful of the boot floor and how it will fit once the battery is sited.
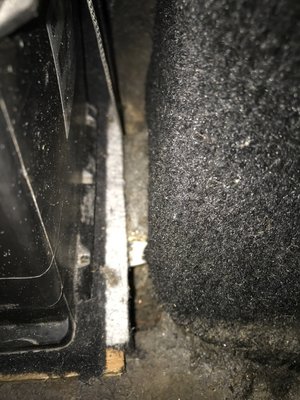
This next picture was supposed to show the tabs located under the flange, but you cannot see it very well. Sorry, but I didn't want to take the battery out again!
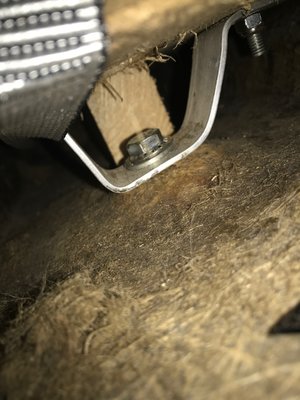
View of the bracket and bolt screwed into the bobbin. That piece of wood behind the bracket is the end of the foot, and to the left is the battery retaining strap.
When you fit the platform, you slide the tabs under the flange with the platform held at an angle, then hold it flat and tap it fully into place with a mallet; then fiddle about until the bolt goes in. That's when you realise you forgot to put the strap behind the thing, so you have to feed a tape measure under the back of it with the strap attached, because you're not taking it out YET AGAIN!
Fitting would be a little easier with the leading lower corner of the foot trimmed off at an angle. It would also be easier if the car is not on stands, so you can actually lean into the boot to see the bolt through the access hole - I had to climb right into the boot! No wonder I had an aching back...
Last edited by JonB on Tue Dec 19, 2017 8:20 am, edited 2 times in total.
-

JonB - Coveted Fifth Gear

- Posts: 2359
- Joined: 14 Nov 2017
Stevie-Heathie wrote:I?m also trying to find a battery solution for my S3.
Not sure this will work on an S3 unless it has a recessed battery tray moulded into the floor like the Plus 2. Take a look at the sketch and see; maybe Lotus used the same mounting scheme, in which case you're in luck. Bear in mind the purpose of the platform is to allow the fitment of a wider battery than the original, which otherwise would not have fitted inside the battery tray. If I had decided to get an original sized battery then it would not have been necessary, although I would have needed a battery clamp bracket (bolts into the bobbin) as it is missing from my car.
-

JonB - Coveted Fifth Gear

- Posts: 2359
- Joined: 14 Nov 2017
So having done that, I put some scraps of carpet I had lying about on the boot floor and refitted the wheel, stuffing the spinner mallet and tool kit around it.
I may have to revisit the boot floor as it is made from heavy MDF and I think the original was plywood (much lighter).
I may have to revisit the boot floor as it is made from heavy MDF and I think the original was plywood (much lighter).
-

JonB - Coveted Fifth Gear

- Posts: 2359
- Joined: 14 Nov 2017
For the strap to secure the battery i have used a ratchet strap on one of my TVRs.
Alan
Alan
Alan.b Brittany 1972 elan sprint fhc Lagoon Blue 0460E
- alan.barker
- Coveted Fifth Gear

- Posts: 3757
- Joined: 06 Dec 2008
MarkDa wrote:Good job!
Thanks, Mark. Much of the boot interior is made up of panels that some PO made. You can see that carpet by the lock is loose, for example, and I am certain that the board it's attached to is not made of the right material. I need to eyeball some other Plus 2s to get a better idea.
@ Alan: I may have an old ratchet lying around somewhere. Will investigate!
-

JonB - Coveted Fifth Gear

- Posts: 2359
- Joined: 14 Nov 2017
JimE wrote:Glad to see I'm not the only one with a Roman Purple +2. Jim
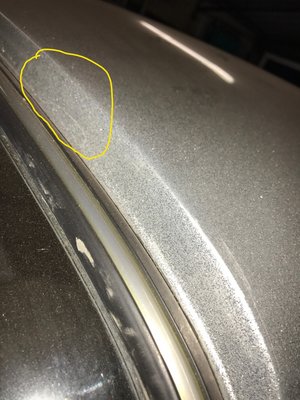
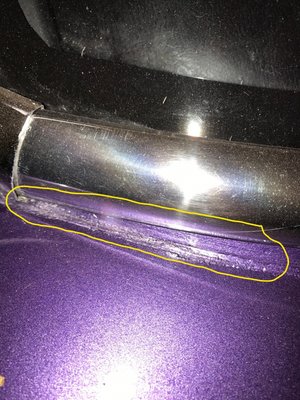
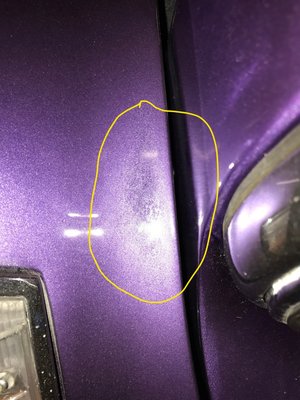
Not its original colour, though. From new it was Carnival Red. Oh, and it was a pretty poor job when you look closely at it. Pinholes, localised colour variance (or rather, metallic variance), other avoidable blemishes. Fortunately it does not bother me as a) the car looks great from > 2ft away and b) it wasn't too expensive. I just wish the PO had been more exacting when he accepted the finished job and paid his ?3900. It was only done last year.
For example:
-

JonB - Coveted Fifth Gear

- Posts: 2359
- Joined: 14 Nov 2017
Hi
My solution for battery update
post271139.html#p271139
My solution for battery update
post271139.html#p271139
John
+2s130 1971
+2s130 1971
-

Hawksfield - Fourth Gear

- Posts: 603
- Joined: 14 Jul 2004
Hawksfield wrote:Hi
My solution for battery update
post271139.html#p271139
Very nice, i like that
Alan
Alan.b Brittany 1972 elan sprint fhc Lagoon Blue 0460E
- alan.barker
- Coveted Fifth Gear

- Posts: 3757
- Joined: 06 Dec 2008
15 posts
• Page 1 of 1
Total Online:
Users browsing this forum: No registered users and 19 guests

