+2 Boot/trunk interior
55 posts
• Page 1 of 4 • 1, 2, 3, 4
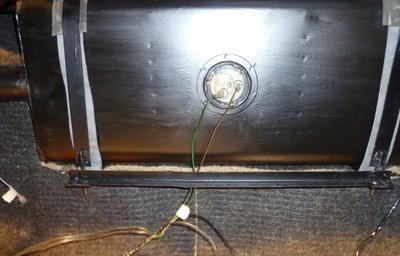
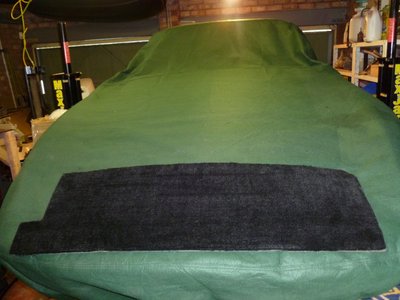
I need to refit my boot interior (1968 +2). Can anyone supply templates or photos of their boot to help me work out what size/shape to cut the plywood, and where/how it attaches to the body. Specifically, I'm missing the back panel which hides the fuel tank.
All info appreciated.
Many thanks, Ian
All info appreciated.
Many thanks, Ian
-

Iyarno - Second Gear

- Posts: 149
- Joined: 21 Aug 2010
I am also missing all the boarding/carpet in mine. So would be very grateful for any sketches/measurements for the panels.
Also any thoughts on material to use. I've been thinking some type of lightweight plastic sheet/board instead of plywood/MDF. I've not been able to get the right key words into google to identify any possibles so far thou.
Thanks.
Also any thoughts on material to use. I've been thinking some type of lightweight plastic sheet/board instead of plywood/MDF. I've not been able to get the right key words into google to identify any possibles so far thou.
Thanks.
'73 +2 130/5 RHD, now on the road and very slowly rolling though a "restoration"
- mbell
- Coveted Fifth Gear

- Posts: 2643
- Joined: 07 Jun 2013
I uploaded a CAD file a while back...It was on the old site.....
not sure where it is now....
its on my PC at home....but that's 200 miles away.....
not sure where it is now....
its on my PC at home....but that's 200 miles away.....
-

theelanman - Coveted Fifth Gear

- Posts: 1052
- Joined: 17 Sep 2003
found it.....
only problem is that the yahoo site that was hosting it seems to have gone.....
only problem is that the yahoo site that was hosting it seems to have gone.....
-

theelanman - Coveted Fifth Gear

- Posts: 1052
- Joined: 17 Sep 2003
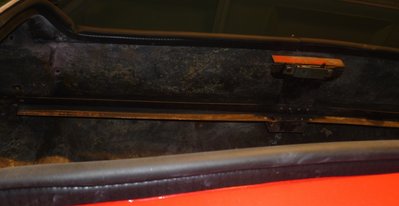
Thanks John. So how is it supported? I have 2 small blocks of wood on either side and a metal rail at the back running the length of the fuel tank. Does anything else support them?
I also need guidance for the back panel which covers the fuel tank. Is there another CAD file for this, and what holds it in place?
Ian
I also need guidance for the back panel which covers the fuel tank. Is there another CAD file for this, and what holds it in place?
Ian
-

Iyarno - Second Gear

- Posts: 149
- Joined: 21 Aug 2010
Ian
You should have another metal rail at the back (handle / lock end) of the boot and a piece of timber nailed to the underside of the right hand panel to support thr left hand panel...
John
P.S. the back panel on mine is held in place by two square cut-outs that engage the bottom of the fuel tank strap fixings...
-

john.p.clegg - Coveted Fifth Gear

- Posts: 4533
- Joined: 21 Sep 2003
There are 'L' shaped brackets that are attached to the wheel well walls to support the floor boards. I think it's two per side that I used. I can take some pic's of mine later this evening.
There is an angled piece between the tail lights that supports the boards at the rear (of the car). They have two threaded rods that are retained by a clip. These rods poke through the floor boards and are held down by wing nuts.
Based on advice here I put 3/4" x 3/4" battens around the perimeter of the plywood boards to stiffen them and provide more room to clear the top of the spare tire. I cut the battens shorter around the battery to clear the terminal posts. Ended up with the floor sitting flat.
We didn't have a nice dimensional drawing of the bulkhead piece that covers the tank posted here. I used my original fibre board piece as a template, but I think I made it a bit larger than the original and used plywood the same as the floor boards. I covered it in some thin foam cut a bit larger, and then covered with carpet. Seals the boot better. There is a notch required to clear the filler elbow. I cut the carpet symmetrical with the right side and the carpet nicely covers the filler elbow plumbing. With the extra foam and carpet the bulkhead wedges in pretty well without using attachment bolts.
The bulkhead is held in place (stock) with two hex head bolts threaded in from the back of a piece of the fuel tank hold down straps. i think wing nuts and washers were used to hold it in place, using the two bolts as sort of threaded studs.
You may have to make the floor boards a bit larger front to back than the stock dimension to hit the front and back supports. I attached an ali strip to the back angle support to make it all fit.
The way it is supposed to work in stock form is the bulkhead can stay attached and the floor boards lifted out. My setup makes this a bit difficult, as the floor boards kind of tuck in under the bulkhead.
I think the original floor board material was 3/16" thick mahogany plywood painted matte or dull black.
Can't recall if it was stock or I added them, but I have a 'L' shaped bracket support using the side bumper bolt.
I will try for some pics in the next day or two.
Note the floor board fit is pretty sloppy, with maybe 3/4" clearance to the fibreglass.
HTH
Stu
1969 Plus 2 Federal LHD
1969 Plus 2 Federal LHD
-

stugilmour - Coveted Fifth Gear

- Posts: 1942
- Joined: 03 Sep 2007
A couple of pic of my boot I had to hand.
- Attachments
'73 +2 130/5 RHD, now on the road and very slowly rolling though a "restoration"
- mbell
- Coveted Fifth Gear

- Posts: 2643
- Joined: 07 Jun 2013
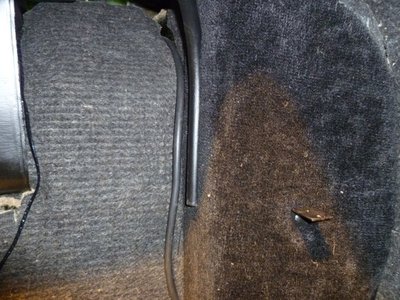
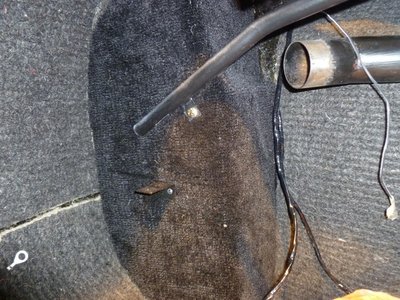
More photo's to add to mbell's.
Boot Floor support bracket- Fuel Tank
Length = 20 1/4" Height = 7/8" Width = 3/4" Thk = 0.079"
Boot Floor Support bracket - Rear
Length = 46" Height = 7/8" Width = 1 1/8" Thk = 0.079"
Rear Wing RH & LH brackets.
Length = 2". Height = 7/8". Width = 1". Thk = 0.079"
RH Wing bracket.
LH Wing bracket.
Boot Floor support bracket- Fuel Tank
Length = 20 1/4" Height = 7/8" Width = 3/4" Thk = 0.079"
Boot Floor Support bracket - Rear
Length = 46" Height = 7/8" Width = 1 1/8" Thk = 0.079"
Rear Wing RH & LH brackets.
Length = 2". Height = 7/8". Width = 1". Thk = 0.079"
RH Wing bracket.
LH Wing bracket.
Trevor
1968 Elan +2 50/0173
1968 Elan +2 50/0173
-

TeeJay - Fourth Gear

- Posts: 540
- Joined: 30 May 2007
55 posts
• Page 1 of 4 • 1, 2, 3, 4
Total Online:
Users browsing this forum: No registered users and 33 guests


