Modernizing the wiring
28 posts
• Page 1 of 2 • 1, 2
Hi All,
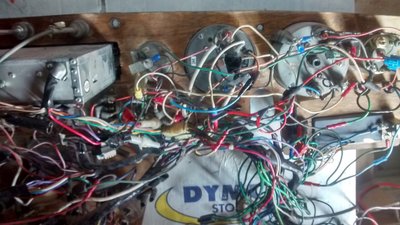
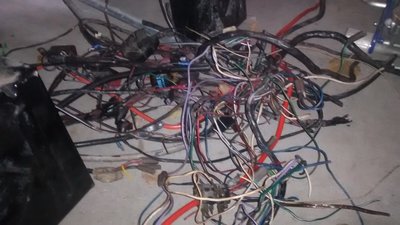
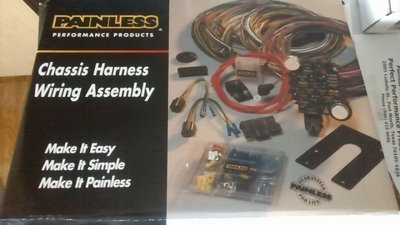
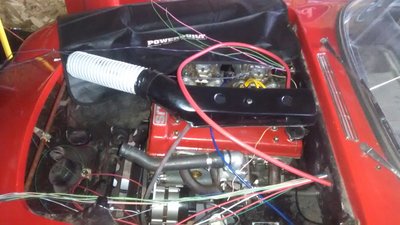
I'm currently in the process of replacing the Prince of Darkness's wiring in my father's Elan with a Painless Performance chassis harness and a few other bits and pieces. I plan to document this process here (at least if I remember to take pictures and such).
I'm an auto tech by trade, but by no means an old car or Lotus expert, so I may need to call on some expert help as well.
- carfixer24
- First Gear

- Posts: 27
- Joined: 24 Nov 2016
Just be sure and make up a wiring diagram. I recently passed on a car that had been totally rewired in non-spec form figuring there's no way I could ever figure out what they did. As it was when I bought my +2 in 89 it had pretty much all red wiring and I started it all over with a new loom from British wiring and then could follow the diagram and go by the standard British code. Gordon Sauer
- Gordon Sauer
- Fourth Gear

- Posts: 608
- Joined: 20 Aug 2004
I re-wired an Elan S4 with a Harness from British Wiring. My strong recoendation is to just buy their ready made harness and as mentioned have a wiring diagram handy. I made a copy of the wiring diagram enlarged to 3' x 2' so it was easy to trace the circuits.
Be patient and keep cold beer near by........
Be patient and keep cold beer near by........
Glen
05 Elise - Back where I started
65 Elan S2 - 26/4055
72 Europa - 74/2358R
69 Elan S4 - 45/7941
64 Elan S1 - 26/0379
12 Colin 30 - Lotus Racing Kart
07 Exige S - Wicked Road/Track Car
07 Exige S - Fast Road/Track Car
06 Elise - Track pack
05 Elise - Back where I started
65 Elan S2 - 26/4055
72 Europa - 74/2358R
69 Elan S4 - 45/7941
64 Elan S1 - 26/0379
12 Colin 30 - Lotus Racing Kart
07 Exige S - Wicked Road/Track Car
07 Exige S - Fast Road/Track Car
06 Elise - Track pack
-

Certified Lotus - Coveted Fifth Gear

- Posts: 1074
- Joined: 04 Aug 2014
I've already begun on the Painless wiring harness. I actually enjoy doing this kind of work, I've just never done a whole car before.
And yes, I'm making diagrams as I go. I have software that'll allow me to make a professional looking diagram on my computer.
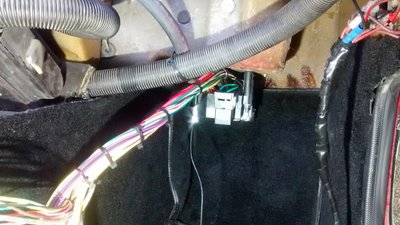
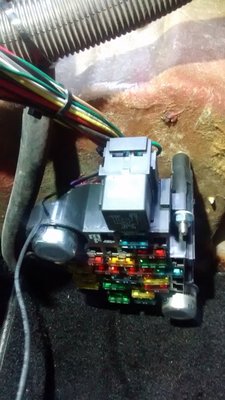
Right now my biggest concern is where to locate the fuse box, as it's considerably larger than stock. I'm thinking the passenger's footwell due to the proximity to most of the required connections.
- carfixer24
- First Gear

- Posts: 27
- Joined: 24 Nov 2016
The Esprit uses the left side panel of the glove box for two fuse boxes and I'm pretty sure there's room behind the glove box of the +2 (radio is immediately on left side I see you have) so you might put it on that backwall of the box with access from there as a possibility Gordon Sauer
- Gordon Sauer
- Fourth Gear

- Posts: 608
- Joined: 20 Aug 2004
I'm using Corel Designer X7 due to my familiarity with the program from my work. I'm still learning all the intricacies of the software (I'm a mechanic by trade after all), but I like how it works.
- carfixer24
- First Gear

- Posts: 27
- Joined: 24 Nov 2016
have to say we decided to keep to the original wiring colour coding throughout and just replace the bullett connectors/ spade connectors and union pieces throughout . The only mod was to shrink wrap the connector /wire junctions and improve on the loom tape and loom harnessing especially behind the dashboard .... oh and replaced the horrid wiring on brand new +2 front sidelights ... far too short for standard loom .
Not sure if it's really necessary but decided to run a separate thick earth cable from the dash to the +ve battery terminal ( early +2) and avoided using the rear bumper as earth for number plate lights as I'm pretty sure the bumper & bolts suffered from electrolytic corrosion as a result of 12v passing through when wet / muddy/ salty .
I must say all the lights look so much brighter !
-

RichC - Fourth Gear

- Posts: 741
- Joined: 28 Apr 2009
Loosely mounting the new fuse panel in the passengers' side footwell. Next step is lay out the wiring.
- carfixer24
- First Gear

- Posts: 27
- Joined: 24 Nov 2016
I'm contemplating doing the same but with a speedway harness and would be interested in the issues you find. Is your father a member of the Lotus club of Canada? I've been an on and off member for a while. They meet close to the 427/401.
Scott
Scott
Scott
45/9011
Hawkestone, On, Ca
45/9011
Hawkestone, On, Ca
- snowyelan
- Third Gear

- Posts: 444
- Joined: 14 Sep 2003
snowyelan wrote:I'm contemplating doing the same but with a speedway harness and would be interested in the issues you find. Is your father a member of the Lotus club of Canada? I've been an on and off member for a while. They meet close to the 427/401.
Scott
I'm not sure, my father is from Ottawa, but he is responsible for the Eastern Canada Lotus Club newsletter. http://www.lotuscarclub.ca/eclc/welcome.html
He does have a friend who has started doing his car with the Speedway harness, but I think he's at about the same stage I am. If you want more detail than I post here, send me a message, I'm more than happy to show off my work.
- carfixer24
- First Gear

- Posts: 27
- Joined: 24 Nov 2016
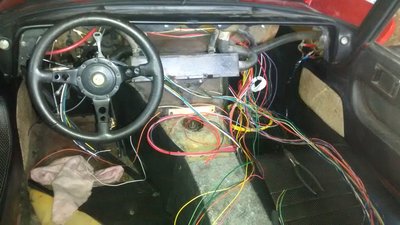
Now that the fuse box location is decided, I've started sorting out where all the wires will go... It still looks like colourful spaghetti though.
- carfixer24
- First Gear

- Posts: 27
- Joined: 24 Nov 2016
Hi all,
When rebuilding the loom I used a very comprehensive layout from elannet 2010 ?.
Lots of fuses. anyway better than the two in the std layout..
I added a further modification:
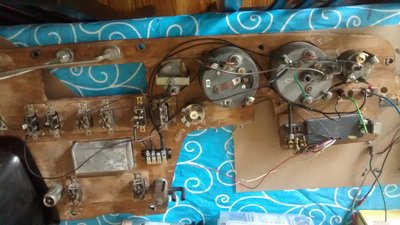
all wirering connected to the back ( front ? ) of the dashboard was connected up on the workbench and fed to the opposite side of the car ( my car being lhd ,it went to the rh side . Here is sufficient room at the glovebox to turn it back in a nice sling connecting the wires to a multi connector or two as necessary.. In this way it is easy to make a very tidy wrap once the wire lenghts has been adjusted. There will be no surplus of extra lenghts necessary for connecting everything up behind ( in front ? ) of the dash during fitting
The wires from the front and rear looms are wrapped and fed to the opposite side ( lots of space now) where the dash loom is waiting with the multi connectors .
This makes working with the dash a treat. Everything can be tested beforehand , no swearing at the terminals out of sight and reach.
and everything looks so nice and tidy.
C.Garde
- c.garde
- Second Gear

- Posts: 59
- Joined: 21 Dec 2011
c.garde wrote:Hi all,
When rebuilding the loom I used a very comprehensive layout from elannet 2010 ?.
Lots of fuses. anyway better than the two in the std layout..
I added a further modification:
all wirering connected to the back ( front ? ) of the dashboard was connected up on the workbench and fed to the opposite side of the car ( my car being lhd ,it went to the rh side . Here is sufficient room at the glovebox to turn it back in a nice sling connecting the wires to a multi connector or two as necessary.. In this way it is easy to make a very tidy wrap once the wire lenghts has been adjusted. There will be no surplus of extra lenghts necessary for connecting everything up behind ( in front ? ) of the dash during fitting
The wires from the front and rear looms are wrapped and fed to the opposite side ( lots of space now) where the dash loom is waiting with the multi connectors .
This makes working with the dash a treat. Everything can be tested beforehand , no swearing at the terminals out of sight and reach.
and everything looks so nice and tidy.
C.Garde
That's basically what I want to do with the dash wiring, though I may use a couple of connectors, one for all the power inputs on the passenger side, and one on each side for the various switch outputs.
- carfixer24
- First Gear

- Posts: 27
- Joined: 24 Nov 2016
28 posts
• Page 1 of 2 • 1, 2
Total Online:
Users browsing this forum: No registered users and 22 guests

