DIY power windows: Re-engineering the Chapman system
46 posts
• Page 1 of 4 • 1, 2, 3, 4
My S4 drivers side electric windows was on its last legs. Unable to get replacement parts from the usual places until further notice I decided to rip up the entire Chapman system and fabricate my own.
I think oompa loompas built the original doors. There is just no space. I could not find another vehicles power window mechanism that would suit. In the end I took a punt on the autoloc 5500 power window kit which runs on a worm drive. I also installed a Directed 535T controller which allows single touch operation and safety soft open/close features. No more squashed fingers.
Here is video of the mechanism mounted outside the door skin to show you my final design. I have documented the whole process and will post up step by step guide soon.
Closing:
https://www.youtube.com/watch?v=b9De7pJYaVc
Open:
https://www.youtube.com/watch?v=UWEM4iWaC0s
Installed into car and wired to Directed 535T controller module. Notice the automatic winding with one single button press:
http://youtu.be/2dZlF15JR7o
- yellowelan
- Second Gear

- Posts: 59
- Joined: 21 May 2013
Great !
also waiting for write-up, but ... meanwhile ... how about a few detail pictures ?
also waiting for write-up, but ... meanwhile ... how about a few detail pictures ?
1964 S1 (all bits at home now)
1967 S3 DHC
1969 S4 FHC
https://theelanman.com for details on Brian Bucklands book.
https://shop.lotus-books.com for more Lotus related books.
We ship worldwide. PM/Email me.
1967 S3 DHC
1969 S4 FHC
https://theelanman.com for details on Brian Bucklands book.
https://shop.lotus-books.com for more Lotus related books.
We ship worldwide. PM/Email me.
- gherlt
- Third Gear

- Posts: 484
- Joined: 20 Jul 2006
Sounds very latchety (a great phrase someone once used to describe a throttle linkage of mine) and what are you going to do for clearance for the worm cable that seems to want to exit the front of the door?
I always thought that the Elans electric winows were one of its best features as well as being an achilles heel, the cabin is so compact and the doors so narrow there simply isnt room for winder handles, compare them to a modern car with its huge bloated width yet has doors so thick and centre consoles etc that mean you have less space overall than in the compact Elan.
One of my major gripes of modern vehicles is how much volume is taken up by the Dashboard, instrument binnacle, console etc even in a huge berline you cannot move your knees laterally more than a couple of cms, an Elan even a Seven has more room in those areas although space is limited for the lardasses
- Chancer
- Coveted Fifth Gear

- Posts: 1133
- Joined: 20 Mar 2012
I have to say Chapman did get it right. I only did this out of neccesity as my original mechanism was beyond repair.
I choose the autoloc kit as you can modify it for remote mounting and be cut down to length. There was a few other ebay kits which I'm sure could do the same. The standard setup with track and motor down the bottom would not fit in the lotus door skin.
It has bosch motors, solid tracks and flexible worm drive. The kit is not without flaws. The hardest part was making everything fit.
- yellowelan
- Second Gear

- Posts: 59
- Joined: 21 May 2013
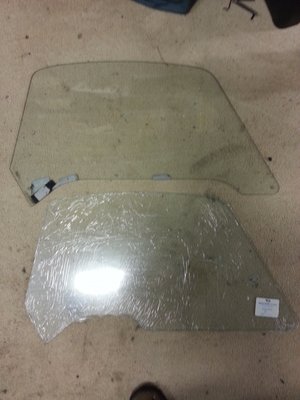
The first thing I did was get a local glazier to cut me another drivers side window. The original probably would of worked but I felt the clamp used in the kit did not have enough bite on the bottom. The new glass I've asked them cut the bottom straight across (the one wrapped up). I was also worried I may break the glass fiddling. Original glass is unobtainable where I live.
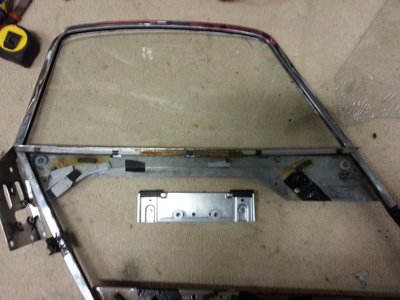
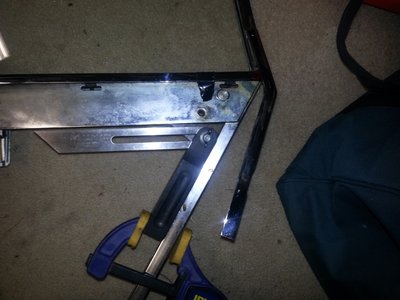
Original glass with mounting clamp:
Original glass with mounting clamp:
- yellowelan
- Second Gear

- Posts: 59
- Joined: 21 May 2013
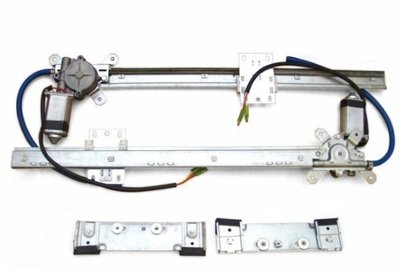
I bought the basic kit without the switches or wiring harness. Here is a picture of it I took from the autoloc website. Sorry copyright. I can't seem to find the pictures from when I unboxed the kit. But basically what you see is what came with the kit. Disappointingly it didn't even come with any additional screws to mount on the frame or instructions manual. Fortunately I had the pdf manual from there website. It is however quite sturdy and worm drive and gears all metal and not cheap and nasty plastic.
Now the kit comes with the motor mounted at the bottom. It has instructions on how to cut the bottom rail with an angle grinder to mount it remotely. I suggest you measure twice and cut once.
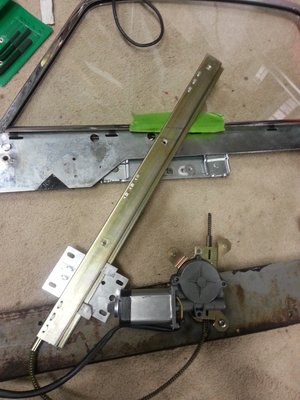
Here is a picture of the mechanism after I cut the motor off the rail.
Last edited by yellowelan on Fri Sep 12, 2014 2:57 pm, edited 1 time in total.
- yellowelan
- Second Gear

- Posts: 59
- Joined: 21 May 2013
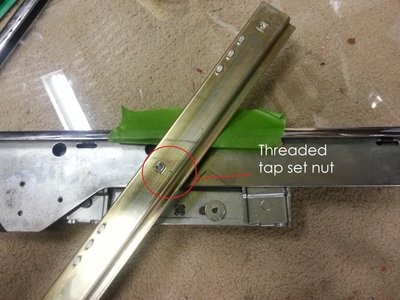
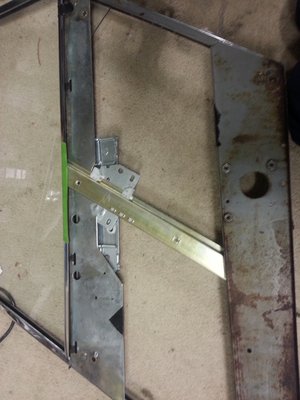
I am measuring the top of the rail. I cut it off at an angle just above the nut on the rail. This quite nicely becames the top mount for the rail. The rail is mounted on an angle in the middle and parallel to the window channels.
- yellowelan
- Second Gear

- Posts: 59
- Joined: 21 May 2013
I notice the glass does not open as far as the original, can this be improved upon, do you think?
Seems to work well other than that!
How much out of pocket are you (GBP if possible?)
Are you confident it will all fit into the fibreglass shell?
Well done!
Regards,
Phil.
Seems to work well other than that!
How much out of pocket are you (GBP if possible?)
Are you confident it will all fit into the fibreglass shell?
Well done!
Regards,
Phil.
Philip.
UK '72 Sprint DHC
Sometimes my Lotus makes me cry.
UK '72 Sprint DHC
Sometimes my Lotus makes me cry.
-

l10tus - Third Gear

- Posts: 476
- Joined: 10 Apr 2008
You do need to modify the window frame and fibreglass door skin for clearance. And yes it does fit into the door no problems.
Looking at what I have done if I needed to reinstate the old system it is still possible. None of the factory screw holes or roller bearing mounts were cut off. I felt the same way with the first cut to the frame but after I reached the point of no return I quickly got over it.
I may have cut the rail a little short. Factoring this and if you used the original glass you probably would get it another 3cm-4cm lower.
I'm in Australia so everything is in Aus ($). The window kit sells for just under $300 delivered from the US, new glass window $140 (It cost extra because I had them drill 2 holes like the original glass before toughening in case in future I wanted to reinstate the old system), controller module $120, various bits and pieces $80. Time - $thousands.
It took countless hours over many weekends and numerous failed attempts to get to the final product. It would cost less if you use the original glass. I still have a spare track for the other door. I'm not modifying it until it dies.
- yellowelan
- Second Gear

- Posts: 59
- Joined: 21 May 2013
I'm curious how you assemble the frame into the door?
Do you have to fasten the motor in place after the frame has been dropped in through the slot at the top of the door? (the motor being too fat to fit through).
I presume the 'worm' just rotates inside its tube so never pops out of the end as one of the earlier replies suggested.
Ian
Do you have to fasten the motor in place after the frame has been dropped in through the slot at the top of the door? (the motor being too fat to fit through).
I presume the 'worm' just rotates inside its tube so never pops out of the end as one of the earlier replies suggested.
Ian
68 Elan S4 DHC. Built in a weekend from a kit (just like the advert said)
-

Elanman99 - Third Gear

- Posts: 449
- Joined: 11 Sep 2003
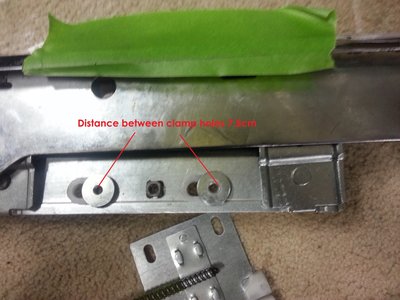
The window clamp holes are 7.5cm apart.
Because the window track is now on an angle the holes on the moving part of the plate did not line up with the clamp holding the window glass.
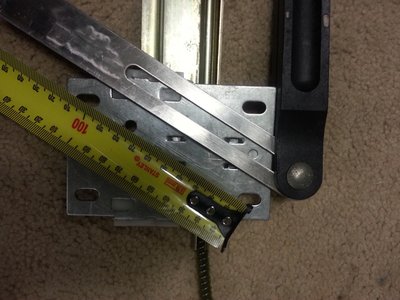
I used my trusty woodwork adjustable angle gauge to work out the frame angle.
I carefully drilled a new hole 7.5cm angle on the plate.
Because the window track is now on an angle the holes on the moving part of the plate did not line up with the clamp holding the window glass.
I used my trusty woodwork adjustable angle gauge to work out the frame angle.
I carefully drilled a new hole 7.5cm angle on the plate.
- yellowelan
- Second Gear

- Posts: 59
- Joined: 21 May 2013
46 posts
• Page 1 of 4 • 1, 2, 3, 4
Total Online:
Users browsing this forum: No registered users and 16 guests


