Removable cross member
12 posts
• Page 1 of 1
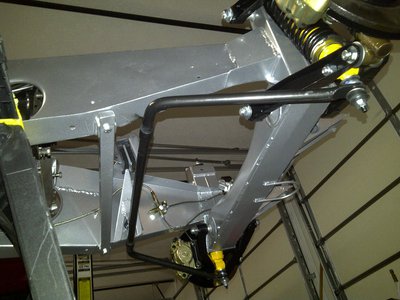
I know many of you have modified your frame to make the cross member that's under the engine removable. I'm thinking of doing said mod so I'd like to see pics of the various ways one can do this.
Thanks,
Greg Z
Thanks,
Greg Z
Greg Z
45/0243K Sprint
45/7286 S3 SE DHC
45/0243K Sprint
45/7286 S3 SE DHC
-

gjz30075 - Coveted Fifth Gear

- Posts: 3020
- Joined: 12 Sep 2003
Greg,
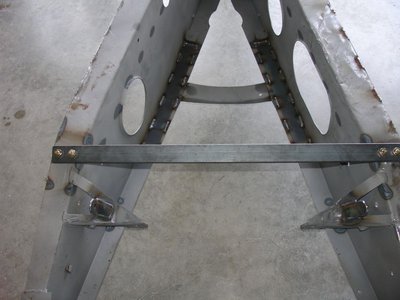
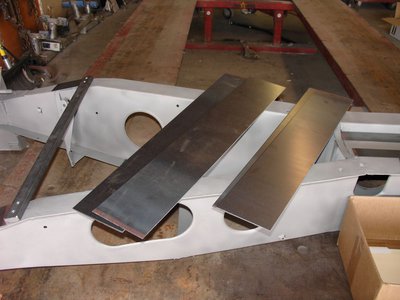
I will try to attach a few shots of the frame rebuild of an S2. The pictures will show a few steps that I have done. First added a plate to the top side with a couple welded nuts and then the bar was made from 1/2" bar stock. I think you will get the idea. Bar could have been made of thinner material I am sure. Does not fit the lightness theme very well but it does work well.
Mark
-

memini55 - Third Gear

- Posts: 347
- Joined: 09 Jan 2004
Here is a photo of the removable crossmember that Spyder makes now, nice design. They used to be made with elliptical tubing, looked quite special. SPY0629 had this feature, I see that Roy Jewell has the same vintage on his S2.
-

garyeanderson - Coveted Fifth Gear

- Posts: 2634
- Joined: 12 Sep 2003
gjz30075 wrote:I know many of you have modified your frame to make the cross member that's under the engine removable. I'm thinking of doing said mod so I'd like to see pics of the various ways one can do this.
Thanks,
Greg Z
Greg,
I have a Spyder stressed-skin frame with a removable crossmember as Piss-Ant shows, and have pointed a couple of friends in the direction of fitting one to a Lotus frames.
Spyder will sell you the kit, but you will need to have welding capability to fix the crossmember end locators to the frame. When welded in position - cut off the old crossmember.
Brian Clarke
(1972 Sprint 5 EFI)
Growing old is mandatory..........Growing up is optional
(1972 Sprint 5 EFI)
Growing old is mandatory..........Growing up is optional
-

bcmc33 - Coveted Fifth Gear

- Posts: 1708
- Joined: 10 Apr 2006
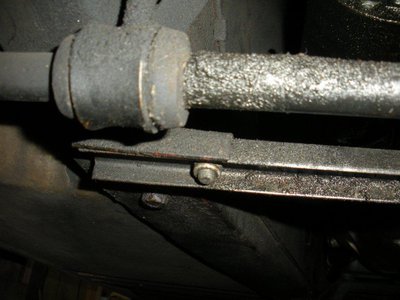
I cut off the original cross member brazed a plate on each end and then drilled and bolted through the chassis flange with close clearance holes.
see attched photo. This has withstood 30 years of chassis load due to racing without distortion or cracking so it works ok
cheers
Rohan
see attched photo. This has withstood 30 years of chassis load due to racing without distortion or cracking so it works ok
cheers
Rohan
-

rgh0 - Coveted Fifth Gear

- Posts: 8411
- Joined: 22 Sep 2003
My S2, the bolt goes into a tapped plate on the top of the chassis lip.
Brian
64 S2 Roadster
72 Sprint FHC
64 S2 Roadster
72 Sprint FHC
-

types26/36 - Coveted Fifth Gear

- Posts: 3407
- Joined: 11 Sep 2003
Greg,
This was a re-purposed item . I thought it was worth including as it is a bit different -
I am still in to process of making it permanent but you are welcome to inspect in person if its something you want to pursue for your car.
George
This was a re-purposed item . I thought it was worth including as it is a bit different -
I am still in to process of making it permanent but you are welcome to inspect in person if its something you want to pursue for your car.
George
- cabc26b
- Fourth Gear

- Posts: 903
- Joined: 21 Sep 2003
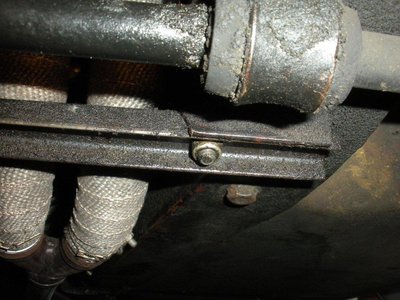
Another way: Cut the original out leaving about an inch protruding inward on each side. Insert a new steel channel the same length as the original by one inch wide by one-half inch deep and drill one side through both old and new and bolt it down, drill and bolt the other side. The fit is pretty snug. The section of the new is smaller but the web thickness is thicker, I'd bet the stiffness of both channels are similar. Rich Kamp showed me this way back when, it has worked for over twenty years and a couple engine removals. I suppose it would be better to drill the matching holes first and then cut out the old, to maintain the proper spacing, but I'm not sure the frame splays much just sitting there.
Yes, I do need an oil cleanup one of these days.
Yes, I do need an oil cleanup one of these days.
-

Yum-yum - Second Gear

- Posts: 57
- Joined: 25 Mar 2008
I had the luxury of having the frame out and had a welder reinforce the known stress points. He also replaced the fixed cross member with a length of channel stock bolted through the frame into nuts welded into reinforcing plates.
- Attachments
Andrew Bodge
'66 Elan S2 26/4869
I love the sound of a torque wrench in the morning. Sounds like... progress.
'66 Elan S2 26/4869
I love the sound of a torque wrench in the morning. Sounds like... progress.
-

RotoFlexible - Fourth Gear

- Posts: 621
- Joined: 01 Sep 2005
As I have had to drop the sump today, it was convenient to take pictures to show some detail of the Spyder design. Something easily made if you have access to welding and machining facilities.
I guess they were as pristine as Piss-Ant's, 20 years ago.
I guess they were as pristine as Piss-Ant's, 20 years ago.
Brian Clarke
(1972 Sprint 5 EFI)
Growing old is mandatory..........Growing up is optional
(1972 Sprint 5 EFI)
Growing old is mandatory..........Growing up is optional
-

bcmc33 - Coveted Fifth Gear

- Posts: 1708
- Joined: 10 Apr 2006
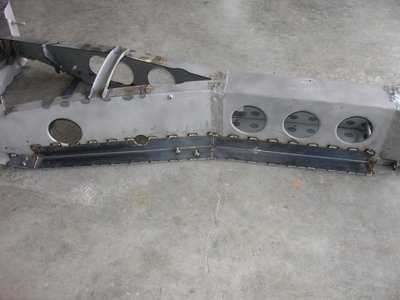
I'm currently restoring a 66 S3 Coupe. This is my solution to the removable cross member. I cut the original "U" section welded bar out and replaced with a solid mild steel bar that nests into the original "U" section. I guess its slightly heavy compared to the original but I put my engine in for a trial body fit and it does the job.
- 65ginetta
- Second Gear

- Posts: 78
- Joined: 26 Jul 2010
12 posts
• Page 1 of 1
Total Online:
Users browsing this forum: No registered users and 26 guests

