My race project - The Proof
Here is how I establish the primary alignment of my cars. I raise the car to a workable distance, supporting the car with supports under the lower control arms. This gives a represtative ride height of the car. Then I find the center of the measurement between the lower attachment points of the lower control arms. I mark the chassis with a small notch at this point, both front and rear with a file so I do not have to do this again. Drop plumb bobs from these marks to the floor. Place a string on the floor aligned with the points of the plumb bobs. Make the string long enough to extend out a good distance in front of or behind the car and firmly tape it to the floor. The string will represent the center line of the car. Place another string across the center line string at 90 degrees to the center line string at a marked starting point. I tape this string firmly to the floor at the marked cross point, so I can swing the string in an arc as needed to get the string to a true 90 degrees. You can make sure this is perfect by using the old 6,8,10 method of finding a right triangle. I usually start with an 8 foot marked measurement on the center line string. If you are short of room, you can use the 3,4,5 distances. Always keep the cross string placed at the starting point mark.
These two strings will give you a reference point from which to measure where everything is located. By dropping a plumb bobs from the center line of the rear axles at their out most point, will establish if the those points are equal distance from the center line. Measuring from the cross string will tell you if they are equal distance, fore or aft of each other. For the front axles, I drop plumb bobs from the outer edge of the brake discs and adjust the tow to be neutral or dead ahead. This generally will place the ends of the stub axles equal. Though one may be a head of the other when measured from the cross string. If you have adjustable suspension pick up points on the lower control arms, you can equalize this distance. This can also make it handy to adjust a longer or shorter wheel base on one side of the car when racing, depending on the number of right or left hand turns and if you can pick up an advantage by throwing away slower turns and picking up more speed in faster turns. Unfortunately, with fixed suspension points on a standard Elan, this becomes more difficult. If it is not too bad, you can just live with it. Otherwise, you may find your car turns better in one direction than the other.
This gives me a starting point for fully adjustable suspension or confirmation of just how good or bad your chassis may be with fixed attachment points. YMMV.
Rob Walker
26-4889
50-0315N
1964 Sabra GT
1964 Elva Mk4T Coupe (awaiting restoration)
1965 Ford Falcon Ranchero, 302,AOD,9",rack and pinion,disc,etc,etc,etc
1954 Nash Healey LeMans Coupe
Owning a Lotus will get you off the couch
26-4889
50-0315N
1964 Sabra GT
1964 Elva Mk4T Coupe (awaiting restoration)
1965 Ford Falcon Ranchero, 302,AOD,9",rack and pinion,disc,etc,etc,etc
1954 Nash Healey LeMans Coupe
Owning a Lotus will get you off the couch
- prezoom
- Coveted Fifth Gear

- Posts: 1176
- Joined: 16 Mar 2009
If I may add a line to Prezoom's excellent description I would place 4 heavy axle stands at a distance from each corner of the vehicle and run a length of string from one to the other-tied off securely. Measure the distance from the centre line that Prezoom has described so that the stings down each side are perfectly parallel to the centre line and about a foot away from the wheels. With the wheels on the alignment can be measured from the side strings and adjusted.
'65 S2 4844
- Davidb
- Fourth Gear

- Posts: 889
- Joined: 02 Jul 2009
Davidb's string method is great for a quick check of alignment. One thing I would add is, when you set the string up and get it parallel to the one on the floor, record the distances from the new string to a specific point on the body for each side. This way you can set up the jack stand string quickly to check alignment or to set front toe.
Rob Walker
26-4889
50-0315N
1964 Sabra GT
1964 Elva Mk4T Coupe (awaiting restoration)
1965 Ford Falcon Ranchero, 302,AOD,9",rack and pinion,disc,etc,etc,etc
1954 Nash Healey LeMans Coupe
Owning a Lotus will get you off the couch
26-4889
50-0315N
1964 Sabra GT
1964 Elva Mk4T Coupe (awaiting restoration)
1965 Ford Falcon Ranchero, 302,AOD,9",rack and pinion,disc,etc,etc,etc
1954 Nash Healey LeMans Coupe
Owning a Lotus will get you off the couch
- prezoom
- Coveted Fifth Gear

- Posts: 1176
- Joined: 16 Mar 2009
Rob and Dave
Many thanks for the descriptions and explainations - very thorough and very helpful
One question on one of the earlier comments, it I sit the chassis on stands, why can't I check bump steer even if the car is incomplete? I plan to remove the damper so if using a jack on the trunnion I work from ride height and go through bump and droop and measure the results each way, I dont get where the car weight comes into the equation.
What am I missing?
Thanks again
Gavin
One day I'll actually finish - completely - one day....
-

gav - Fourth Gear

- Posts: 538
- Joined: 26 Jan 2004
Checking the bump steer would be the next step. The chassis/body needs to be up on stands to do this, with the wheels free to move up and down, i.e., no springs installed. On most of our cars, the only way to adjust front bump steer is to fuss with the height of the steering rack. The rear toe/roll steer under bump is a whole other problem, as there are no adjustable pieces. If that problem exists, and is severe, there must be some chassis damage.
Rob Walker
26-4889
50-0315N
1964 Sabra GT
1964 Elva Mk4T Coupe (awaiting restoration)
1965 Ford Falcon Ranchero, 302,AOD,9",rack and pinion,disc,etc,etc,etc
1954 Nash Healey LeMans Coupe
Owning a Lotus will get you off the couch
26-4889
50-0315N
1964 Sabra GT
1964 Elva Mk4T Coupe (awaiting restoration)
1965 Ford Falcon Ranchero, 302,AOD,9",rack and pinion,disc,etc,etc,etc
1954 Nash Healey LeMans Coupe
Owning a Lotus will get you off the couch
- prezoom
- Coveted Fifth Gear

- Posts: 1176
- Joined: 16 Mar 2009
Taken a slight pause while I have a go at GRP. Just started a dash and need to finish the front end then while its being painted, I'll check the suspension for squareness, sort out bump etc etc.
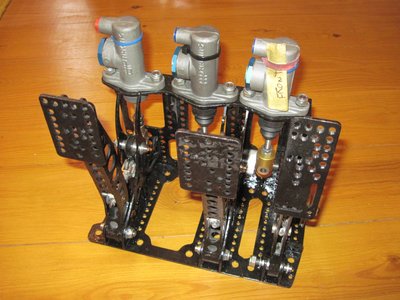
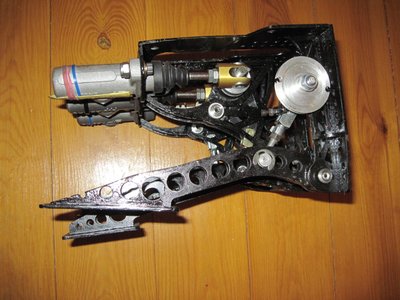
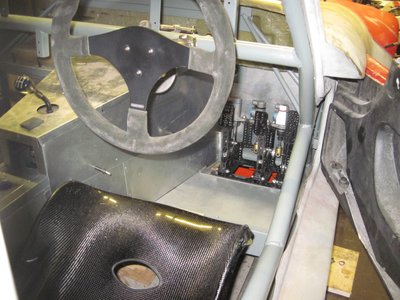
At last have sorted driving position - the problem was that my head was behind the rear hoop so I changed the pedal box to the one below - very unusual with vertical cylinders. Its the most space efficient solution I could come up with.
Steering column sorted - just needs welding and thats another job done and have bought the right tyres which fit nicely under the arches so good progress there too.
I'll post some pictures of the revised interior shortly
Inching closer......
Gavin
One day I'll actually finish - completely - one day....
-

gav - Fourth Gear

- Posts: 538
- Joined: 26 Jan 2004
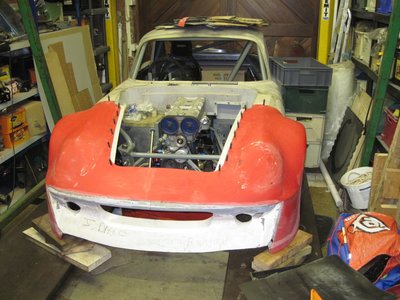
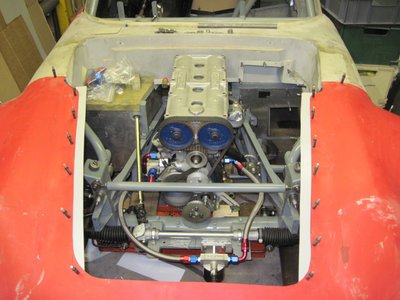
Very much work in progress........
Driving position coming together
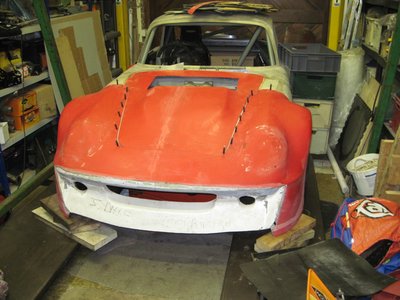
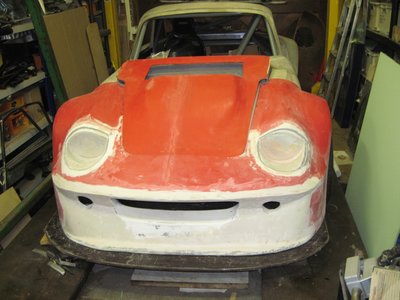
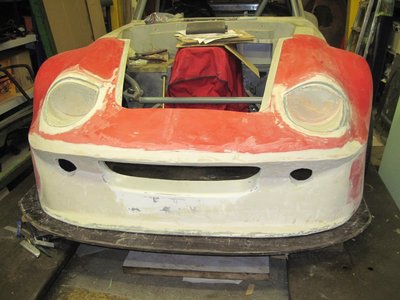
I wanted to change the slab sided front to something more appropriate - probably not as efficient but it needs to look right.
I'm going to add fixed headlights and sort out the lower part of the splitter.
Two levels of access - an oversized bonnet or the whole front can come off.
One day I'll actually finish - completely - one day....
-

gav - Fourth Gear

- Posts: 538
- Joined: 26 Jan 2004
gav wrote:Taken a slight pause while I have a go at GRP. Just started a dash and need to finish the front end then while its being painted, I'll check the suspension for squareness, sort out bump etc etc.
At last have sorted driving position - the problem was that my head was behind the rear hoop so I changed the pedal box to the one below - very unusual with vertical cylinders. Its the most space efficient solution I could come up with.
Steering column sorted - just needs welding and thats another job done and have bought the right tyres which fit nicely under the arches so good progress there too.
I'll post some pictures of the revised interior shortly
Inching closer......
Gavin
Hi Gavin
This pedal box looks very familiar
- stevebroad
- Fourth Gear

- Posts: 846
- Joined: 08 Mar 2004
gav wrote:The nose section is taking an age but I sense that I am through the worst now - inching closer
If you make the front removable, any thoughts yet on how you are going to do it (photos please
- stevebroad
- Fourth Gear

- Posts: 846
- Joined: 08 Mar 2004
Steve
When you say that the pedal box looks familiar is that because you made it, owned it or designed it (or something else)?
I got it off eBay and whilst it isn?t light, it is very compact and even with the number of moving parts it has, seems very smooth
As to the front, the modsports rules required that the bodywork was original between the wheel centres and my front achieves this (nearly) so its not the whole front.
I am going to have a mould taken of it in GRP so that I don?t have to go through the agonies of creating a new one but I don?t think that a GRP mould will take the pressure of an autoclave
I too was thinking about a carbon solution but suspect that I wont be able to afford it.
Interested in your thoughts on practicality and cost. I do have the mould for the original flat front end if you wanted to have a play...
Gavin
One day I'll actually finish - completely - one day....
-

gav - Fourth Gear

- Posts: 538
- Joined: 26 Jan 2004
That was my pedal box. I drilled all the holes in it in an attempt to reduce its weight  However, even with the vertical cylinders it didn't give me enough room once i had fitted the seat, so I had to have a rethink. I thought that I sold it to a guy in France or somewhere similar.
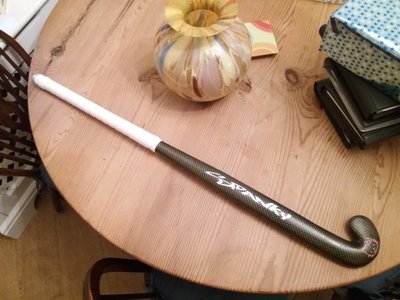
Pressure isn't the issue (just make it thick enough) it's the temp. Glass fibre resin doesn't like temps over 93 deg C. You need to use proper stuff designed for the job that's good for 150 deg C. However, if you use low temp cure resins in your part you can get away with it if you keep temps below 85 deg C, just takes a long time to cure - over 12 hours. My son and I used my new oven (as mentioned below) for the first time to make this carbon/aramid field hockey stick for his girlfriend. Turned out pretty good for the first attempt. Made the mould using glass fibre not realizing the temp issue so had to keep temps below 90 deg C. They got away from me once and reached 106. Almost got away with it but a small section of the mould's resin seeped into the carbon.
I have built a curing oven (not autoclave, just vacuum bags)big enough to take a complete front end Next job is to finish the front so I can make the mould, probably in 2 of 3 pieces but hopefully 2.
Still need to work out how and where to hinge it.
Steve
Pressure isn't the issue (just make it thick enough) it's the temp. Glass fibre resin doesn't like temps over 93 deg C. You need to use proper stuff designed for the job that's good for 150 deg C. However, if you use low temp cure resins in your part you can get away with it if you keep temps below 85 deg C, just takes a long time to cure - over 12 hours. My son and I used my new oven (as mentioned below) for the first time to make this carbon/aramid field hockey stick for his girlfriend. Turned out pretty good for the first attempt. Made the mould using glass fibre not realizing the temp issue so had to keep temps below 90 deg C. They got away from me once and reached 106. Almost got away with it but a small section of the mould's resin seeped into the carbon.
I have built a curing oven (not autoclave, just vacuum bags)big enough to take a complete front end
Still need to work out how and where to hinge it.
Steve
- stevebroad
- Fourth Gear

- Posts: 846
- Joined: 08 Mar 2004
Blimey Steve
An oven big enough to take the front of an Elan - must be huge.
Do you need to hinge the body? - wouldn't it be easier to have a lift off - if its light enough the only issue will be the front blowing away on a windy day.
I decided to have an over sized but manageable bonnet and an unboltable front section. It wont take long to unbolt it but in ordinary circumstances, I shouldn't need to
This pedal box that may or may not have traveled to Europe - well I can see where the holes came from now - it is still a little heavy and I was wondering what I could do to take some weight out - but everywhere I looked there were holes.....
Is it one you made? I did see some plans on the net for a similar thing and wondered it it was a prototype. I haven't seen anything else like it.
Let me know how your deliberations progress on the front
All the best
Gavin
One day I'll actually finish - completely - one day....
-

gav - Fourth Gear

- Posts: 538
- Joined: 26 Jan 2004
Total Online:
Users browsing this forum: No registered users and 7 guests

