
Restore Log - '68 Coupe
46 posts
• Page 3 of 4 • 1, 2, 3, 4
![]() Post by: mini64 » Fri Oct 25, 2013 8:51 pm
Post by: mini64 » Fri Oct 25, 2013 8:51 pm
the lump is in and purring! lots of little details yet, but enough to do some test runs around the neighborhood. You can see my winged oil pan. Radiator hoses are not what will be final. I need to get the fill tank up higher.
Headers are Tony Thompson. Jigsaw puzzle to get them in! Coated by Jet Hot - Extreme Sterling
Headers are Tony Thompson. Jigsaw puzzle to get them in! Coated by Jet Hot - Extreme Sterling
 Viewed 1145 times")
Last edited by mini64 on Fri Oct 25, 2013 8:59 pm, edited 1 time in total.
- mini64
- Second Gear

- Posts: 176
- Joined: 26 Aug 2005
![]() Post by: mini64 » Fri Oct 25, 2013 8:58 pm
Post by: mini64 » Fri Oct 25, 2013 8:58 pm
wanted to put the radiator up front. Used a Griffin 55185 which seems to be a copy of the Scirocco sized one at 22" x 13", 2-1/" thick double row.
for now i have an electric fan on the front. will probably move it to a sucker fan when i get an oil cooler in, covering up the graphic I did - doh! Interesting note - I miswired this fan to where it's power is always live, being turned on by a temp switch in the head. Several minutes after running the car the fan comes on, whether i had it that hot or not. Not sure it if is heat soak from the head or maybe from the headers. Just found it interesting.
for now i have an electric fan on the front. will probably move it to a sucker fan when i get an oil cooler in, covering up the graphic I did - doh! Interesting note - I miswired this fan to where it's power is always live, being turned on by a temp switch in the head. Several minutes after running the car the fan comes on, whether i had it that hot or not. Not sure it if is heat soak from the head or maybe from the headers. Just found it interesting.
 Viewed 1141 times")
- mini64
- Second Gear
- Posts: 176
- Joined: 26 Aug 2005
![]() Post by: mini64 » Fri Oct 25, 2013 9:04 pm
Post by: mini64 » Fri Oct 25, 2013 9:04 pm
Here is my go at the transverse muffler idea. Used a Dynomax 17676 which barely fits the pocket. Kept the length of pipe from the header collector back the same bore, with the transitions up to 2.5" happening here. The pocket has a layer of the same DEI's reflect-a-cool I used next to the headers.
The flange hanging down under the diff is acting as my jack point and may eventually have some sort of tow strap extension bolted to it. would kind of like to incorporate an exhaust skid plate also.
The flange hanging down under the diff is acting as my jack point and may eventually have some sort of tow strap extension bolted to it. would kind of like to incorporate an exhaust skid plate also.
 Viewed 1136 times")
- mini64
- Second Gear
- Posts: 176
- Joined: 26 Aug 2005
![]() Post by: mini64 » Fri Oct 25, 2013 9:16 pm
Post by: mini64 » Fri Oct 25, 2013 9:16 pm
Made my own loom for this effort. Quite a bit more work then a race car! Fuse box is one of the hella splash proofs, 6 row. Loom covered with covers from cableorganizer.com.
Yes, I will put the chassis plates back!
Yes, I will put the chassis plates back!
 Viewed 1131 times")
- mini64
- Second Gear
- Posts: 176
- Joined: 26 Aug 2005
![]() Post by: billwill » Sat Oct 26, 2013 6:59 pm
Post by: billwill » Sat Oct 26, 2013 6:59 pm
Is that a V notch for the headers?
A V would build up stress at the point of the V and I believe it would be better to round that out to make it a wide U notch and thicken that part of the chassis with extra plate welded on.
A V would build up stress at the point of the V and I believe it would be better to round that out to make it a wide U notch and thicken that part of the chassis with extra plate welded on.
Bill Williams
36/6725 S3 Coupe OGU108E Yellow over Black.
36/6725 S3 Coupe OGU108E Yellow over Black.
- billwill
- Coveted Fifth Gear

- Posts: 5062
- Joined: 19 Apr 2008
![]() Post by: mini64 » Sat Oct 26, 2013 10:54 pm
Post by: mini64 » Sat Oct 26, 2013 10:54 pm
i did a cutout similar to the TTR style photo i posted July 24, 2011. I can post a photo of mine if you want. In this area the flange is fully triangulated or boxed in the full length with extra plate per the chassis stiffening that i've done. the header "notch", which is about 4 inches long with angled but rounded corners, is boxed in. Still, a terrible thing to do to the flange but necessary.
- mini64
- Second Gear
- Posts: 176
- Joined: 26 Aug 2005
![]() Post by: billwill » Sun Oct 27, 2013 12:47 am
Post by: billwill » Sun Oct 27, 2013 12:47 am
AHM wrote:Where are you looking Bill? I can't even see the chassis.
Page 2 empty engine bay.
lotus-elan-f19/restore-log-coupe-t21032-15.html#p196947
but I think I was probably mis-interpreting some shading in the photo.
Bill Williams
36/6725 S3 Coupe OGU108E Yellow over Black.
36/6725 S3 Coupe OGU108E Yellow over Black.
- billwill
- Coveted Fifth Gear
- Posts: 5062
- Joined: 19 Apr 2008
![]() Post by: 65ginetta » Sun Oct 27, 2013 9:09 pm
Post by: 65ginetta » Sun Oct 27, 2013 9:09 pm
I don't think you need to worry about the frame rail notch, before I cut mine I made an FEA model to simulate the stress condition and in fact it significantly increases both the torsional rigidity and resistance to bending load of the frame adjacent to the engine mount. I also plated under the mounts on both sides. The filet down to the side rail makes all the difference. The chassis itself is really more of a sub-frame and I wanted to keep the Chapman philosophy alive with some minor improvements. I also reduced the width of the driver footwell by an inch to make fitting the exhaust manifold easier.
 Viewed 1023 times")
- Attachments
-
 Viewed 1023 times")
- 65ginetta
- Second Gear
- Posts: 86
- Joined: 26 Jul 2010
![]() Post by: mini64 » Fri Nov 15, 2013 4:24 am
Post by: mini64 » Fri Nov 15, 2013 4:24 am
Over the years I've had spells of fighting electrical gremlins on the racers, often causing misfires. Usually turns out to be the rotor, but I've had about every other failure possible as well. My practice these days is to have an independant circuit for the ignition. Here you see my "race panel" on the dash. Battery cutoff, ignition, fuel pump, both with their dedicated fuses below the switches, starter button and a manual cooling fan switch that can override the temp sensor one. The cable on the kill switch goes to a pull knob outside the car. As strung right now you'll see the red key cant leave the car, meaning any crook could easily steal it if given the chance. To foil him for a few minutes I kept the starter wired through the key switch. I will probably put a quick release link in the cable so i can take the cutoff key with me too.
great link on our wiper motor wiring:
http://www.vtr.org/maintain/wiper-problem.shtml
 Viewed 972 times")
great link on our wiper motor wiring:
http://www.vtr.org/maintain/wiper-problem.shtml
Last edited by mini64 on Fri Nov 15, 2013 4:47 am, edited 1 time in total.
- mini64
- Second Gear
- Posts: 176
- Joined: 26 Aug 2005
![]() Post by: mini64 » Fri Nov 15, 2013 4:41 am
Post by: mini64 » Fri Nov 15, 2013 4:41 am
Boy was window installation a joy. Here was my technique-follow at your own risk:
Rear glass- dropped the bottom into the gasket and the rest went in with relative ease. Maybe because our roofs have some give in the back.
Front glass- tried dropping the bottom in and working the gasket around the rest. Ended up cracking the glass when getting the last of the top in! Pulled it out and started over with the top in first. The bottom was then relatively easy, pushing the gasket under the glass from inside the car.
Going to get the crack repaired and live with it till I can afford a new one.
Here is a photo of my homemade tools for the chrome locking strip. I made the one on the bottom first and it was a bear to get the strips in. I then temporarily lost the tool (it was hanging up behind the wheel nut wrench!), so made the other. I dont know if its the tool or I got better at it, but this one worked well - taking about 15 minutes to get one strip in. I'd hold this tool in one hand, at about 20-30 degree angle from vertical, and wiggle/rotate it back and forth as I kind of pushed it with my other hand's wrist, whose thumb would be down between the tool V pushing the strip down behind the tool. Lots of soapy water of course. I ended up electrical taping a piece of rubber on the thumb and then covering it in two pair of glove for the pain!
link to my rear screen fitting problems:
lotus-chassis-f36/fhc-rear-glass-gasket-fit-question-t29250.html#p194115
Rear glass- dropped the bottom into the gasket and the rest went in with relative ease. Maybe because our roofs have some give in the back.
Front glass- tried dropping the bottom in and working the gasket around the rest. Ended up cracking the glass when getting the last of the top in! Pulled it out and started over with the top in first. The bottom was then relatively easy, pushing the gasket under the glass from inside the car.
Going to get the crack repaired and live with it till I can afford a new one.
Here is a photo of my homemade tools for the chrome locking strip. I made the one on the bottom first and it was a bear to get the strips in. I then temporarily lost the tool (it was hanging up behind the wheel nut wrench!), so made the other. I dont know if its the tool or I got better at it, but this one worked well - taking about 15 minutes to get one strip in. I'd hold this tool in one hand, at about 20-30 degree angle from vertical, and wiggle/rotate it back and forth as I kind of pushed it with my other hand's wrist, whose thumb would be down between the tool V pushing the strip down behind the tool. Lots of soapy water of course. I ended up electrical taping a piece of rubber on the thumb and then covering it in two pair of glove for the pain!
 Viewed 969 times")
link to my rear screen fitting problems:
lotus-chassis-f36/fhc-rear-glass-gasket-fit-question-t29250.html#p194115
- mini64
- Second Gear
- Posts: 176
- Joined: 26 Aug 2005
![]() Post by: mini64 » Fri Nov 15, 2013 4:49 am
Post by: mini64 » Fri Nov 15, 2013 4:49 am
some good images of how our door latches go together:
lotus-chassis-f36/sprint-door-lock-and-receiver-t27926.html
lotus-chassis-f36/elan-door-lock-t25972.html
lotus-chassis-f36/sprint-door-lock-and-receiver-t27926.html
lotus-chassis-f36/elan-door-lock-t25972.html
- mini64
- Second Gear
- Posts: 176
- Joined: 26 Aug 2005
 Viewed 963 times")
![]() Post by: mini64 » Fri Jan 30, 2015 10:17 pm
Post by: mini64 » Fri Jan 30, 2015 10:17 pm
Time for some updates!
mechanical:
The rear anti roll bar (sway bar) mount. Chassis mount is on the little pads shown in an earlier photo, similar to what is in the DBean catalog. Didn?t bend the bar (1/2? dia) far enough out so I have to run it below the rear shelf bodywork necessitating little stubby link arms ? not ideal geometry. Someday will put in a different bar.
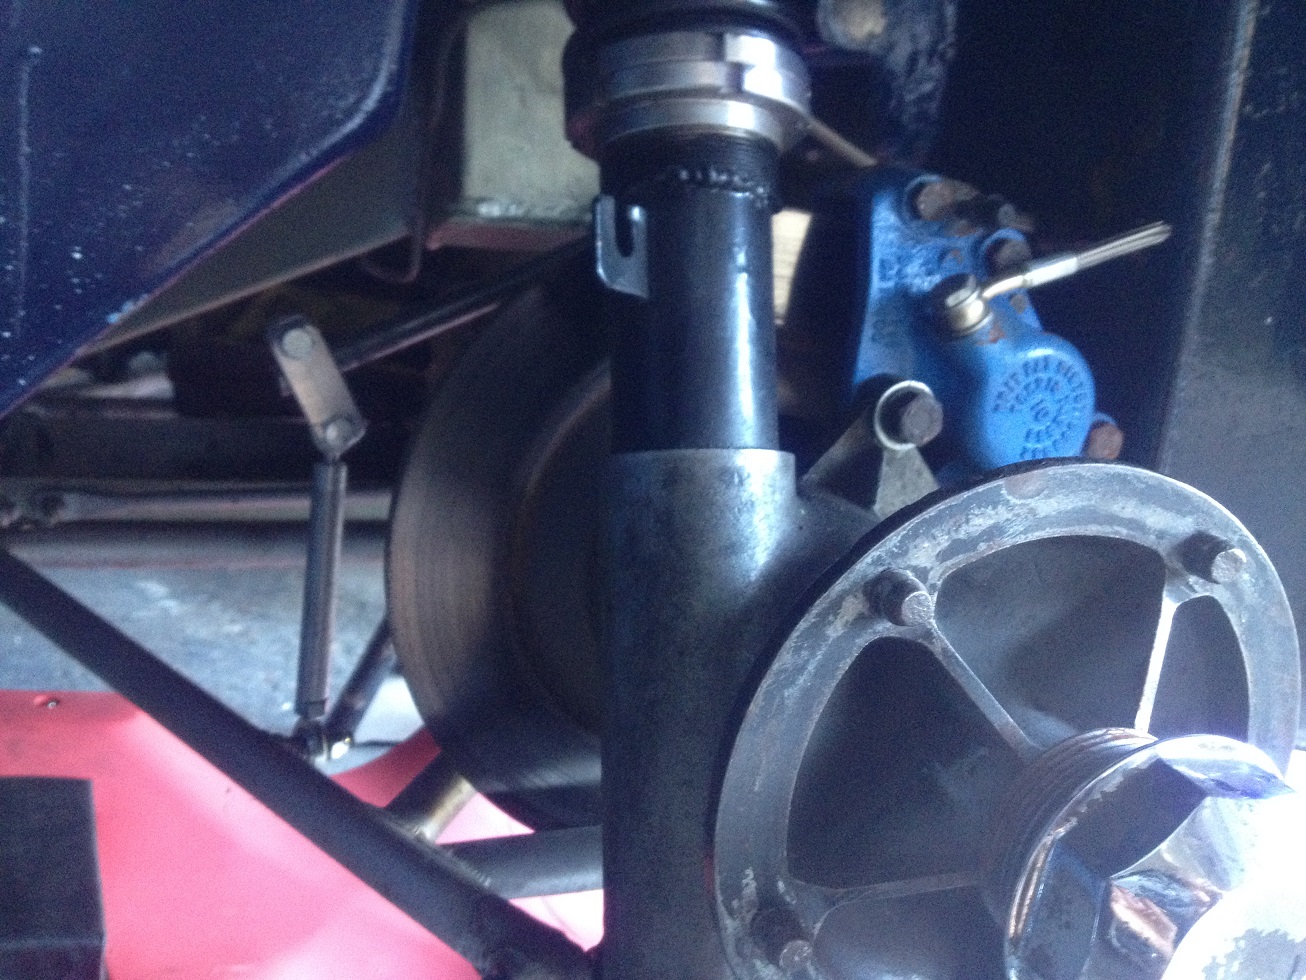
Makings of a diff cooler scoop. Fashioned a male mold out of foam then glassed over it. Will connect a short bit of tube from the outlet to aim at the cooler.
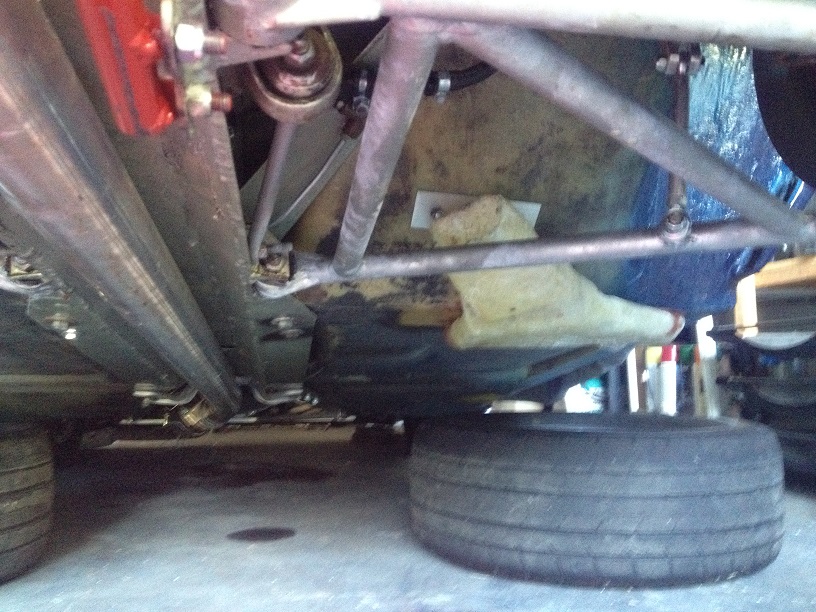
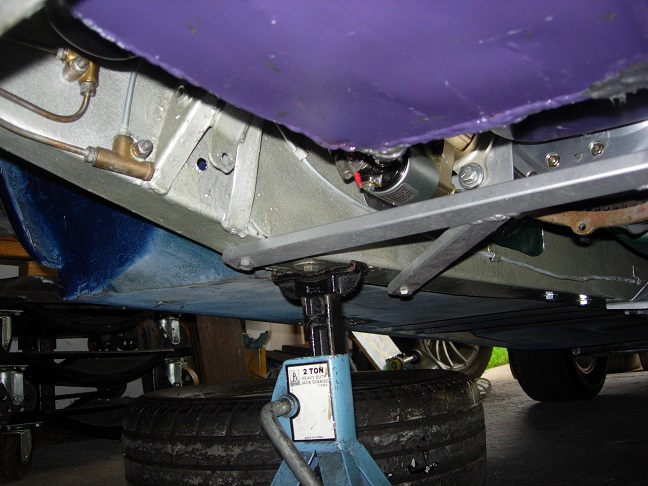
My version of the under-the-pan frame brace.
Some nice looking, if I do say so myself, catch bottle arrangements for oil and water. The oil is the front one with the larger breather filter on it. Bottles are 1 liter aluminum water bottles bought at a camping store, manifolds on top I made in the shop. Not sure if the oil is going to give me the breathing capacity I want as it?s only a ?? ID tube.

mechanical:
The rear anti roll bar (sway bar) mount. Chassis mount is on the little pads shown in an earlier photo, similar to what is in the DBean catalog. Didn?t bend the bar (1/2? dia) far enough out so I have to run it below the rear shelf bodywork necessitating little stubby link arms ? not ideal geometry. Someday will put in a different bar.
Makings of a diff cooler scoop. Fashioned a male mold out of foam then glassed over it. Will connect a short bit of tube from the outlet to aim at the cooler.
My version of the under-the-pan frame brace.
Some nice looking, if I do say so myself, catch bottle arrangements for oil and water. The oil is the front one with the larger breather filter on it. Bottles are 1 liter aluminum water bottles bought at a camping store, manifolds on top I made in the shop. Not sure if the oil is going to give me the breathing capacity I want as it?s only a ?? ID tube.
- mini64
- Second Gear
- Posts: 176
- Joined: 26 Aug 2005
![]() Post by: mini64 » Fri Jan 30, 2015 10:21 pm
Post by: mini64 » Fri Jan 30, 2015 10:21 pm
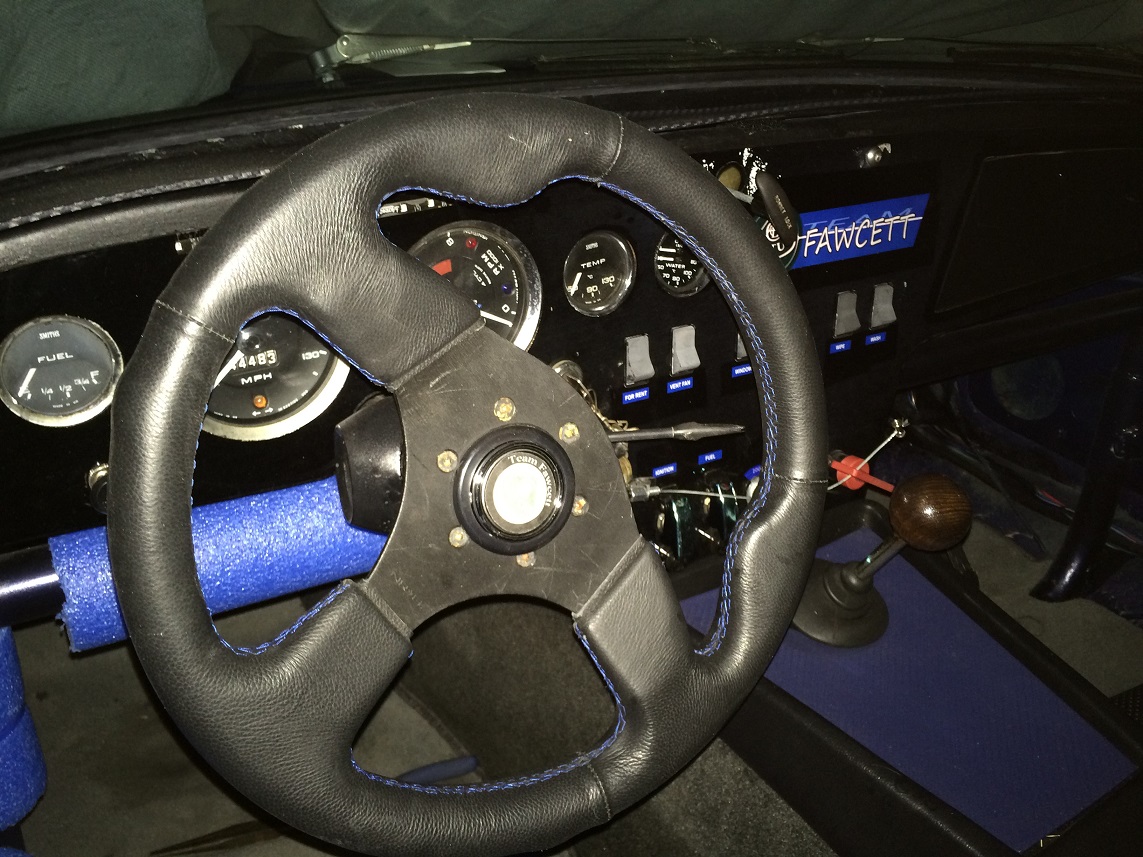
interior details
Gratuitous dash shot to show the steering wheel without a center button. I drilled the wheel hub and fashioned a long brass screw with spring on the front, just visible. This sits under the button I later put on to act as the horn contact, necessary to get a registration. Has worked well so far.
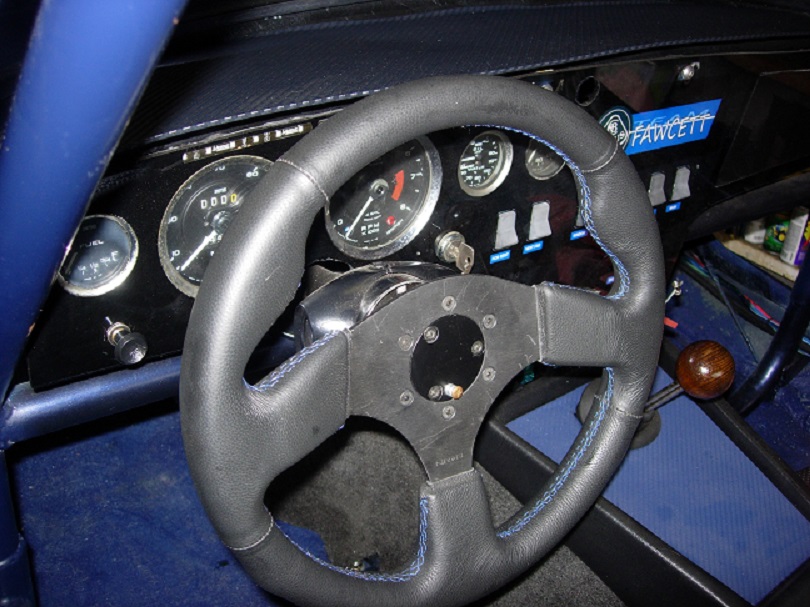
with push button:
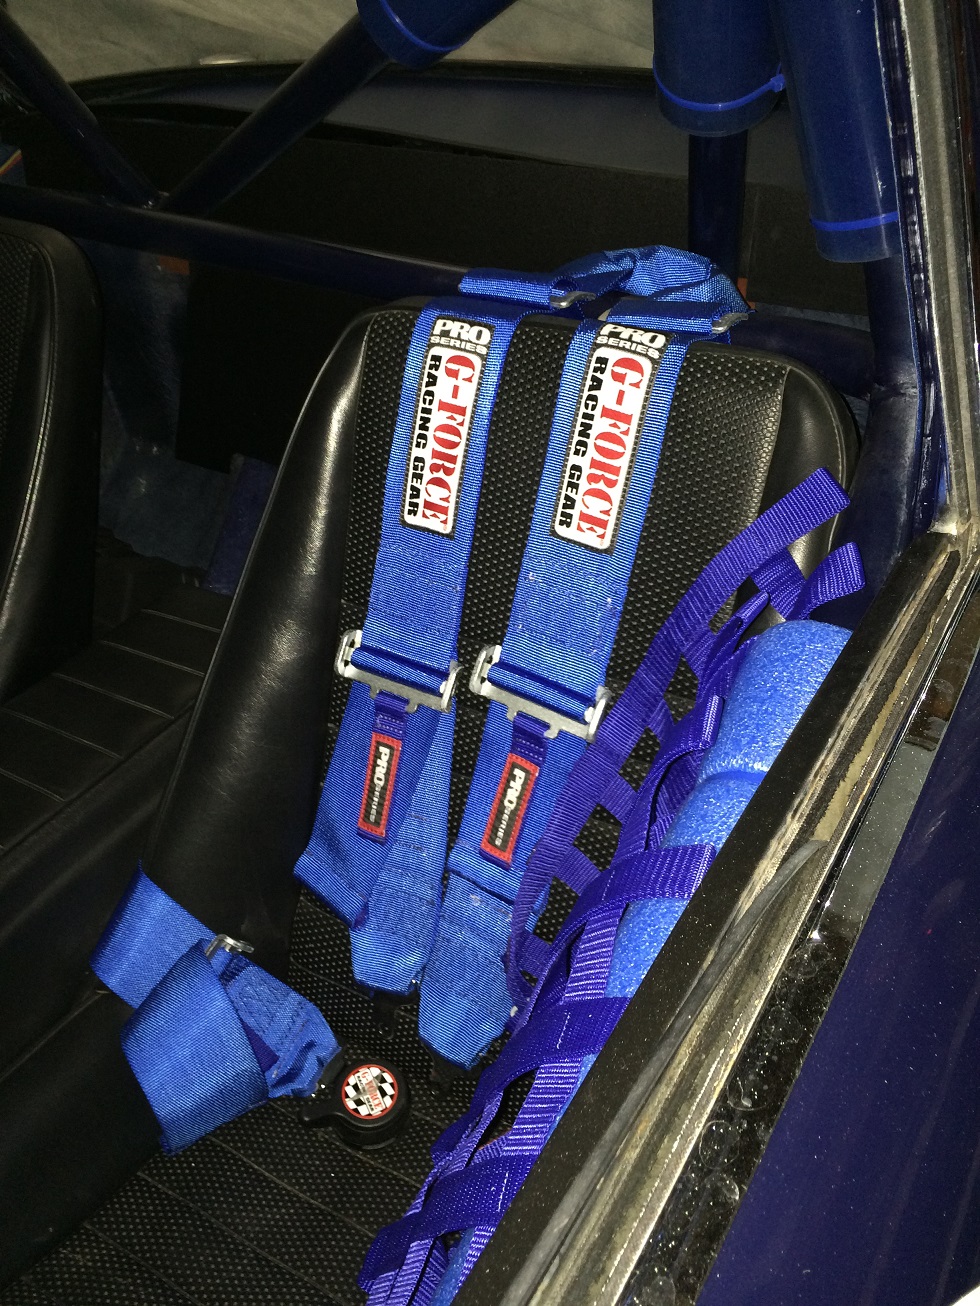
Since I?m doing interior shots here is a rear view
Gratuitous dash shot to show the steering wheel without a center button. I drilled the wheel hub and fashioned a long brass screw with spring on the front, just visible. This sits under the button I later put on to act as the horn contact, necessary to get a registration. Has worked well so far.
with push button:
Since I?m doing interior shots here is a rear view
- mini64
- Second Gear
- Posts: 176
- Joined: 26 Aug 2005
46 posts
• Page 3 of 4 • 1, 2, 3, 4
Total Online:
Users browsing this forum: JerryBoone, smo17003 and 51 guests