
Tingles ex C production race Elan Body
19 posts
• Page 1 of 2 • 1, 2
![]() Post by: garyeanderson » Sat May 17, 2008 10:30 pm
Post by: garyeanderson » Sat May 17, 2008 10:30 pm
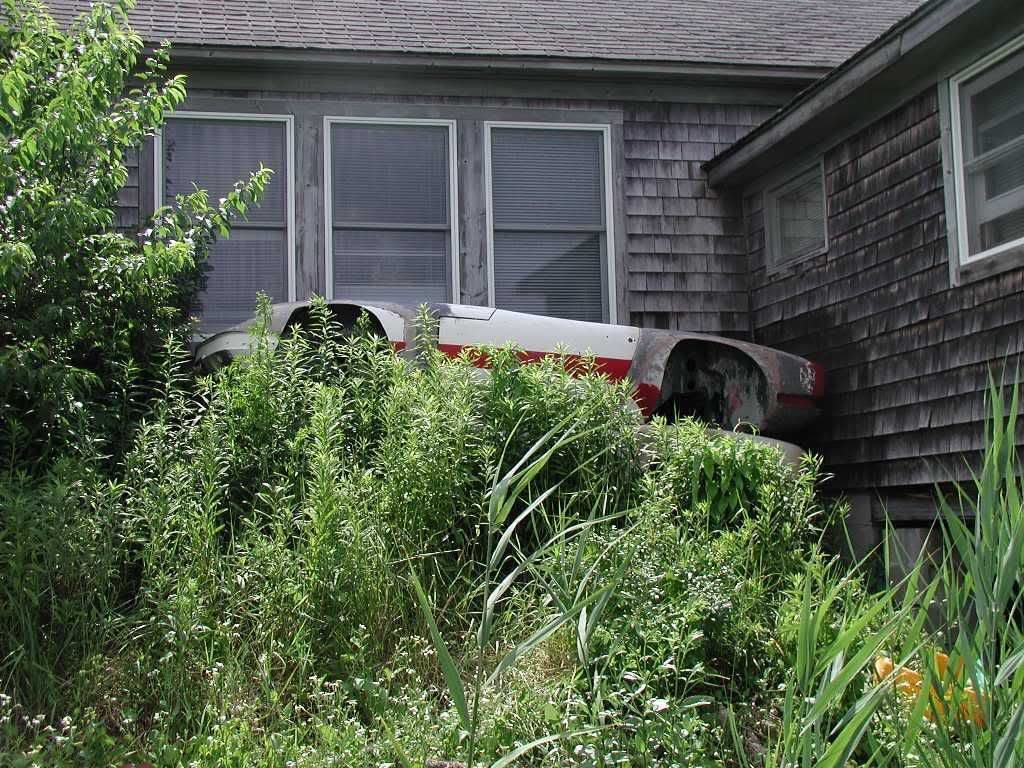
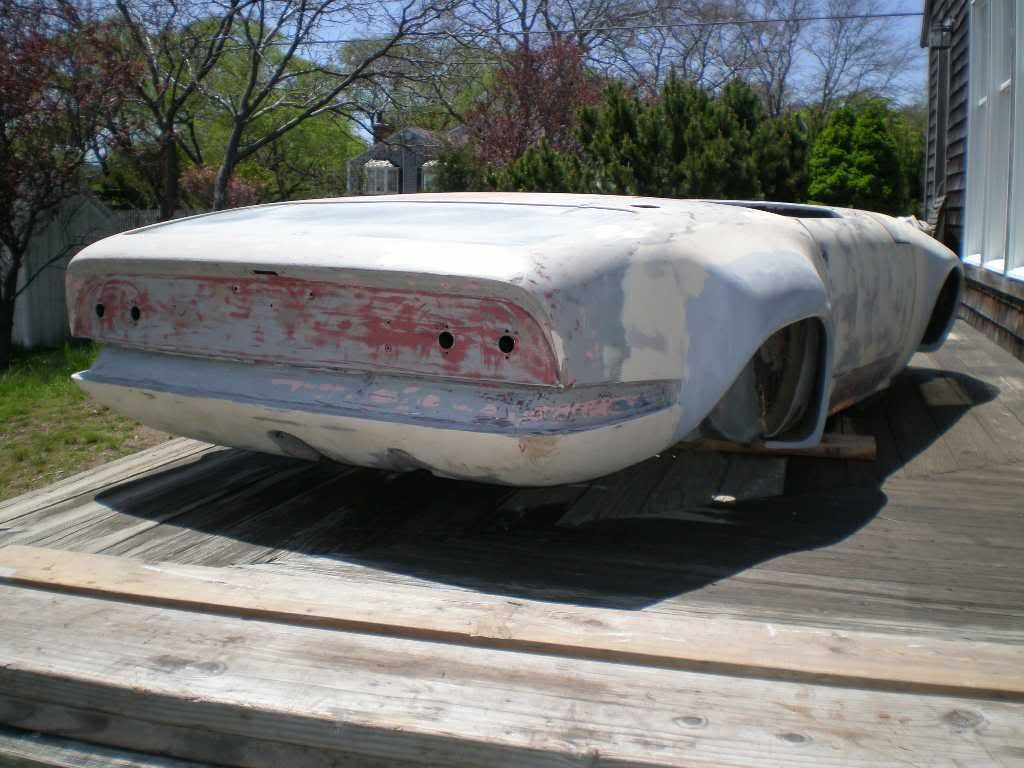
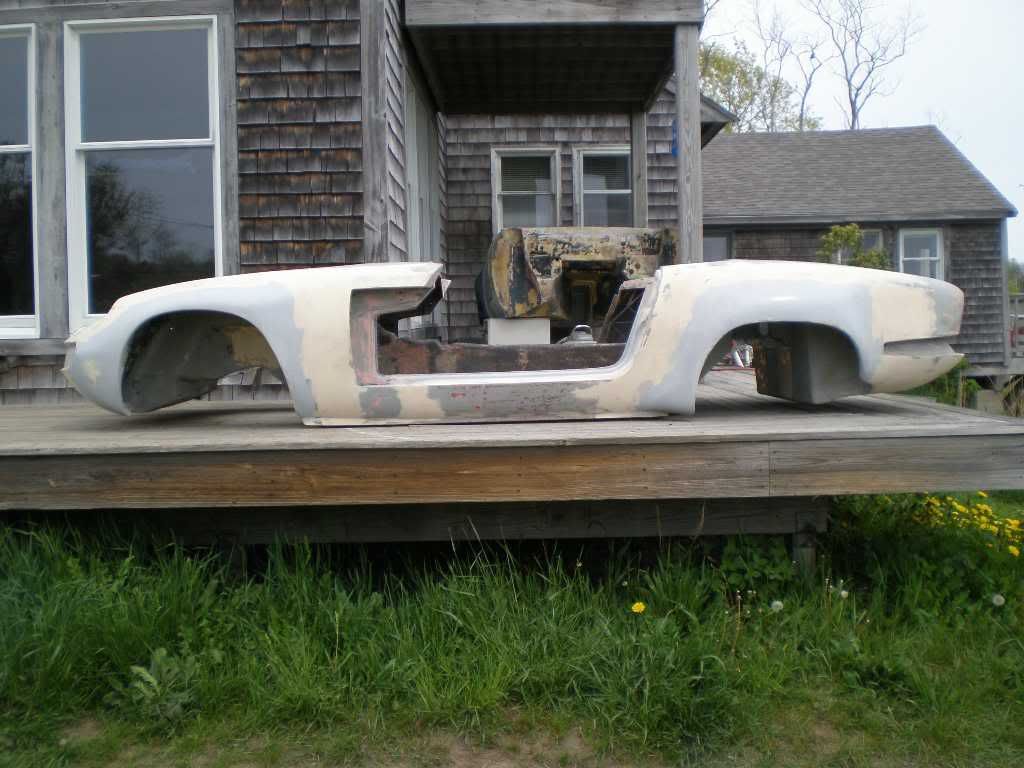
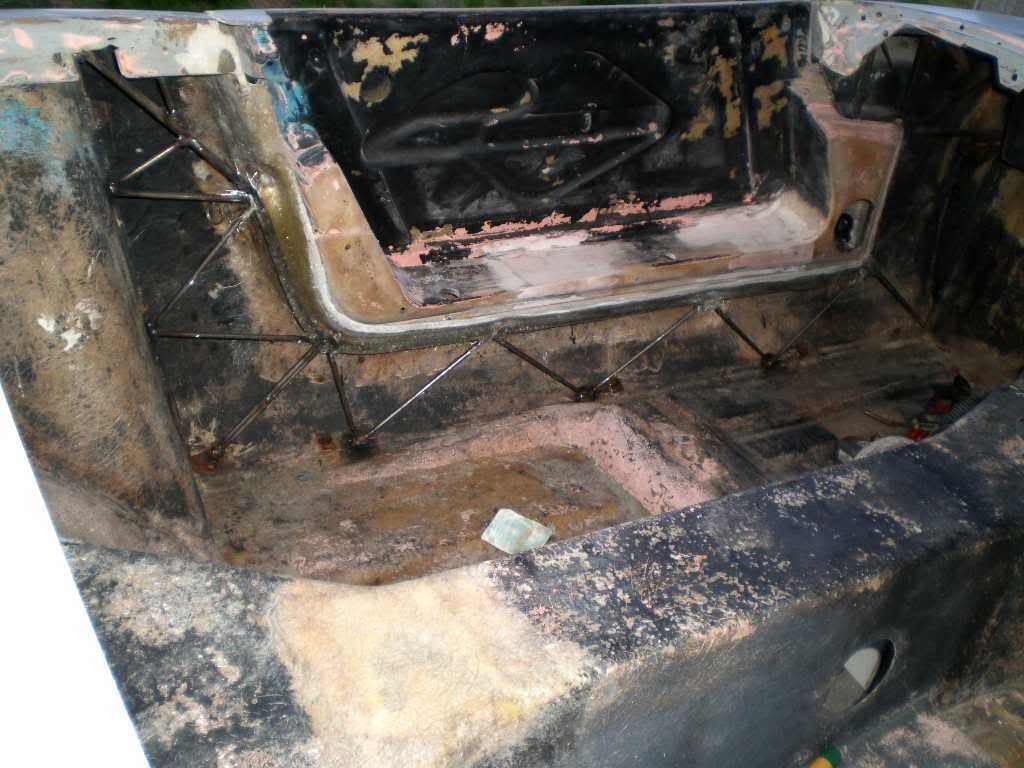
This is another of my on going projects that I have been working on. I haven't done a thing to it in a couple of years but I dragged it out of the shed yesterday to move it a bit closer to getting it in primer and possibly back to being painted the Medici Blue as it was delivered. I bought the body from Charles Fulop who restored Tingle ex racer back to a street Elan. Charles was going to restore the body but found another body that was already painted and needed to move the body out of his friend?s shop in Somerville. Charles had already cut the roll cage out and taken off the C production flairs when I got it. There were holes cut in a lot of locations that I wanted to patch to get it to the point where I could decide at a later date if it was to be a race car again or just another street terror. These are the same flairs that I put on the other (S3/S4) cut up special that I am also doing. Tingles Elan also has the front flairs along with the rears so you can get an idea of how it looked in its day. Ground clearance is currently a little low (sitting on a 2x6 at each end), it may need just a bit more. I brought it out now as the weather is just about right for spreading filler and while one Elan is getting filler applied the other can be sanded. Well that?s the plan anyway, we will have to see if it works out.
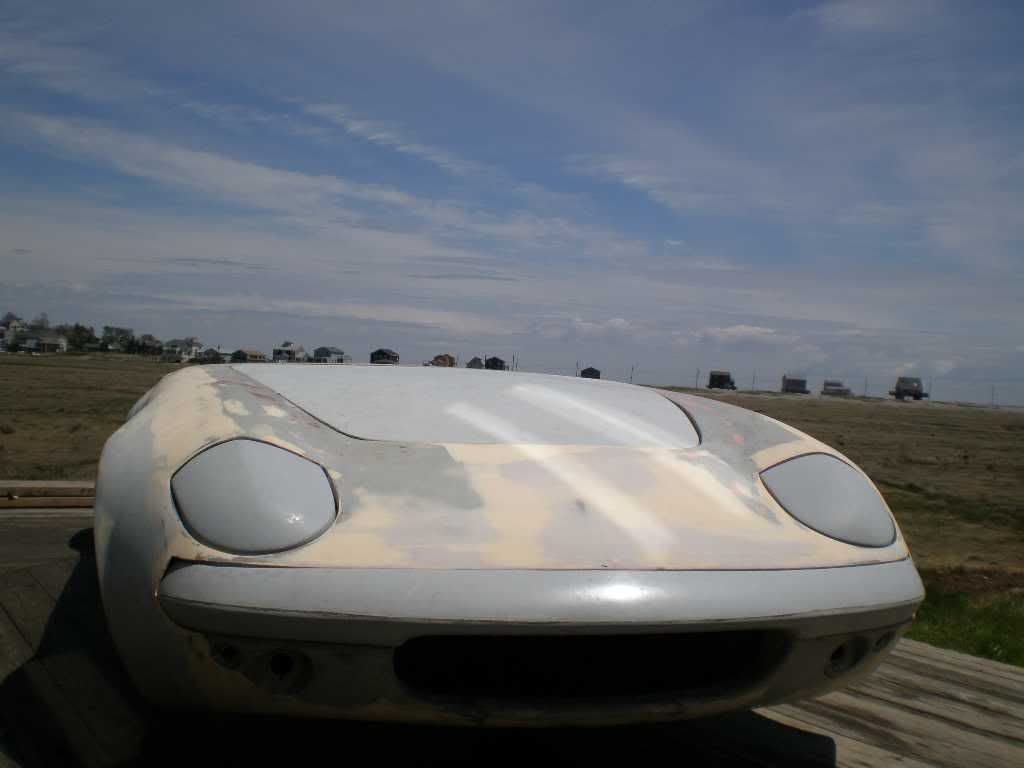
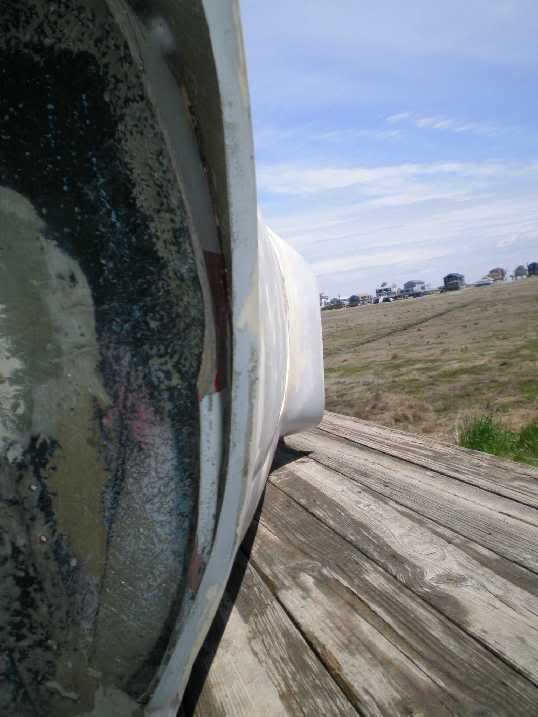
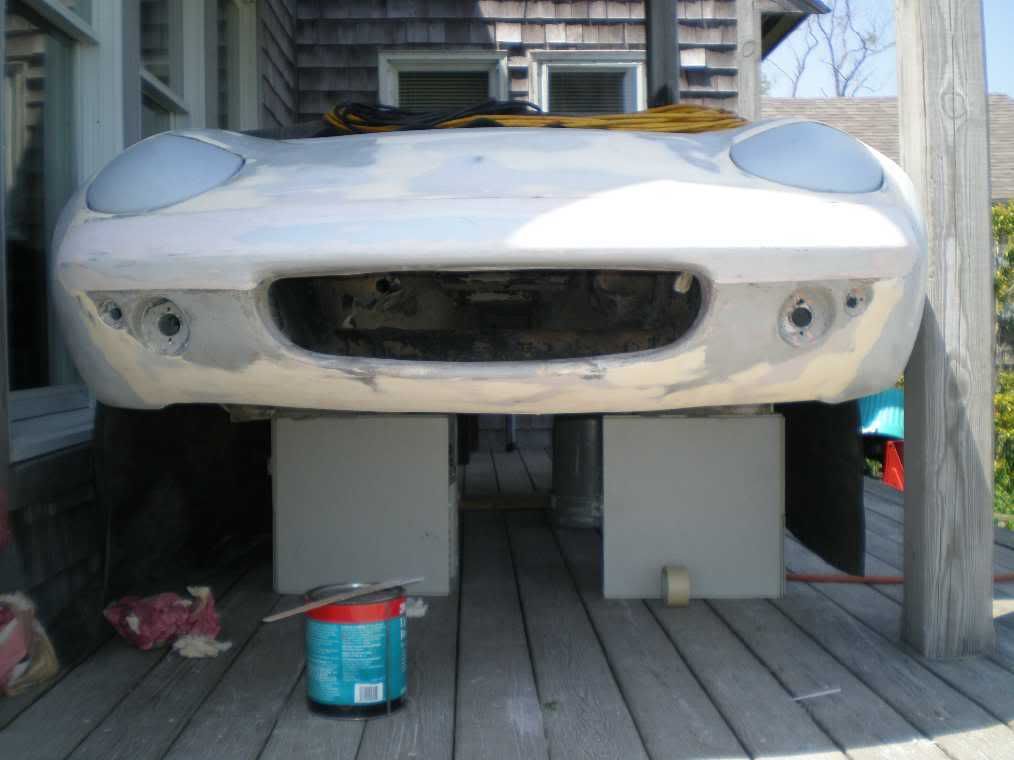
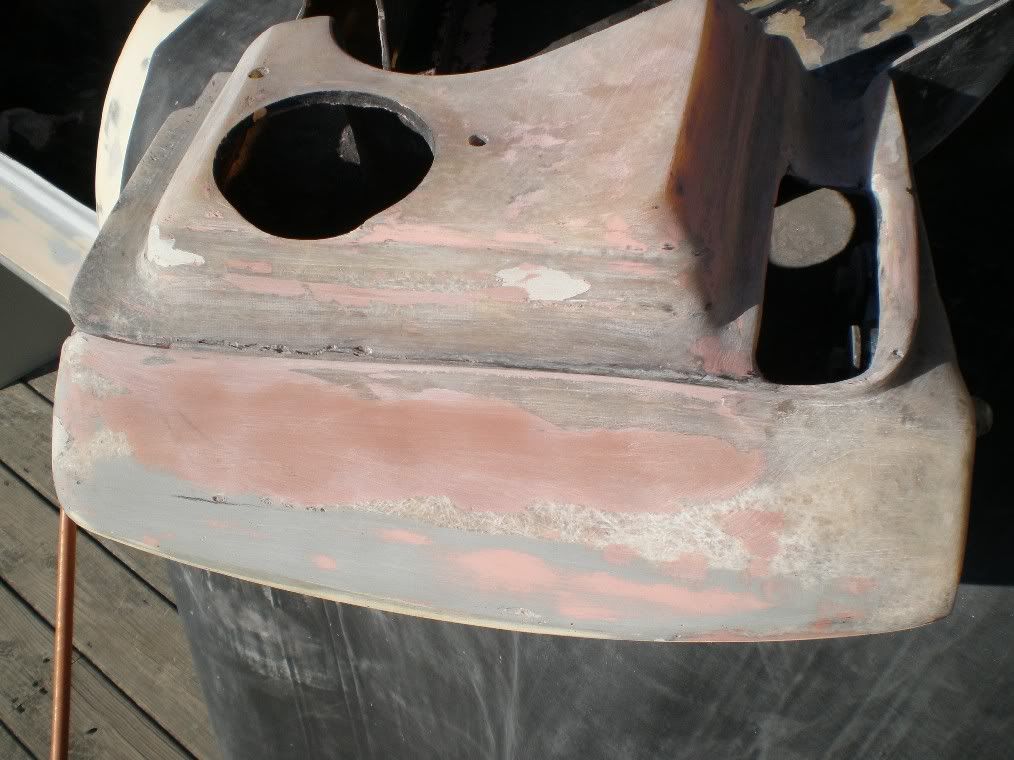
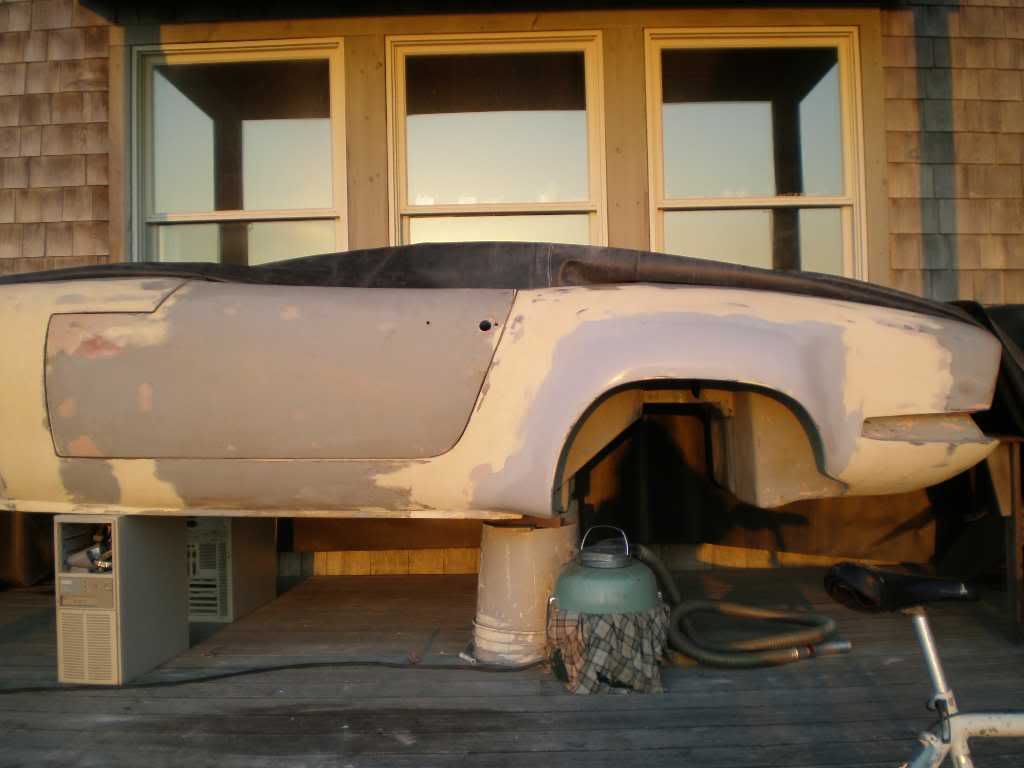
Tingles ex C-Prod race car body as I bought it, well you can see a little of it.
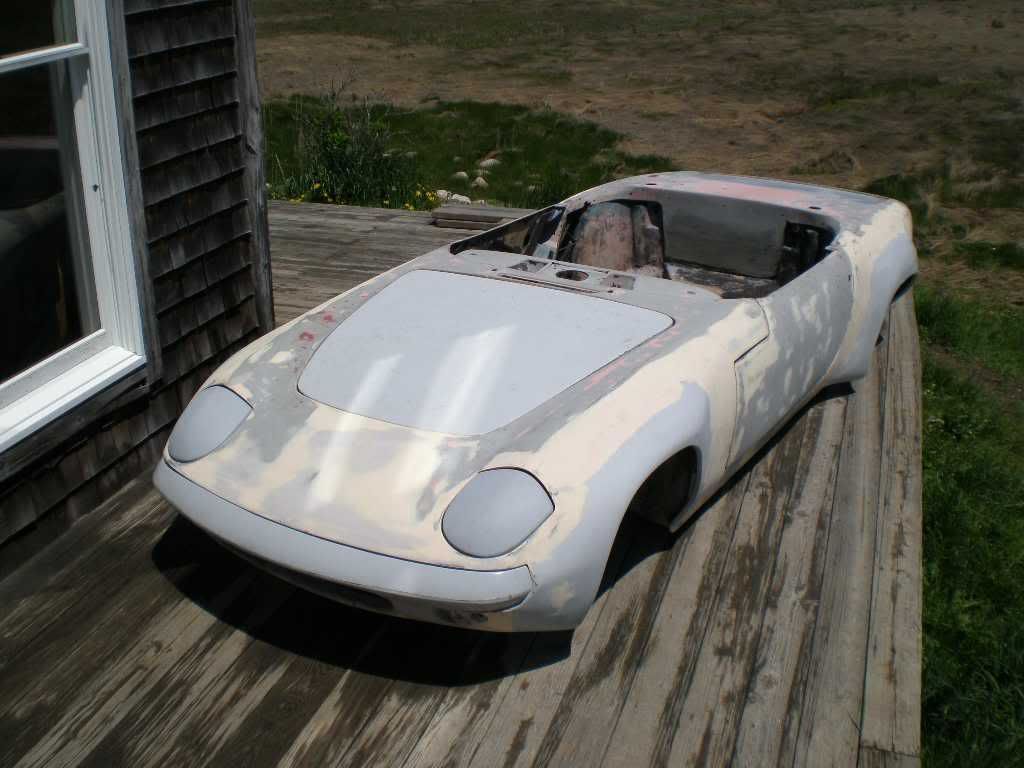
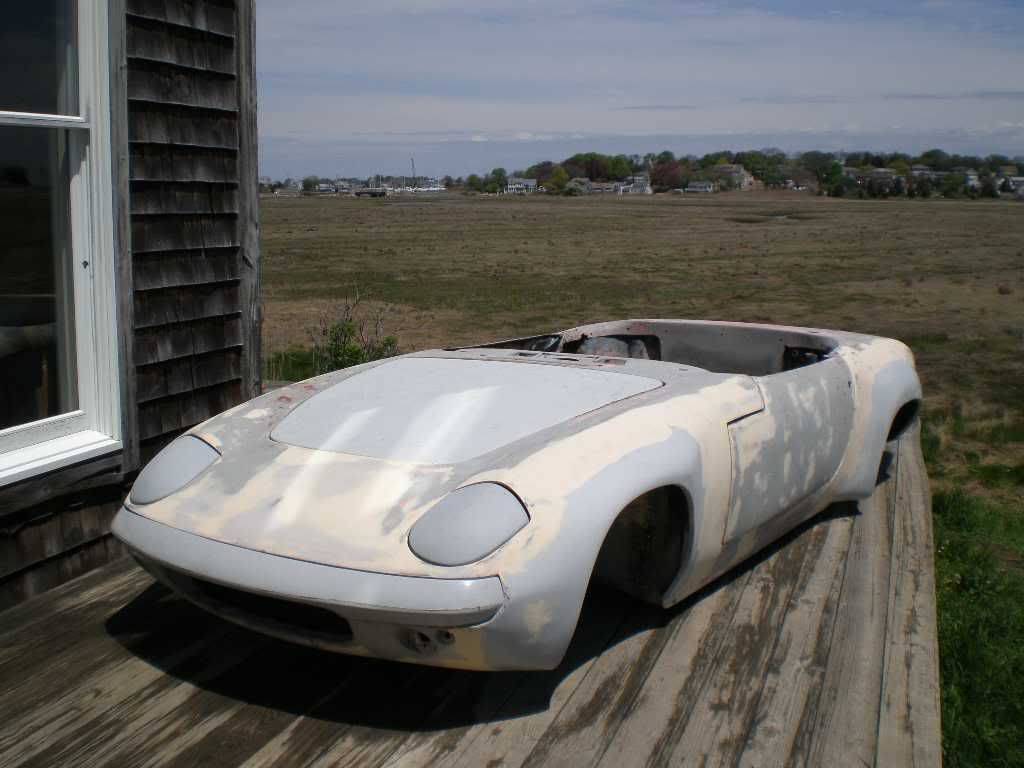

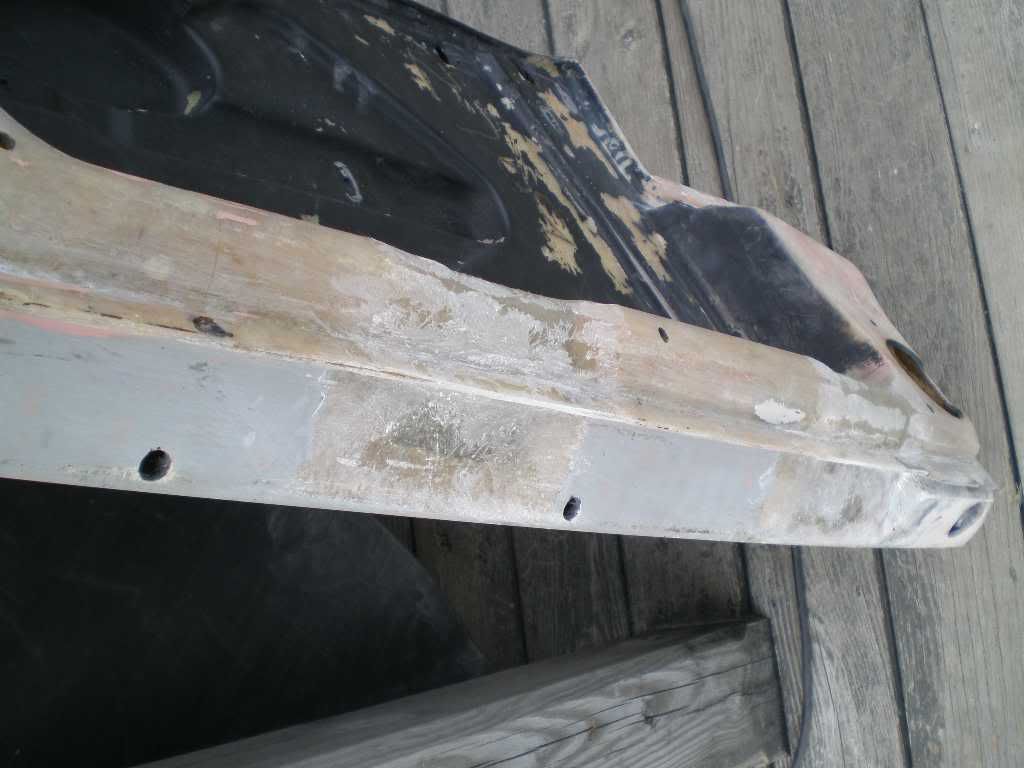
Low ground clearance?
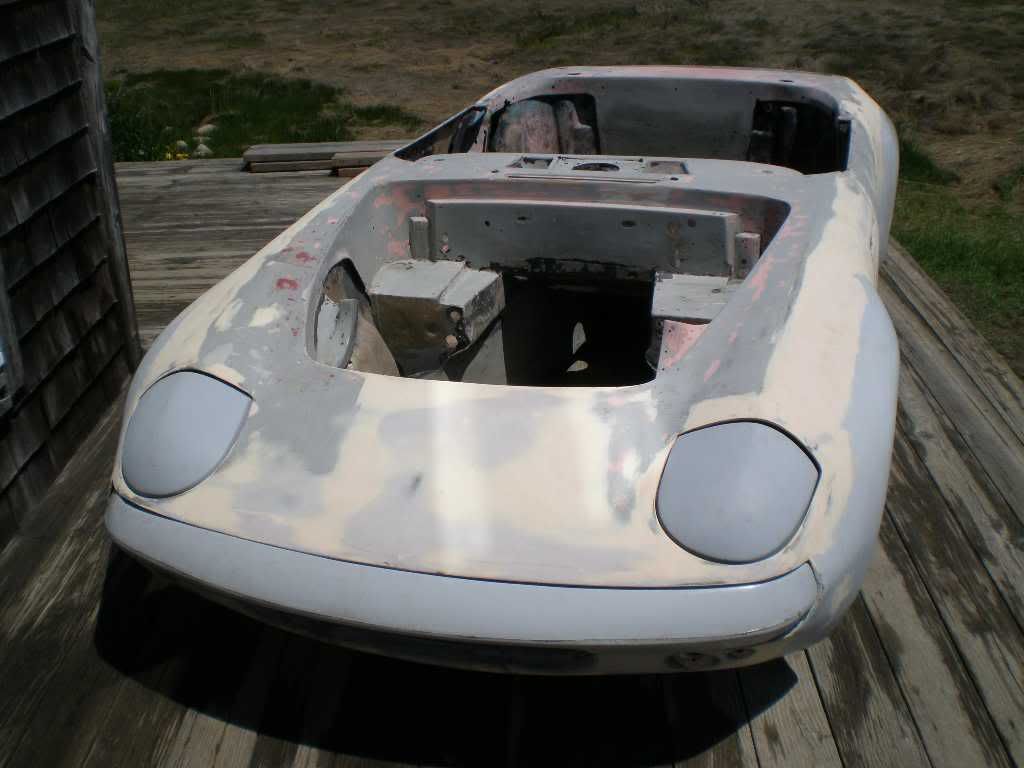
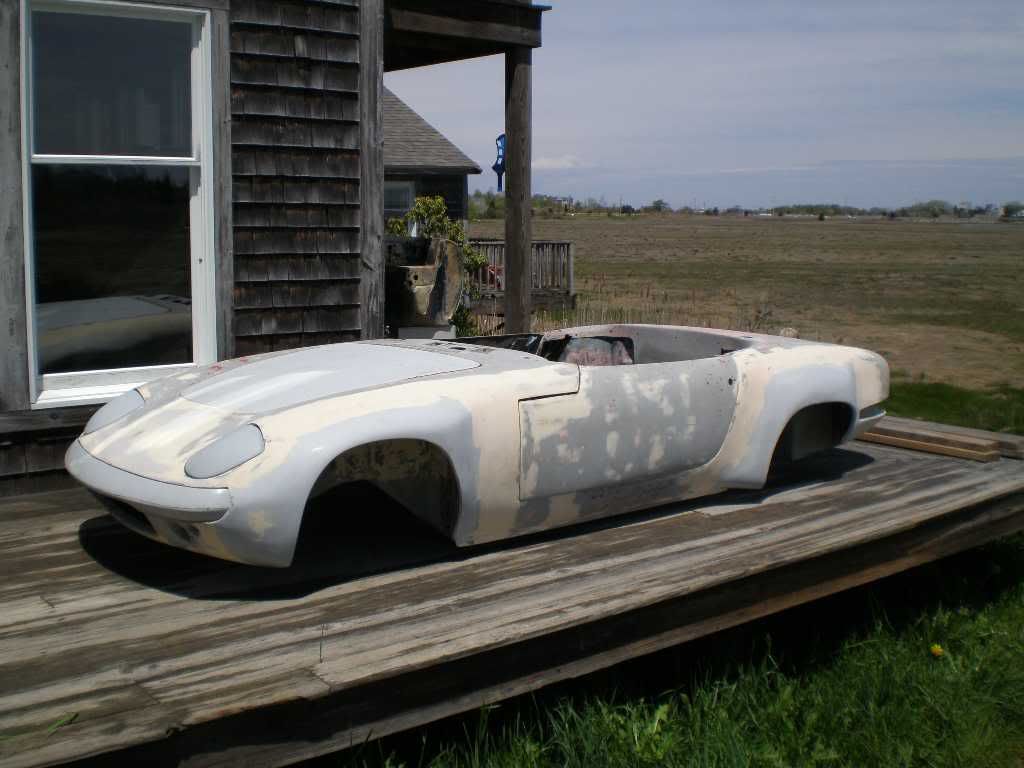
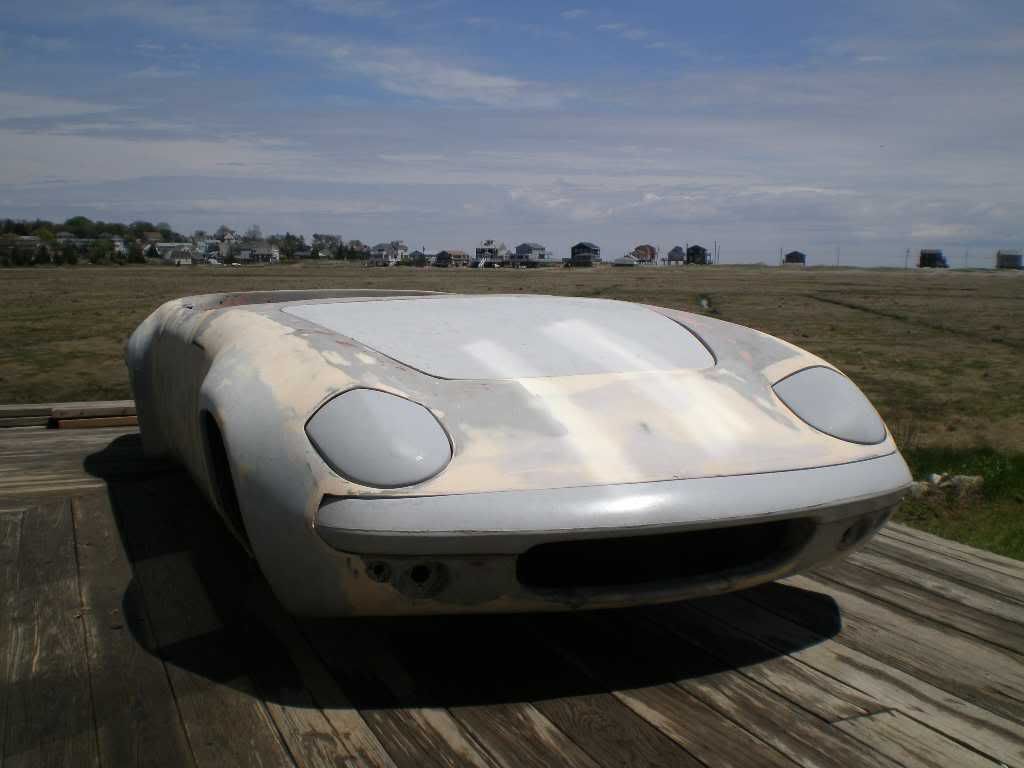
My friend Bill Hough molded the bonnet in one of my molds for a customier and it was never picked up or paid for so I'll put it to good use.
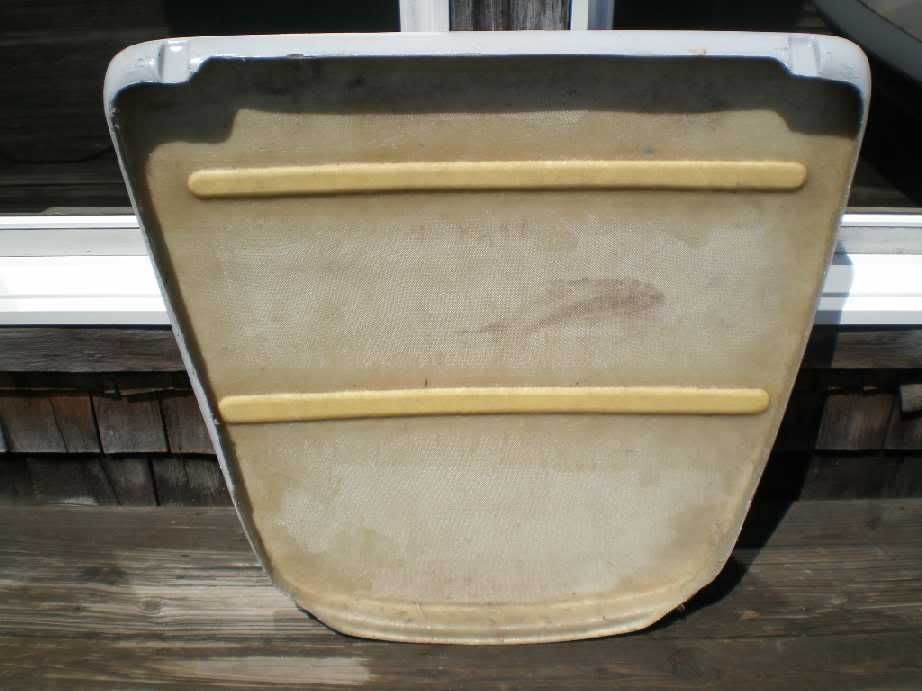
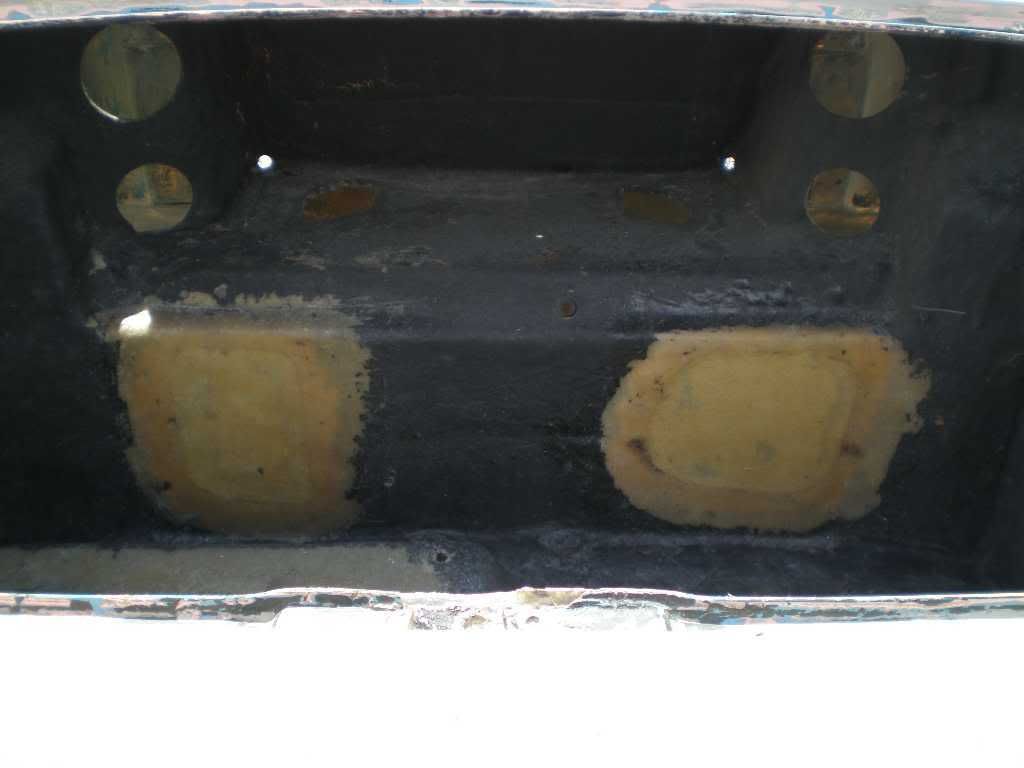
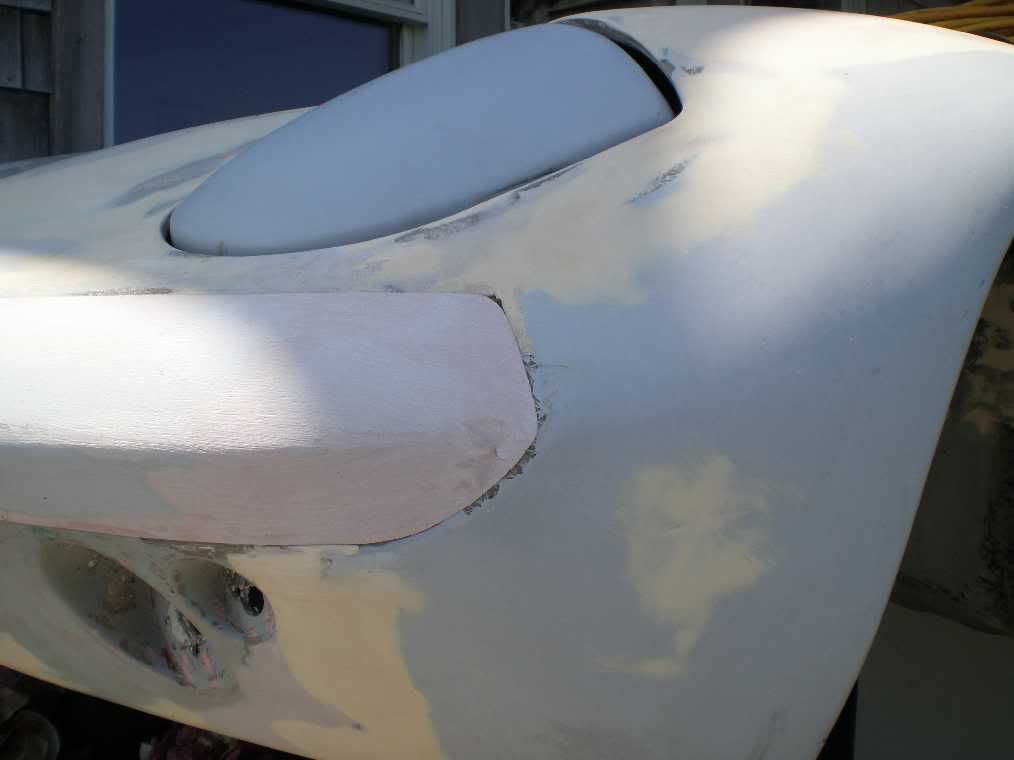
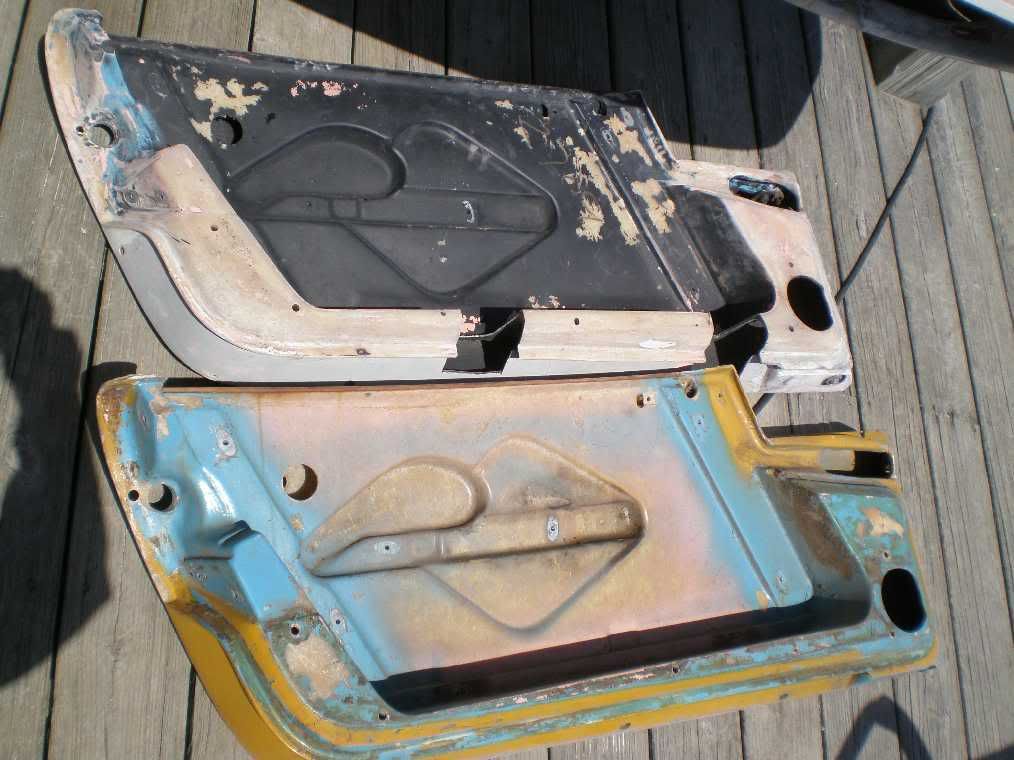
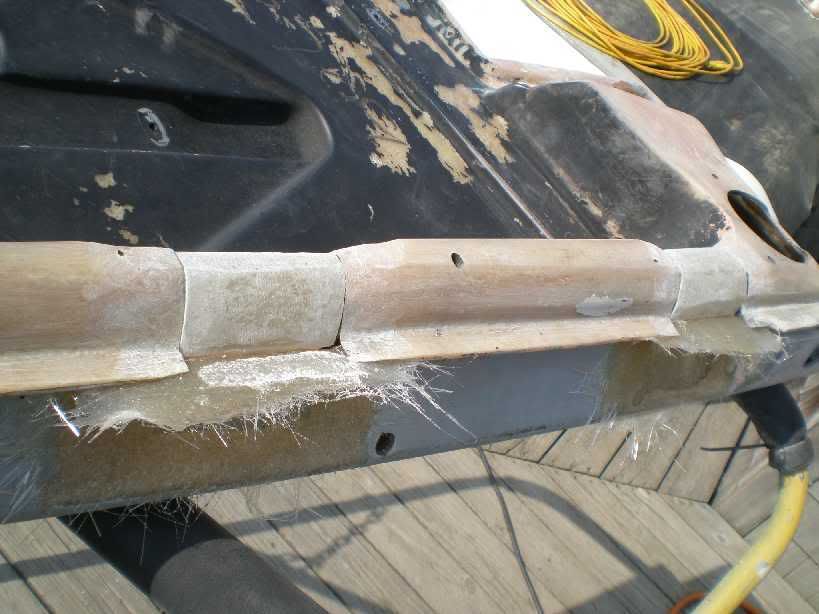
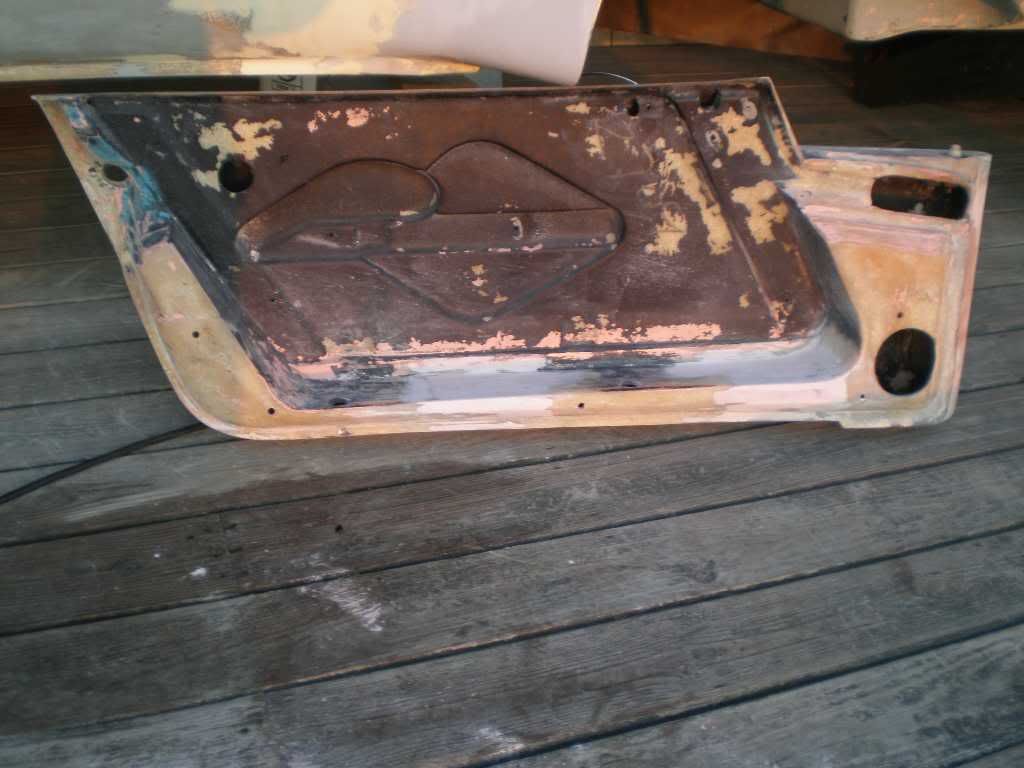
The door lattice is perfect on the right side.
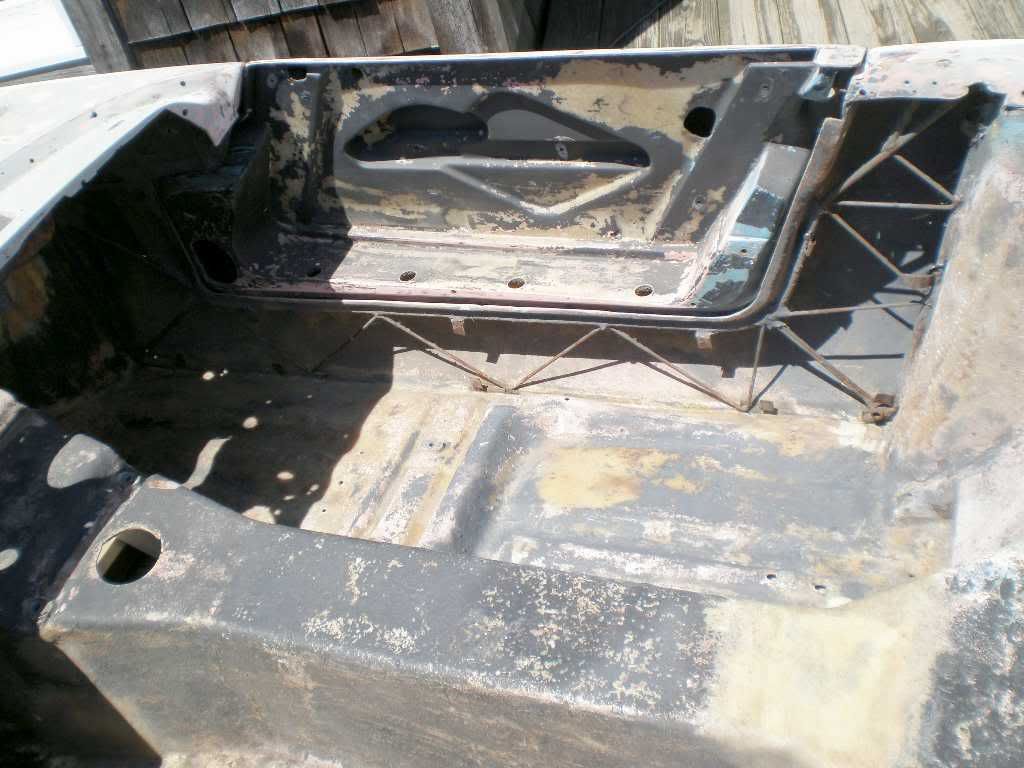
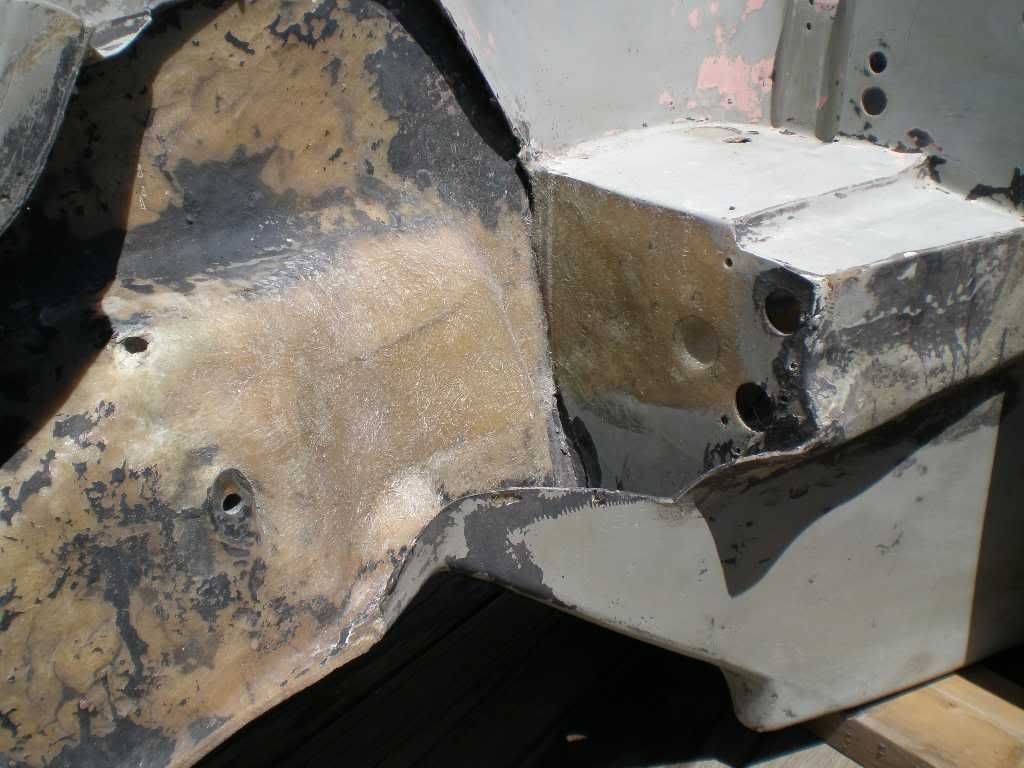
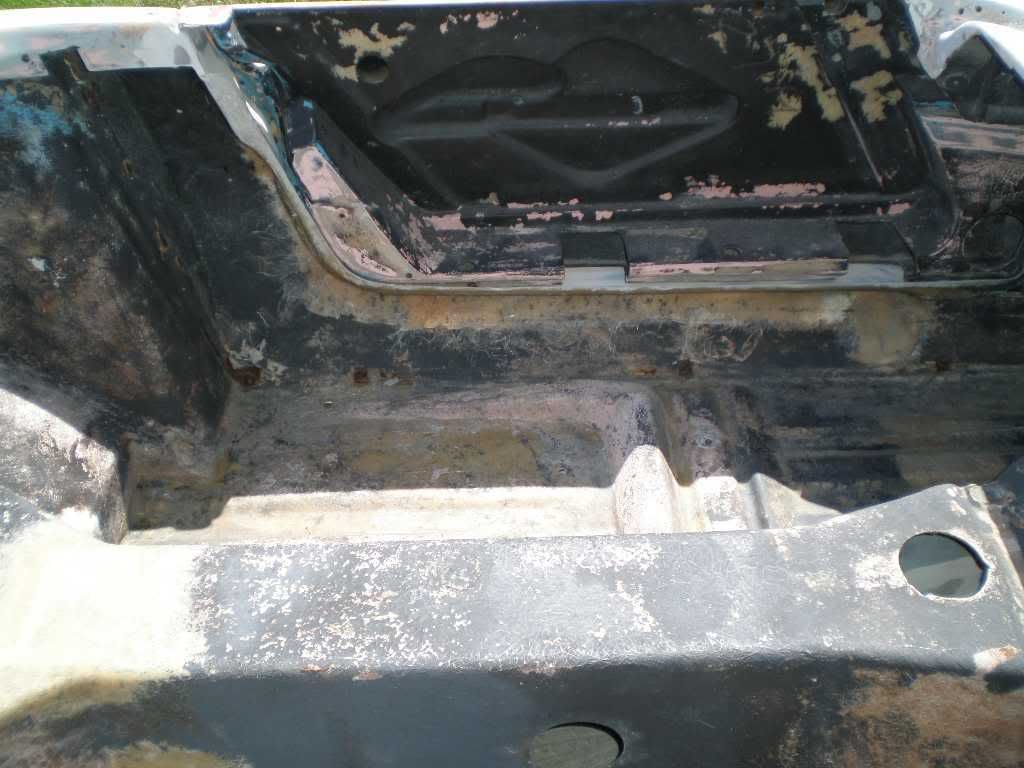
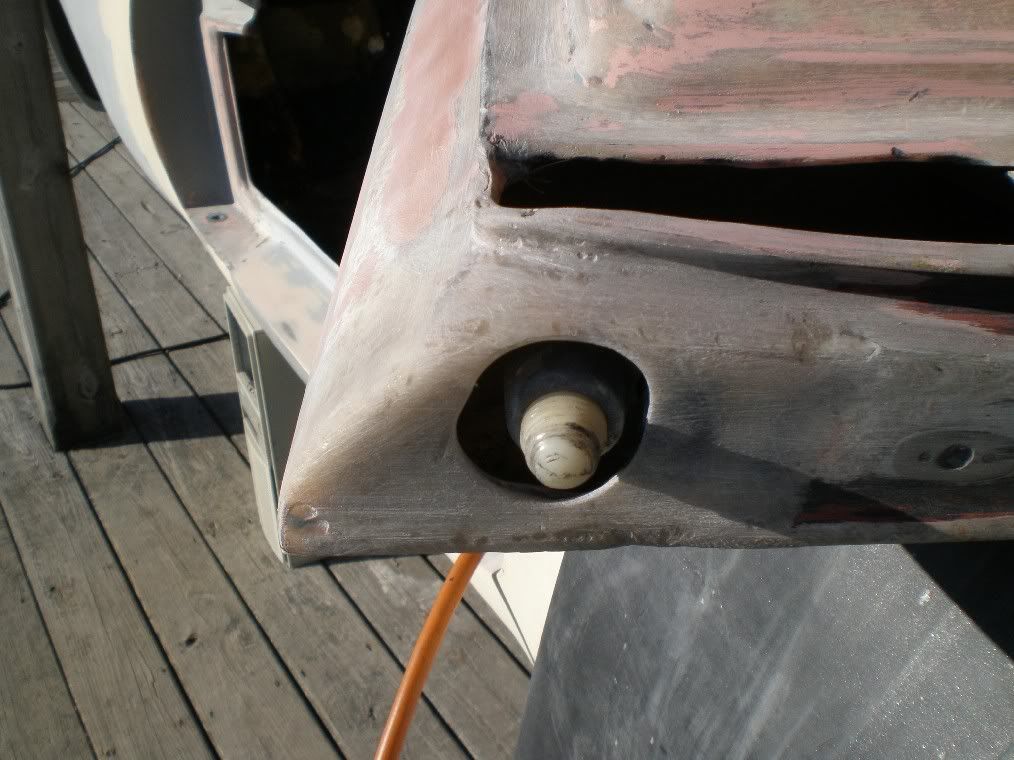
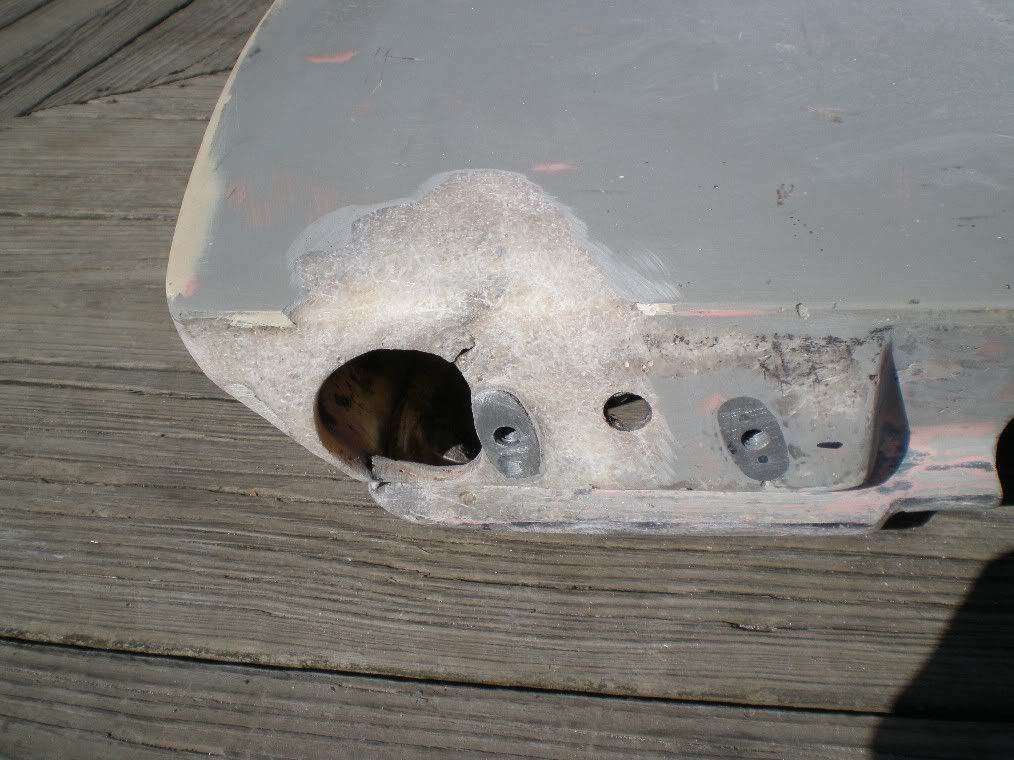
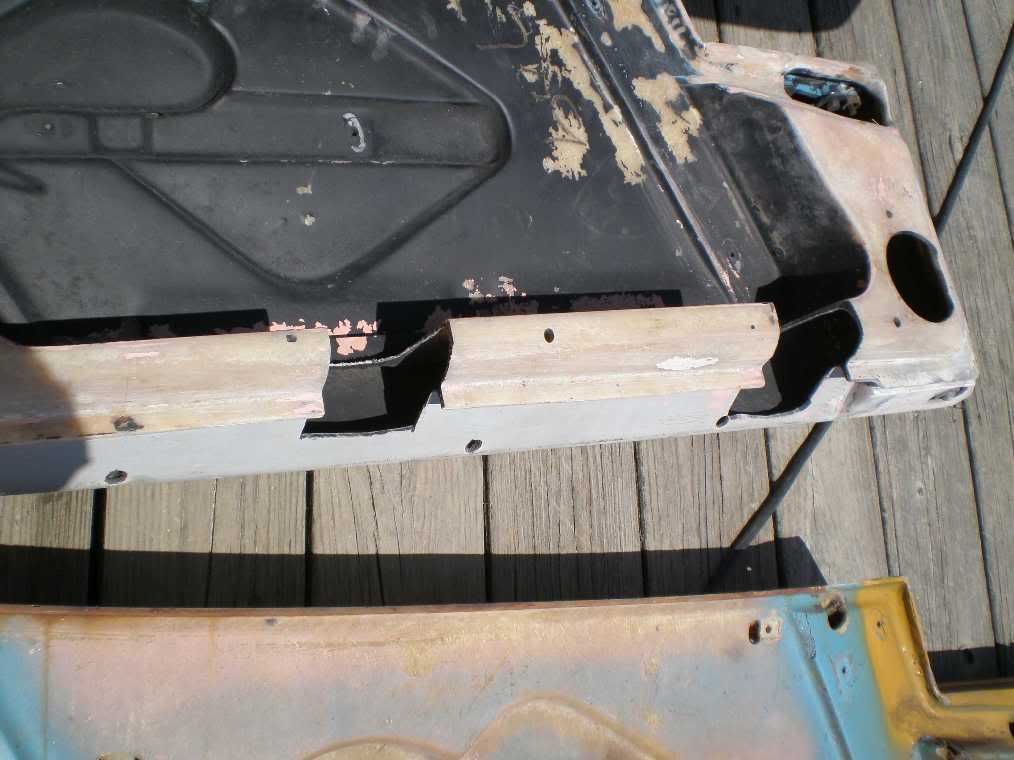
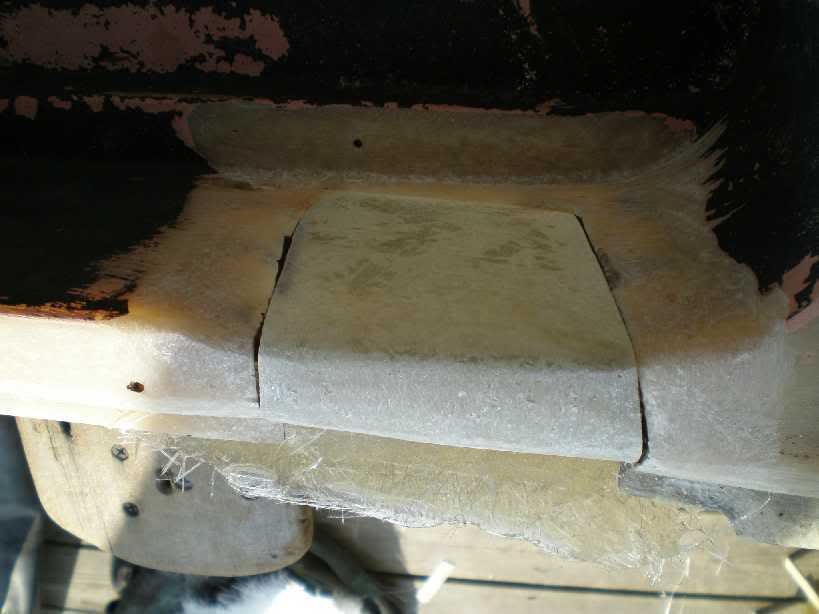
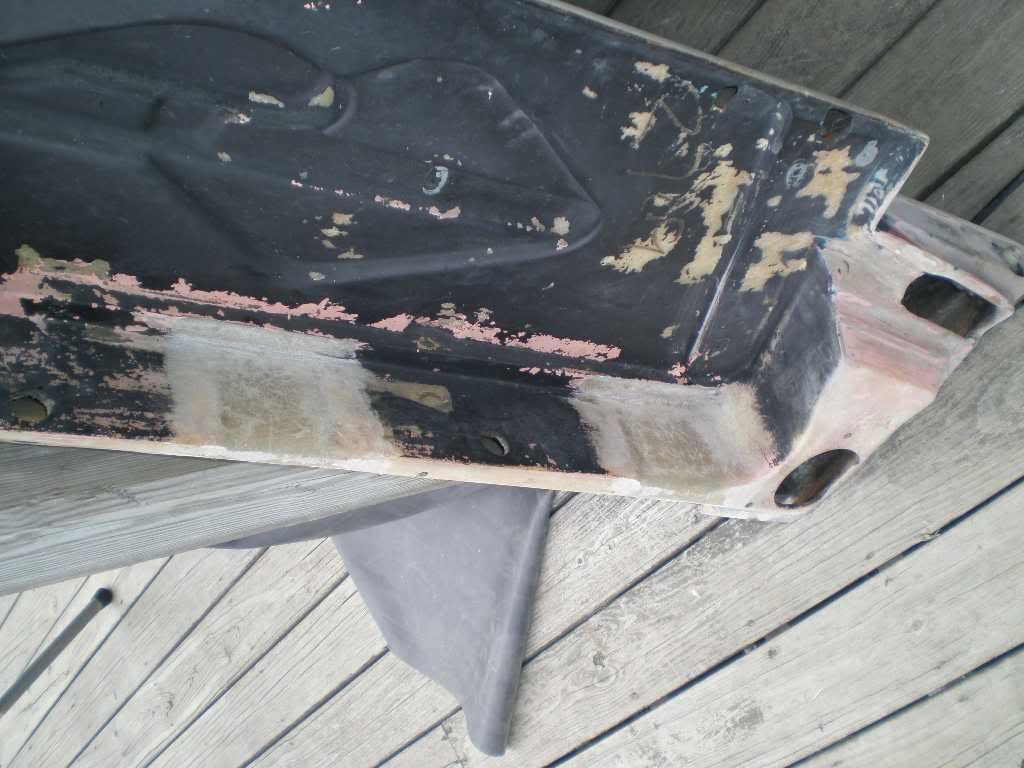
One of the many holes that the roll cage went through to pickup the front shock towers.
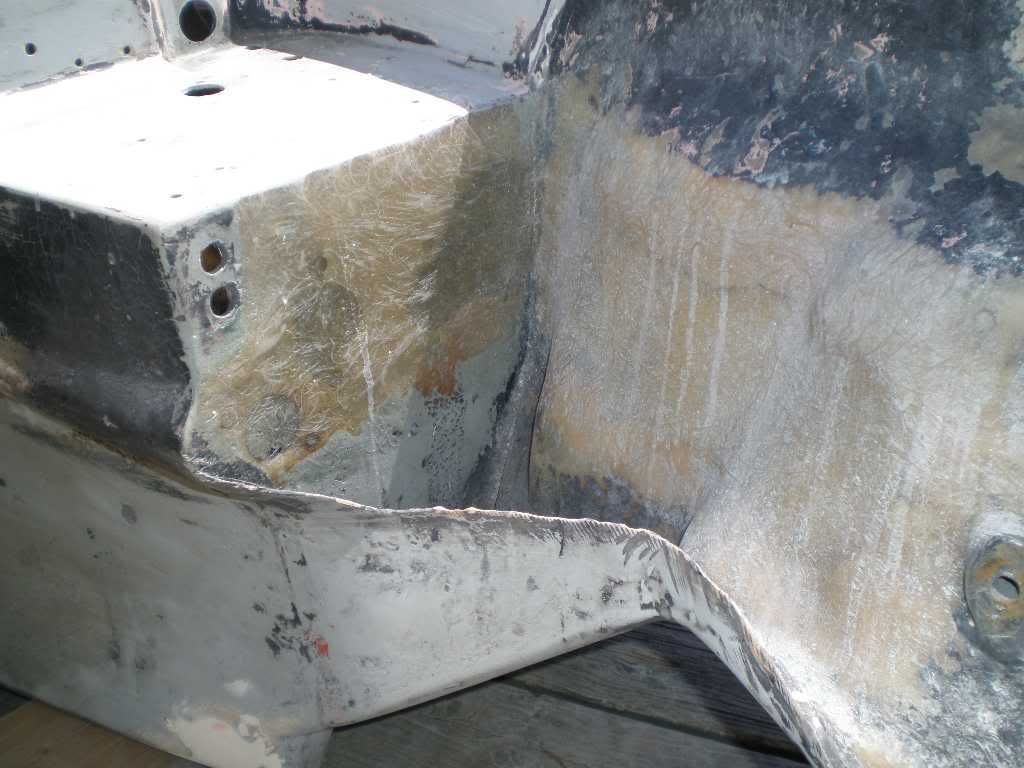
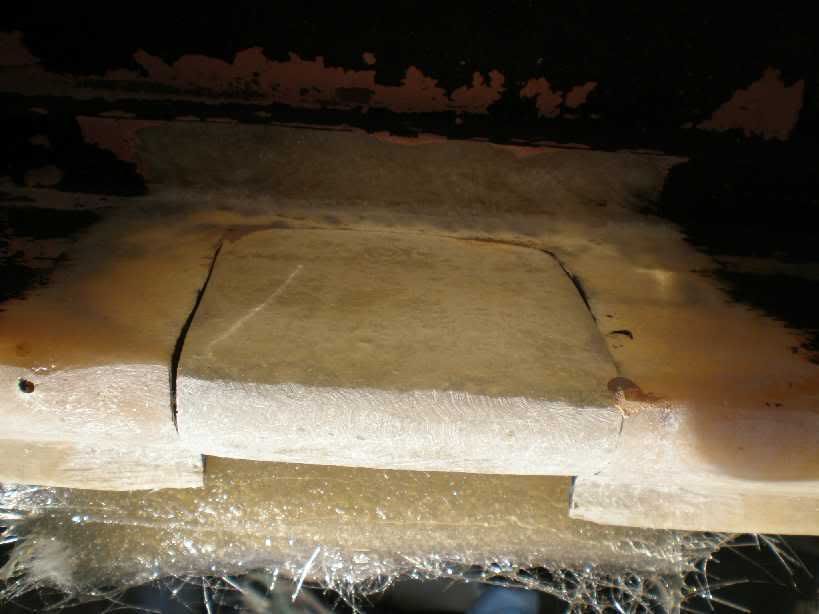
The left side needed the same patch.
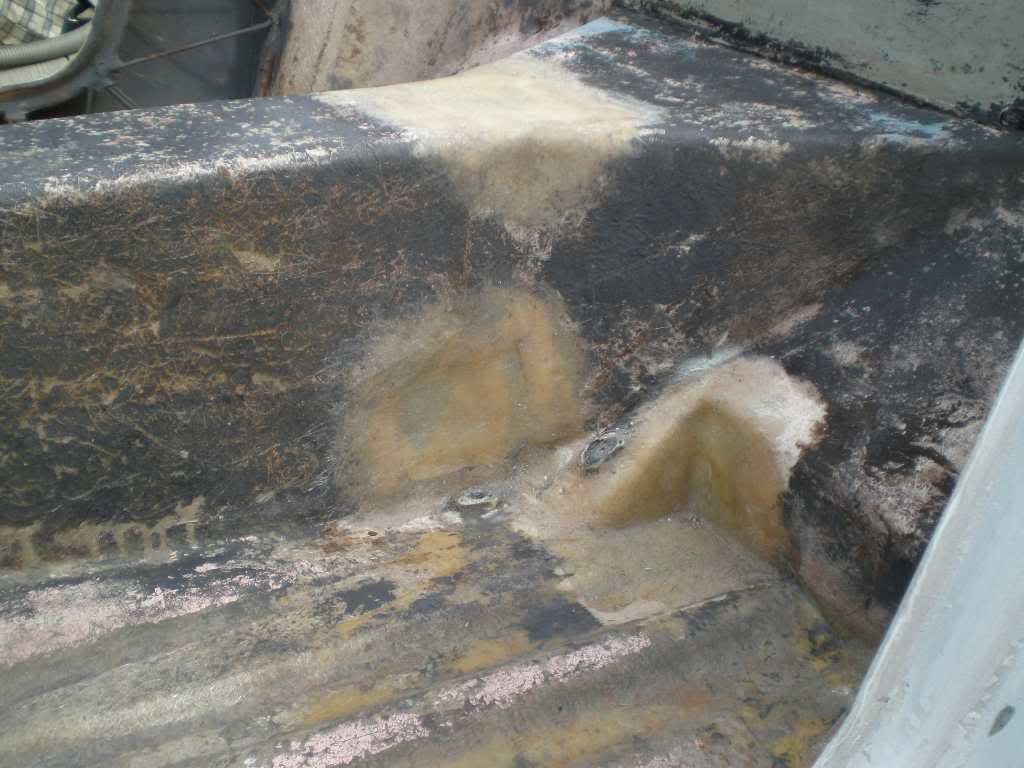
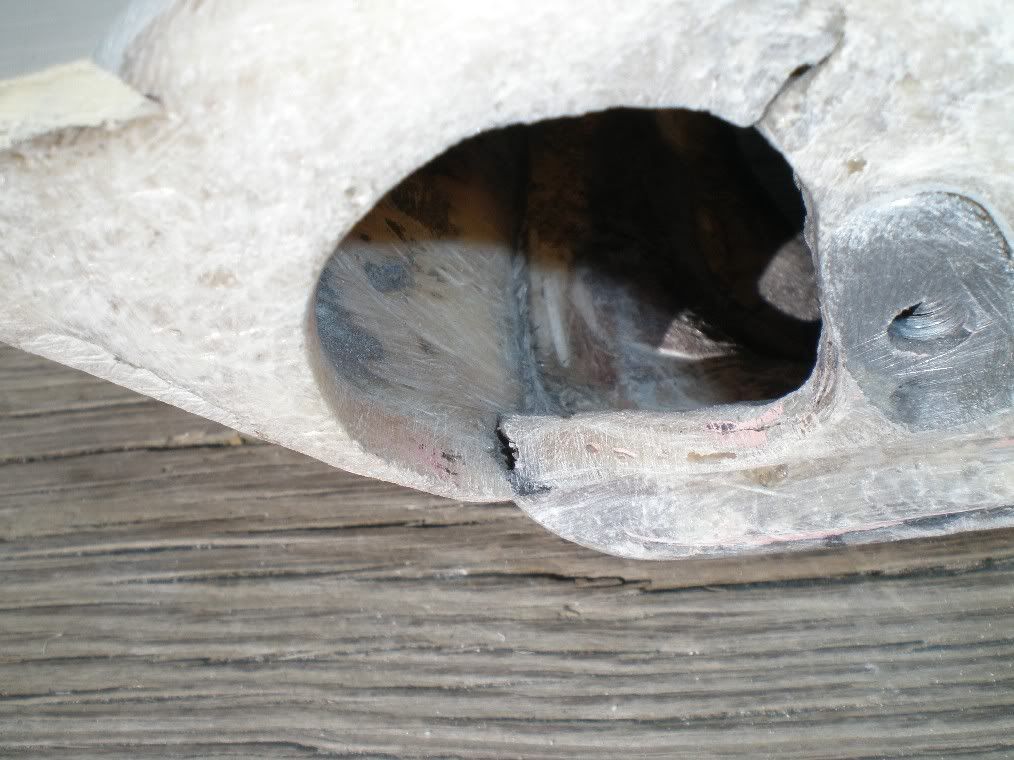
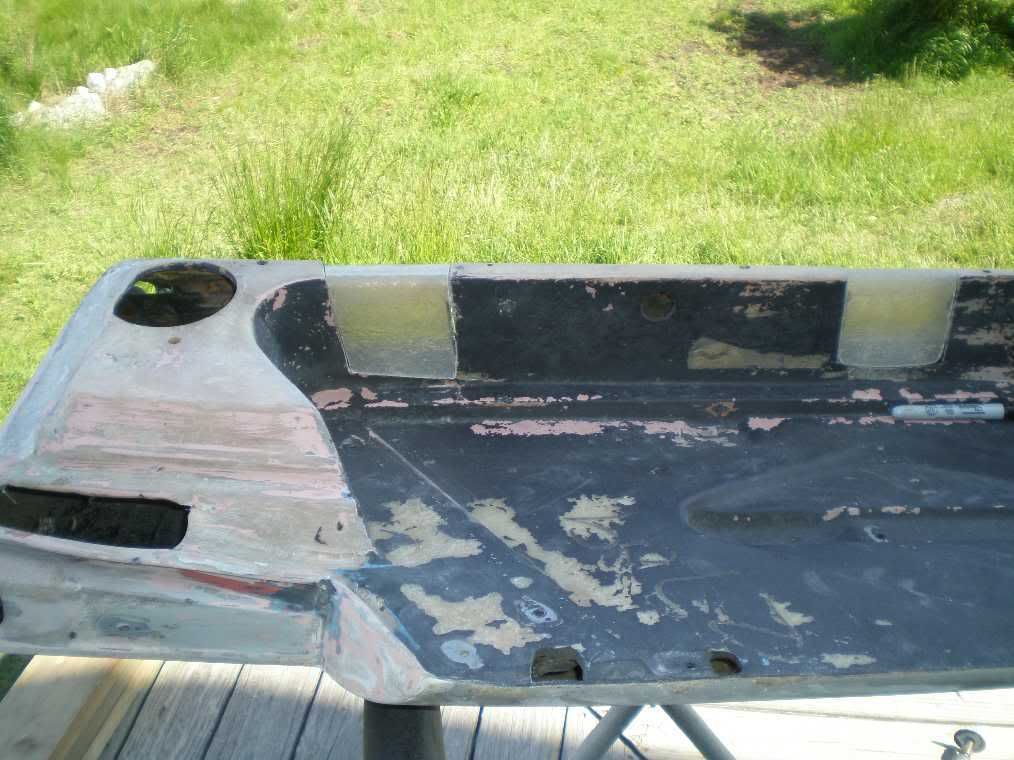
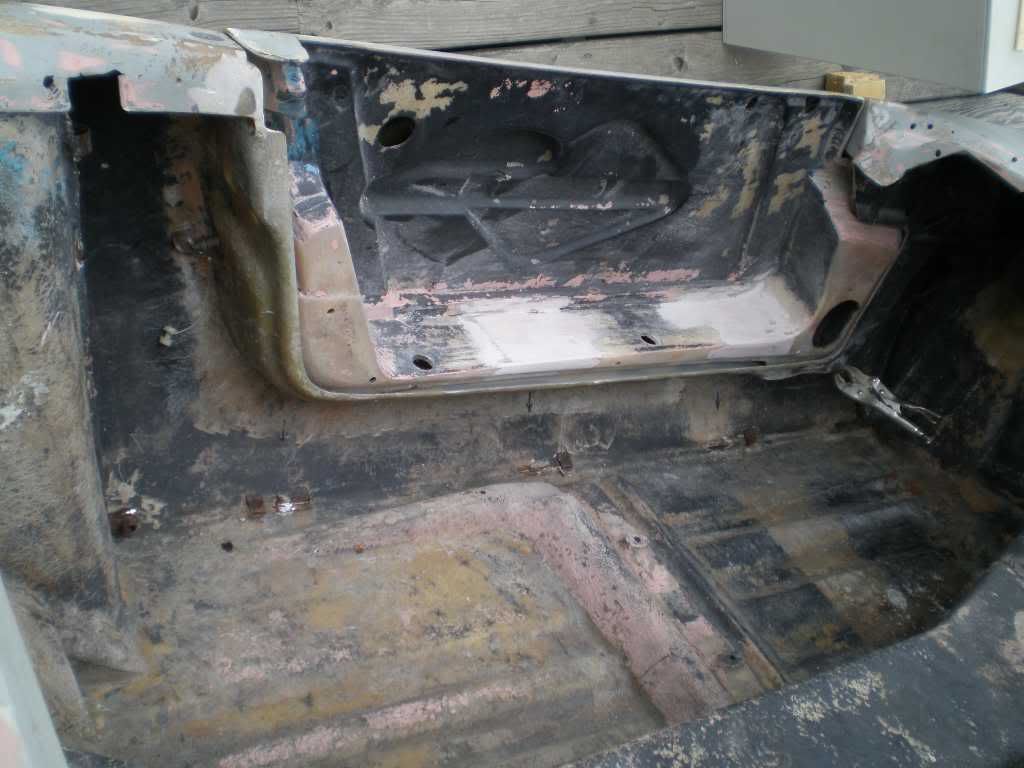
The inner arch show how much was cut away on the back of the photo above.
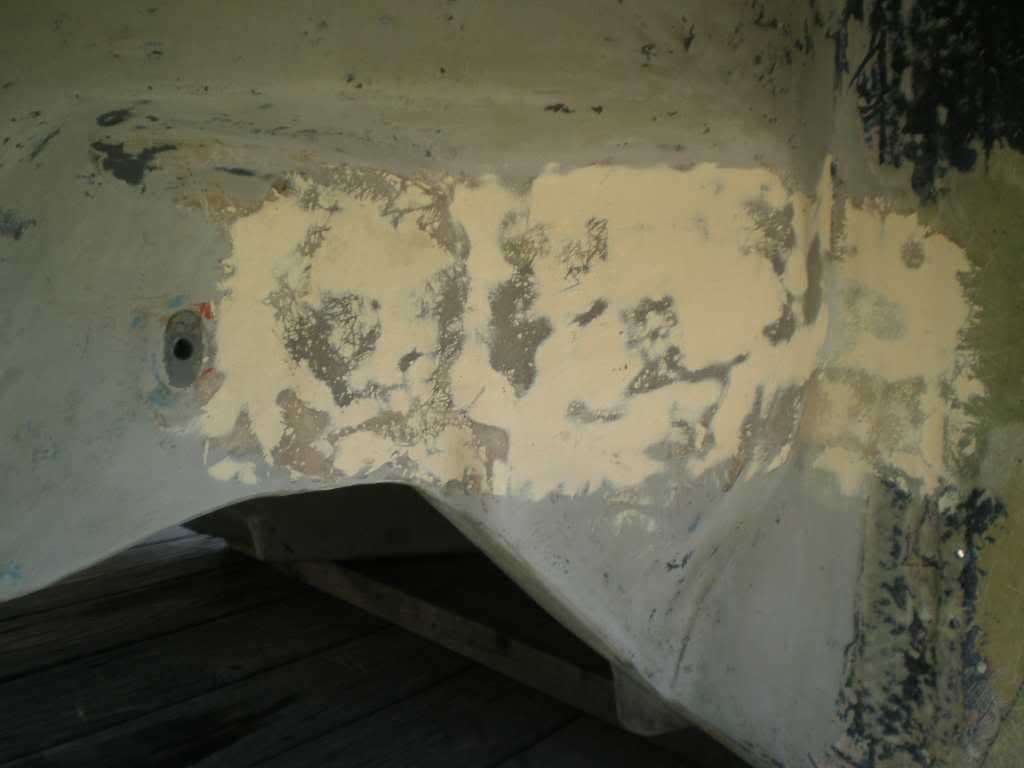
Same patch as the above two photos from the left (original U.S. drivers side) the foot well.
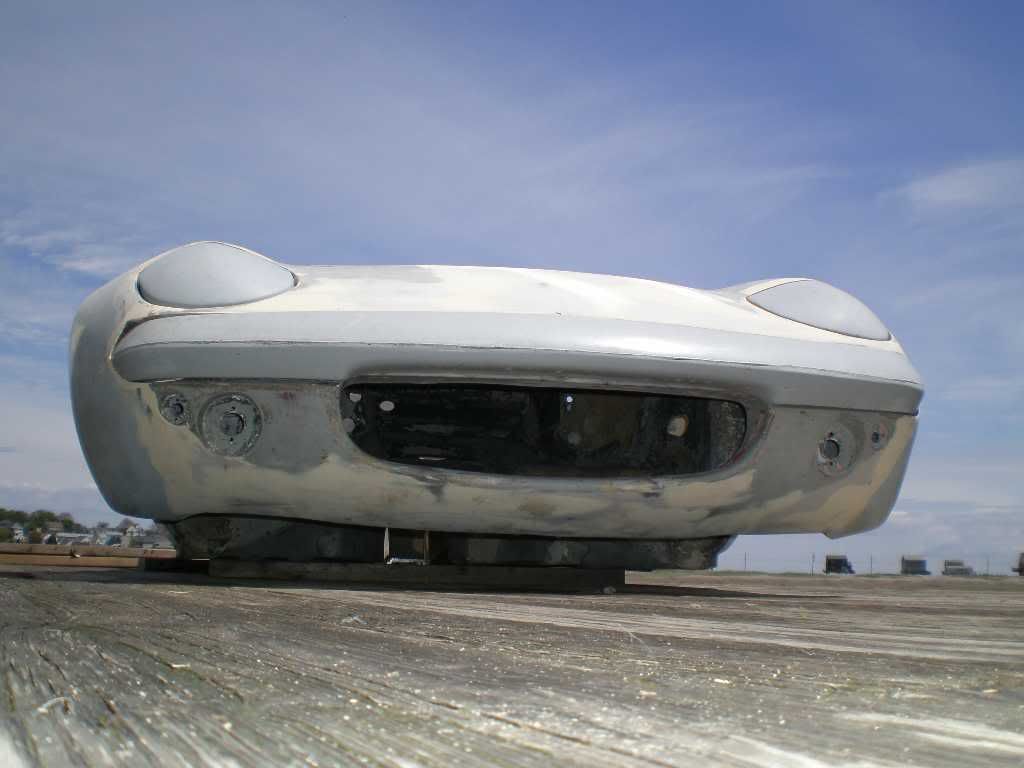
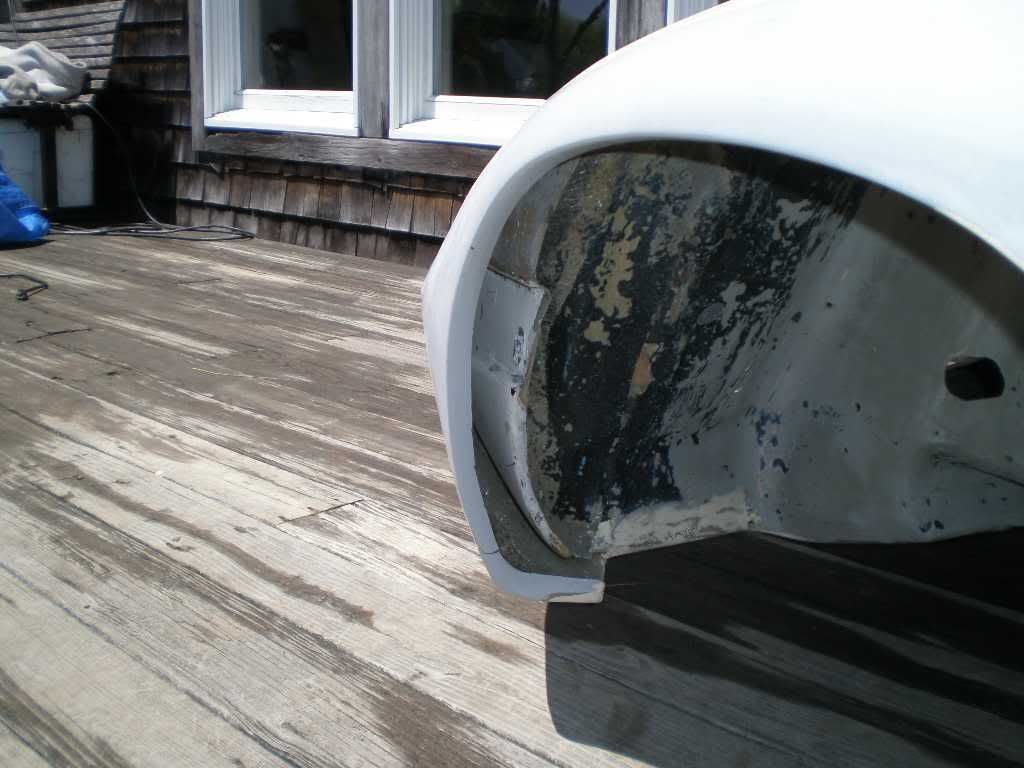
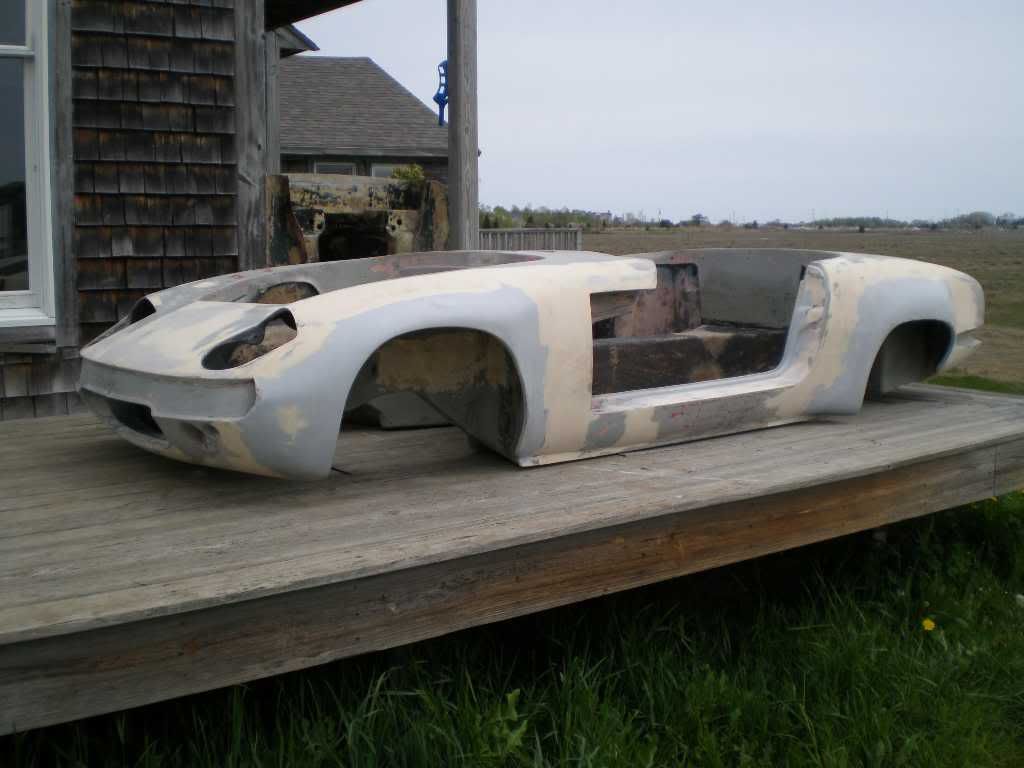
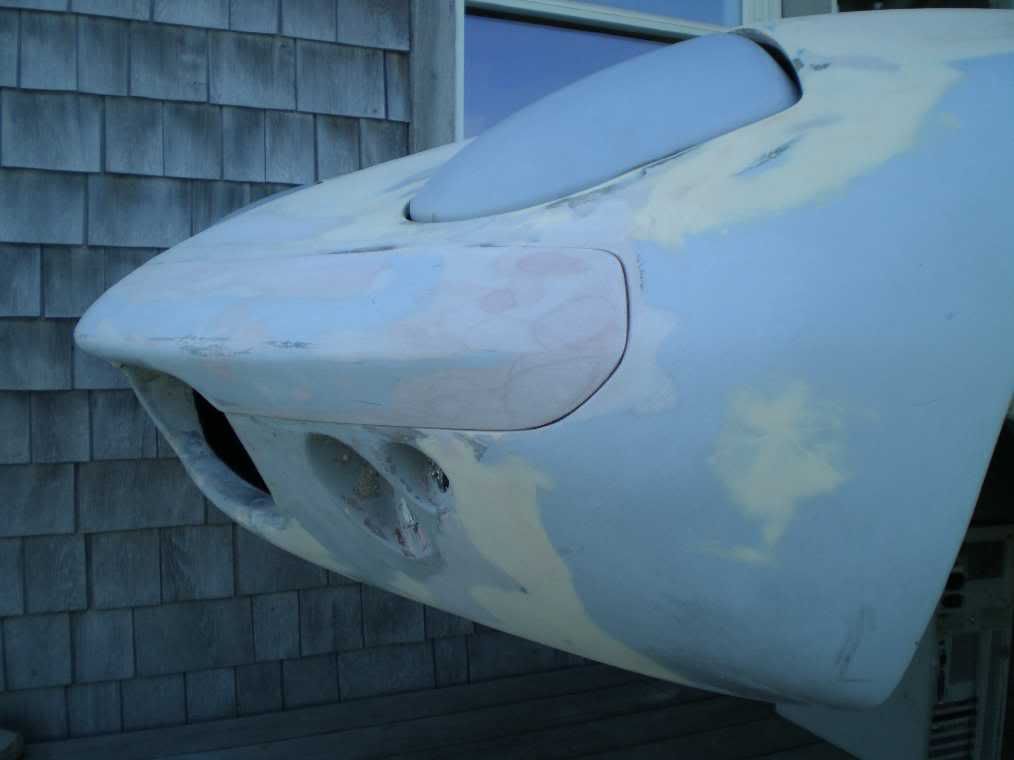
This photo show how large the rear arch is.
The front left arch looks small in comparison
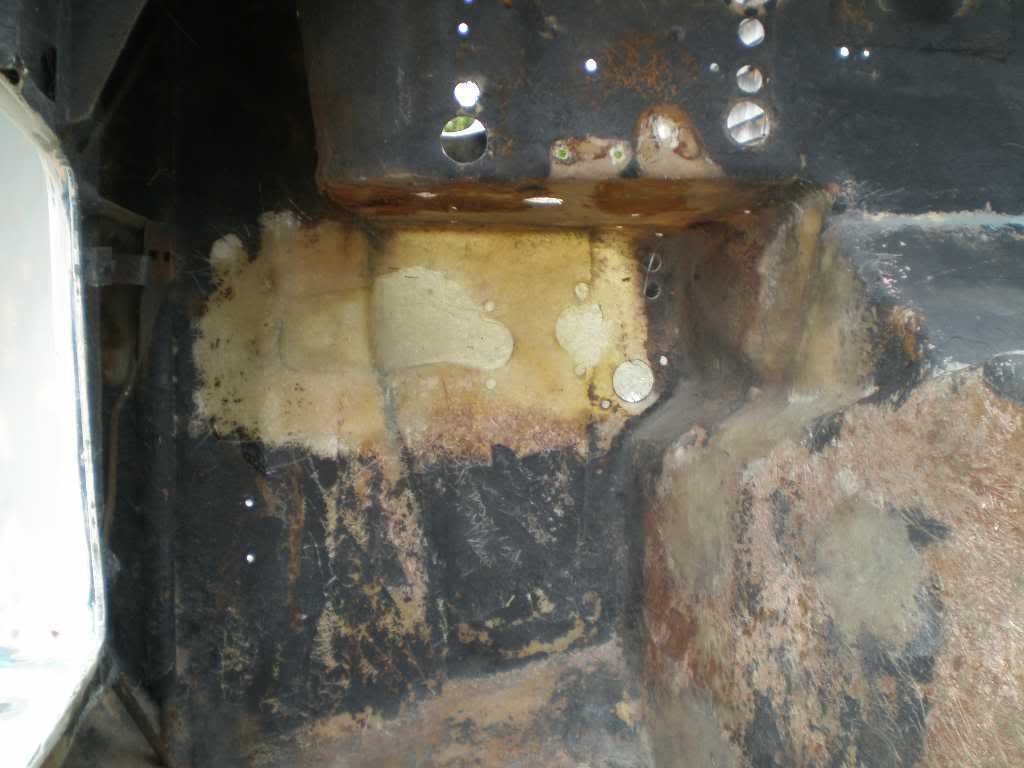
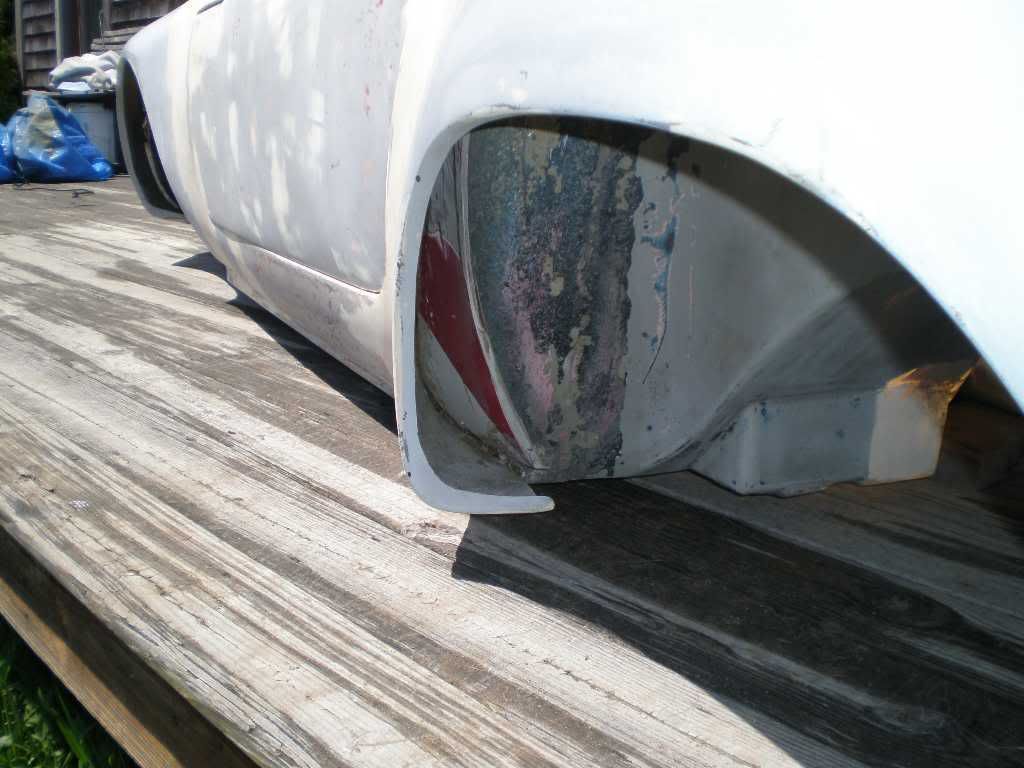
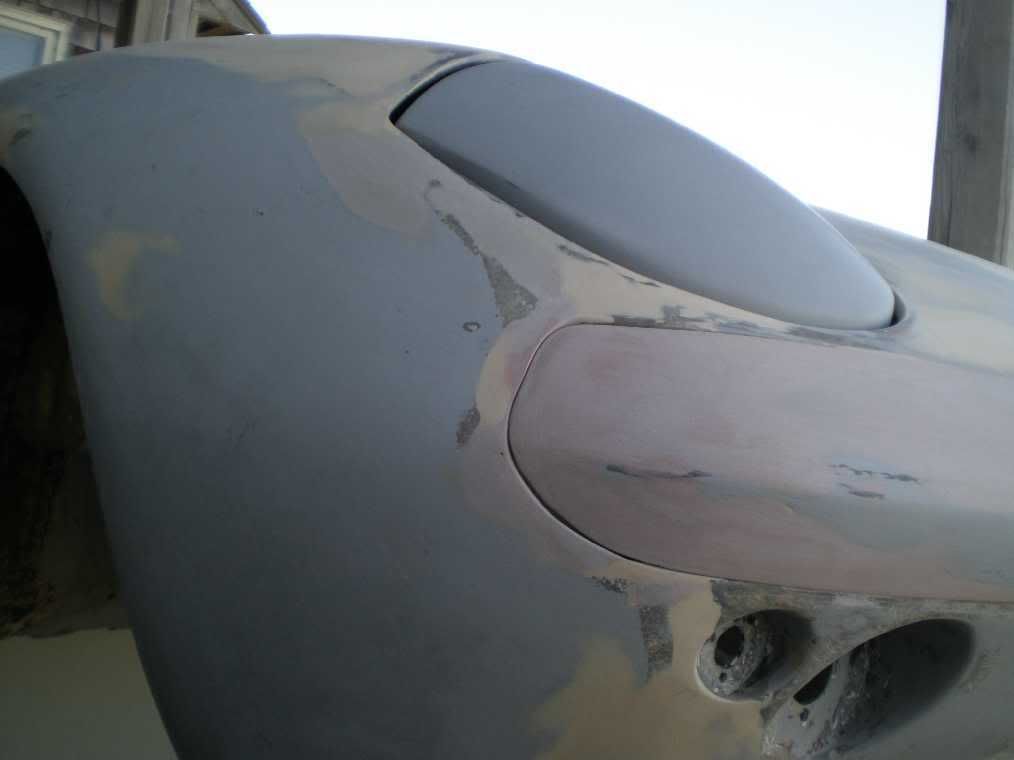
The rear arch still has some of the old TLC color scheme on it. I didn't want to loose its entire heritage
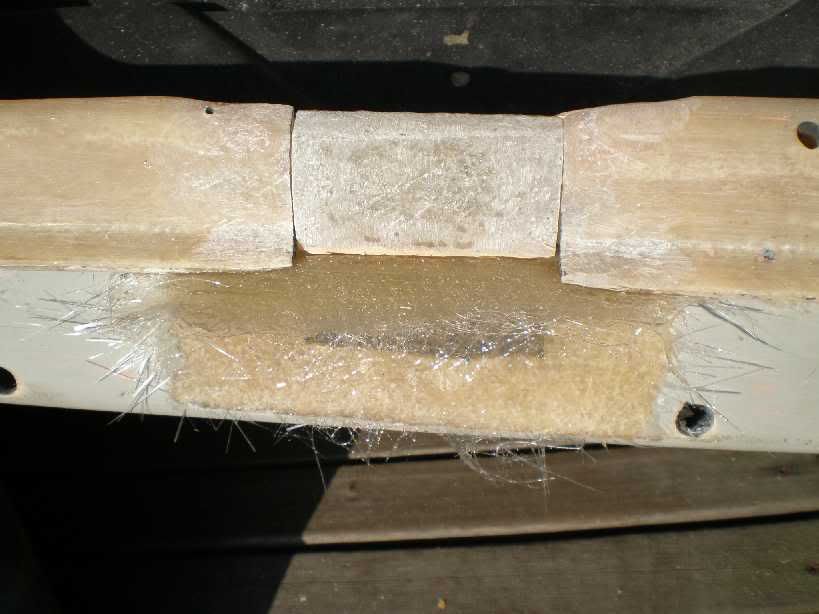
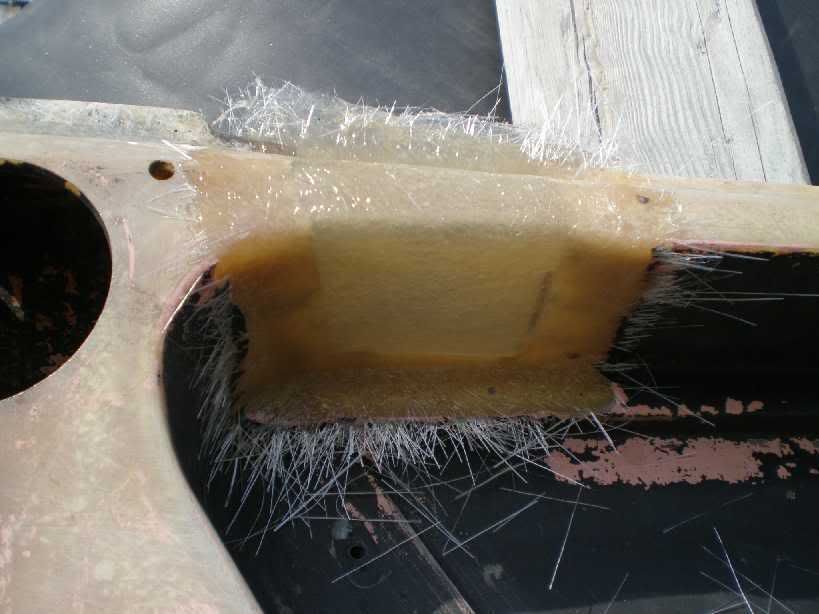
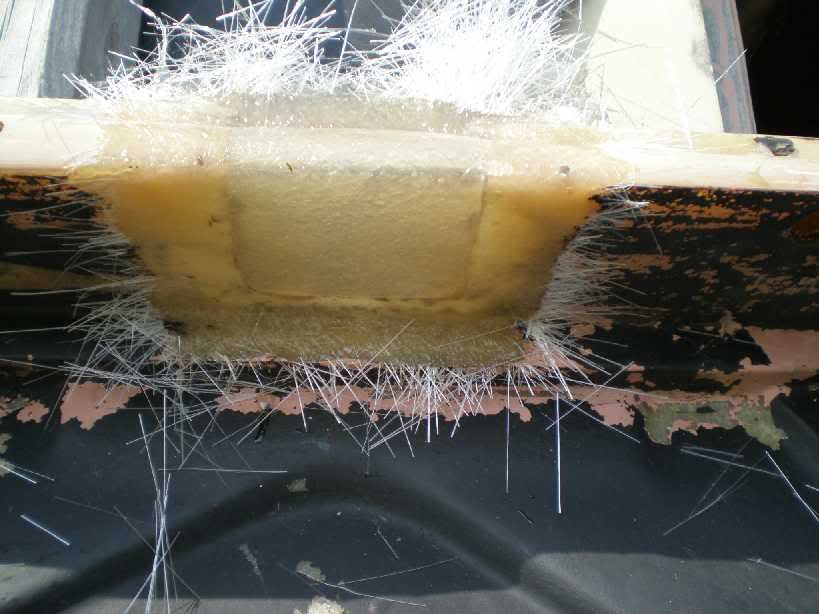
Lattice around the Left door was cut out for the roll cage along with the the inner sill. I needed to mold up a piece to replace it with and bond it in. I still need to replace the lattice work.
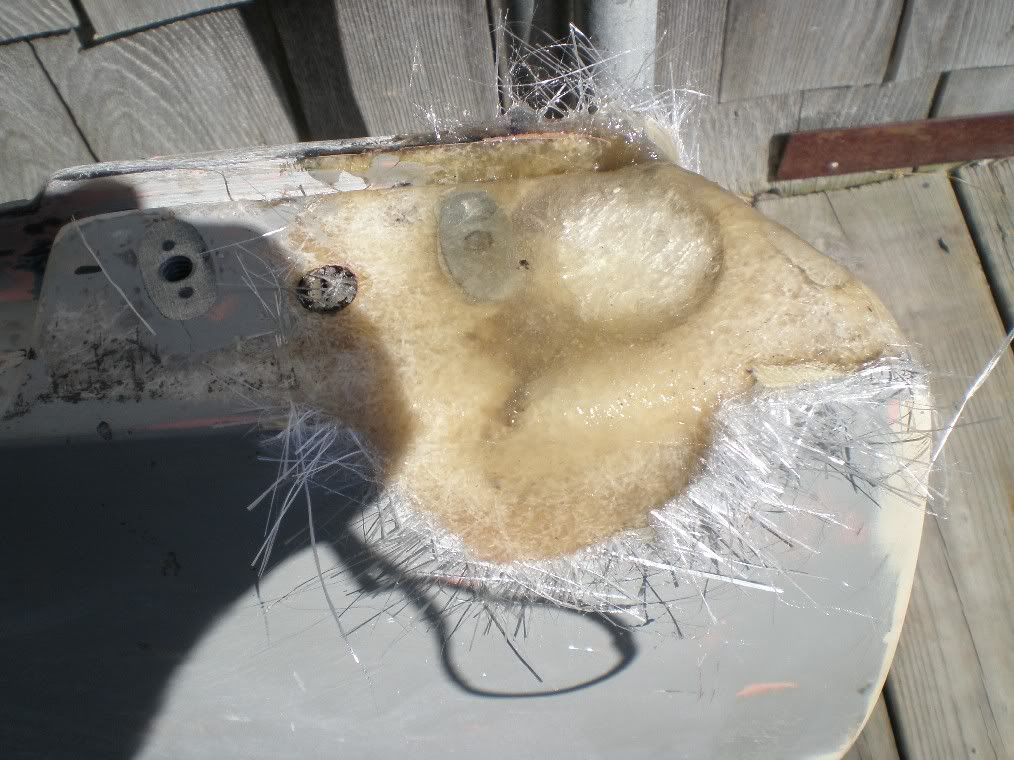
More holes filled...
still more holes
Still needs more sanding to get rid of the rest of the red spot putty, unfortunately its down below the gelcoat.
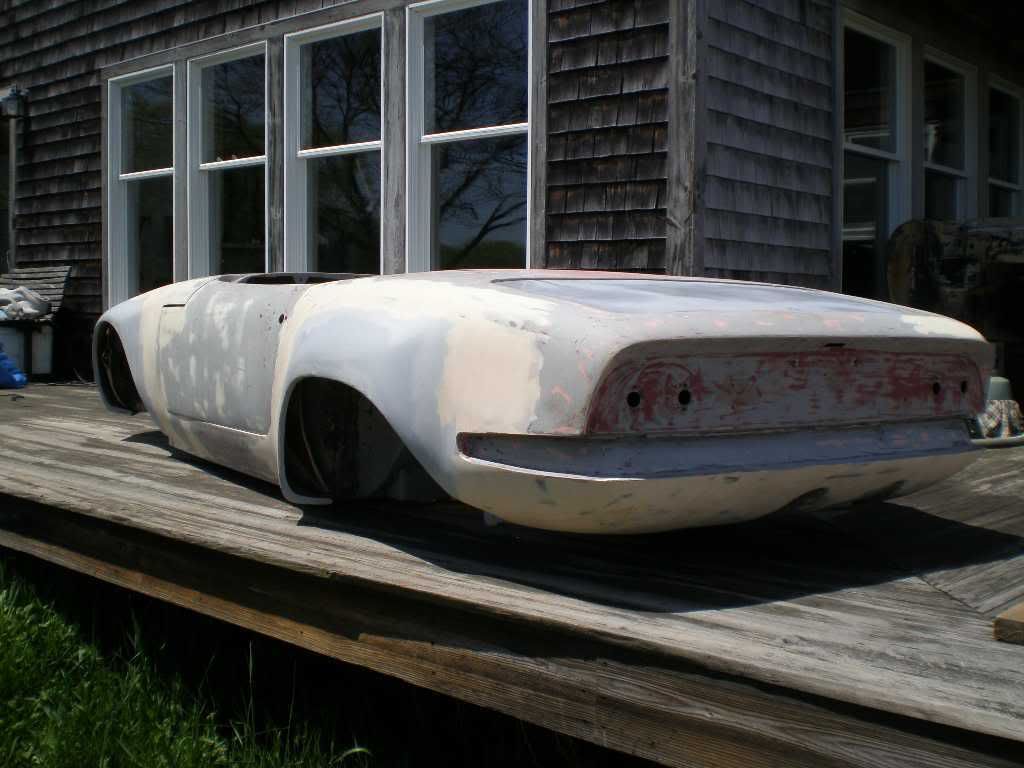
As it was when I dragged it out yesterday.

Tingles ex C-Prod race car body as I bought it, well you can see a little of it.
Low ground clearance?
My friend Bill Hough molded the bonnet in one of my molds for a customier and it was never picked up or paid for so I'll put it to good use.
The door lattice is perfect on the right side.
One of the many holes that the roll cage went through to pickup the front shock towers.
The left side needed the same patch.
The inner arch show how much was cut away on the back of the photo above.
Same patch as the above two photos from the left (original U.S. drivers side) the foot well.
This photo show how large the rear arch is.
The front left arch looks small in comparison
The rear arch still has some of the old TLC color scheme on it. I didn't want to loose its entire heritage
Lattice around the Left door was cut out for the roll cage along with the the inner sill. I needed to mold up a piece to replace it with and bond it in. I still need to replace the lattice work.
More holes filled...
still more holes
Still needs more sanding to get rid of the rest of the red spot putty, unfortunately its down below the gelcoat.
As it was when I dragged it out yesterday.
Last edited by garyeanderson on Thu May 29, 2008 12:20 am, edited 1 time in total.
-

garyeanderson - Coveted Fifth Gear

- Posts: 2634
- Joined: 12 Sep 2003

![]() Post by: Ross Robbins » Mon May 19, 2008 12:50 am
Post by: Ross Robbins » Mon May 19, 2008 12:50 am
Gary,
Thanks for the photos. It is great of you to preserve some real SCCA history. What years did Don race that car? With those flares, it would have to be the late '70's,right?It is interesting to me that several of our key suppliers were avid racers of Elans...Dave Bean, Ray Psulkowski, Don TIngle and Dave Veagher. Any more I've missed?
Thanks for the photos. It is great of you to preserve some real SCCA history. What years did Don race that car? With those flares, it would have to be the late '70's,right?It is interesting to me that several of our key suppliers were avid racers of Elans...Dave Bean, Ray Psulkowski, Don TIngle and Dave Veagher. Any more I've missed?
- Ross Robbins
- Third Gear

- Posts: 298
- Joined: 03 Apr 2006

![]() Post by: garyeanderson » Mon May 19, 2008 2:07 am
Post by: garyeanderson » Mon May 19, 2008 2:07 am
Hi Ross
When I bought my first Elan in 75 I went to Don for parts as he was about 25 miles away. He had the Seven in his shop in Watertown. I didn't see this Elan except in a photo at the Tewksbury shop. I never saw it in the flesh until I picked up the body in Somerville from Charles. I told Don I had the body and was putting it back to the way it looked when he had it (well, except tor the paint scheme). Don said the log book was around some place, if he came across it I could have it. Bill hough said he painted it so I assume he did the first set of flairs before he painted it (same molds I borrowed). I don't have a clue on how much or when it was out on the track.
Hi George
I think a quart is about enough to do the doors, boot, bonnet, headlamp buckets and bumpers, probably need nearly another 3 quarts for the body. After moving both the S2 and the S3/S4 around, I am supprised how heavy the S2 is. The fiberglass seem to be a lot thicker on the S2 or maybe I am just getting old... Body number is 3709 from Unit number 4100
-
garyeanderson - Coveted Fifth Gear
- Posts: 2634
- Joined: 12 Sep 2003
![]() Post by: CBUEB1771 » Mon May 19, 2008 2:28 pm
Post by: CBUEB1771 » Mon May 19, 2008 2:28 pm
Ross Robbins wrote:What years did Don race that car? With those flares, it would have to be the late '70's,right?
I became a "regular" at TLC (Tingle's Lotus Center) in Watertown when I bought my +2 in July 1977. The C-Production Elan was already a hanger queen in his back shop, completely taken apart. He was trying to put it back together. Eventually Don decided to commission the late Ed Loveday to build the racer to a high standard. Don sent the whole kit send it to Ed's shop, the Avon Pit Stop. Noel Poduje was also racing a C-Production Elan at the time and Noel was kind enough to lend Don all of his design notes and specifications. From these notes I made a set of top strut mounts for the rear in the machine shop at work. These located the top of the strut insert in a spherical bearing and allowed the camber to be adjusted. I made a few other bits but I don't recall what they were. Don, Ed and I had a few evening "design review meetings" at a bar called D. D. Cooper's that was not far from Ed's shop. The bar was named after the fellow who highjacked a Boeing 727, picked up ransom money in a sack and then parachuted out the rear door somewhere over Oregon. Ed was subjected to a big rent increase from his landlord and decided to fold up the Avon Pit Stop and retire before much was done on Don's racer. The story has probably gotten better with time. Oh yes, the original question. Don probably last raced the Elan in the mid seventies.
Russ Newton
Elan +2S (1971)
Elite S2 (1962)
Elan +2S (1971)
Elite S2 (1962)
-

CBUEB1771 - Coveted Fifth Gear
- Posts: 1546
- Joined: 09 Nov 2006

![]() Post by: Ross Robbins » Thu May 22, 2008 3:36 am
Post by: Ross Robbins » Thu May 22, 2008 3:36 am
Thanks Russ,
I always enjoy hearing the history of the marque. The guys who went through this when there was no internet resource did some amazing things. Like spherical bearing mounts for the rear suspension to adjust camber...You clever dog!
I always enjoy hearing the history of the marque. The guys who went through this when there was no internet resource did some amazing things. Like spherical bearing mounts for the rear suspension to adjust camber...You clever dog!
- Ross Robbins
- Third Gear
- Posts: 298
- Joined: 03 Apr 2006
![]() Post by: garyeanderson » Tue May 27, 2008 7:07 pm
Post by: garyeanderson » Tue May 27, 2008 7:07 pm
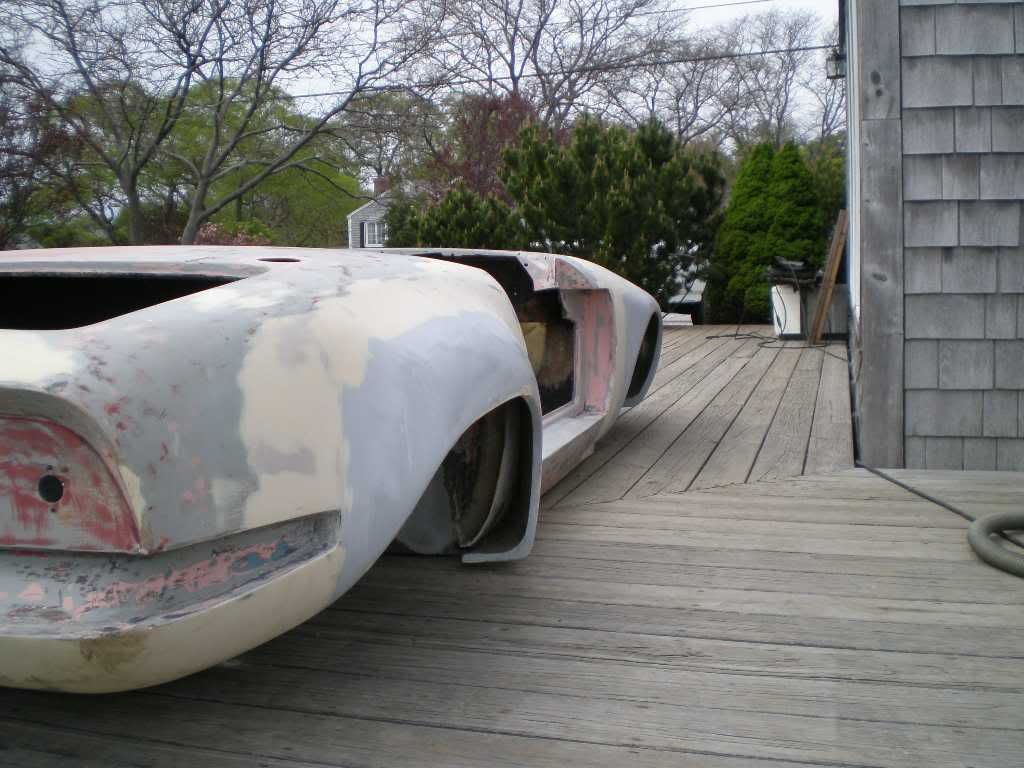
I spent the Memorial day weekend around the house, I didn't want to contribute to the Exxon profits. Vote with your wallet mentality I guess. I did a bit of sanding on the back of the Elan to remove as much of the red spot putty as possible as this I know will cause problems later.
Before
After
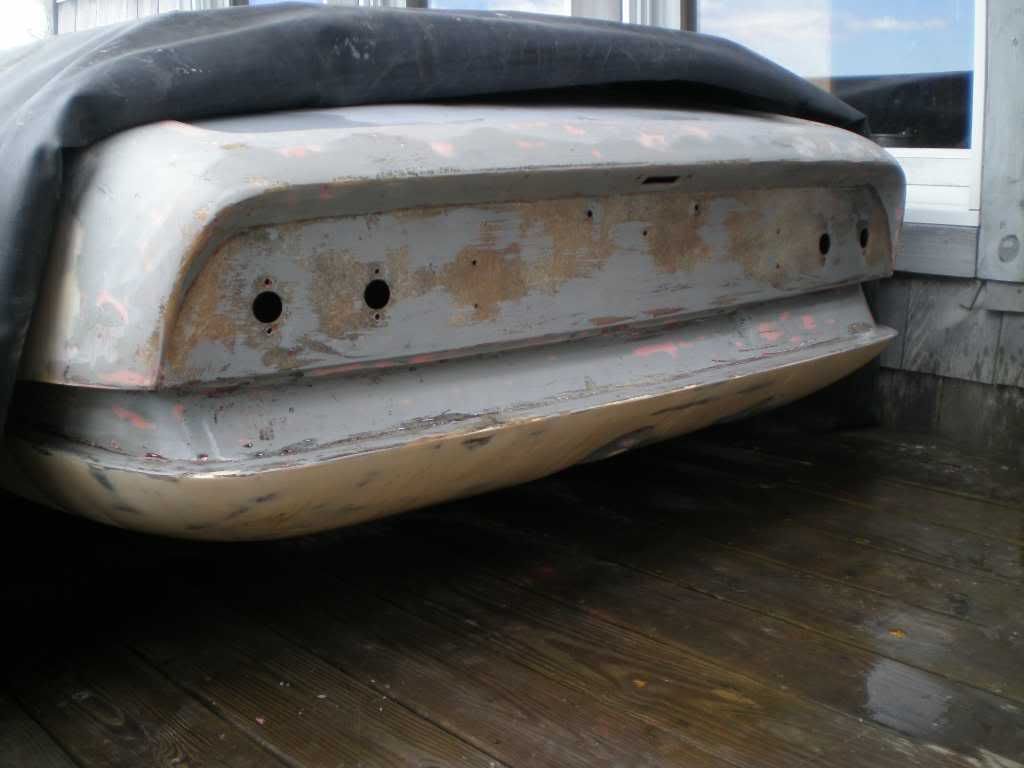
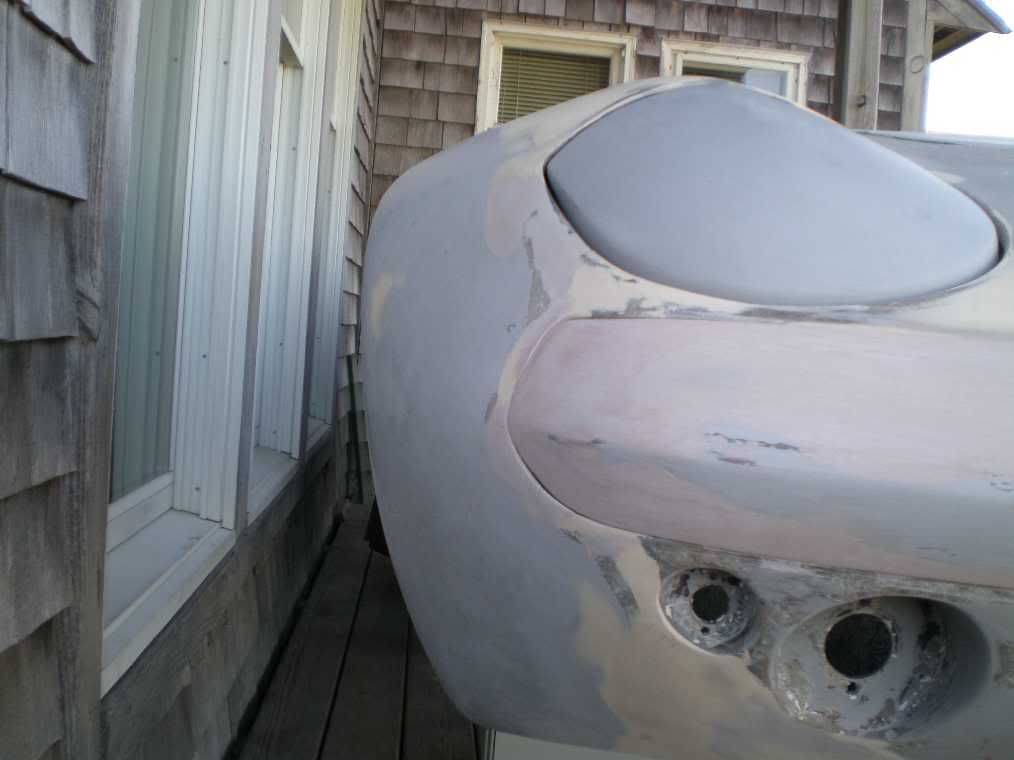
I worked my way up into the boot gutter as I had left this somewhat unfinished two years ago when the weather turned in late August. I then looked at the doors and decided that I shoud have done a better job on the left door. When I looked at it, more red spot putty and I had forgotten about the crummy repair. I guess I had decided to use another left door but it needed work too. So back to the original and I got the drill out to remove the pop rivited aluminum ducthman patch. The door must have been opened too far and split open at the hinge pivots. It was repaired at one time with aluminum sandwiched between and 6 oz. cloth over the ally, god I hate it when people have to mess up a repair like this. It still needs a bit more glass work but the top hinge area is as good as it neeeds to be for now. Then I looked at all of the BRG, blue and primer and it needed to come off. I spent a day and a half sanding the door perimeters of both left and right. So my sholders are a bit sore today and the temp and humidity are way up there. I thought about going over to Bill Hough's and working on a rear bumper mold but decided to vote with my wallet again and stay home. Lets see too hot and humid for sanding, that front bumper sure looks ugly, I can probably get that a little further along. Well here are the photos.
before
after
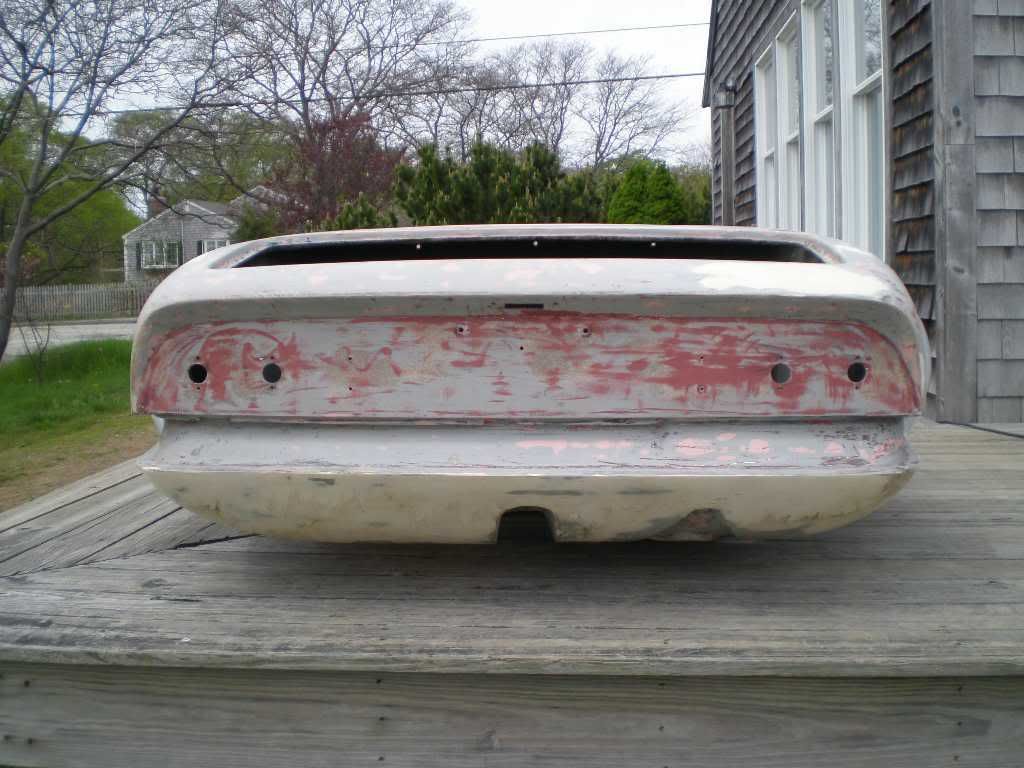
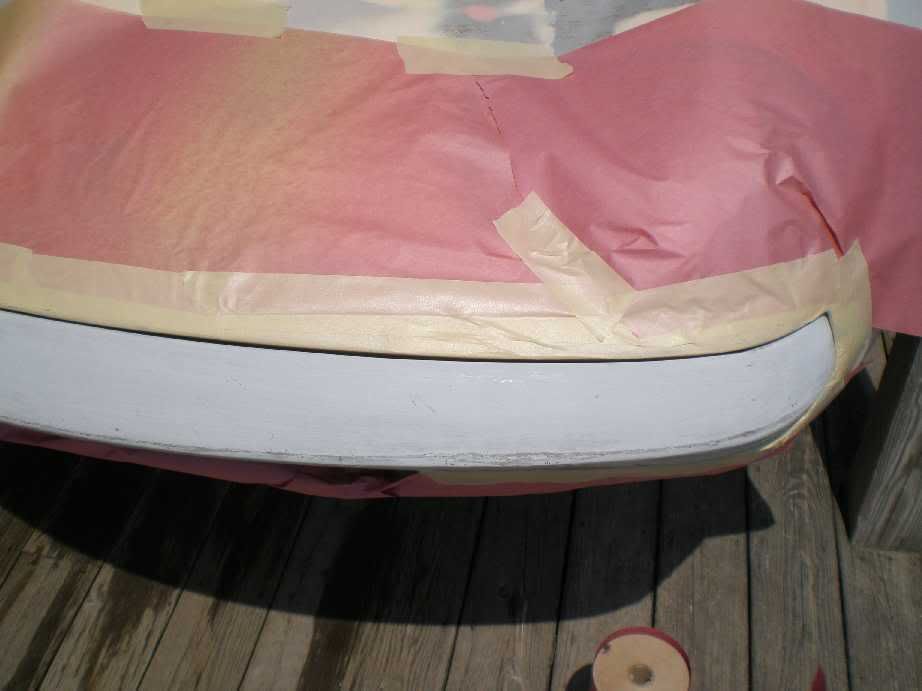
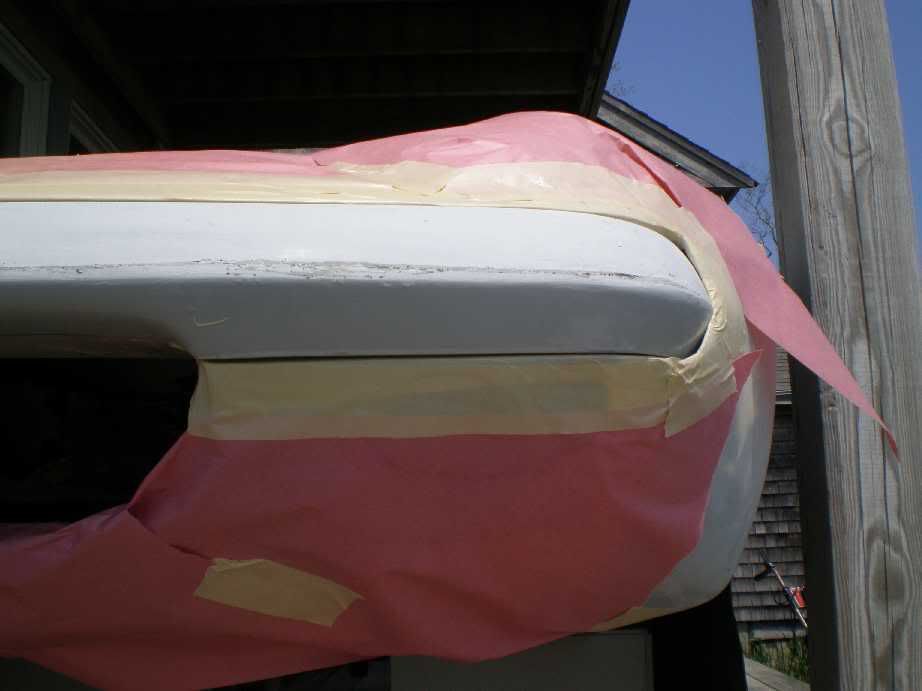
The first ting to do was to mask off the opening, any where that I would get filler on, I should have waxed it but I didn't.
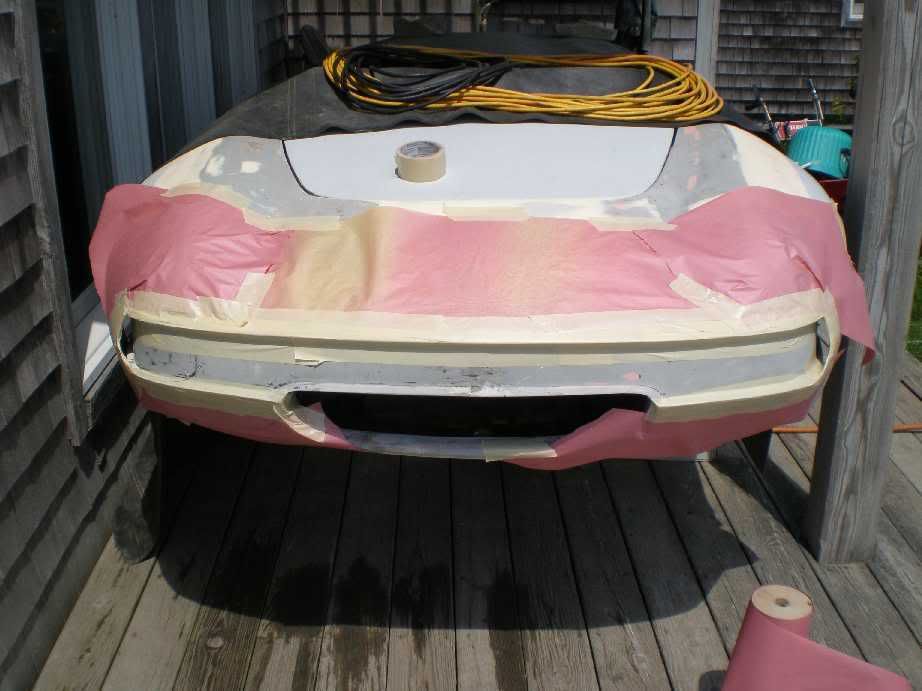
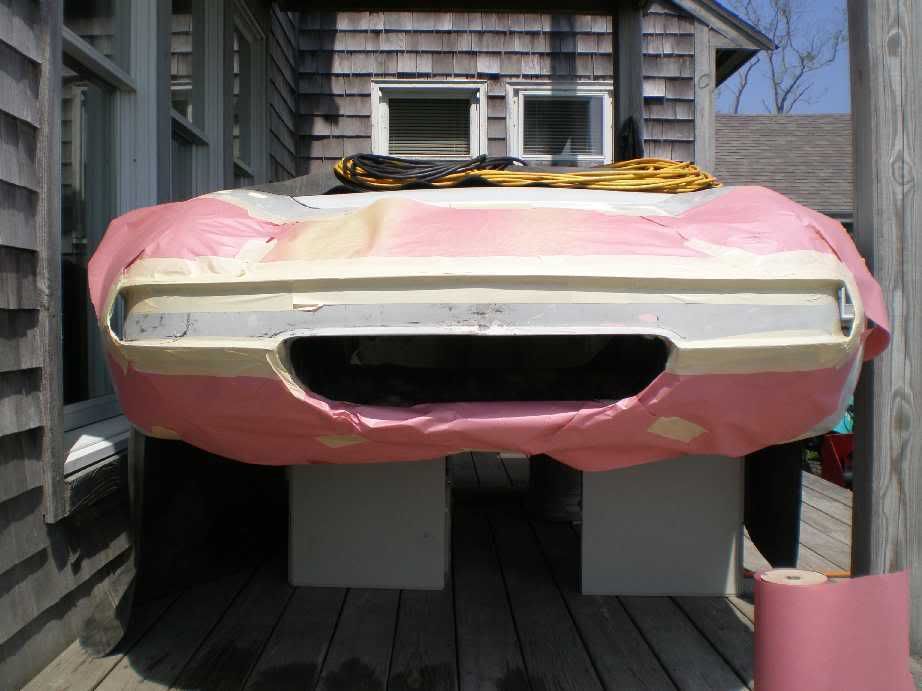
Sure looks ugly with that big gap there, the mold is 30 years old and has produced a quite a few pieces, I doubt it was a good bumper that the mold was taken from.
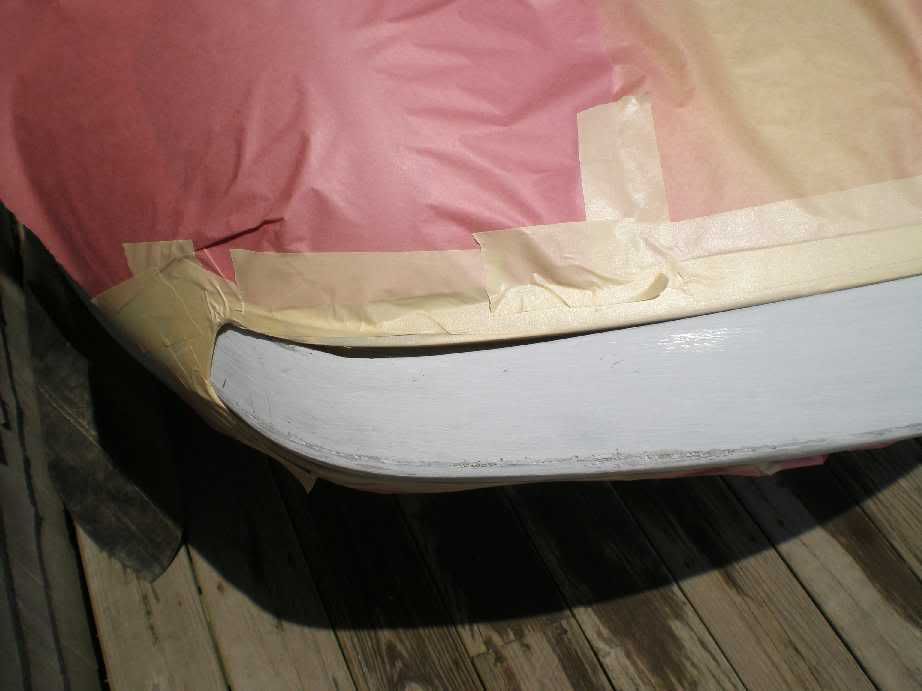
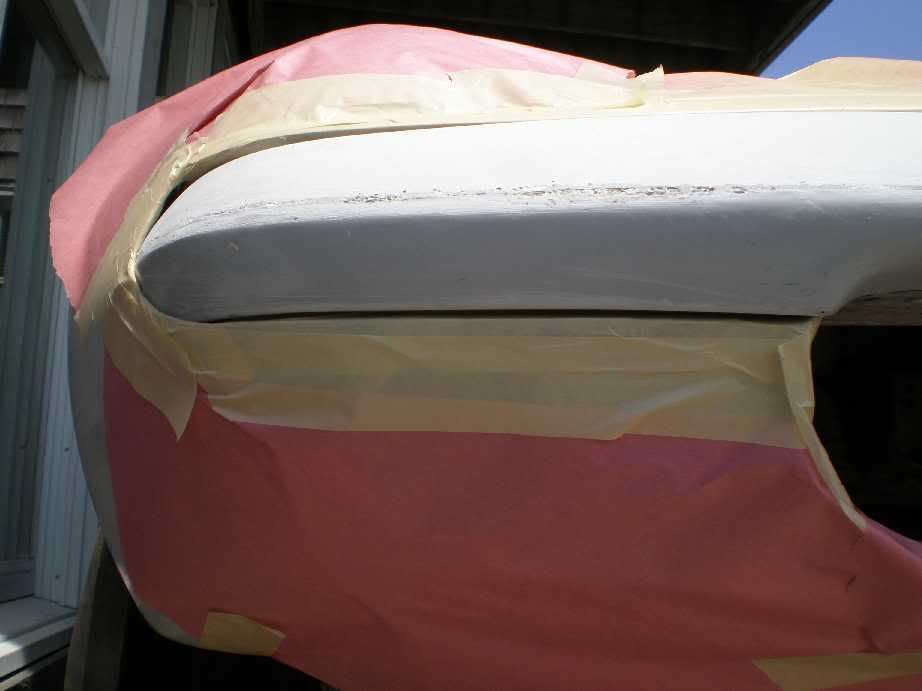
The gap isn't too bad on this side but still needs work.
The under side isn't bad but if it doesn't fit well it will move around the the top side will look like hell again.
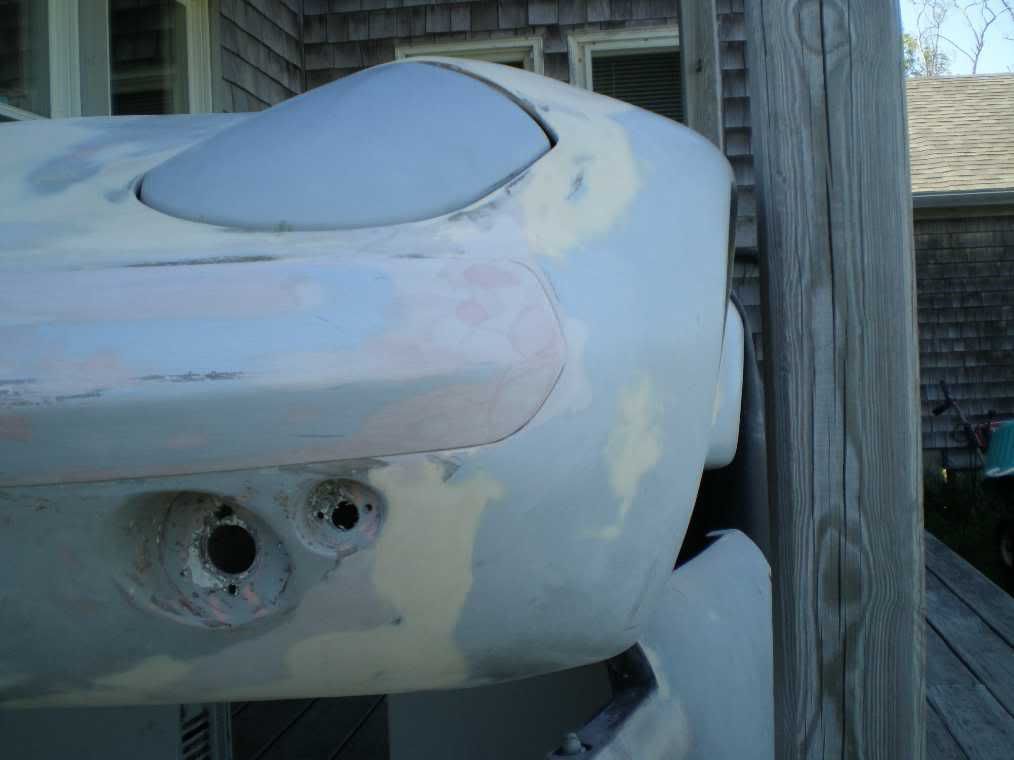
Several coats of bondo forced into the gaps with a spreader sanding between coats to take of the high spots.
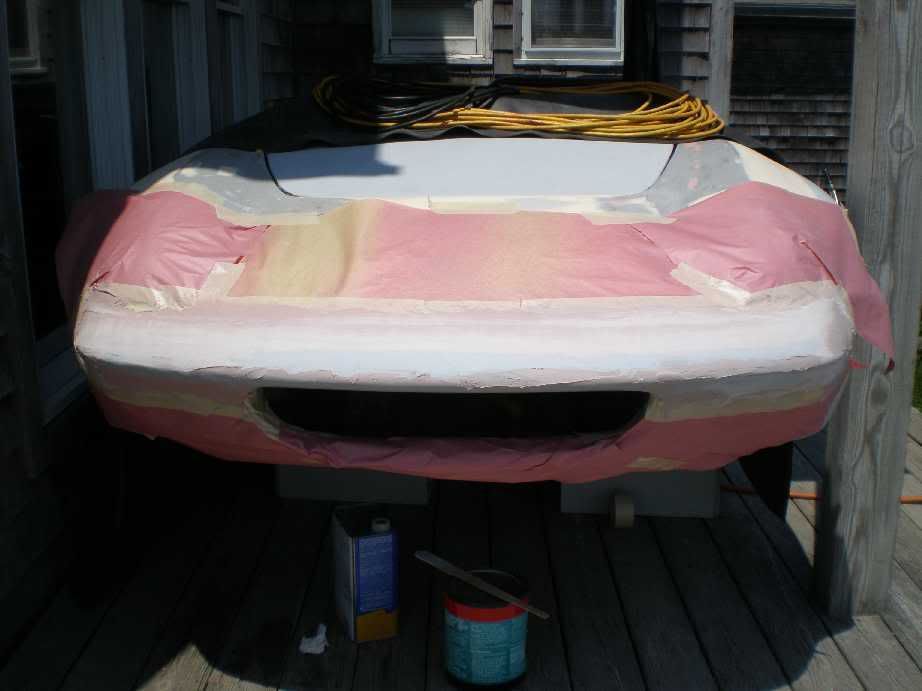
Same with the under side, this wasn't too bad but like I said it will move around if the fit isn't right all the way around.
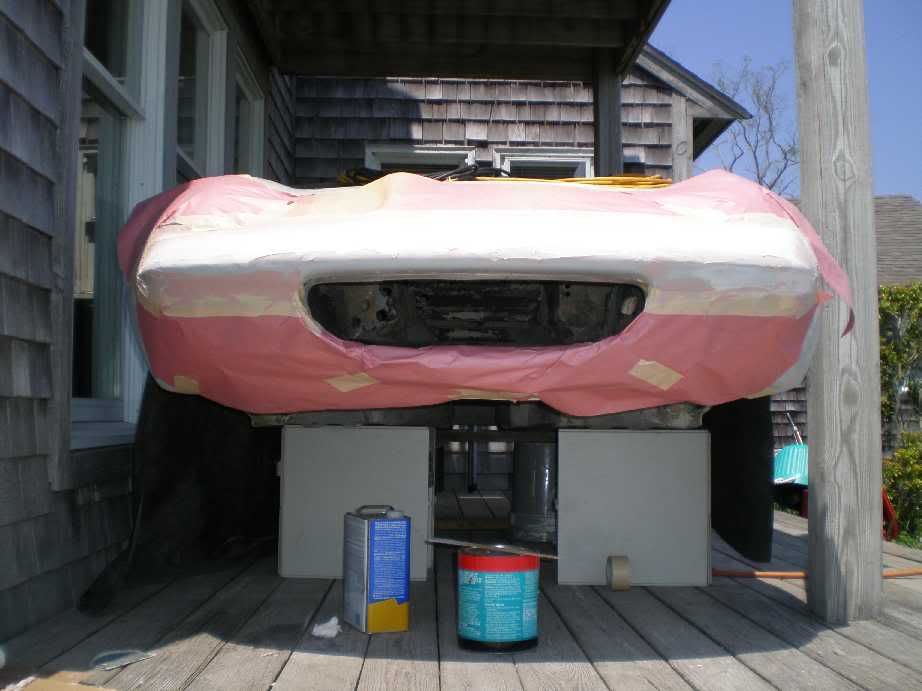
Tape all pulled off, it left some sticky residue that needs to be cleaned but the basic shape is now there and still needs a bit of work to be right.
Right side looks a lot better

Left side is not bad either
Total time about 2 hours and a bit...
---May 28th---
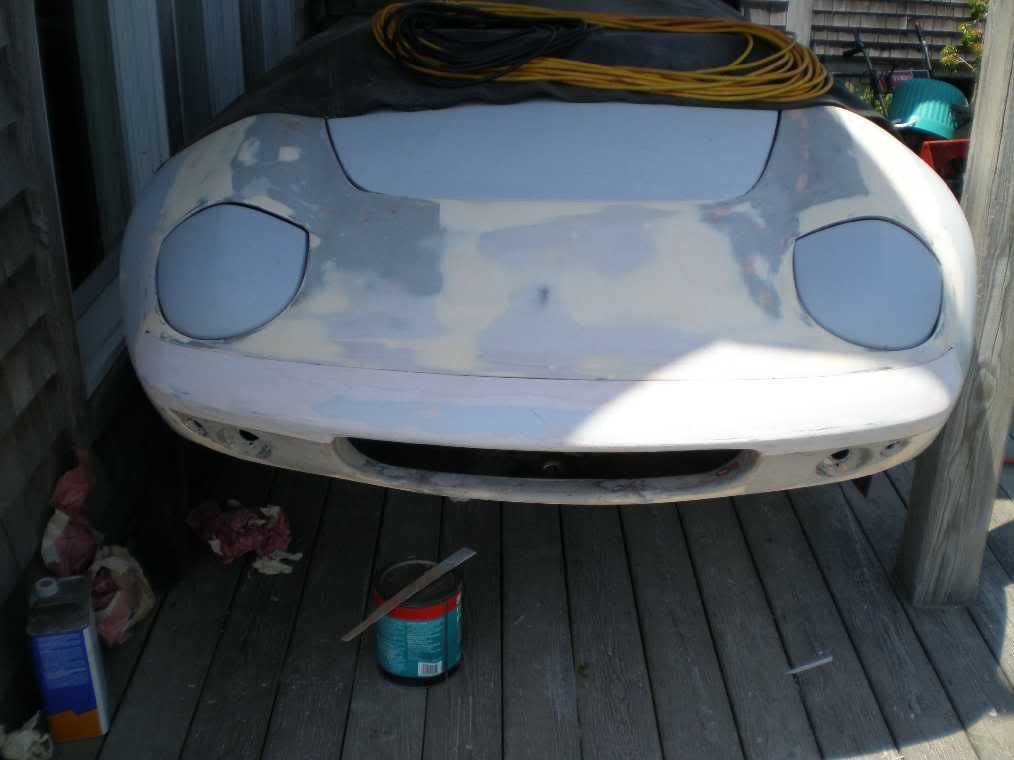
yesterday went pretty well so I continued on with fairing in the front bumper. another 5 hours on and off filling and sanding has made the front somewhat respectable.
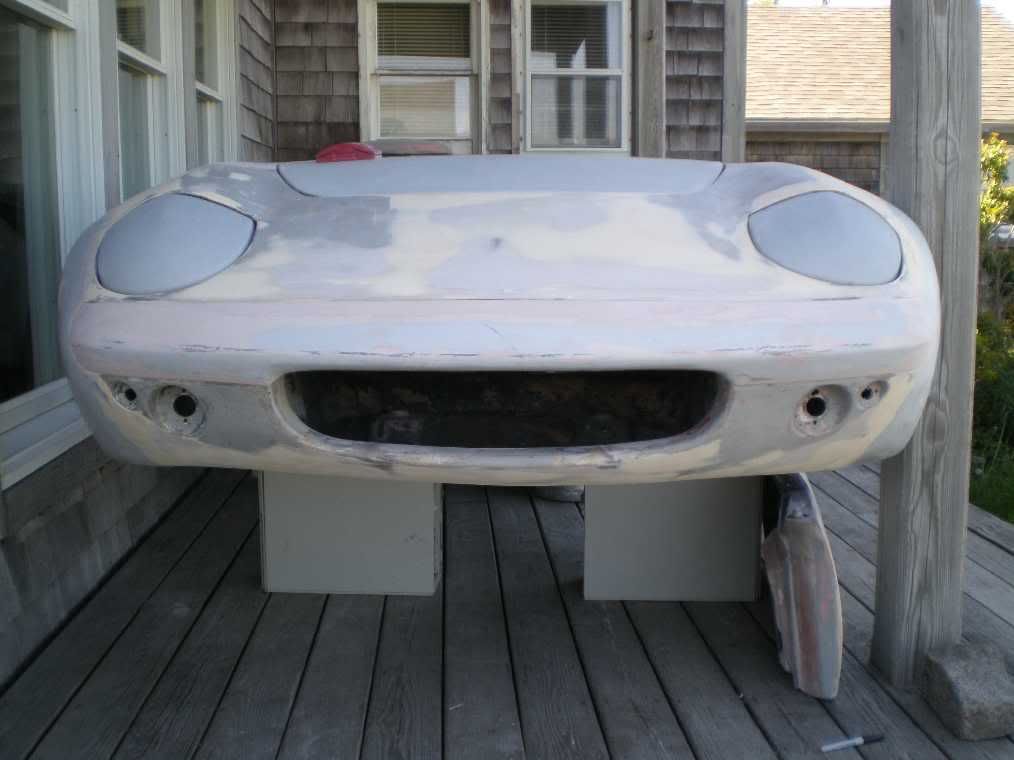
Before
After
I worked my way up into the boot gutter as I had left this somewhat unfinished two years ago when the weather turned in late August. I then looked at the doors and decided that I shoud have done a better job on the left door. When I looked at it, more red spot putty and I had forgotten about the crummy repair. I guess I had decided to use another left door but it needed work too. So back to the original and I got the drill out to remove the pop rivited aluminum ducthman patch. The door must have been opened too far and split open at the hinge pivots. It was repaired at one time with aluminum sandwiched between and 6 oz. cloth over the ally, god I hate it when people have to mess up a repair like this. It still needs a bit more glass work but the top hinge area is as good as it neeeds to be for now. Then I looked at all of the BRG, blue and primer and it needed to come off. I spent a day and a half sanding the door perimeters of both left and right. So my sholders are a bit sore today and the temp and humidity are way up there. I thought about going over to Bill Hough's and working on a rear bumper mold but decided to vote with my wallet again and stay home. Lets see too hot and humid for sanding, that front bumper sure looks ugly, I can probably get that a little further along. Well here are the photos.
before
after
The first ting to do was to mask off the opening, any where that I would get filler on, I should have waxed it but I didn't.
Sure looks ugly with that big gap there, the mold is 30 years old and has produced a quite a few pieces, I doubt it was a good bumper that the mold was taken from.
The gap isn't too bad on this side but still needs work.
The under side isn't bad but if it doesn't fit well it will move around the the top side will look like hell again.
Several coats of bondo forced into the gaps with a spreader sanding between coats to take of the high spots.
Same with the under side, this wasn't too bad but like I said it will move around if the fit isn't right all the way around.
Tape all pulled off, it left some sticky residue that needs to be cleaned but the basic shape is now there and still needs a bit of work to be right.
Right side looks a lot better
Left side is not bad either
Total time about 2 hours and a bit...
---May 28th---
yesterday went pretty well so I continued on with fairing in the front bumper. another 5 hours on and off filling and sanding has made the front somewhat respectable.
-
garyeanderson - Coveted Fifth Gear
- Posts: 2634
- Joined: 12 Sep 2003
![]() Post by: garyeanderson » Sun Jun 01, 2008 8:14 pm
Post by: garyeanderson » Sun Jun 01, 2008 8:14 pm
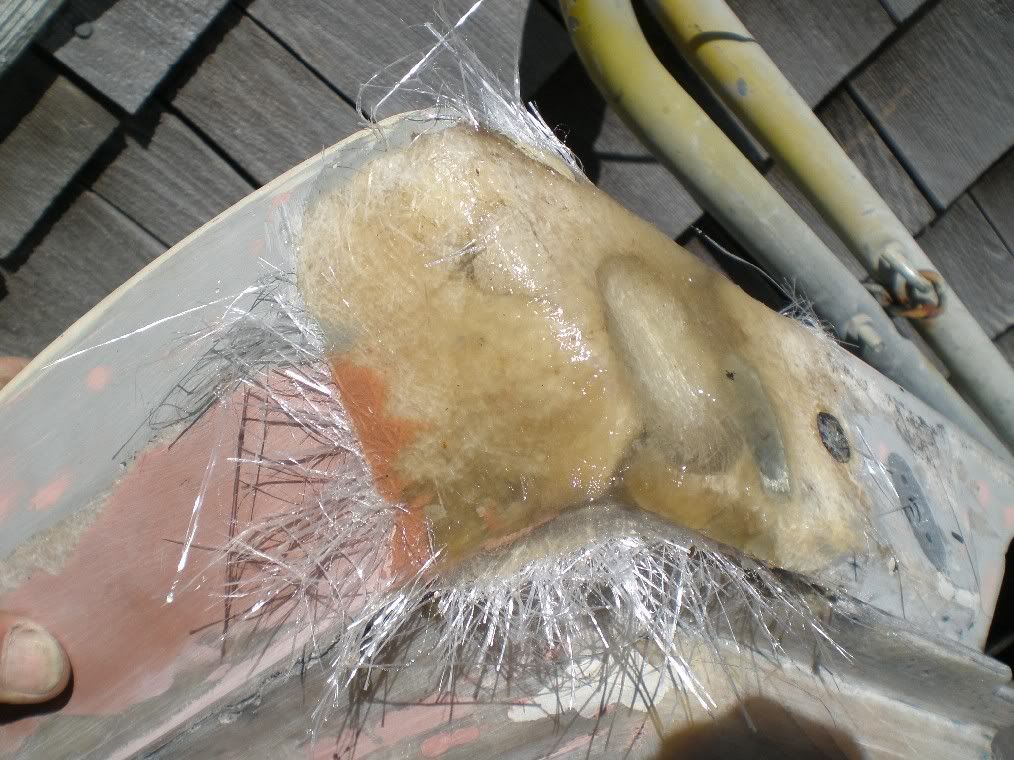
I had made mention in the last reply on how much I enjoy fixing other folks repairs so I continued with the Left door. There was and option to use another door I had but it had been over opened also and needed all of the paint stripped and a quarter inch of filler had been spread on the front half so I decide on using the original door that came with the shell and fix what needed to be done. total time for the door is about five days of more on and off work but in reality there isn't a lot of time when your not working on something. If you had to pay someone by the hour, its cheaper to buy a new door.
This is the top hinge pivot after the repair, I forgot to take the before pictures but it looked just about like the bottom hinge.
Bottom hinge mount after grinding away most of the crack,
new fiberglass matt applied over crack.
my choice of doors, neither one good
I decided to use the original door as the paint was all sanded off and it was original and the fit was good.
The piece in's were made off of the mustard yellow door, I covered the area that I wanted to take a mold of with aluminum foil and gave it a coating of release agent. I was going to mold a part off of the new mold but the shape was close enough that just sliding the piece down a couple inches gave me the width of the taper I was looking for. The new pieces were layed up with three layers of 1 1/2 oz. matt and cut to fit.
Because I used my mold for the actual part the flange ended up in the wrong area, it will be cut off later when I know how much I need to remove.
pieces fitted.
the first step in glassing the new pieces into place was to fill in the area that I did not make pieces for. Using masking tape to span the gaps, this is a relatively simple shape so tape is easy to use and works well for the application.
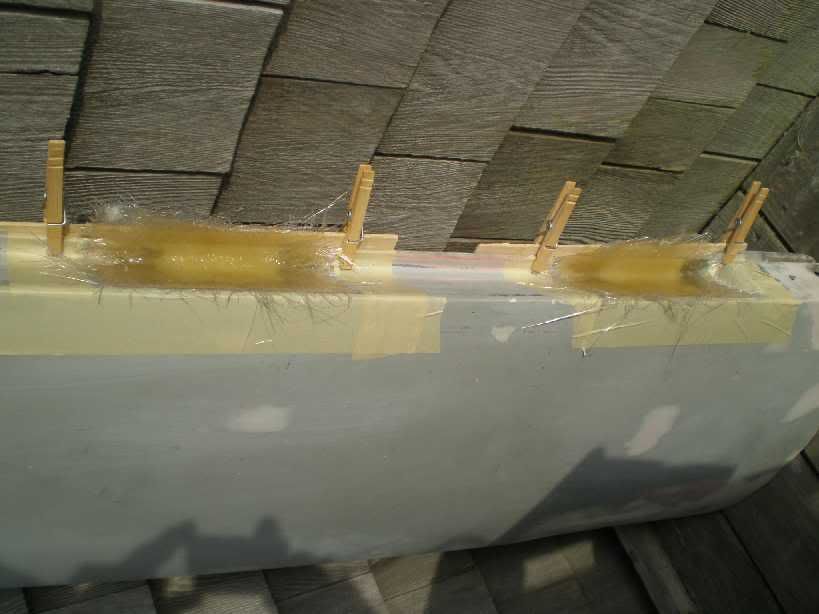
Paint sticks and close pins were used to make shure the new flange was straight.
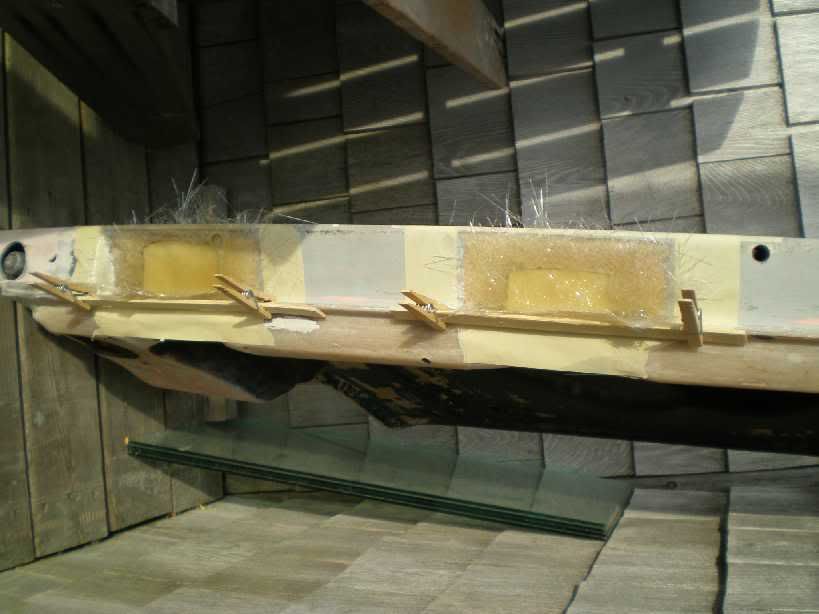
the flange cut off and placed in position, a small spot of bondo on each corner and a bit along the edge of where the flange had been holds it in place for final grinding.
a closer look at the front piece held in with putty and all grinding done, ready for fiberglass mat.
looks pretty ratty here
Glassing done, 3 to 5 layers depending on how much was ground away durring the prep portion.
All of the fiberglass fur ground off leaving the door quite strong.
a couple of coats of bondo to fill in any of the low spots and its close for a coat or two of primer.
The door hung back on Elan, still needs a bit of work but so does the whole exterior of the S2 body.
This is the top hinge pivot after the repair, I forgot to take the before pictures but it looked just about like the bottom hinge.
Bottom hinge mount after grinding away most of the crack,
new fiberglass matt applied over crack.
my choice of doors, neither one good
I decided to use the original door as the paint was all sanded off and it was original and the fit was good.
The piece in's were made off of the mustard yellow door, I covered the area that I wanted to take a mold of with aluminum foil and gave it a coating of release agent. I was going to mold a part off of the new mold but the shape was close enough that just sliding the piece down a couple inches gave me the width of the taper I was looking for. The new pieces were layed up with three layers of 1 1/2 oz. matt and cut to fit.
Because I used my mold for the actual part the flange ended up in the wrong area, it will be cut off later when I know how much I need to remove.
pieces fitted.
the first step in glassing the new pieces into place was to fill in the area that I did not make pieces for. Using masking tape to span the gaps, this is a relatively simple shape so tape is easy to use and works well for the application.
Paint sticks and close pins were used to make shure the new flange was straight.
the flange cut off and placed in position, a small spot of bondo on each corner and a bit along the edge of where the flange had been holds it in place for final grinding.
a closer look at the front piece held in with putty and all grinding done, ready for fiberglass mat.
looks pretty ratty here
Glassing done, 3 to 5 layers depending on how much was ground away durring the prep portion.
All of the fiberglass fur ground off leaving the door quite strong.
a couple of coats of bondo to fill in any of the low spots and its close for a coat or two of primer.
The door hung back on Elan, still needs a bit of work but so does the whole exterior of the S2 body.
-
garyeanderson - Coveted Fifth Gear
- Posts: 2634
- Joined: 12 Sep 2003
![]() Post by: garyeanderson » Tue Jun 03, 2008 10:19 am
Post by: garyeanderson » Tue Jun 03, 2008 10:19 am
Hi Robb
I was wondering if it was you that had bought the Elan from Charles, your user name kind of gave it away but you never know what the reason is for a person to choose a name. How?s the car going other than the minor problems with the alternator and starter?
Gary
I was wondering if it was you that had bought the Elan from Charles, your user name kind of gave it away but you never know what the reason is for a person to choose a name. How?s the car going other than the minor problems with the alternator and starter?
Gary
-
garyeanderson - Coveted Fifth Gear
- Posts: 2634
- Joined: 12 Sep 2003
![]() Post by: garyeanderson » Wed Jun 04, 2008 1:40 am
Post by: garyeanderson » Wed Jun 04, 2008 1:40 am
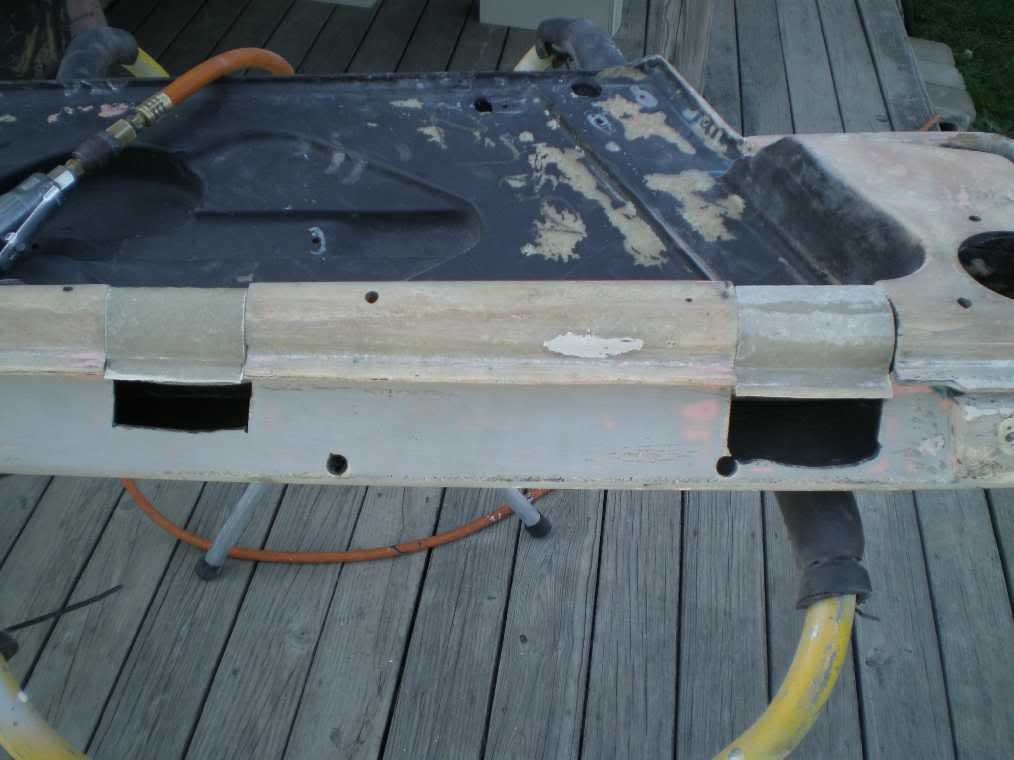
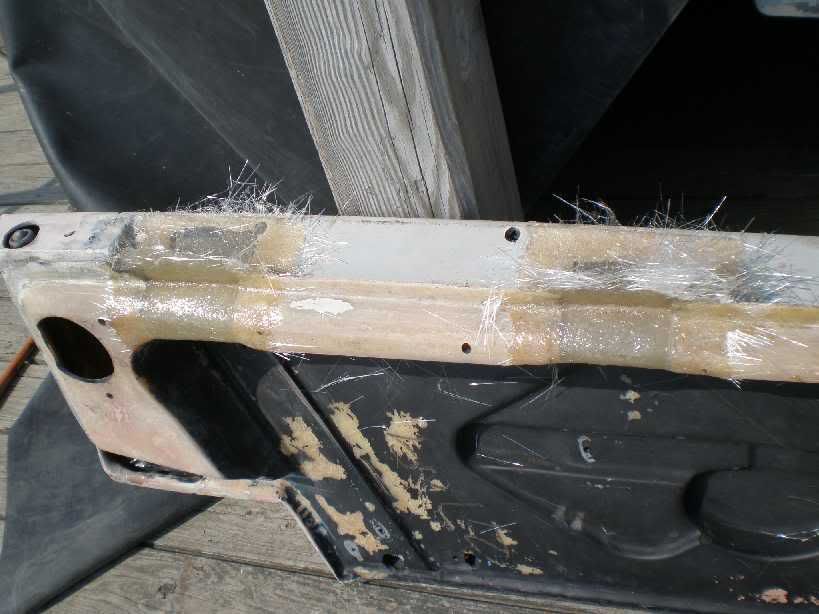
I got up this morning thinking of another low dollar job that needed to be done on the shell and came up with the Steel lattice work that had been cut out on the drivers side to install the roll cage. I didn't have the jig to bend up the upper part of the lattice as the rot doesn't ever go that high on the body, well at least I haven't seen it. I used the good side and used a pair of vice-grips to hold a carpenters square in place and then used a speed square to get the coordinates and plotted them on a sheet of plywood. Then connected the dots and loaded the plywood and the steel jig into the truck along with the extra steel I got last summer to re-do Andy's sill lattice. Beau and I drove over to a friends shop that used to share a parking area at my old shop, Beau got a day old dounut while we were there. They had a set of torches so I bent up 1/4 inch rod into 2 seperate pieces to form the lattice. The 3/8 inch rod I cold bent at home as I thought it would be a lot easier with the pattern there.
So some more photos for those who are still following this. I must be up to $75 on this project so far, the big dollars are soon to follow...
As started this morning
1/4 inch steel lattice pieces sitting in place to see how the lined up, workable to be sure.
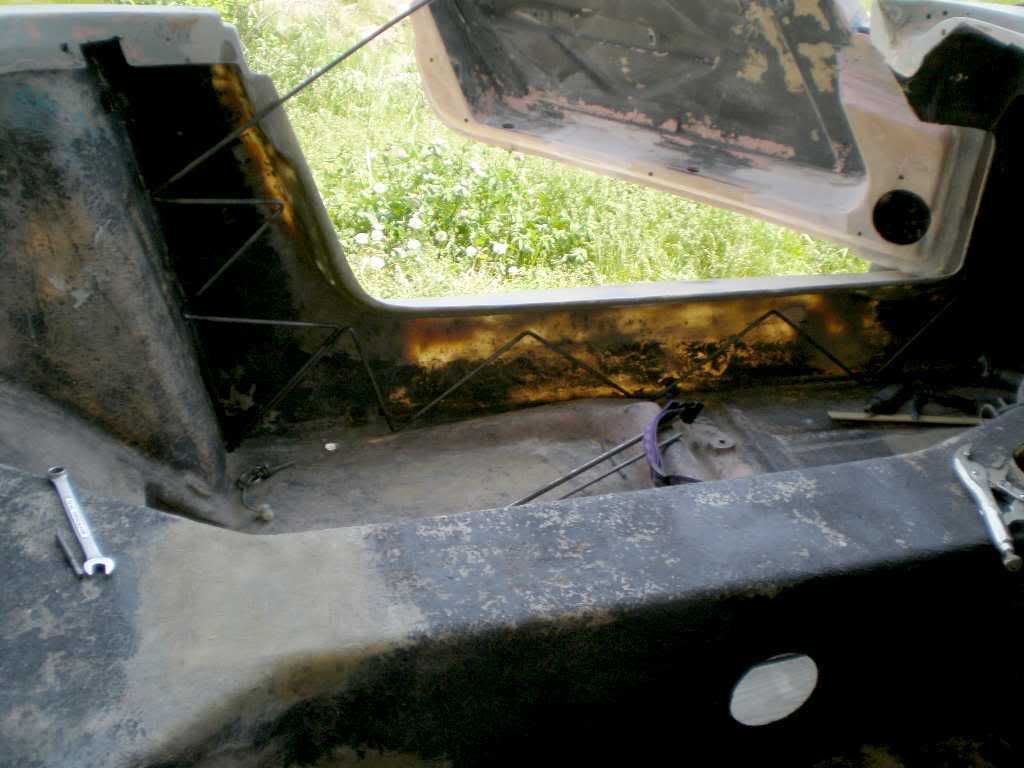
Body shell sitting on it's side to make access easier.

1/4 inch bottom lattice and 3/8 ince top door perimeter pieces trial fitted.
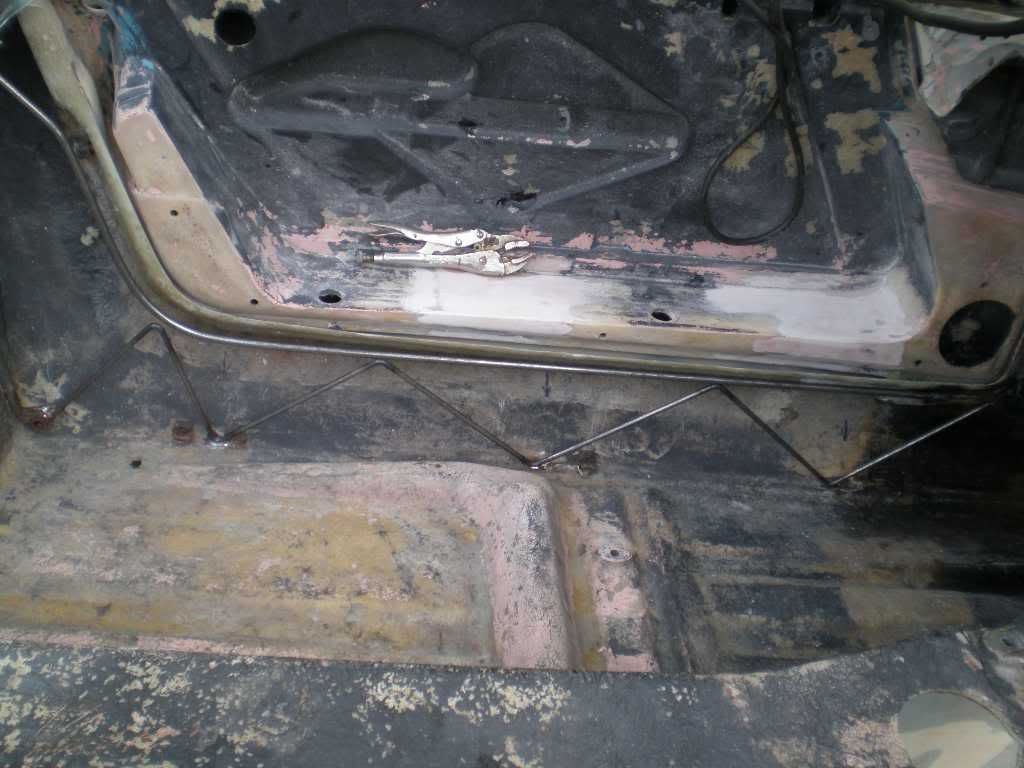
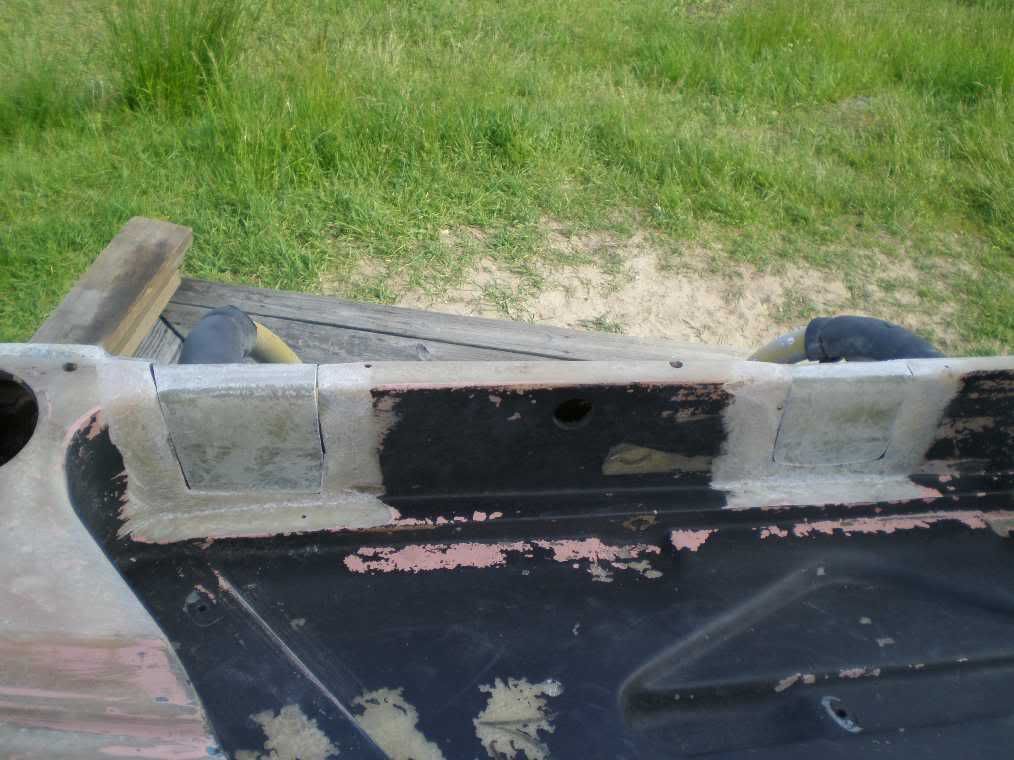
Steel fitted and welded into place.
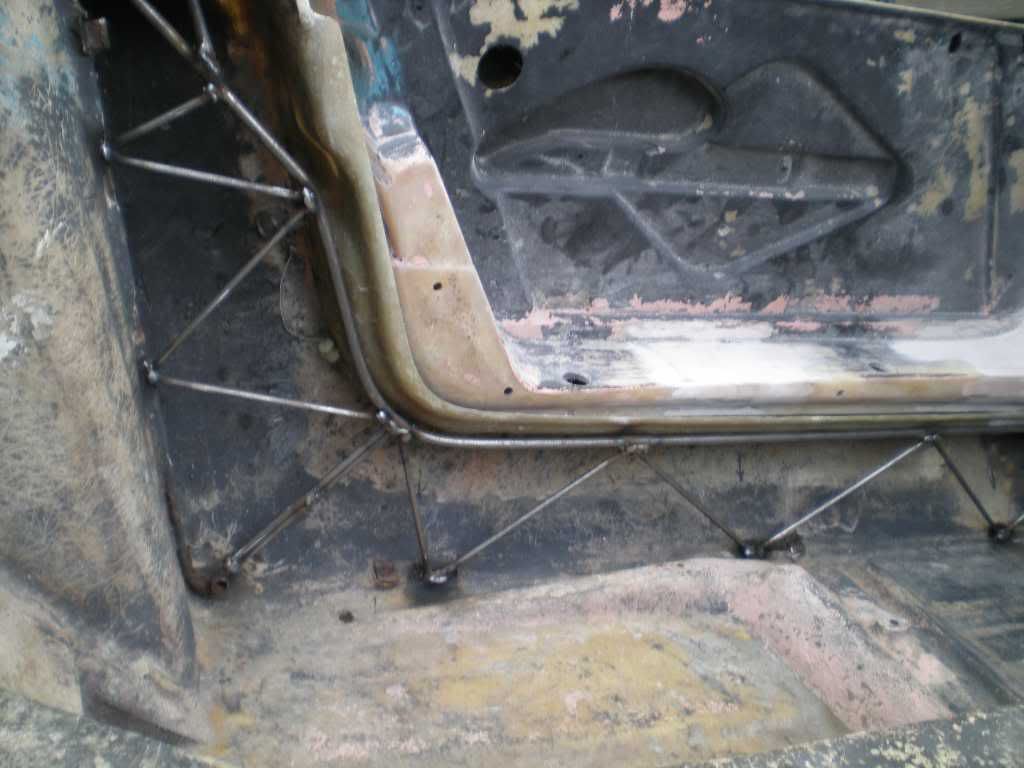
Steel all fiber-glassed into place, two layers of 1 1/2 oz matt.
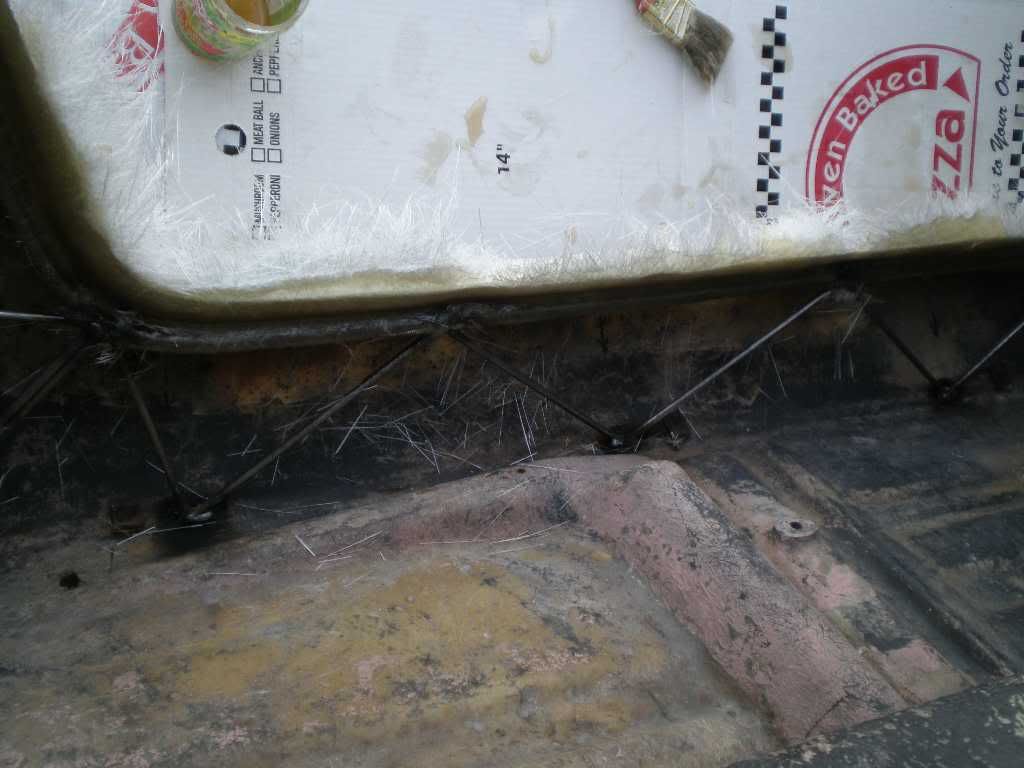
all of the fur cut off and edge ground smooth. Good enough for me...
Before photos
So some more photos for those who are still following this. I must be up to $75 on this project so far, the big dollars are soon to follow...
As started this morning
1/4 inch steel lattice pieces sitting in place to see how the lined up, workable to be sure.
Body shell sitting on it's side to make access easier.
1/4 inch bottom lattice and 3/8 ince top door perimeter pieces trial fitted.
Steel fitted and welded into place.
Steel all fiber-glassed into place, two layers of 1 1/2 oz matt.
all of the fur cut off and edge ground smooth. Good enough for me...
Before photos
-
garyeanderson - Coveted Fifth Gear
- Posts: 2634
- Joined: 12 Sep 2003
![]() Post by: type36lotus » Wed Jun 04, 2008 1:51 am
Post by: type36lotus » Wed Jun 04, 2008 1:51 am
Gee, all those old PCs I have been throwing away I could have been using for body stands!
And I thought I was the only person to stand his Elan body shell on its side to more easily work on it.
And I thought I was the only person to stand his Elan body shell on its side to more easily work on it.
Mike Geiger
66 S3 Coupe', no more
66 S3 Coupe', no more
-

type36lotus - Third Gear
- Posts: 276
- Joined: 17 Sep 2003
![]() Post by: garyeanderson » Wed Jun 04, 2008 10:45 am
Post by: garyeanderson » Wed Jun 04, 2008 10:45 am
Hi Mike
The coupe are mere difficullt to flip over onto the top but it can be done. If the rear window is removed you can use a bar stool to support the back (through the window opening) and a shortend saw horse to support the front on the top of the foot boxes which form a nice flat platform. With a compleatly stripped out Coupe shell its possible for 3 people to flip it over and not touch the roof.Two at the back and one in front, once its flipped over, 2 folks suspend the body while the third places the saw horse and bar stool. Both 36/5520 and 36/6292 were done that way to work on the underside.
Gary
p.s. the early pc's are the best as the steel was a heavier guage. the two I have are 1990 Digital 486/66 and are still fully loaded. They might even work still...
-
garyeanderson - Coveted Fifth Gear
- Posts: 2634
- Joined: 12 Sep 2003
![]() Post by: robb4100 » Thu Jun 05, 2008 2:38 am
Post by: robb4100 » Thu Jun 05, 2008 2:38 am
Gary,
The car is great and is now finally back on the road. last year was a disaster. first the generator died and then when I got that fixed the clutch stuck to the flywheel and no amount of prodding would free it up so I figured once I had to pull the engine I might as well swap out the starter, generator etc.
I used to be a plumber so am good with my hands but really knew very little about cars so this has been a great learning experience. Next lesson will be in fibreglass as I need to make a glove box. the commercially available ones do not fit because of the heater ducting.
It is always something.
BTW I still keep in touch with Charles, Tracy and they now have a little girl.
Robb
dumb current owner
1965 S2
1965 S2
- robb4100
- Second Gear

- Posts: 145
- Joined: 08 Jul 2004
![]() Post by: garyeanderson » Thu Jun 05, 2008 10:35 am
Post by: garyeanderson » Thu Jun 05, 2008 10:35 am
Hi Robb
I have known Charles for a while. We met years ago when I went to look at a Cortina at his house in Watertown, I didn't buy it and time went by and met up with him again in 2000 when he was working in Ayer for a while. We were talking about his friend with the shop in Somerville and it clicked that we had met 10 years earlier. I am not good with faces and we had a laugh... I saw Charles last September at Lime Rock for the 50th anniversary of the first Elite. I had told him about the flairs being back on the body but the project had died. I guess I should send a progress report to him.
Gary
p.s. - The stock glove box fits, its a tight one though and the defrost hose is usually crushed a bit.
-
garyeanderson - Coveted Fifth Gear
- Posts: 2634
- Joined: 12 Sep 2003
19 posts
• Page 1 of 2 • 1, 2
Total Online:
Users browsing this forum: No registered users and 15 guests