Why restore an Elan
Frank / Robert
I just looked at mine (S2, as opposed to Roberts which is a S3)
Mine has battery box on both sides and is ribbed floor - according to the history is a S/E and no sign of any duct which I still fail to see how it would fit with a battery box theer anyway - is mine a rare 2 battery box car? Dual batteries?
Gordon
Sorry frank but definitely Kerb....
I just looked at mine (S2, as opposed to Roberts which is a S3)
Mine has battery box on both sides and is ribbed floor - according to the history is a S/E and no sign of any duct which I still fail to see how it would fit with a battery box theer anyway - is mine a rare 2 battery box car?
Gordon
Sorry frank but definitely Kerb....
Gordon
26/5416
26/5416
- gordont
- Fourth Gear

- Posts: 503
- Joined: 11 Jun 2007
robertverhey wrote:Near side and off side refer to the kerb, not the driver, right? So driver is always on the off-side, and passenger on near-side whether LHD or RHD. That's what helps me get my head around it. Unless of course a car's been imported and not converted, when the opposite applies! Think I'd better lie down for a while, before I grapple with A, B and C pillars......does an Elan have an A and B, or an A and C? What would ACBC have thought?
Not as I understand it. My Morgan with wire wheels had the spinners marked NS & OS, and those designations didn't change no matter what side of the road I was on at any given moment!
Jim
Temporarily Elan-less
Temporarily Elan-less
-

summerinmaine - Third Gear

- Posts: 392
- Joined: 22 Sep 2003
I always remember Off side from taking my Eleven apart for the first time and while removing the RF suspension I found "SO" stamped onto one of the components, then turned it over to reveal "OS" and at the LF corner found a corresponding "NS" stamping.
I wonder if the S1 shell was meant to have the battery installed on the opposite side from the driver, to balance the car. There were no S1 SE models. That shell continued to be used into early S2 production, until it was standardized to one side. Then at commencement of S2 SE production, there was a place to put the diff scoop, but it could not have been retrofitted to earlier S1 shells.
Just my thoughts, based on 37 years of Elan and Lotus ownership.
Roger
'67 Elan S3 SS DHC
'67 Elan FHC pre-airflow
'67 Elan S3 SE upgrade to 26R by Original owner
'58 Eleven S2 (ex-works)
'62 20/22 FJ (ex-Yamura)
'70 Elan +2S RHD
'61 20 FJ project
'76 Modus M1 F3
'67 Elan FHC pre-airflow
'67 Elan S3 SE upgrade to 26R by Original owner
'58 Eleven S2 (ex-works)
'62 20/22 FJ (ex-Yamura)
'70 Elan +2S RHD
'61 20 FJ project
'76 Modus M1 F3
- Elan45
- Fourth Gear

- Posts: 957
- Joined: 23 Nov 2008
Elan45 wrote:I wonder if the S1 shell was meant to have the battery installed on the opposite side from the driver, to balance the car.
I've got a space for the battery on each side.
I'm sure you are right about balancing the car. I read one of the Costin's books about chassis design and it mentioned doing this kind of thing.
Paddy
1963 Elan S1
-

paddy - Coveted Fifth Gear

- Posts: 1036
- Joined: 27 Oct 2008
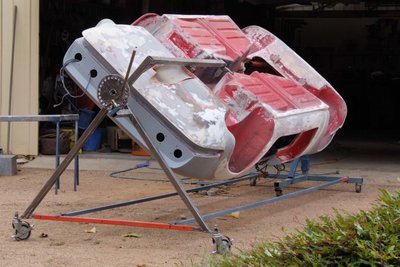
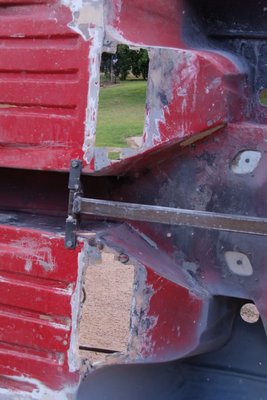
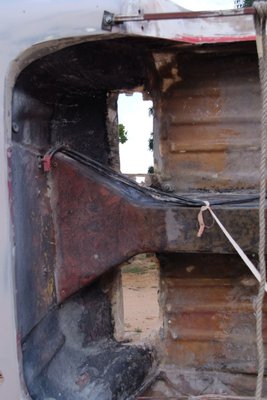
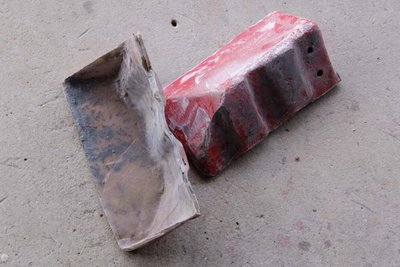
My old battery boxes have now been removed, I never liked them anyway, so now that
the S2 is having it's second major rebuild in twenty nine years of my ownership,
I thought it would be a good chance to redo a few things.
but honestly, if you are thinking of rebuilding/restoring your elan, make the time
to build a rotisserie, I only wished that I had this way back in the early 80s
while rebuilding the basket case S2.
Excuse the dust and stuff hanging out, but at the time of the photos, I had
not oet around to stripping everything out of the body, but things are being
removed now.
The rotisserie cost the huge sum of $70.00AU!!, built from 40x40x2mm tube
and scrap found around the workshop. Index plate took a bit of work,
you may also notice that I have used my engine stand for the other
support/rotating end... saved a few bucks there. The whole thing can be
dismantled and stored away.
Hope you enjoy these shots.
Col.
- Attachments
- ceejay
- Fourth Gear

- Posts: 558
- Joined: 27 Mar 2007
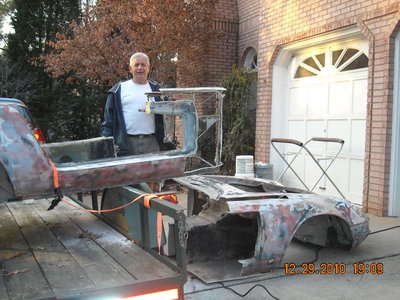
Hard to believe it's been over a year since I've updated this thread. The work on the Elan continues, albeit slowly. In between body work, the engine has been removed from mothballs (it was rebuilt approximately 20 years ago but never installed). I brought it to Barry Sales at PHP Racing in Wauconda, Illinois. An old friend and one of the finest engine builders in the country! We pulled the head, did some porting, etc., mounted it on the dyno and made a few pulls. It's broken in, not leaking, and making sufficient power.
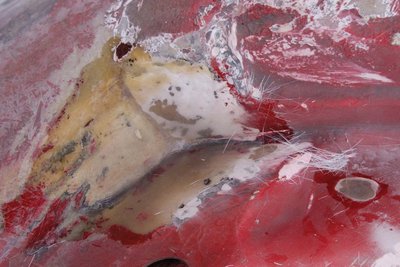
The most amount of work is getting the body done. Last time many of you noticed the new front clip that was installed. Well after media blasting, the rest of the body was full of rotten glass work, bondo, and a million, .................................and I mean a million little pin holes.
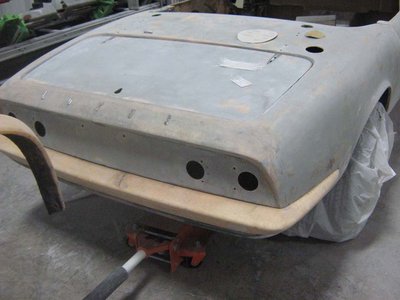
It was obvious that after digging out even more bondo and seeing more fiberglass damage, the repairs are going to take some time. And as for the pin holes, they are being repaired using the method in ............oh what's his names book?............the one the dipicts the proper way to repair fiberglass, ..........I can't remember. Anyway, most of the car will need to be "Tissued". Now it appears that is the term used in the UK. Here in the states, my good body man Keith calls it "Veil". Either way, it's EXTREMELY THIN fiberglass stranded mat. Much thinner than a kleenex tissue, which is probably where the "Tissue" term came from.
Veil or Tissue repair is easy or hard depending how you look at it. Technically, it's very easy. The hard part is getting it to stay in place when working it. Either way, in the last few months, Keith, in between working on other cars has "Veiled" most of the rest of the body. It's most likely the best way to elimminate the million pin holes. It provides a smooth surface for your high build primer and a great base for the rest of your paint work.
Attached are a number of photos.
Famous Frank
67 Elan Coupe
66 Elan S2 SE
65 Elan S2
65 Elan 26R
69 S2 Europa
06 Elise
67 Barracuda
67 Elan Coupe
66 Elan S2 SE
65 Elan S2
65 Elan 26R
69 S2 Europa
06 Elise
67 Barracuda
-

Famous Frank - Fourth Gear

- Posts: 556
- Joined: 29 Apr 2004
Lets see, how do I say this. I re-did 26/4597 15 years ago and it had some issues then but was probably the best of the bodies I had bought and it still had character (cracks, pinholes, stars, and other stressed area) I did the best I could with the then 32 year old body with an eye on keeping the weight down and it looked good but there were issues that I figured would come back and they have. To say "thats life" is about all you can, I took off all of the original paint and primer to get to the gelcoat.
elan-photos-f18/the-resurrection-4597-many-photos-and-some-text-t16846.html
Re-applied new prime and my friend and painter did his thing and applied the basecoat/clearcoat. It was built into a DRIVER and that is what I do with it, its not a queen and Beau has a second doghouse and we both don't worry about it. It's going on 47 years now and it probably could use a repaint but its not likely to happen so I just enjoy the fact that its raining out today and the salt that was spread on the road yesterday will be gone and I can get back out on the road later this week and beat the snot out of it again.
26/4020 was left outside for 25 or 30 years and its got all those problems too, so do my Elites and nearly every other fiberglass body, New body's have there own problems so damned if you do and screwed if you don't. I guess there are those that get 20 years out of there painted shells but some don't get the smiles per mile that a lot of us do.
-

garyeanderson - Coveted Fifth Gear

- Posts: 2634
- Joined: 12 Sep 2003
OK, I need some more of that expert assistance from the Forum. The front bumper has been stripped and of course you can see where it broke into a few pieces in the past and was poorly patched together back in the 70's. Here is the question: Where the bolt goes through the bumper, there is a bobbin. Does that Bobbin get covered with fiberglass so that it reaches the same height as the rest of the bumper or does it just get painted where you could possibly see the outline of the Bobbin beneath the paint?
When the bumper was sanded of its old paint, you can see the Bobbin. But the Bobbin surface is below the surface of the rest of the bumper but only slightly. My fear is that if I fiberglass over the Bobbin to level the surface with the bumper, will that fiberglass crack when the bolts are snugged down? Probably not I think as long as the bolts are just tight and not muscled down.
BTW - CEEJAY, your car will look terrific when done. Be careful, when removing those battery boxes, you won't have anything flat to store your beer in !
Famous Frank
67 Elan Coupe
66 Elan S2 SE
65 Elan S2
65 Elan 26R
69 S2 Europa
06 Elise
67 Barracuda
67 Elan Coupe
66 Elan S2 SE
65 Elan S2
65 Elan 26R
69 S2 Europa
06 Elise
67 Barracuda
-

Famous Frank - Fourth Gear

- Posts: 556
- Joined: 29 Apr 2004
Thanks, Famous Frank, your elan is going to look brilliant to,
amazing to think how many hours that can be spent in the
workshop rebuilding/restoring our fantastic lotus elan cars.
At times the work is a pain, but then the special day does
eventually arrive (Call it Pay Day) when it is back on the
road once more.
Do something everyday, and you bring that special day
one step closer.
Ceejay.
- ceejay
- Fourth Gear

- Posts: 558
- Joined: 27 Mar 2007
This may be the only factory bumper I own. Its been worked on but not in my usual manor of making the contour match the body but the low spots where to bobbins are filled and reshaped to match the area. The bumper bolts were/are lose but these are not a torque to yield bolt and are just snugged tight, I think they were a slight interference fit on the nut to bumper bolt and these are just to keep the end in place and the crotch that the front bumper sits in does the actual retention. I hope some other add to this because most of my cars have had problems (HIT in front) so things are not as delivered 42 to 48 years ago.
Greg posted a photo at
elan-f14/front-bumper-t19193-15.html
that appears to show the area some what depressed where the bolt goes through the bobbin.
Gary
p.s. Frank - the photo of the tail lamp cut out holes with the 3 dimples are the original L551 location markings that were drilled for that lamp assembly. The marking dimples for the L539 were cut away when the L684 tail lamp were installed.
Better photos were posted in
elan-f14/how-many-the-road-t18991-45.html


Last edited by Guest on Sun Apr 29, 2012 9:23 am, edited 1 time in total.
-

garyeanderson - Coveted Fifth Gear

- Posts: 2634
- Joined: 12 Sep 2003
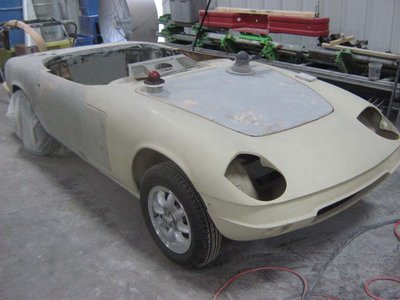
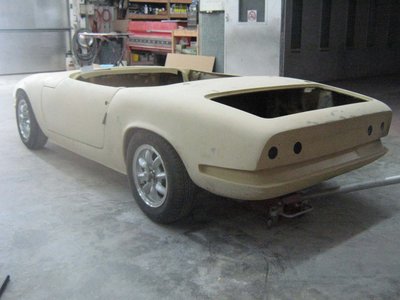
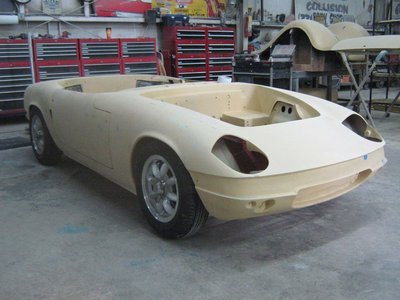
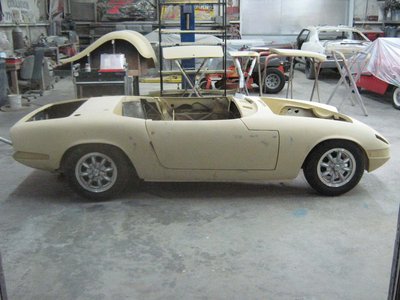
Update: the entire body had now been tissued! The doors, boot and bonnet have been fitted. Still some work to do on the doors but its getting very close. The body has now been sprayed with high build primer and blocked once. More of that to come. Yesterday we took the body off the dolly and fitted it to the chassis. Then we moved the suspension through its entire travel to make doubly sure we have the correct wheel clearance, etc before paint. Here are some pics!
- Attachments
Famous Frank
67 Elan Coupe
66 Elan S2 SE
65 Elan S2
65 Elan 26R
69 S2 Europa
06 Elise
67 Barracuda
67 Elan Coupe
66 Elan S2 SE
65 Elan S2
65 Elan 26R
69 S2 Europa
06 Elise
67 Barracuda
-

Famous Frank - Fourth Gear

- Posts: 556
- Joined: 29 Apr 2004
Is it not easier to paint when it is off the chassis?
Henry
1967 S3 FHC
A joke a day helps you work, rest, and play.
1967 S3 FHC
A joke a day helps you work, rest, and play.
- Henry VIIII
- Second Gear

- Posts: 74
- Joined: 10 Mar 2012
Henry, you are correct, it's much easier to paint off the chassis. The body has been on and off the chassis two dozen times. When i took these last pics, i only put the body on the chassis to perform one final check of tire/wheel clearance. I removed the springs so I could move each suspension corner up and down through its whole range of motion to make sure the tires didn't rub anywhere. After I took these pics the body came off the chassis again and went back on the dolly. The last thing I want to happen is for the tires to rub AFTER its painted !
Famous Frank
67 Elan Coupe
66 Elan S2 SE
65 Elan S2
65 Elan 26R
69 S2 Europa
06 Elise
67 Barracuda
67 Elan Coupe
66 Elan S2 SE
65 Elan S2
65 Elan 26R
69 S2 Europa
06 Elise
67 Barracuda
-

Famous Frank - Fourth Gear

- Posts: 556
- Joined: 29 Apr 2004
Total Online:
Users browsing this forum: No registered users and 20 guests

