My Elan S3 DHC restoration thread (warning: picture heavy)
63 posts
• Page 3 of 5 • 1, 2, 3, 4, 5
Yes - I had the box off while I was rebuilding the fuel pump , master cylinders, etc. I?ve put it back on now for driving.
- tomjones20194
- Second Gear

- Posts: 64
- Joined: 13 Sep 2018
Received my new parts from RD Enterprises earlier this week. Bought a used right front caliper, rebuild kit, upper and lower radiator hoses and a new fuel filler grommet.
My car has been on jack stands since Tuesday because I was hoping to rebuild the calipers earlier this week. Well family and work kept me busy so didn?t get to it until today. I woke up early and busted my a$$ to get the calipers rebuilt, reinstalled, brakes bled (thanks to my daughter for helping bleed the brakes) and wheels back on the car so I could get to a local meetup.
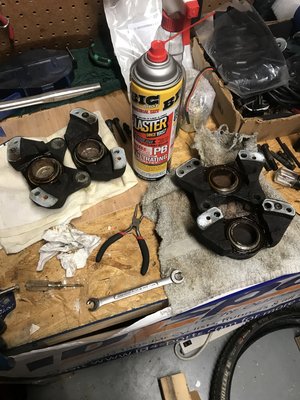
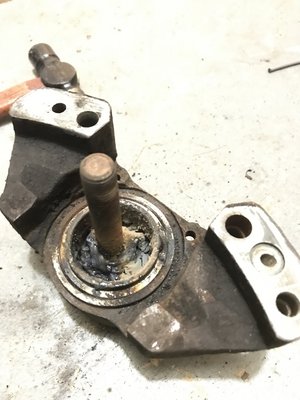
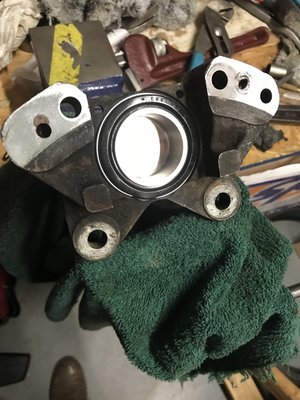
Here are a couple of pictures of the rebuild.
First calipers off.
Couldn?t get piston out of one of them so welded in a bolt and used a strip of metal stock with a hole drilled in it and nut to screw the piston out.
Here is one of the rebuilt calipers halves
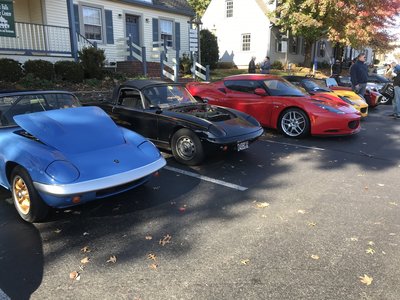
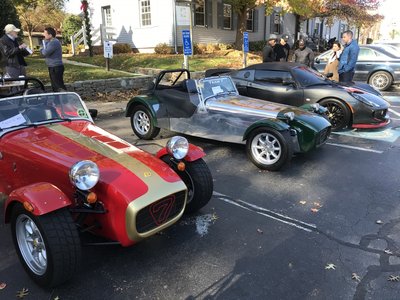
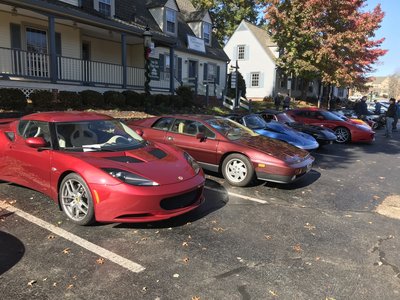
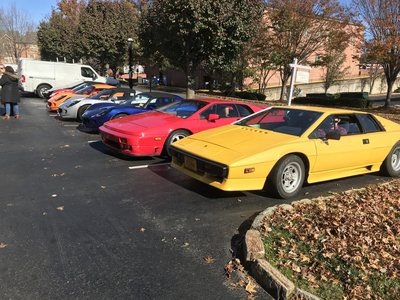
My local Lotus car club hosted their annual Get Your Lotus Out (GYLO) get together this morning. This is their 16th year and the event ran from 10-12 this morning. Finally got the car back together. So I booked it over to the meeting location. I arrived at 1130. Just in time to meet a few folks and get a few pictures! Enjoy!
- tomjones20194
- Second Gear

- Posts: 64
- Joined: 13 Sep 2018
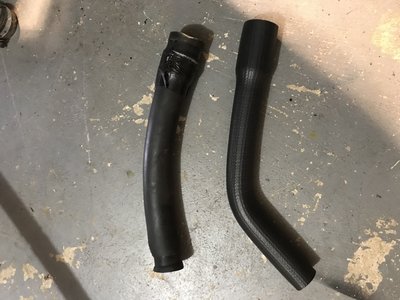
A little more progress this week. I changed the upper and lower radiator hoses and flushed and filled with coolant again. The upper hose had dry rot and leaked a little.
Old upper hose versus new upper hose.
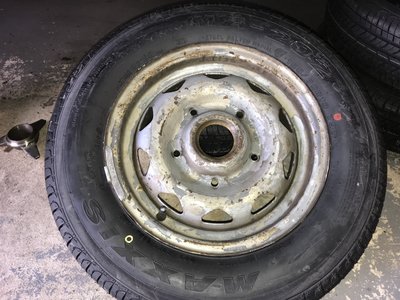
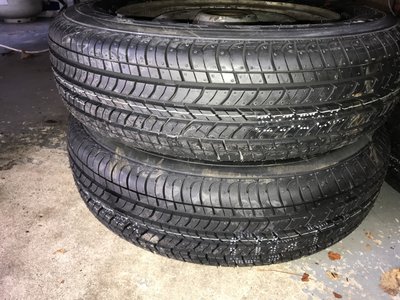
Also ordered and received new tires. I went with Maxxis MA-202s which are an all-season tire. I mountain bike and really like Maxxis brand tires. So thought I?d give them a go for my Lotus. Will report back after I?ve had a chance to put some miles on them.
Old tires had plenty of tread but were dry rotten and had flat spots. Local shop here mounted and balanced the new tires. Apparently one of the rims is bent (has a wobble) but it balanced up. So hopefully it will not vibrate when driving.
Eventually I plan to have the rims refurbished- stripped, straightened and painted. But they?ll do for now.
On my list for this weekend is to drain and fill the rear diff, remove the old carpet and give the interior a good wash and drive it.
- tomjones20194
- Second Gear

- Posts: 64
- Joined: 13 Sep 2018
Here?s a couple of pictures with the new tires on.
- tomjones20194
- Second Gear

- Posts: 64
- Joined: 13 Sep 2018
Folks -
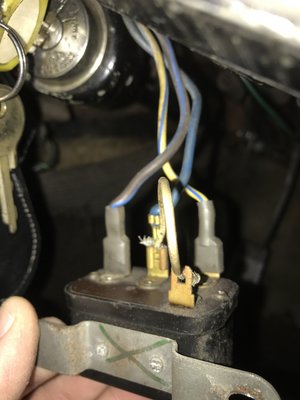
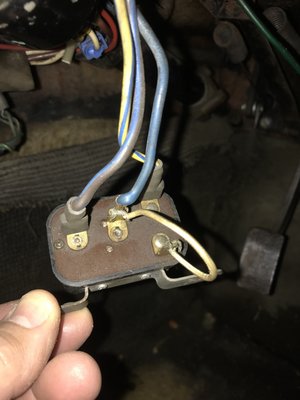
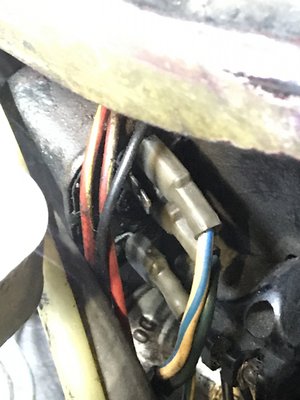
I need help identifying these relays and whether they are original or have been replaced with alternate parts. I suspect the latter for at least one of them since there is a jumper wire on it. See pics below.
This first one controls the headlights. It is located under the dash near the steering shaft. What is the original part number? There is not one on the relay. There is also a jumper wire connected so I suspect it is not original. Wire colors are solid blue, blue/brown and yellow/blue.
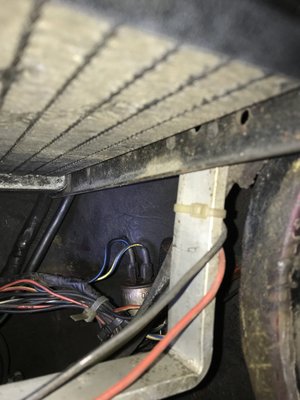
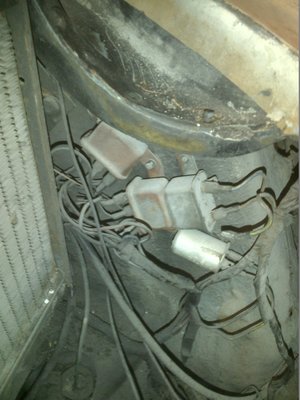
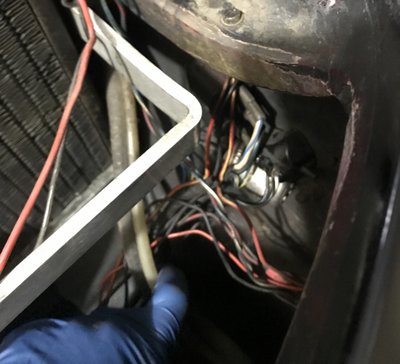
Next are two relays on the inner left front fender well just in front of the radiator. I have no idea what these are for. I?ve tried disconnecting various wires and testing for voltages while turning on various systems, e.g., lights, signals, etc., but have not been able to measure any volts. The headlights still work when these are disconnected so not sure what they do. The rectangular one has 4-pins but only three wires connected. Colors are solid blue, white/blue and blue/yellow.
This next one is just below the rectangular one but is a cylinder. Has two wires connected to it. Wire colors are blue/black and blue/yellow.
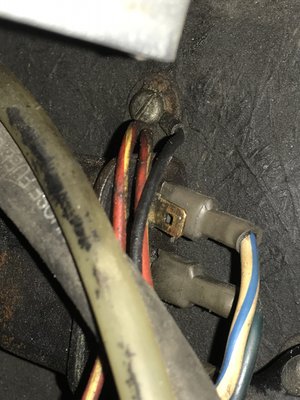
There looks to be a grounding point just above these relays too. There are 3 or 4 wires connected to the ground. See below.
I suspect a number of changes have been made to the original wiring layout. Any suggestions figuring this out are appreciated.
- tomjones20194
- Second Gear

- Posts: 64
- Joined: 13 Sep 2018
Thanks for the pictures. I'm pretty sure that I've figured the wiring out. I'm planning to do away with the flasher relay as we can't use that feature here in the US. This will simplify the wiring and clean things up a bit.
- tomjones20194
- Second Gear

- Posts: 64
- Joined: 13 Sep 2018
tomjones20194 wrote:Thanks for the pictures. I'm pretty sure that I've figured the wiring out. I'm planning to do away with the flasher relay as we can't use that feature here in the US. This will simplify the wiring and clean things up a bit.
Not sure what you mean by that, it was a standard feature on all Federal S4s & Sprints.
Phil Harrison
1972 Elan Sprint 0260K
1972 Elan Sprint 0260K
-

pharriso - Coveted Fifth Gear

- Posts: 3196
- Joined: 15 Sep 2010
Been a while since I?ve posted...
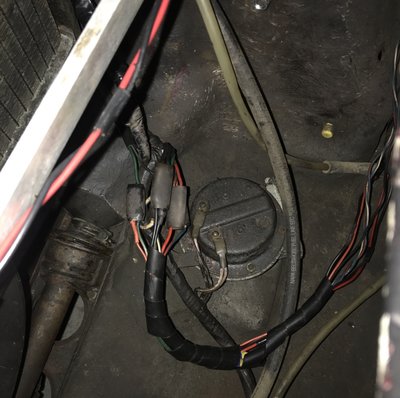
I?ve sorted through most of the wiring and cleaned things up a bit. I got the taillights and tag lights working. Replaced the Headlights with a newer clear glass version with replaceable bulbs. Replaced the original signal relay with a new Lucas one. Now blinkers flash at normal speed versus old relay where they were VERY slow. I?ve bundled, shortened, lengthened and replaced wiring bullet-style terminals as needed. And I?ve cleaned and applied dialectic grease to every connector that I messed with.
Here?s an example of before and after photos
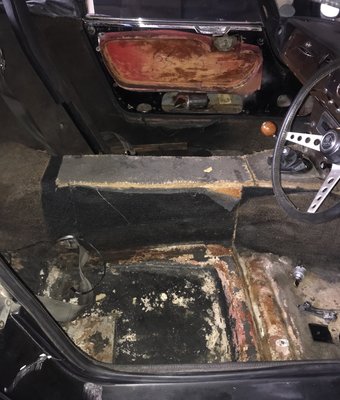
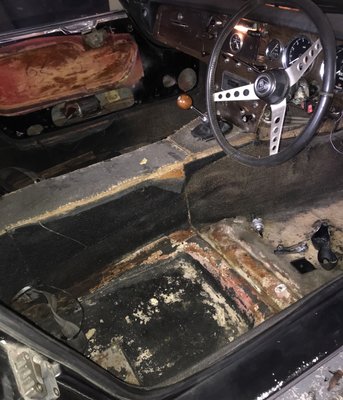
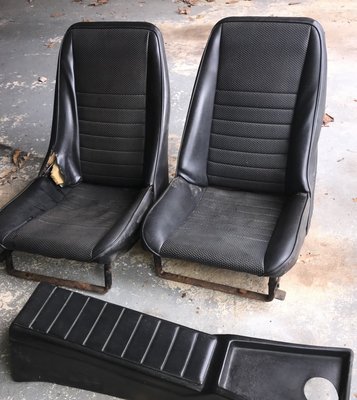
Also removed the seats and started removing the nasty, rotten carpet. I purchased some MDF board to remake the side and rear panels that the carpet is attached to. I?m in the process of sourcing some outdoor carpet that is a suitable replacement for the original. Also took the seats and door panels to an upholsterer for an estimate to repair them. Looks like it?ll cost me $700 to repair the driver seat and redo the door panels. Shop says the passenger seat is good.
- tomjones20194
- Second Gear

- Posts: 64
- Joined: 13 Sep 2018
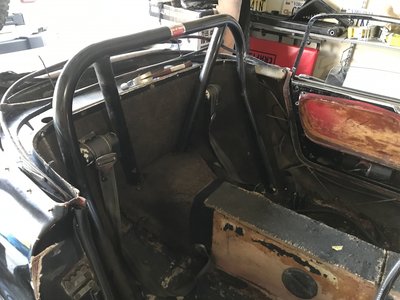
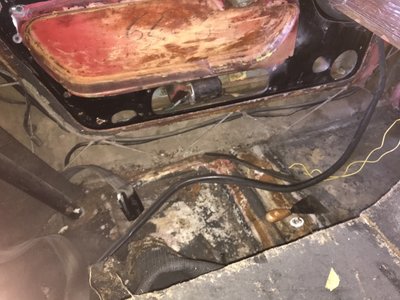
Made a little more progress this weekend getting the interior disassembled so that I can clean, repair paneling and install new carpet. I removed the seat rails. They?re heavily rusted and need replacing. Broke most of their mounting bolts too getting them out. Good news is that the lattice work is in great shape with no rust. I?m stuck on one area though. I haven?t yet figured out how to remove the seat belt retractor from the rear wall. I opened the trunk and can?t access to mounting bolts there. My guess is I need to remove the rear shelf. I?m currently soaking the Tenax studs so that I can hopefully remove them without breaking them. Any pics of how the seat belt retractor is mounted would be very helpful.
TIA,
Tom
TIA,
Tom
- tomjones20194
- Second Gear

- Posts: 64
- Joined: 13 Sep 2018
For the Seats sometimes you can get new Covers. Also don't forget to replace the Foams, otherwise the stitching on the new Covers will split. It's not a difficult diy job if you can find the Covers. Glue new Foam and then use Silicone Spray to help slide the Covers over the top.
I saw in a past post you replaced the Rad Hoses and i hope you replaced the Heater Hoses also
Alan
I saw in a past post you replaced the Rad Hoses and i hope you replaced the Heater Hoses also
Alan
Alan.b Brittany 1972 elan sprint fhc Lagoon Blue 0460E
- alan.barker
- Coveted Fifth Gear

- Posts: 3762
- Joined: 06 Dec 2008
It?s been a while since I?ve posted in this thread. I was able to get the seat belts out and the roll bar out, so the interior is out now. I was planning to replace the paneling with pressboard but I?ve decided to remake the panels in fiberglass. I need to order the cloth and supplies so that?s on hold for a bit.
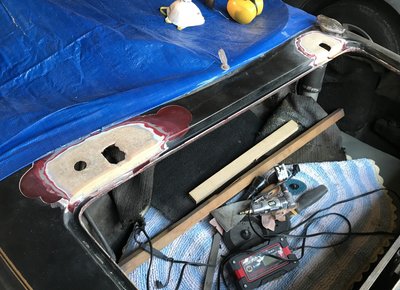
I decided to work on repairing the boot hinge mounting areas. They had completely broken through. This is my first time working with fiberglass body repair. I must say it very time consuming. The car appears to have 3 coats of paint including the factory Carnival Red.
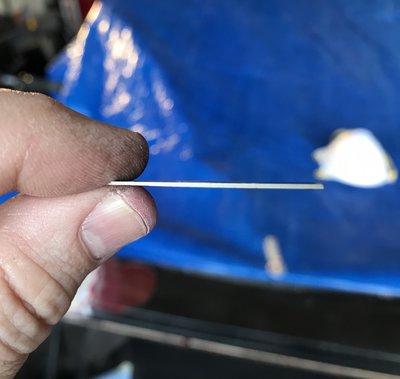
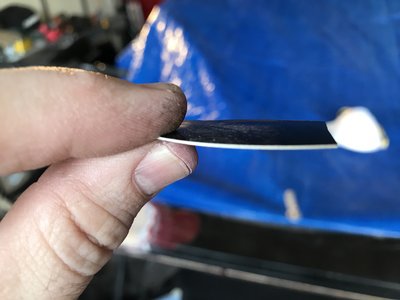
Not sure how the last coat was done but I think the whole car was skimmed with body filler. This layer of paint is dried out and chipping from the second layer in certain sections. It?s about 1mm thick. See pic below.
In the areas where it?s not easily chipped off and needs to be sanded, it?s a PITA to get rid of.
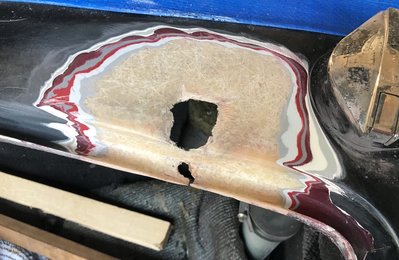
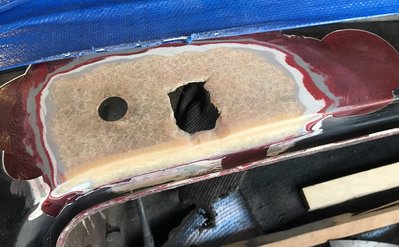
It took me about 3 hours but I finally got the two mounting areas sanded down.
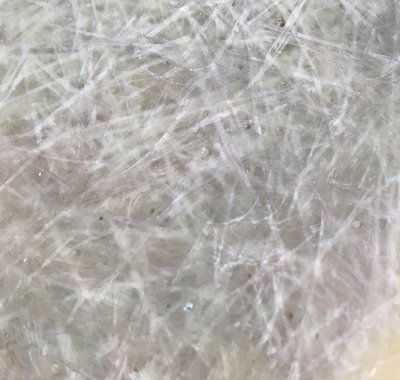
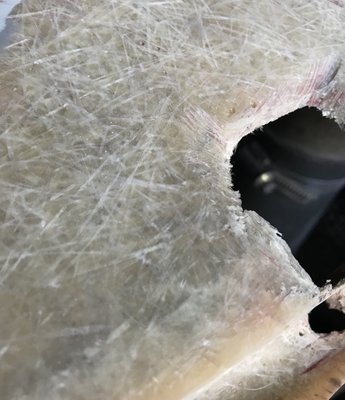
I?m not sure if I?m all the way through the gel coat however. What?s the best way to tell? I don?t want to over do the sanding. Here?s a close up of one of the prepped areas. I still see some pin holes so does that mean I?m not through the get coat?
- tomjones20194
- Second Gear

- Posts: 64
- Joined: 13 Sep 2018
Finish off with the very light Tissue. If you strenghen with Woven do it from underneath inside the Boot.
You can get Hinge Gaskets from sjsportscars. Also you can use more than one Gasket to adjuust fit height.
Alan
You can get Hinge Gaskets from sjsportscars. Also you can use more than one Gasket to adjuust fit height.
Alan
Alan.b Brittany 1972 elan sprint fhc Lagoon Blue 0460E
- alan.barker
- Coveted Fifth Gear

- Posts: 3762
- Joined: 06 Dec 2008
63 posts
• Page 3 of 5 • 1, 2, 3, 4, 5
Total Online:
Users browsing this forum: philbirch and 17 guests


