S1 Elan Rebuild - My Story
I'm back working on my Elan. Couple of weeks of some video projects and a vacation got me distracted!
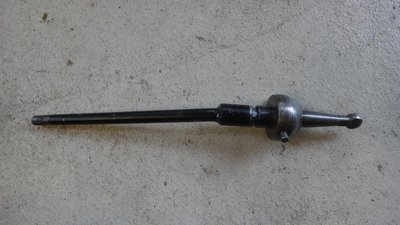
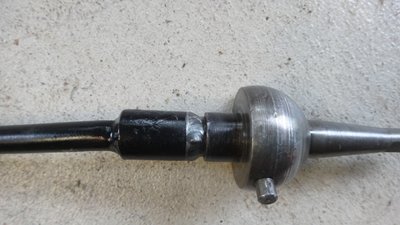
Drew came over to help and while I was away I ordered a new gear lever from RD Enterprises so we went about the removal of the old one and installation of the new. The old one had been welded and it looked like someone knew what they were doing as it was a nice job. Never the less, I replaced it.
There was a previous discussion about my mounting bracket for the gearbox. After much deliberation, research, measuring and using a level in various places I determined the fitting that holds the tail of the gearbox in the chassis bracket was custom made and it was sized for the right height of a level gearbox. No need for additional washers.
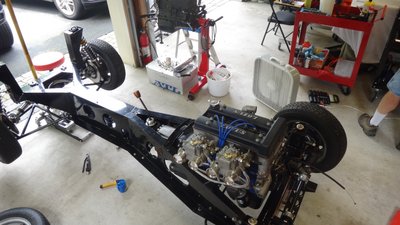
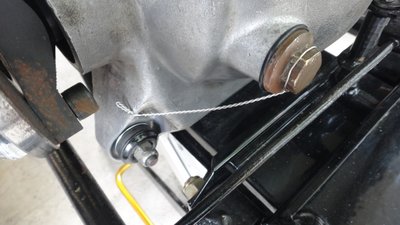
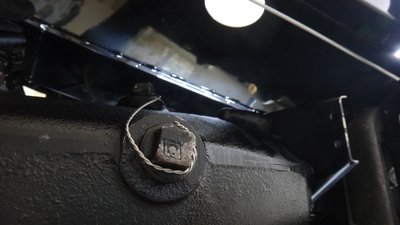
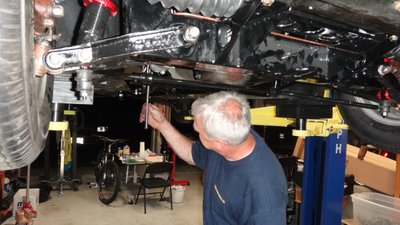
We decided to remove all the nuts and bolts we used for assembly and put anti-seize on them. In particular on the suspension bolts. I've got grade 8 bolts and washers and nyloc nuts on just about everything. So we jacked up the chassis and spent the morning unbolting, spreading anti-seize and rebolting. Then the bolts and plugs that had been drilled for safety wire all had new wire installed.
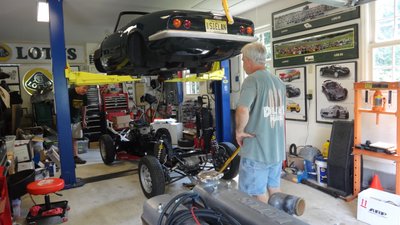
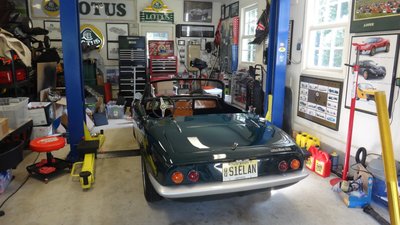
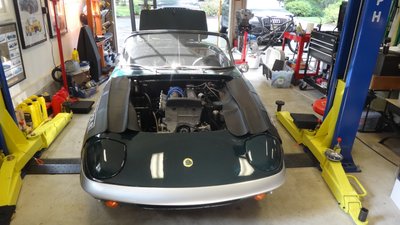
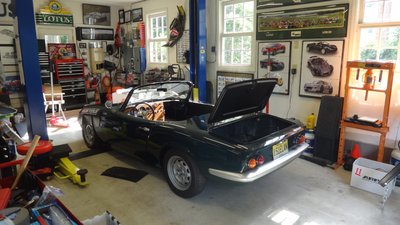
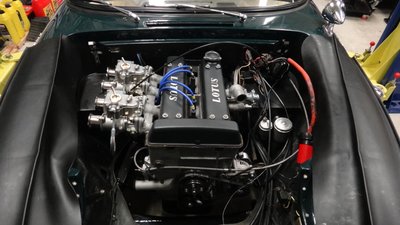
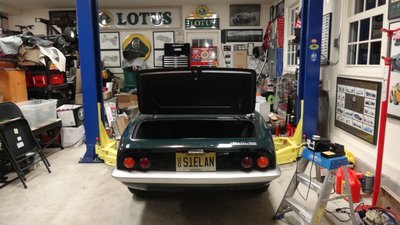
After every nut and bolt was retightened we removed the weber carbs, took off the last two sets of intake studs, added the closed cell foam pad to the rear of the chassis and rolled the chassis under the body. Then slowly lowered the body onto the chassis aligning the chassis in small increments to fit. Only one problem. No matter how we positioned the chassis the gear lever would not fit thru the fiberglass hole in the tunnel. So the body went back up and the gear lever was removed. After some minor adjustments moving the chassis (now on hydraulic jacks front and rear) we got it aligned and removed the two post jack support on the body and the floor jacks on the chassis. The car was finally sitting back on its chassis!
We were amazed that everything was aligned exactly as it should be with the bobbins. Spent an hour measuring and walking around the car looking at every area to see what was off. We screwed in the seat belt bolts as they were the only already threaded part on the chassis. They were perfectly aligned so it was time to transfer punch all the bobbin holes.
The two bobbin holes that were impossible to transfer punch were the ones behind the dash. I have to replace the fuel gauge (new sending unit in the fuel tank required a recalibrated fuel gauge) and I have a Type 26 replacement crash pad to install and the screws holding the dash in place are the wrong type so we took the dash apart in order to transfer punch the last two bobbin holes.
Drew and I decided to call it a day. We had nine hours of work accomplished, it was almost 90 degrees (F) outside and the humidity was close to 80%. We were wiped out!
Tomorrow we plan on raising the body off the chassis and drilling all the holes and tapping the ones required.
Glen
05 Elise - Back where I started
65 Elan S2 - 26/4055
72 Europa - 74/2358R
69 Elan S4 - 45/7941
64 Elan S1 - 26/0379
12 Colin 30 - Lotus Racing Kart
07 Exige S - Wicked Road/Track Car
07 Exige S - Fast Road/Track Car
06 Elise - Track pack
05 Elise - Back where I started
65 Elan S2 - 26/4055
72 Europa - 74/2358R
69 Elan S4 - 45/7941
64 Elan S1 - 26/0379
12 Colin 30 - Lotus Racing Kart
07 Exige S - Wicked Road/Track Car
07 Exige S - Fast Road/Track Car
06 Elise - Track pack
-

Certified Lotus - Coveted Fifth Gear

- Posts: 1075
- Joined: 04 Aug 2014
Glen, can I ask were you found the fender covers that actually fit the engine bay? Thanks, Dan
-

collins_dan - Coveted Fifth Gear

- Posts: 1102
- Joined: 09 Jan 2006
Hi,
Seeing the degree of thoroughness on your rebuild you may like to take a look at the inboard drive shaft to TTR flange bolts, I have by the looks of things, in one of your close-up pics (Safety Wire Diff), exactly the same cap headed bolts supplied by TTR for this purpose. When checking the fit of these two parts I noticed that the head of the bolts did not sit on the driveshaft squarely/fully, but were stopped by the radius on the inside of the head. Your bolts look exactly like this, I used a counter sink/bore to provide just enough clearance in the drive shaft to allow full head contact.
FWIW
Ron.
- Craven
- Coveted Fifth Gear

- Posts: 1623
- Joined: 14 Sep 2013
Thanks for all the comments!
Billwill, in my 42+ years of working on cars in my garage without a lift was just the norm for me. This was a birthday present to myself last year (well, I told my wife she bought it for me) and its a real luxury to have!
Collins_dan, the fender covers are from Pep Boys. Yes, they fit perfectly!
Craven, you have good eyes to notice the TTR flange bolt issue. I thought something was wrong with them and ordered another set. Same situation. Will be going back to countersink them. Thanks!
Glen
05 Elise - Back where I started
65 Elan S2 - 26/4055
72 Europa - 74/2358R
69 Elan S4 - 45/7941
64 Elan S1 - 26/0379
12 Colin 30 - Lotus Racing Kart
07 Exige S - Wicked Road/Track Car
07 Exige S - Fast Road/Track Car
06 Elise - Track pack
05 Elise - Back where I started
65 Elan S2 - 26/4055
72 Europa - 74/2358R
69 Elan S4 - 45/7941
64 Elan S1 - 26/0379
12 Colin 30 - Lotus Racing Kart
07 Exige S - Wicked Road/Track Car
07 Exige S - Fast Road/Track Car
06 Elise - Track pack
-

Certified Lotus - Coveted Fifth Gear

- Posts: 1075
- Joined: 04 Aug 2014
Sunday was just as hot but the humidity was down a bit. Drew and I persevered as we are getting to the stage of getting the rebuild completed.
We lifted the body off the chassis and located all the transfer punch holes. Most appeared just where they should in places that had lots of metal to drill holes. A couple where very close to the edge of the metal chassis but in looking at the original chassis the same thing existed. In reality, its about the location of the bobbins. We got all the drilling and taps done in about 1 1/2 hours.
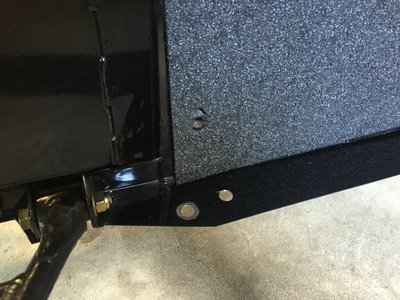
Then we added the closed cell foam over the chassis spine and glued it place with spray adhesive. Also cut out the inspection hole and seat belt bolt threaded taps. Also drilled a hole and took away the powder coat paint for the ground cable for the chassis. Will use star washers for this area to insure a good connection.
Now came the lowering of the body again unto the chassis again. This time we placed 2 X 4's on jack stands below the chassis as we need to get under the car to bolt in the 6 bolts that screw into bobbins underneath. We started with the bolts that went into threaded locations in the front, middle and rear of the chassis first. Of course a couple of holes were just a tiny bit off, but after some perseverance we got them all in. Also made sure the original shims were put back into place. Not sure if we need them, but I still installed them as I have read that the front ones help with bonnet clearance issues and rear add a bit of tire clearance.
Half day today as I had company coming and needed to get cleaned up. Will work on completing the bolt up during the week at night. Then on to the assembly of engine systems, wiring, exhaust system, radiator and reinstall of dash. The list is getting smaller!
Glen
05 Elise - Back where I started
65 Elan S2 - 26/4055
72 Europa - 74/2358R
69 Elan S4 - 45/7941
64 Elan S1 - 26/0379
12 Colin 30 - Lotus Racing Kart
07 Exige S - Wicked Road/Track Car
07 Exige S - Fast Road/Track Car
06 Elise - Track pack
05 Elise - Back where I started
65 Elan S2 - 26/4055
72 Europa - 74/2358R
69 Elan S4 - 45/7941
64 Elan S1 - 26/0379
12 Colin 30 - Lotus Racing Kart
07 Exige S - Wicked Road/Track Car
07 Exige S - Fast Road/Track Car
06 Elise - Track pack
-

Certified Lotus - Coveted Fifth Gear

- Posts: 1075
- Joined: 04 Aug 2014
Sorry I did did not post this earlier but your comments on screwing in the threaded body location bolts reminded me of the same issue. I ended up putting points on all my bolts that went into threaded chassis sections to make engagement with the chassis threaded holes easier. Especially those pesky bolts behind the dash
cheers
Rohan
cheers
Rohan
-

rgh0 - Coveted Fifth Gear

- Posts: 8415
- Joined: 22 Sep 2003
Your reading my mind Rohan. Had to do same for one of the bolts. All the rest fit with a bit of finesse 
Glen
05 Elise - Back where I started
65 Elan S2 - 26/4055
72 Europa - 74/2358R
69 Elan S4 - 45/7941
64 Elan S1 - 26/0379
12 Colin 30 - Lotus Racing Kart
07 Exige S - Wicked Road/Track Car
07 Exige S - Fast Road/Track Car
06 Elise - Track pack
05 Elise - Back where I started
65 Elan S2 - 26/4055
72 Europa - 74/2358R
69 Elan S4 - 45/7941
64 Elan S1 - 26/0379
12 Colin 30 - Lotus Racing Kart
07 Exige S - Wicked Road/Track Car
07 Exige S - Fast Road/Track Car
06 Elise - Track pack
-

Certified Lotus - Coveted Fifth Gear

- Posts: 1075
- Joined: 04 Aug 2014
They always say "the devil is in the details". As my rebuild gets closer to finishing everything I'm doing seems to take longer. At the beginning of each work session on the Elan Drew and I talk about what we want to accomplish and focus on that. Usually some unknown part is required that forces us to change our direction and we punt while I source a part or go get bolts and nuts the next day.
One of those parts was the union for the temp gauge bulb. When I removed it from the head for the engine rebuild I didn't realize that there were only a couple of threads holding it on. When I went to re-install it was very obvious it needed to be changed. Another small part order to RD Enterprises and a couple of day wait for the part. Ray had a very nice stainless union that had lots of threads on it. Glad I changed it out.
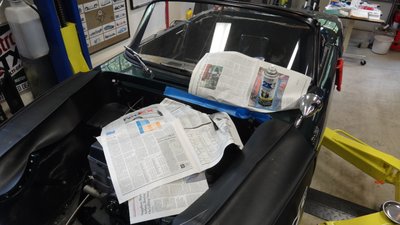
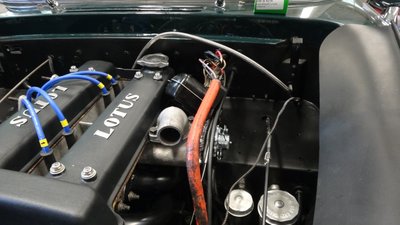
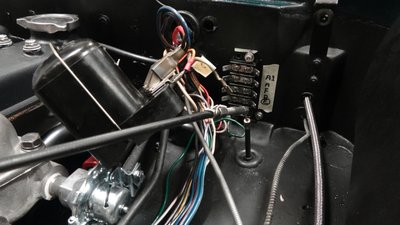
Lots of holes on my firewall and inside the engine bay. The previous owners would just drill holes for any type of attachment point anywhere they wanted. And if a wire or cable ran through the hole LOTS of black silicon was used. Mountains of the stuff! I scraped off all the silicon and cleaned all the areas with paint thinner. Of course this required some re-spraying of the firewall and engine. Also needed to source a number of different size rubber grommets from British Wiring who had everything I needed.
Now comes the rewiring of the electrical components as I no longer need the voltage regulator so a new terminal block will get installed and the Lucas fuse box was melted from the exhaust so I ordered a new one and will change the location as it will just happen again.
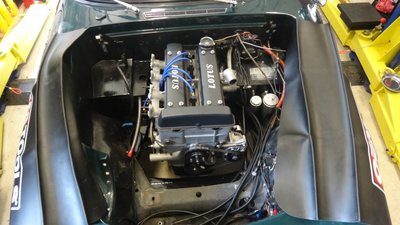
While I was working on the left side of the Elan deep in wiring relocation, Drew was on the right getting the fuel line fittings and the weber carbs installed. We ran into a slight problem with the braided steel hose as the fittings were being difficult no matter how carefully we cut the hose. Both of us applied our resourcefulness along with a couple of beers to keep our spirits up. Success!
It was late by the time we finished. Tomorrow is another day!
Glen
05 Elise - Back where I started
65 Elan S2 - 26/4055
72 Europa - 74/2358R
69 Elan S4 - 45/7941
64 Elan S1 - 26/0379
12 Colin 30 - Lotus Racing Kart
07 Exige S - Wicked Road/Track Car
07 Exige S - Fast Road/Track Car
06 Elise - Track pack
05 Elise - Back where I started
65 Elan S2 - 26/4055
72 Europa - 74/2358R
69 Elan S4 - 45/7941
64 Elan S1 - 26/0379
12 Colin 30 - Lotus Racing Kart
07 Exige S - Wicked Road/Track Car
07 Exige S - Fast Road/Track Car
06 Elise - Track pack
-

Certified Lotus - Coveted Fifth Gear

- Posts: 1075
- Joined: 04 Aug 2014
Hottest day of the year and Drew and I are in the garage working on electrical with hot soldering irons!
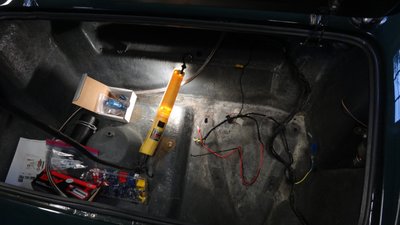
I'm working in the engine bay sorting out the wiring and installing a new terminal block to replace the no longer needed voltage regulator due to changing to an alternator. Drew is in the boot getting all the wiring sorted out for the new electric fuel pump, various ground wires and some unknown and unmarked wiring. Plus we had three wires that went from the race fuel cell sending unit to the front of the car but only need two wires.
We are soldering all the connections (no crimp fittings) so everything takes time. I've got a massive collection of just about every electrical connection fitting you can imagine.........except for one I need in the engine bay so once again I'm stopped until the next day when I can get to the store.
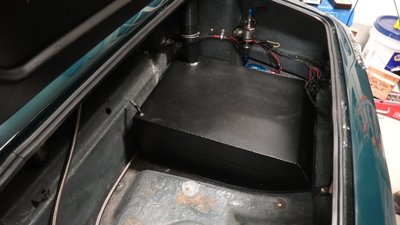
We got most of what we expected to accomplish and finished the fuel tank re-installed with new sending unit and custom loom.
Now we need to complete all the fuel line fittings in the boot and finish the wiring in the engine bay. Tomorrow nights work!
Glen
05 Elise - Back where I started
65 Elan S2 - 26/4055
72 Europa - 74/2358R
69 Elan S4 - 45/7941
64 Elan S1 - 26/0379
12 Colin 30 - Lotus Racing Kart
07 Exige S - Wicked Road/Track Car
07 Exige S - Fast Road/Track Car
06 Elise - Track pack
05 Elise - Back where I started
65 Elan S2 - 26/4055
72 Europa - 74/2358R
69 Elan S4 - 45/7941
64 Elan S1 - 26/0379
12 Colin 30 - Lotus Racing Kart
07 Exige S - Wicked Road/Track Car
07 Exige S - Fast Road/Track Car
06 Elise - Track pack
-

Certified Lotus - Coveted Fifth Gear

- Posts: 1075
- Joined: 04 Aug 2014
Drew is in the boot getting all the wiring sorted out for the new electric fuel pump, various ground wires and some unknown and unmarked wiring.
Are you going to fit an intertia switch to cut off the fuel pump in the unklikely event of a prang?
Bill Williams
36/6725 S3 Coupe OGU108E Yellow over Black.
36/6725 S3 Coupe OGU108E Yellow over Black.
- billwill
- Coveted Fifth Gear

- Posts: 4417
- Joined: 19 Apr 2008
Bill, to be honest I hadn't thought of an intertia switch. I do have a manual switch on the dash with a red toggle that is connected to the electric fuel pump to shut it off and on. I'll think about it more. Appreciate your suggestion.
Glen
05 Elise - Back where I started
65 Elan S2 - 26/4055
72 Europa - 74/2358R
69 Elan S4 - 45/7941
64 Elan S1 - 26/0379
12 Colin 30 - Lotus Racing Kart
07 Exige S - Wicked Road/Track Car
07 Exige S - Fast Road/Track Car
06 Elise - Track pack
05 Elise - Back where I started
65 Elan S2 - 26/4055
72 Europa - 74/2358R
69 Elan S4 - 45/7941
64 Elan S1 - 26/0379
12 Colin 30 - Lotus Racing Kart
07 Exige S - Wicked Road/Track Car
07 Exige S - Fast Road/Track Car
06 Elise - Track pack
-

Certified Lotus - Coveted Fifth Gear

- Posts: 1075
- Joined: 04 Aug 2014
I bought one off eBay (ex-Rover), but I haven't fitted it yet.
The difficult bit seems to be getting an approppriate connection plug to fit in the bottom of the switch.
http://www.ebay.co.uk/sch/i.html?_nkw=i ... tch&crdt=0
All the Interia switches look similar; I don't know if one needs any particulr G-rating or even whether they come in different G-ratings.

The difficult bit seems to be getting an approppriate connection plug to fit in the bottom of the switch.
http://www.ebay.co.uk/sch/i.html?_nkw=i ... tch&crdt=0
All the Interia switches look similar; I don't know if one needs any particulr G-rating or even whether they come in different G-ratings.

Bill Williams
36/6725 S3 Coupe OGU108E Yellow over Black.
36/6725 S3 Coupe OGU108E Yellow over Black.
- billwill
- Coveted Fifth Gear

- Posts: 4417
- Joined: 19 Apr 2008
I found a PDF from one of the manufacturers of Interia switches. With an interesting graph that I am struggling to understand.
http://www.sensata.com/download/resettable-crash.pdf
Obviously one does not want one with a G rating less than the accelleration of an Elan.
http://www.sensata.com/download/resettable-crash.pdf
Obviously one does not want one with a G rating less than the accelleration of an Elan.
Bill Williams
36/6725 S3 Coupe OGU108E Yellow over Black.
36/6725 S3 Coupe OGU108E Yellow over Black.
- billwill
- Coveted Fifth Gear

- Posts: 4417
- Joined: 19 Apr 2008
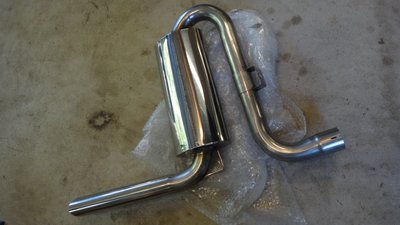
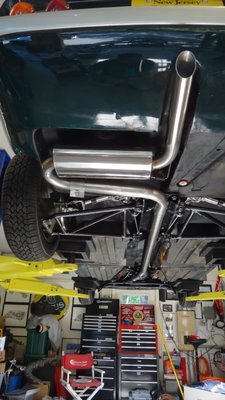
One of the things I have learned about installing new parts on the Elan is they typically don't fit without some modification or fettling. Rarely does something just bolt right in. So it should have come as no surprise that my complete TTR Fast Road, Big Bore, 2 inch exhaust system didn't just bolt in. The quality of the materials and workmanship of all the parts is excellent. Getting it to fit is another thing........
The Big Bore silencer is well made with welds that flow seamlessly. Brackets are in the right place and it was well thought out to have one of the brackets adjustable (not welded to the tube like my other smaller silencer) for proper placement.
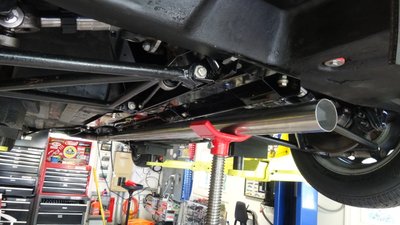
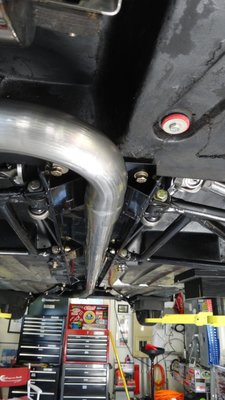
I installed all the parts as a test fit, the header collector tube, center pipe and silencer. The entire exhaust system was too far to the right and off center. More importantly, it was right below the brake line to the rear calipers. That wouldn't be good, preheating the brake fluid.......
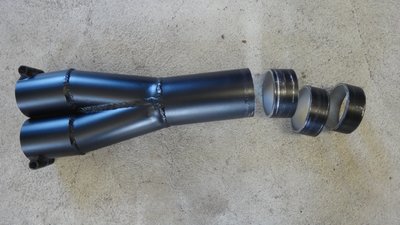
After some measuring I determined that the center pipe and the collector tube was too long and needed to be shortened. Out came the tubing cutter. The center pipe was easy, about 4 inches came off. Then I dealt with the collector tube and I took off what I thought was the right amount. Refitted the collector and put everything in place. Nope. Not enough. Do it again and take some more off. Nope, not enough. As they say, third time is a charm.
Now I have the exhaust center pipe centered under the chassis area and away from the brake line. All good and it looks great!
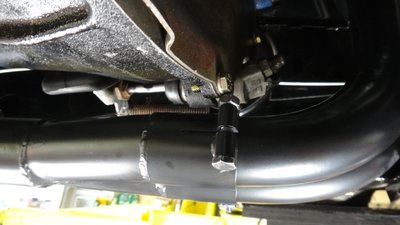
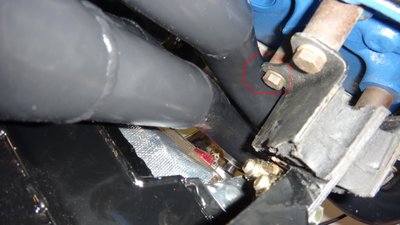
I still need to make a few modifications. One of the collector nuts hits the gear box and one of the header pipes hits the motor mount. Both need bending to provide clearance.
Will figure those things out tomorrow. My wife was waiting for me to take her to dinner which she deserves as I have spent another afternoon with my car and not her. Dinner is the least that I can do!
Glen
05 Elise - Back where I started
65 Elan S2 - 26/4055
72 Europa - 74/2358R
69 Elan S4 - 45/7941
64 Elan S1 - 26/0379
12 Colin 30 - Lotus Racing Kart
07 Exige S - Wicked Road/Track Car
07 Exige S - Fast Road/Track Car
06 Elise - Track pack
05 Elise - Back where I started
65 Elan S2 - 26/4055
72 Europa - 74/2358R
69 Elan S4 - 45/7941
64 Elan S1 - 26/0379
12 Colin 30 - Lotus Racing Kart
07 Exige S - Wicked Road/Track Car
07 Exige S - Fast Road/Track Car
06 Elise - Track pack
-

Certified Lotus - Coveted Fifth Gear

- Posts: 1075
- Joined: 04 Aug 2014
Total Online:
Users browsing this forum: No registered users and 6 guests

