Page 2 of 3
Re: Nose cone wiring tidy up

Posted:
Thu Oct 17, 2019 7:05 pmby MarkDa
Very impressive

Re: Nose cone wiring tidy up

Posted:
Thu Oct 17, 2019 7:24 pmby JonB
Thanks Mark. It?s been a bit of a slog to be honest. Wrapping the looms took ages. Oh and those connectors, crimped an soldered. What a faff! I?ve also sprayed the engine bay in satin black. Not perfect but way better than before. Now I have to respray the wiper motor and brake servo, because they are letting the side down a bit. But that can wait. I need beer!
Re: Nose cone wiring tidy up

Posted:
Thu Oct 17, 2019 9:44 pmby vincereynard
JonB wrote:So, after lots of faffing about and not inconsiderable expenditure, we find ourselves at this juncture:
0D70913F-9B18-4133-A8C1-6F555AC3582A.jpeg
And that, gentlemen, is how we do that.
I used those connectors on my Dissie and Elec. Pump. I was concerned about their ability to take much higher current as the "connector prongs" seemed rather small. They must have been well under 1 square mm.
Are you happy that they are adequate for low resitance current flow? I'm not suggesting they aren't -
just asking.
Re: Nose cone wiring tidy up

Posted:
Fri Oct 18, 2019 8:06 amby JonB
I suppose so, though it looks close. They are rated 300V at 12A, 1.5mm2. There is one three way connector per headlight unit so I don?t think that will be exceeded. If I remember my O Level physics, the 12v 55W headlamp units should draw about 4.5A. They do seem to be brighter (recall that they were already rewired via relays) and the fan?s going like the clappers. Since it?s done now, we?ll have to wait and see.
Re: Nose cone wiring tidy up

Posted:
Fri Oct 18, 2019 2:07 pmby h20hamelan
Want to add my preference for paint (or brunch on electric tape, which is less viscous) for coating open wires. It is true, 12V can heat up higher than any paint or brush on tape can handle.
For me, its more about using a coating which stops corrosion. Negative or Positive.
Re: Nose cone wiring tidy up

Posted:
Fri Oct 18, 2019 6:29 pmby JonB
Sorry, don?t understand your point. Paint? Ermmm....
Re: Nose cone wiring tidy up

Posted:
Fri Oct 18, 2019 7:19 pmby MarkDa
Something like this instead of shrink wrap
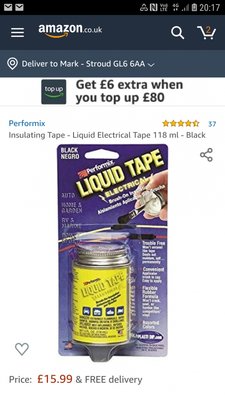
- Brush on insulation
But you PiA was wearing bundles?
Re: Nose cone wiring tidy up

Posted:
Sat Oct 19, 2019 3:23 amby h20hamelan
Paint seals conductive surfaces. After bits are fastened and tight.
Re: Nose cone wiring tidy up

Posted:
Sat Oct 19, 2019 6:52 amby JonB
Oh I see. I was going to smear some grease on the bus bars to help protect them, even though they are plated and the screws are stainless. I wouldn?t be putting that stuff on the loom wires though, as they are colour coded and I don?t want to cover them. The connectors I used are waterproof to IP65 so I think there is no need to paint them either.
I think that if my loom survived for 47 years wrapped with non adhesive loom tape, then me doing the same with my new looms is not going to cause problems. plus it looks more original (apart from the modern connectors).
Re: Nose cone wiring tidy up

Posted:
Wed Oct 23, 2019 5:35 pmby JonB
Since we?re in the nose one...
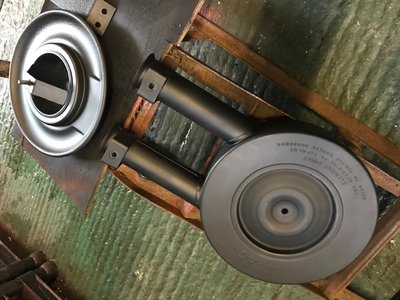
- Air box
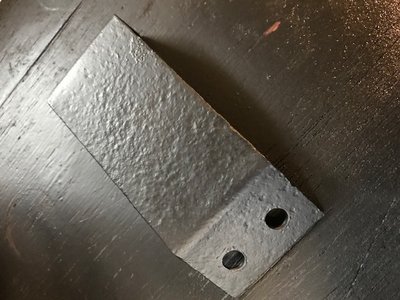
- Sadly, the mounting bracket was too pitted to come up well.
Amazing what results you can get with a space heater and rattle can. I used the angle grinder with wire brush wheel to remove loose rust and old paint, then heated the pieces with the space heater, then painted. This stuff is Screwfix no nonsense matt black, and it can be used as an undercoat, as here. I will finish up with gloss or satin black.
I also fitted the new bushes to my drop links and roll bar, piece of cake. Used Swarfega and water as a lubricant, slid bushes onto rollbar ends first, then fitted drop links over bushes.
Re: Nose cone wiring tidy up

Posted:
Wed Oct 23, 2019 7:51 pmby The Veg
Wow, that airbox looks good! Mine is an oily mess with lots of paint missing, so that gives me something to aim for!
Re: Nose cone wiring tidy up

Posted:
Thu Oct 24, 2019 9:35 amby JonB
While we're at it...
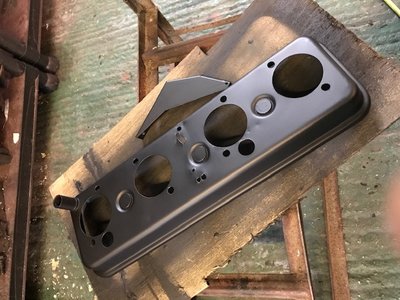
- Carb back plate / box and throttle bracket
The bracket should be welded to the back plate but it broke off long ago, hence the odd shaped hole. There's a corresponding bit on the bracket that fits this hole. It's now secured by a pair of nuts & bolts, an arrangement I prefer because I can paint the mating surfaces to avoid rust.
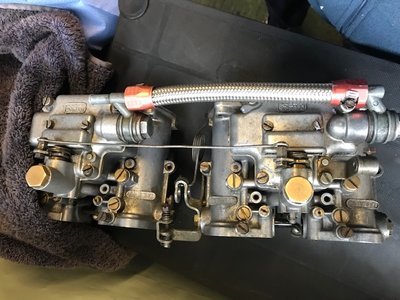
- Carbs cleaned
This took a long while and entailed brushing with brake cleaning fluid, petrol and finally degreaser rinsed off with water. Then dried off with an airline followed by some heat from the space heater. They don't look "restored". Is the patina pleasing, I wonder?
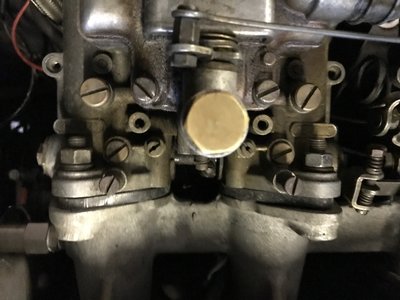
- This is how they started!
On the other hand, they were proper filthy.
Re: Nose cone wiring tidy up

Posted:
Thu Oct 24, 2019 12:22 pmby types26/36
Looks as though the carbs were solidly mounted with no thackery washers or nyloc nuts?
Re: Nose cone wiring tidy up

Posted:
Thu Oct 24, 2019 12:28 pmby JonB
That was taken ages ago. It?s got Thackeray washers and new O rings now.
Re: Nose cone wiring tidy up

Posted:
Thu Oct 24, 2019 5:42 pmby MarkDa
This may be preaching to the converted but I only realised recently (on reading an air box sticker in someone's post) that there's supposed to be a 'sealant' gasket between the two parts of the airbox.
I've had my car 37 years and it never had anything visible when I bought it - so I just carried on pulling them up "dry'
