OMG what have I done?? (New dashboard)
71 posts
• Page 1 of 5 • 1, 2, 3, 4, 5
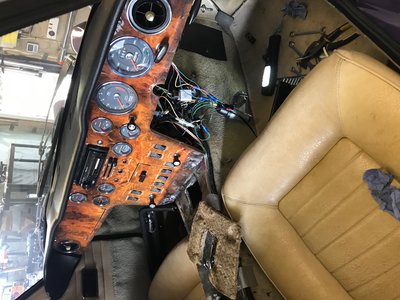
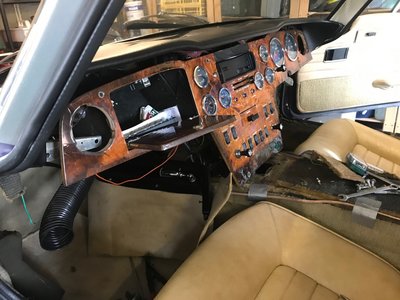
I had a bit of a slow day today so thought to go into the garage to make some progress. Something small and straightforward - like pulling the Kienzle clock out and seeing if I could repair it. However, one thing led to another...
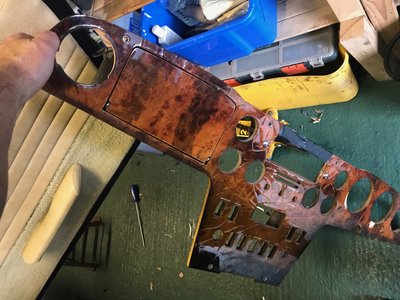
Ooops, I seem to have pulled the dash out!
En route, I also replaced the steering column bushes.
Ooops, I seem to have pulled the dash out!
En route, I also replaced the steering column bushes.
Last edited by JonB on Fri Sep 06, 2019 1:36 pm, edited 3 times in total.
-

JonB - Coveted Fifth Gear

- Posts: 2358
- Joined: 14 Nov 2017
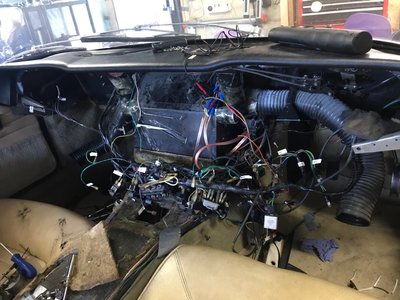
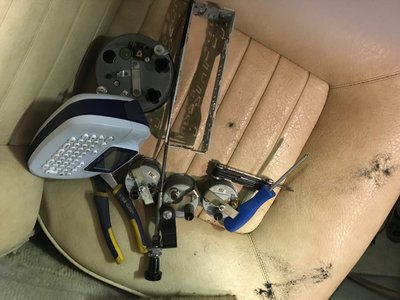
Using a Brother labelling machine I labelled up all loose wires, but left the switches and fuse box connected, preferring to unscrew them from the back of the dashboard. I will pull them off the loom, but only after labelling all the connections.
I'm delighted with the little labeller.
Now, as usual I took very few pictures, trusting instead to the labels.
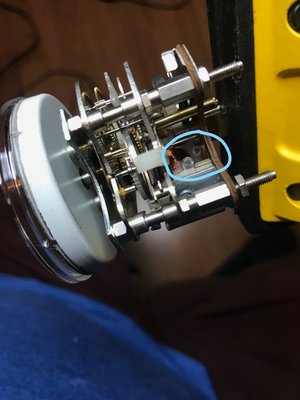
Later on I turned my attention to the broken clock. It looked like the solenoid was burned out - certainly it has seen a bit of heat - but in the end I just needed to resolder a joint that had come loose.
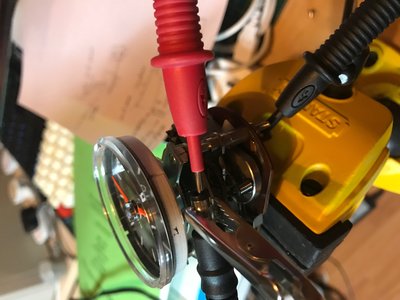
Then some testing on a dodgy test setup..
Seems to work - ticks along and auto winds, but the hands aren't moving. It was working before.. I must have knocked it out of kilter. Will need a good fiddle I expect.
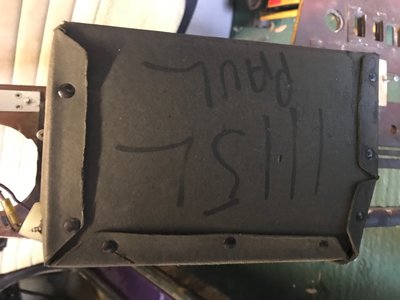
Big thanks to Paul for assembling my car!
-

JonB - Coveted Fifth Gear

- Posts: 2358
- Joined: 14 Nov 2017
Actually, it wasn't a full suspension rebuild, but a refresh of the bushes all round and trunnions. To be fair, I knew this had to be done, just as I knew a new dashboard and heater overhaul was needed. I have to say, dashboard removal has been much easier than I thought it'd be, especially pulling the ambient temperature gauge out which I fretted about incessantly. In fact, so far the only unexpected work was the knackered rear bearing and trip to Peterborough, so I consider myself lucky (so far)!
By the way, since Peterborough the indicators have not self cancelled, because when they did the tracking they didn't ensure the steering column was in the central position. I've put up with it since, but I'll sort it when the column goes back in.
So this morning I will pull the heater box... what horrors await??
-

JonB - Coveted Fifth Gear

- Posts: 2358
- Joined: 14 Nov 2017
Jon
As a matter of interest how did you get the column bushes out?
I have more play than I should and bought replacements but couldn't shift the old ones.
Fortunately my MoT man is fairly laid back so it's not been a problem but I'd like to them right.
Mark
As a matter of interest how did you get the column bushes out?
I have more play than I should and bought replacements but couldn't shift the old ones.
Fortunately my MoT man is fairly laid back so it's not been a problem but I'd like to them right.
Mark
- MarkDa
- Coveted Fifth Gear

- Posts: 1116
- Joined: 15 Apr 2017
Easy peasy.
To fit new bushes:
Looks like a faff but in practice it is common sense. Just remember to refit the shaft prior to fitting the second bush, and treat the housing carefully - it's very thin and can easily be damaged.
- Remove column from the car entirely (and take the ignition barrel off).
- Locate the rubber pegs in the shaft, then drill them out.
- Remove the indicator self centering clip (ah ha!)
- The steering column shaft should slide up and down inside the casing, and stop. It's the locking collet hitting the old bushes.
- Stand column upright on a Workmate with the steering wheel end down. You need to have the jaws of the Workmate open enough to let the shaft go through.
- Use a wooden mallet to tap the shaft down. This should drive the top bush out.
- Remove shaft, turn it over and reinsert it. Slide it down so that it stops on the bottom bush.
- Place the column on a block of wood on the floor, upright, and drive the bottom bush out with the mallet.
To fit new bushes:
- Lubricate bush with detergent and push into bottom end of column housing, ensuring the pegs line up with the holes in the housing.
- Use the shaft to drive the bush into the housing. You might need to press the leading edge of the pegs in once they catch on the housing edge.
- Remove shaft and insert it in the top of the housing, right way round (this means, with the steering lock collet nearest the top of the housing). Slide it down.
- Lubricate the second bush with detergent and insert into top of housing, ensuring the pegs are aligned with the holes.
- Use a suitable drift to drive the top bush into the housing (in my case, a M10 garden bolt with a domed end).
- Slide inner shaft up into position and refit the indicator self centering clip.
Looks like a faff but in practice it is common sense. Just remember to refit the shaft prior to fitting the second bush, and treat the housing carefully - it's very thin and can easily be damaged.
-

JonB - Coveted Fifth Gear

- Posts: 2358
- Joined: 14 Nov 2017
JonB wrote:By the way, since Peterborough the indicators have not self cancelled, because when they did the tracking they didn't ensure the steering column was in the central position.
They did the tracking!
- vincereynard
- Coveted Fifth Gear

- Posts: 1071
- Joined: 12 Jan 2015
Well, you drove it. I've not touched the tracking since, and it feels OK. He said it was set at 3mm toe in (possibly per side, can't recall). Just a pity they didn't check the self cancellers.
Meanwhile...
I've pulled the heater box out. As usual, the foam and lip rubbers are all perished and crumbly, but the general condition is pretty good, especially the radiator. Quite happy!
Anyone know where to get lip rubber?
Meanwhile...
I've pulled the heater box out. As usual, the foam and lip rubbers are all perished and crumbly, but the general condition is pretty good, especially the radiator. Quite happy!
Anyone know where to get lip rubber?
-

JonB - Coveted Fifth Gear

- Posts: 2358
- Joined: 14 Nov 2017
JonB wrote: Just a pity they didn't check the self cancellers.
Maybe they did but disconnected the handbrake instead?
- vincereynard
- Coveted Fifth Gear

- Posts: 1071
- Joined: 12 Jan 2015
Anyone know where to get lip rubber?
Sheet neoprene from Fleabay and a pair of scissors..
John
Sheet neoprene from Fleabay and a pair of scissors..
John
-

john.p.clegg - Coveted Fifth Gear

- Posts: 4533
- Joined: 21 Sep 2003
71 posts
• Page 1 of 5 • 1, 2, 3, 4, 5
Total Online:
Users browsing this forum: No registered users and 44 guests

