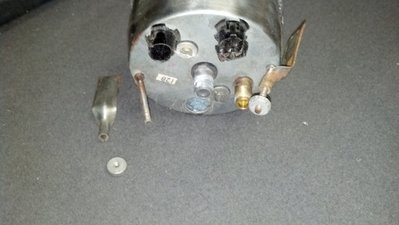
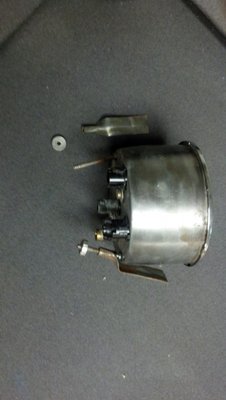
behind the dash on a Plus 2
18 posts
• Page 1 of 2 • 1, 2
Hi,
I need to get behind the dash board to i) remove the rev counter and ii) to get to the wiper switch, to tighten it, as it has worked loose. However, you seem to need fingers 6 inches long with universal joints for knuckles. Is there an easy way to get to the back of these instruments?
Thanks
I need to get behind the dash board to i) remove the rev counter and ii) to get to the wiper switch, to tighten it, as it has worked loose. However, you seem to need fingers 6 inches long with universal joints for knuckles. Is there an easy way to get to the back of these instruments?
Thanks
Last edited by Hongokongo on Mon Aug 19, 2013 8:44 am, edited 1 time in total.
- Hongokongo
- Second Gear

- Posts: 79
- Joined: 07 Jan 2013
You can get at most things if you remove the two knee trim panels.
The wiper control needs to be tightened from the front, the nut is deep in an alloy tube.
The knob comes off by pressing in a little button on the side.
Then get a short (say 6 inch) tube of metal that will go into the alloy tube and cut the ends with a hacksaw leaving two small points at 180 degrees apart, to fit in the slots of the securing nut.
It is then easy to tighten the nut and replace the knob.
Bill Williams
36/6725 S3 Coupe OGU108E Yellow over Black.
36/6725 S3 Coupe OGU108E Yellow over Black.
- billwill
- Coveted Fifth Gear

- Posts: 5062
- Joined: 19 Apr 2008
billwill wrote:The wiper control needs to be tightened from the front, the nut is deep in an alloy tube.
The knob comes off by pressing in a little button on the side.
Then get a short (say 6 inch) tube of metal that will go into the alloy tube and cut the ends with a hacksaw leaving two small points at 180 degrees apart, to fit in the slots of the securing nut.
It is then easy to tighten the nut and replace the knob.
Isn't that the headlamp vacuum switch Bill ?
Roger
S4 DHC
S4 DHC
- oldelanman
- Coveted Fifth Gear

- Posts: 1969
- Joined: 02 Jan 2008
oldelanman wrote:billwill wrote:The wiper control needs to be tightened from the front, the nut is deep in an alloy tube.
The knob comes off by pressing in a little button on the side.
Then get a short (say 6 inch) tube of metal that will go into the alloy tube and cut the ends with a hacksaw leaving two small points at 180 degrees apart, to fit in the slots of the securing nut.
It is then easy to tighten the nut and replace the knob.
Isn't that the headlamp vacuum switch Bill ?
Ulp! have I confused the two?
Anyway the same home made tool can be used to tighten any of the panel controls I think, so it is still worth making one.
<visits Elan in garage>
<returns triumphant>
Aha.. No I am not going potty yet. My Wiper switch is the old one that used to have a hand pump section on the back to pump the washer fluid. And it is indeed the one which is set back in an alloy tube, not the Headlamp lifter.
Last edited by billwill on Sun Aug 18, 2013 7:17 pm, edited 2 times in total.
Bill Williams
36/6725 S3 Coupe OGU108E Yellow over Black.
36/6725 S3 Coupe OGU108E Yellow over Black.
- billwill
- Coveted Fifth Gear

- Posts: 5062
- Joined: 19 Apr 2008
Sorry, what are knee trim panels?
I don't think I have those, but still can't reach where I need to.
I don't think I have those, but still can't reach where I need to.
- Hongokongo
- Second Gear

- Posts: 79
- Joined: 07 Jan 2013
Hongokongo wrote:Sorry, what are knee trim panels?
I don't think I have those, but still can't reach where I need to.
See the photos above that I just uploaded. The (black) knee trim panels attach to the curve of the dashboard just above the drivers & passengers knees to hide the stuff behind the dash board. It is possible that yours are missing.
Which model car is yours.
Bill Williams
36/6725 S3 Coupe OGU108E Yellow over Black.
36/6725 S3 Coupe OGU108E Yellow over Black.
- billwill
- Coveted Fifth Gear

- Posts: 5062
- Joined: 19 Apr 2008
1969 Elan plus 2. there is no under dash cover, just loads of wires!!
- Hongokongo
- Second Gear

- Posts: 79
- Joined: 07 Jan 2013
El-Saturn.
Do your instructions apply to the Plus 2 as well?
Do your instructions apply to the Plus 2 as well?
- Hongokongo
- Second Gear

- Posts: 79
- Joined: 07 Jan 2013
Hongokongo,
It would also be good to know what type of switch you have as the tacho is a long way from either. If it's the early rotary type (as my car) I go in from the radio slot. If it's the rocker type I would have thought you can get at it from the side.
I would also point out that if it's an early +2 with the Ford column the most you need to do to remove the tacho is to remove the column shrouds.
Cheers
John
- elanman999
- Third Gear

- Posts: 487
- Joined: 12 Nov 2005
It is my experience that both tach and speedo can be removed without disassembling the steering column.
I have always been able to very carefully work one hand from under the dash thru the wiring nest until I find the 2 knurl nuts that retain the 2 mounts brackets. They are on finger tight and can be spun off releasing the instrument which then can be pulled from the dash while releasing attached cables, wires, and bulbs as they come out of the dash.
Replacement is the same but more difficult as you now have to find the mounting studs, slip on the brackets, and the nuts all by feel. A word of caution, there may also be ground wires on one or more of the studs that have to be located and replaced.
Hope this helps
Rick
- crannyr
- Second Gear

- Posts: 132
- Joined: 10 Oct 2004
John,
I'm away from home at the moment, but will post a picture, if I can, when I return.
I'm away from home at the moment, but will post a picture, if I can, when I return.
- Hongokongo
- Second Gear

- Posts: 79
- Joined: 07 Jan 2013
My switch appears to be the same as the one above, but how do you get the knob off to access the nut?
- Hongokongo
- Second Gear

- Posts: 79
- Joined: 07 Jan 2013
18 posts
• Page 1 of 2 • 1, 2
Total Online:
Users browsing this forum: No registered users and 24 guests


