Page 5 of 6

Re: Overhauling the back end

PostPosted: Wed Jan 24, 2018 4:38 pm
by JonB
Meanwhile, CV jointed shafts are delayed.

Time for a rest I think!

Re: Overhauling the back end

PostPosted: Wed Jan 24, 2018 5:15 pm
by alan.barker
For the exhaust i like the "Mikalor" clips in stainless and they don't crush or damage the pipes.
Alan

Re: Overhauling the back end

PostPosted: Wed Jan 24, 2018 7:03 pm
by JonB
I ordered these

http://www.ebay.co.uk/itm/330653154359

Should do the job with a bit of jointing paste.

Re: Overhauling the back end

PostPosted: Sun Jan 28, 2018 9:17 pm
by JonB
Quick question.

Does anyone know the correct torque setting for the diff torque rod bush nuts? Can't see it in the manual.

Re: Overhauling the back end

PostPosted: Mon Jan 29, 2018 2:17 am
by elanner
From the 2 seater manual:

elan-section-0-26.jpg and

Nick

Re: Overhauling the back end

PostPosted: Mon Jan 29, 2018 11:01 am
by JonB
Thanks Nick!

Meanwhile... a delivery cometh!

img_4474.jpg and
Sue Miller CV Driveshafts


img_4475.jpg and
With helpful fitting reminder!


So I will not be battling with doughnuts after all. :D

Some observations:
  • They are much bigger than they look, especially the end pieces. Heavy, too - not sure if heavier than an original shaft + 2 doughnuts.
  • The shafts themselves are encased in a plastic sleeve that goes under the CV joint boots.
  • The CV joint boots are secured with a tie wrap round the driveshaft; the outer ends are secured by the steel ring that the hex bolts pass through.
  • Feels like quality!

Re: Overhauling the back end

PostPosted: Mon Jan 29, 2018 11:07 am
by john.p.clegg
Jon
Looking at photo 1,I can't spot the difference....what is it?, length of studs?

John :wink:

Edit
Yes,probably ,thickness of brake disc added?

Re: Overhauling the back end

PostPosted: Mon Jan 29, 2018 11:28 am
by JonB
Yes, the diff studs are longer to accommodate the brake disk.

These are Kelvedon units supplied by Sue Miller. The instructions that came with them don't specify a torque setting for the nuts, so I rang them. The rather helpful chap said that the setting was "tight", very Lotus. :lol:

They are supposed to be done up proper tight then checked after a couple of hundred miles. I figure that I will know immediately if they come loose..

Re: Overhauling the back end

PostPosted: Mon Jan 29, 2018 11:29 am
by ericbushby
When mine came recently, I did not want to fit them out of sight under the car.
I really wanted to mount one on a vee block on the side board for a few weeks.
A nice piece of kit.
Eric in Burnley
1967 S3SE DHC

Re: Overhauling the back end

PostPosted: Mon Jan 29, 2018 4:06 pm
by prezoom
Maybe it is just me, but the shafts seem a bit short for a Plus2. Could be the adapters thickness.

Re: Overhauling the back end

PostPosted: Mon Jan 29, 2018 4:56 pm
by JonB
About a centimetre at each end. That said, they are retracted.

f97cb691-d96e-4ea5-9516-184df0e32303.jpeg and

Re: Overhauling the back end

PostPosted: Tue Jan 30, 2018 5:31 pm
by The Veg
Very nice kit indeed! My car has them too but they've been there since fitted by a PO and don't look nearly so shiny and pretty.

Re: Overhauling the back end

PostPosted: Sat Feb 03, 2018 1:30 pm
by JonB
The long haul to a reassembled back end begins.

First off, I noticed that the offside outer driveshaft is not original. It actually looks like the new billet item I fitted to the nearside.

img_4495.jpg and


It's not obvious from the photo, but this is a different shape to the old one I took off the nearside hub. That bit in the middle is the safety pin I had to cut off in order to fit the CV jointed driveshafts. Anyway, the spider legs have the characteristic square edges that indicate they were milled rather than cast and thus likely to be billet. So, that's good, then!

The diff control rod bushes are done for.
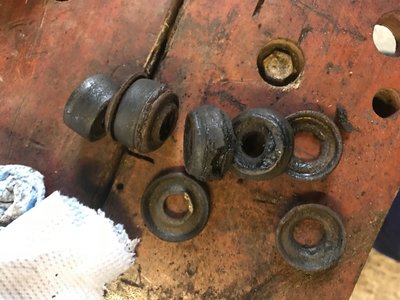
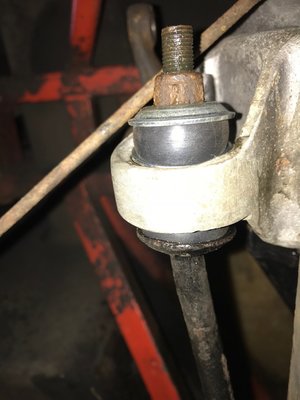
img_4494.jpg and
Old diff control rod bushes.


They are replaced and all bolts done up tight with thread lock.
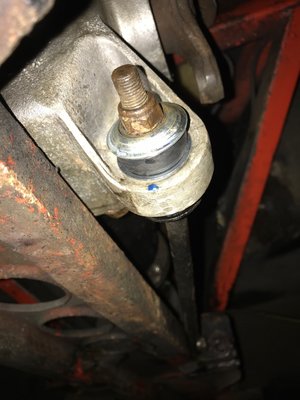
img_4492.jpg and
Nearside

img_4493.jpg and
Offside


Next up, trial fit of the CV jointed shafts (no, the wishbones are not on yet, but this being a Plus 2, the shafts have enough length for "full droop" to be OK). Hit a bit of a snag - the CV joints have cups on their outer faces and one of them (the one that faces the nearside spider of the diff output shaft) will not fit, because the remains of the shaft "safety pin" are standing a little too proud for me to be able to bolt the thing together. I'm going to have to take it off and grind the pin back some more.... bother!

Off to pick up the wishbones soon.

Re: Overhauling the back end

PostPosted: Sat Feb 03, 2018 6:20 pm
by JonB
Right. Picked up the wishbones with new bushes fitted, primed in Hammerite.

img_4496.jpg and


Not perfect paint-wise (I will probably spray them later) but the bent one is now straight. So on to the trial fitting of the CV jointed shafts. In my previous post I said one wouldn't fit due to the cap, but I found the cap would just slide inwards with persuasion, so I didn't have to remove it after all. :D

img_4498.jpg and


img_4499.jpg and


The angles look a little extreme, but they are not binding. Not tightened up either as I need someone to sit in the car and press the foot pedal to lock the hubs.

Re: Overhauling the back end

PostPosted: Sat Feb 03, 2018 6:27 pm
by JonB
Now aggro with the wishbones. As usual, the bushes don't quite line up properly with the mounts (inner or outer), so it's a matter of grunt and swear until it's done. Would have been so much easier on a proper lift! Anyway, I'll let the pictures do the talking:

img_4507.jpg and

img_4503.jpg and

img_4502.jpg and

img_4505.jpg and

img_4506.jpg and


The inner bolts have washers under the nuts only, as I discovered I couldn't wind the nut on all the way with a washer at both ends (they're a bit fat). These bolts were fitted with the nuts closest to the drive shaft, not sure if that is right but does it really matter? The outer bolts have washers at both ends (nice thin ones).