Page 1 of 1
glove box catch

Posted:
Tue May 07, 2019 12:34 pmby bill griffiths
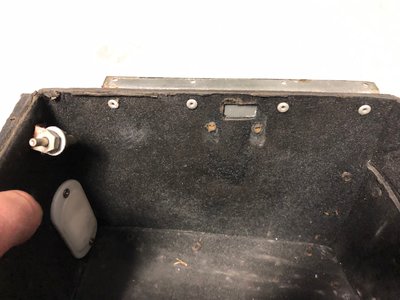
I shall attempt to attach a photo of the top of my new glovebox.
I have not got any detail of the method by which it attaches to the dash, nor
any detail of the catch which connects with the tongue on the press button
opener.
Any help as to the missing parts or their assembly would be greatly appreciated.
Regards
Bill
Re: glove box catch

Posted:
Tue May 07, 2019 1:12 pmby jono
Bill,
It's a long time since I did mine but I seem to recall the top edge was fixed to the inner face of the dash by means of a thin metal angle which clamped the top edge of the box and then the other 'flanges' of the box were fixed by short screws and cup washers.
I can't advise on the latch I'm afraid as mine had a tutch latch.
Jon
Re: glove box catch

Posted:
Tue May 07, 2019 10:34 pmby wotsisname
Top edge is a thin angle iron rivetted on. Small u shaped bracket screwed up into the aforementioned for the latch. I'll post up some photos tomorrow evening as I'm currently doing the same job.
Re: glove box catch

Posted:
Wed May 08, 2019 12:18 amby bill griffiths
Thanks, gentlemen. I think I recall the latch itself being a short piece of steel bent at about 45 degrees
along one axis and with a hole at each end for fixing. Your ongoing assistance is marvellous!
Regards
Bill
Re: glove box catch

Posted:
Wed May 08, 2019 3:47 amby Chrispy
I happen to have mine out at the moment. I'll try and grab a photo!
Re: glove box catch

Posted:
Wed May 08, 2019 12:41 pmby Certified Lotus
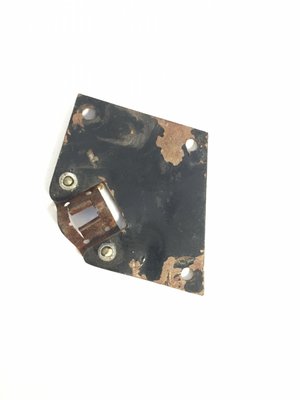
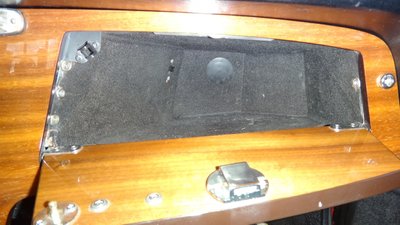
Bill, if I remember correctly there are two types of glove box catches. This is what I had on my S4:
The metal plate in the first photo is what is mounted in the upper left corner of the glove box second photo. There is a round chrome plate with a pin mounted on the glove box door that is pushed into the receiving plate when closed.
Hope it all makes sense.
Re: glove box catch

Posted:
Wed May 08, 2019 5:25 pmby wotsisname
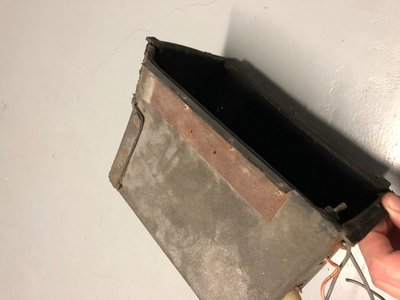
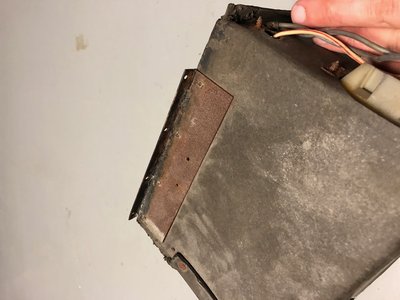
Bill, I think this is what you are describing. This was on my early +2.. this the original glovebox, close up from top. This doesnt have an internal light or the extra latch hole as on the top of yours.
I will attempt to attach to the dash tonight. There is less wood between dash top and glovebox on my replacement dash (purchased many years ago).. so I hope it will fit together sensibly... I think I will have to relieve the bracket shown.
Adrian
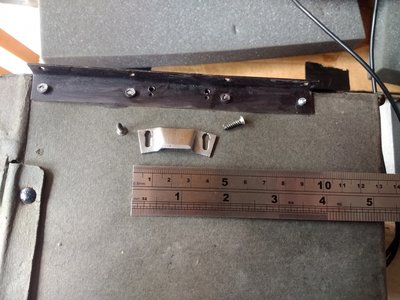
- Early +2 glovebox, latch
Re: glove box catch

Posted:
Mon May 13, 2019 2:19 amby Chrispy
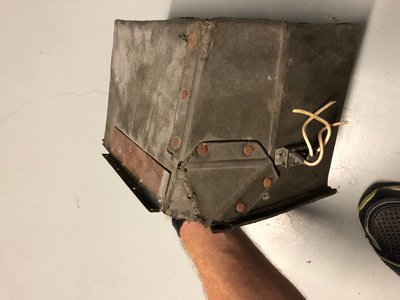
Finally got some pictures of mine. Unsure if it's the correct glovebox for an early +2 with the little light, but I'll be keeping it.
Re: glove box catch

Posted:
Mon May 13, 2019 12:25 pmby wotsisname
I finally got mine assembled to the back of the dash. A bit of fine tuning of the latch position is required to prevent the lid rattling at the same time as not having the lid permanently closed (quite handy that you can remove the lock from outside). A few learning's...if it helps anyone
1) I found it difficult to source suitable screws.. I've mislaid many of the originals / the screwdriver slots were knackered... model maker shops are a good source.
2) I used small washers (sold for use with rivets), some ground to a D shape... these also help ensure the screw doesn't come out the front of the dash.
3) A straight edge (carefully) clamped to the dashboard (inside the glovebox opening) helped me set the top of the glovebox correctly so that you don't see the front edge of the "cardboard". Once the top was in the rest was much easier.
4) I put the lower dash edge trim in place before attaching the glovebox.. the trim fits too tightly for the glovebox to sit between it and the dash.
I was working with an old glovebox and new dash so didn't have any initial line up holes.
next... to suss out what to do with the anti-theft switch.. I have a replacement [which has small solder connections]... I'm undecided whether to use it for an alternative purpose. I think I may solder a multi-way plug on rather than directly solder it into the loom.
Adrian
