vacuum pod repair
8 posts
• Page 1 of 1
just as well it was a bright evening yesterday , as the driver's headlamp failed to rise and the passenger side just about shone over the bumper as we were coming home from a very nice visit to the Red Lion in Manningtree which has just been given a makeover & reopened.
Transpires that the driver's side diaphragm had split & today Susan Miller gave me the bad news that it would be a couple o weeks before stock comes in .
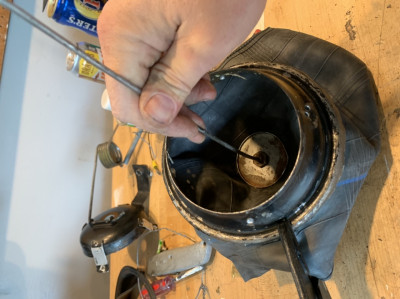
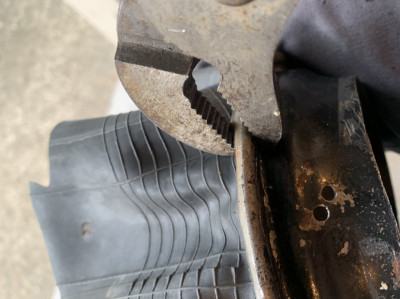
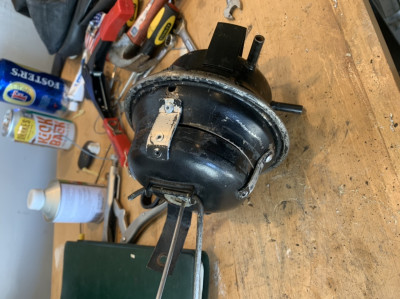
Despite posts to the contrary I thought I'd have a bash at deconstructing the pod to see if a repair was possible .It was & pictures below show how it can be possible to undo the seam , access the diaphragm for repair with cycle inner tube patch and then knock the seam back together again . I decided it wasn't necessary to redo the seam quite as tight as before , which will make it a little quicker to access the diaphragm next time. To ensure correct location of the diapragm between the two halves I smeared a little silicone sealant on top half before reassembly. I've just painted the seam with hammerite so will refit tomorrow
The diaphragm had failed along a crease line I suspect caused by the pod plunger being out of line with it's anchor point , causing a slight twist in the diphragm on tightening
-

RichC - Fourth Gear

- Posts: 741
- Joined: 28 Apr 2009
Rich,
Well done. I think that's a first!
Looks like the diaphragm wasn't perished, as such, due to any fuel contamination for example.
Cheers - Richard
Well done. I think that's a first!
Looks like the diaphragm wasn't perished, as such, due to any fuel contamination for example.
Cheers - Richard
- ardee_selby
- Coveted Fifth Gear

- Posts: 1090
- Joined: 30 Sep 2003
hmmm interesting I have a pair of pods which have seen better days, after reading this i think i might have a go at dis-assembling them to see if i can save them (and the ?75 each I have been quoted for new ones!)
- gazzamuffin
- Second Gear

- Posts: 70
- Joined: 08 Oct 2011
Hi
Years ago I actually went to the trouble of making these in grp using, of all things, a Sainbury xmas pudding container (only because it was the correct size). I added a flange on both halves where they meet so they could be bolted together and fibreglassed in the necessary bracketry in stainless steel. The steel connecting rods I replaced with brass and used silicon to seal the 4 halves when bolting together. Worked fine for years- until I went for electric lift. The guy who bought them from me is still using them (untouched) 15 odd years later. Cost- about ?15 in materials plus lots of time and patience.
John
- worzel
- Fourth Gear

- Posts: 614
- Joined: 13 Jan 2004
Just how did you open the seam Rich?
Henry
1967 S3 FHC
A joke a day helps you work, rest, and play.
1967 S3 FHC
A joke a day helps you work, rest, and play.
- Henry VIIII
- Second Gear

- Posts: 74
- Joined: 10 Mar 2012
sorry Henry , you've probably worked it out by now, (ahem!) but for those others of you, just try peeling back the lip of the 'equator' fold... that's all it is , no spot welds or glue. I used a decent screwdriver blade, little and often all round . Getting it started is the trickiest .
-

RichC - Fourth Gear

- Posts: 741
- Joined: 28 Apr 2009
I recently took my vacuum pod apart.
Years ago my dad had cut the top off to get to the rubber diaphragm and he repaired a tear. Well 40 years later the repair failed and the old diaphragm was too far gone so I decided to replace the rubber with a inner tube and lots of rubber cement.
Figured I’d share my results.
Years ago my dad had cut the top off to get to the rubber diaphragm and he repaired a tear. Well 40 years later the repair failed and the old diaphragm was too far gone so I decided to replace the rubber with a inner tube and lots of rubber cement.
Figured I’d share my results.
- ethanlance
- First Gear

- Posts: 33
- Joined: 16 May 2006
ethanlance wrote:I recently took my vacuum pod apart.
Years ago my dad had cut the top off to get to the rubber diaphragm and he repaired a tear. Well 40 years later the repair failed and the old diaphragm was too far gone so I decided to replace the rubber with a inner tube and lots of rubber cement. ...
Brings back memories of my own dad rebuilding a 69 Plus 2 in the '80s, which I subsequently enjoyed for some 15 years. Wish the car were still with me. And the dad.
John
- baileyman
- Third Gear

- Posts: 347
- Joined: 17 Aug 2017
8 posts
• Page 1 of 1
Total Online:
Users browsing this forum: No registered users and 26 guests


