Page 11 of 17

Re: S1 ?lan Rebuild - My Story

PostPosted: Sun Aug 02, 2015 12:53 pm
by billwill
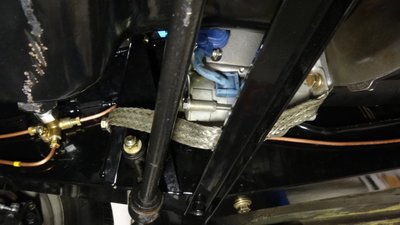
If that photo of engine mount is from above, is it not upside down?

I thought they were designed so that if the rubber to metal joint failed, the engine would not drop out?


lotus-twincam-f39/engine-mounts-tilting-twink-t14152.html#p65778

Image

Re: S1 ?lan Rebuild - My Story

PostPosted: Sun Aug 02, 2015 3:22 pm
by Certified Lotus
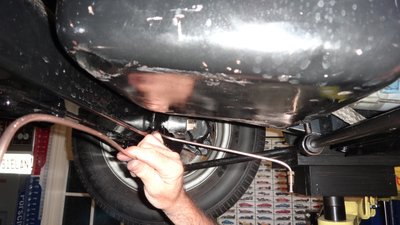
Photo of motor mount is from below, under the car.

Re: S1 ?lan Rebuild - My Story

PostPosted: Mon Aug 03, 2015 1:54 am
by Certified Lotus
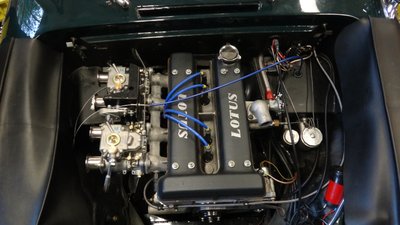
Drew and I put in a 10 hour day today on the Elan, although a big chunk of that was dealing with the throttle linkage and not being satisfied with the way it was designed and operated so we made a couple of mods........but that is another story.

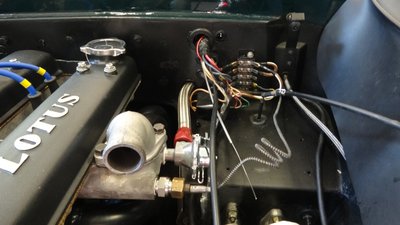
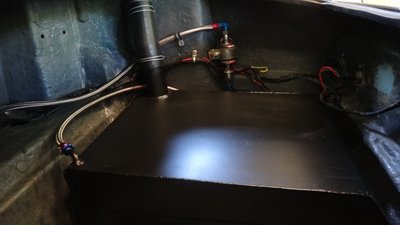
Drew finished up the fuel tank connections and wiring in the boot while I finished up the terminal block connections in the engine bay. We both tidied things up but didn't completely finish all the taping of harnesses until we test all the electrical circuits.

DSC06626.jpg and
Terminal Block Wiring

DSC06622.jpg and
Fuel Tank & Fuel Pump


Next we tackled the throttle linkage for the Webers. Knowing the I was not using the OEM air filter (I had ordered the QED box for maximum air flow to the carbs) I had already ordered the throttle linkage kit from TTR. We spent a couple of hours looking at the way it was designed and trying out various alternatives when we figured out the mods we thought would make it function better. More time then we anticipated, but it works great!

DSC06629.jpg and
Throttle Linkage completed


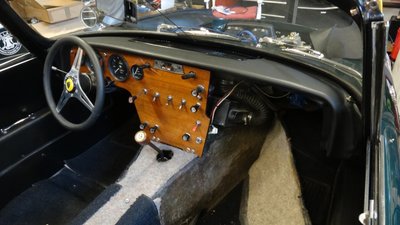
Next came the rebolting of the dash to the car. I had purchased a type 26 crash pad this past winter so I test fit it first. It fit very well. I took it back out and installed the tonneau cover brackets located at the front of the windscreen. They wouldn't allow the crash pad to be refit, I bent the brackets carefully upwards and the crash pad fit fine. Next came the bolting of the dash to the body.

DSC06634.jpg and
Dash and crash pad fitting


After the dash was bolted back in, we tested all the electrical circuits and got everything to work except for the horn and the turn signals. We also pressurized the fuel system and there were no leaks!

I'm hopeful to enter the New Hope Auto Show this Sunday with my completed Elan. Its a bit risky as there is still much to do........but I'm being optimistic as I expect to put a few late nights in this week to get everything buttoned up.

Re: S1 ?lan Rebuild - My Story

PostPosted: Mon Aug 03, 2015 12:32 pm
by billwill
Support the temperature capillary pipe by fastening it to the water-heater valve so that the capilliary pipe does not vibrate at the weak point where it enters the 'bulb' holder.

Re: S1 ?lan Rebuild - My Story

PostPosted: Mon Aug 03, 2015 12:42 pm
by Certified Lotus
Great suggestion Bill! Do you have a photo of an installation like this? Would like to see how others have done this.

Re: S1 ?lan Rebuild - My Story

PostPosted: Mon Aug 03, 2015 12:49 pm
by billwill

Re: S1 ?lan Rebuild - My Story

PostPosted: Mon Aug 03, 2015 1:24 pm
by Certified Lotus
Thanks Bill! One more thing I have learned from you :D

Re: S1 ?lan Rebuild - My Story

PostPosted: Tue Aug 04, 2015 11:04 am
by Certified Lotus
When I took my car apart this spring the master cyclinder and slave cylinder for the clutch was working. So I didn't replace them when I started reassembling the car. Bad decision.

Last night Drew and I worked on getting the clutch master and slave cylinder working. I had bought a new flex line from RD Enterprises with the heat protection hose on it and once we figured out the best routing for it (three different install tries) we put fresh fluid in and pumped away to remove air from the system. No matter what we did the pedal went to the floor very very easily.

I had purchased a new clutch master cylinder last year along with a new brake master cylinder so I had one in my garage. We changed it out and it was obvious the old master cylinder was on its last legs. Note to self, change out the old part especially when you have a new one on the shelf!

Another session of bleeding the master and slave cylinders. Better pedal force this time but still not enough to make me feel confident. I don't have a slave "on the shelf" so I'm resigned to drive out to Ray's place this morning to get one plus a couple of other small bits.

My biggest concern in getting the car running and on the road this weekend is some small part is going to stop me cold as I'll have to wait for something being shipped.

Here is to thinking positive that this is my close to last need of a new part for a while. I mean, what else could I possibly need on the mechanical side...........I think I've replaced just about everything!

Re: S1 ?lan Rebuild - My Story

PostPosted: Tue Aug 04, 2015 3:40 pm
by CBUEB1771
It looks like you have installed the electric full pump that RD offers these days. I have no experience with this pump but I noticed on the RD web site that the output pressure ranges from 2.5 to 4.5 psi. That seems a bit high for Webers. Before starting the engine you might want to check that the fuel pump stalls when the float chambers are full to the correct level.

Re: S1 ?lan Rebuild - My Story

PostPosted: Wed Aug 05, 2015 10:34 am
by Certified Lotus
Russ, have taken note of your comment. I was also concerned about this fuel pump but Ray says I won't need a pressure regulator so I didn't install one. Will know once I get some road time on the engine.

Re: S1 ?lan Rebuild - My Story

PostPosted: Wed Aug 05, 2015 12:20 pm
by Certified Lotus
My hat is off to Ray at RD Enterprises once again. I sent Ray an email very late the other night asking if he had the parts I needed and he responded early the next morning and said I was welcome to pick them up (he is typically mail order only). I left early in the morning (Ray is 1 hour 20 minutes from my house) had a nice chat with Ray & George (they will be at LOG 35), collected my parts and drove home.

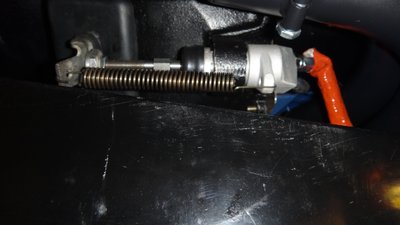
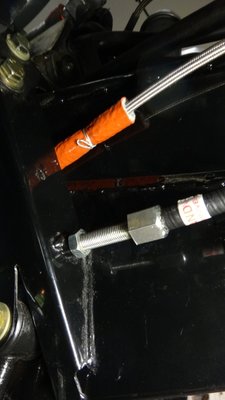
Drew and I tackled the installation of the clutch slave cylinder, bled the system (once again) and got everything routed the way we wanted it. Drew is the master of wire tie so he was at it again making sure the heat protection hose wasn't going to move out of place in the critical area next to the exhaust manifold.

DSC06639.jpg and
Clutch Slave Cylinder

DSC06642.jpg and
Wire tie the heat protection hose


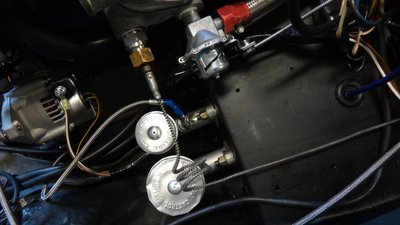
The engine bay now has nice new master cylinders for clutch and brakes.

DSC06635.jpg and
Master Cylinders


Installed the ground strap to the gear reduction starter. The chassis has both left and right threaded holes in it for the emergency brake cable adjustment so we used the empty threaded hole to attach the ground strap.

DSC06644.jpg and
Gear reduction starter ground strap


We were at the point where the unknown was will the engine start, go into gear and actually run before we buttoned everything up. Drew and I decided to try and start the engine without the radiator installed just to test everything quickly. On the second turn over it fired right up, all the gears worked, the clutch pedal is very nice and the engine sounds sooooo nice ! Quick shut down and now we are very motivated knowing we are very close to the finish line.

Broke out a couple of beers while we worked on various little things and quit just after 11pm. A couple more evenings and we will be done. Looks like the New Hope Auto show is a real possibility :D

Re: S1 ?lan Rebuild - My Story

PostPosted: Wed Aug 05, 2015 12:35 pm
by gjz30075
Very nice, Glen. So, it's really not the ground for the starter but rather the chassis to engine ground, right?

Re: S1 ?lan Rebuild - My Story

PostPosted: Wed Aug 05, 2015 2:54 pm
by Certified Lotus
Hey Greg, I stand corrected! You are absolutely right.........engine ground which I connected at the reduction gear starter :D

Re: S1 ?lan Rebuild - My Story

PostPosted: Thu Aug 06, 2015 12:05 pm
by Certified Lotus
Brake system. I had been waiting to finish this last as the "complete" copper hard line set I had purchased from the UK was for a right hand drive car and the tubing that went from the four way union to the master cylinder was way too short......by about 3 feet!

Drew is masterful at bending tubing in his hands and we knew we had to route the last piece of brake line around a few things so we waiting until almost everything was installed to make and run this last critical piece. Plus, the flares on the tubing needed to be the bubble type so a normal flare tool doesn't work. Neither of us owned one so I bit the bullet and bought a nice one. I also ordered nickel cooper line as it is a bit stronger but still bendable.
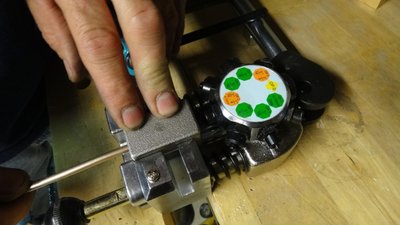
DSC06650.jpg and
Bubble flare tool

DSC06648.jpg and
Custom bending brake line


While Drew was bending away, I was measuring and fitting the new Optima battery for a hold down system that would bolt to the floor and still allow for the fiberglass battery cover to be used. I need two threaded rods 8 1/2 inches long to complete it, but I'm close to finishing. We tested more electrical circuits and confirmed the horn now works but still don't have turn signals. Must be a loose connection under the dash. Will check that tomorrow.

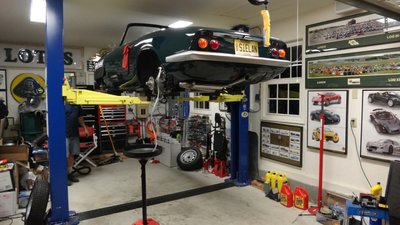
We took all the wheels off to bleed the brakes. There is a back story to the brake system. When I bought the car it had a newer tandem master brake cylinder. There were also many coupler fittings in the brake line all over the car. The brakes were very dangerous. You had to pump like crazy to get any pedal and even then they wouldn't stop you very well. I bled the system twice after I bought the car and couldn't get it to work any better. All the calipers were working and the pads were all fine. I knew I would rip the whole brake line system out and replace in its entirety plus a new master cylinder.

Bled the entire system twice to ensure no air bubbles. The pedal is nice and hard and all the calipers work very well.
DSC06653.jpg and
Bleeding the brake lines


Torqued the wheels back on the car and just for the heck of it I put the chrome hub caps on. Getting closer to completion. Tomorrow night is the installation of the cooling system.
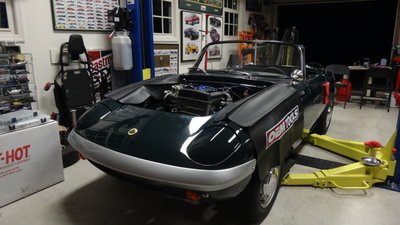
DSC06660.jpg and
Hub caps back on!

DSC06661.jpg and
Finished for the night


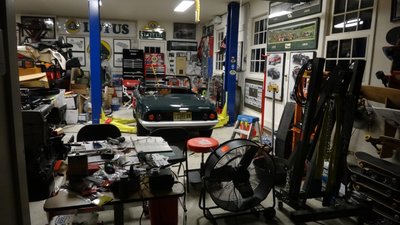
My garage is a mess! I need to finish this project so I can spend a day (or two) cleaning it up and organizing !

Re: S1 ?lan Rebuild - My Story

PostPosted: Thu Aug 06, 2015 5:21 pm
by oldchieft
Sigh,

Your mess looks like mine on a good day.

Jon the Chief