Page 8 of 17

Re: S1 ?lan Rebuild - My Story

PostPosted: Thu Jun 18, 2015 12:11 pm
by rgh0
I dont use lock washers on the tail shaft - just torque up correctly and use loctite. I torque by feel as no room for torque wrench :lol:

cheers
Rohan

Re: S1 ?lan Rebuild - My Story

PostPosted: Thu Jun 18, 2015 1:10 pm
by Craven
Hi,
I think Ford recognized this clearance problem as on later Escort?s they changed to tapped holes in the diff flange, admittedly a larger diameter but tapped at 10mm & bolt with lock washer. This is when Ford moved to all metric sizes on the axle.
FWIW
Ron.

Re: S1 ?lan Rebuild - My Story

PostPosted: Thu Jun 18, 2015 1:29 pm
by Certified Lotus
Rohan & Ron, thanks for your comments. Interesting that Ford recognized the clearance issue and made a subsequent change. Now I don't feel so dumb that I couldn't figure it out :D

Re: S1 ?lan Rebuild - My Story

PostPosted: Thu Jun 18, 2015 3:02 pm
by Certified Lotus
Here is my Dyno plot. Was looking for about 150HP, which I will get to with the TTR exhaust system and a bit more tuning.

Lotus Elan Twin Cam Dyno Plot.pdf
Dyno Plot Twin Cam
(256.92 KiB) Downloaded 706 times

Re: S1 ?lan Rebuild - My Story

PostPosted: Thu Jun 18, 2015 3:43 pm
by elanner
Ray at R.D. Enterprises sells diff/propshaft nuts/bolts:

http://www.rdent.com

------------
Aircraft quality AN bolts for above pinion flange are also in stock.
5/16-24 thread with 5/8" grip length, thread length sufficient for flat washer and full-height nylon locking nut.
Ref. 36R6021 Bolt $1.25 each
Ref. AN365-0524 Nylon Locking Nut $.50 each
-----------

I found that the bolt shoulder was a little longer than the combined thickness of two flanges, and the bolt a couple of threads too long (fouled the nose of the diff). So I needed a fairly thick AN washer under the head of the bolts, and a small (o/d and thickness) washer under the Nyloc nuts. And also had to shorten them slightly. It all took a bit of finagling, but ended up fine, certainly better than the fully threaded UNC bolts that were there before.

Nick

Re: S1 ?lan Rebuild - My Story

PostPosted: Thu Jun 18, 2015 3:57 pm
by Certified Lotus
Thanks Nick. I spoke with Ray earlier this morning and ordered them. I'm also going to source cap bolts and see which fits best.

Re: S1 ?lan Rebuild - My Story

PostPosted: Sun Jun 21, 2015 12:43 am
by Certified Lotus
Today was planned to accomplish the following: 1) route the hand brake cable 2) route the steel braided fuel line 3) finish the installation of the brake hard lines and 4) install the gear box and rebuilt engine as we had finished all the work inside the chassis boxed area. Drew and I were working together again and its so much easier when you have a second pair of hands and someone to bounce ideas off of.

The hand brake cable routing went well. We were careful about where it crossed the chassis from rear to front and installed grommets anywhere there might be a chance of chaffing.

DSC05649.jpg and
Hand brake cable at Diff

DSC05650.jpg and
Routing of hand brake cable

DSC05653.jpg and
Hand Brake cable adjustment left side


Next came the routing of the steel braided fuel line and the tie downs to insure location and safety of the line.

DSC05656.jpg and
Steel Braided fuel line

DSC05657.jpg and
Routing of steel braided fuel line


We finished the routing and chaffing prevention of the hard brake lines. Plus the install of the brake switch at the 5 way junction.

DSC05654.jpg and
Hard Brake line 5 way connector


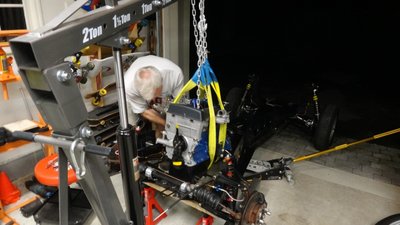
Now for the job that would make us feel the project was getting close to completion. We installed the gear box and lowered the engine in place.

DSC05662.jpg and
Installing the engine


And this is where I find out I made my first BIG mistake. It took us almost 2 hours to figure it out........ but I'll cut to the chase. I spec'd the wrong size pilot bearing (spigot bearing) and the gear box shaft would not fit into the crank shaft. Seems I had spec'd the size pilot bearing for the engine type that was supposed to be in the car but the engine I was installing came from a later car and the pilot bearing size changed. Stupid mistake. Now I have to wait for a bearing next week to install the engine and gear box. Lesson learned. Should have read the Lotus Shop manual a lot closer as they point this out very clearly (at the very end of the chapter).

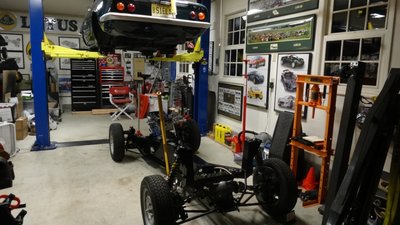
Not one to belabor a set back, I tend to other projects that need attention. Spent the afternoon scraping off all the grease and road dust off the bottom of the car and then used brake clean to wipe it all down with a scotch pad wipe to rough up for undercoat painting. Also install a heat reflector pad where the ceramic coated headers are going to be located to minimize the heat transfer into the foot well. Had a couple of beers to ease the pain :roll:

DSC05659.jpg and
Scraping dust, dirt and oil from under body

DSC05670.jpg and
Masking off the rear for undercoating

DSC05673.jpg and
Adding heat shield protection for TTR headers

Re: S1 ?lan Rebuild - My Story

PostPosted: Sun Jun 21, 2015 2:27 am
by CBUEB1771
Glen - Great progress! One observation from your first photo in the series above "hand brake cable at diff". The bolt securing the control arm to the chassis at the rear is facing the wrong way. You have it set up so that the bolt has to be moved rearward in order to remove the control arm. This is fine if the body is off the chassis. However the bolt will foul the body when the latter is in place and you won't be able to remove the control arm. The bolt at the forward pivot should have its head facing rearward and the bolt at the rear should have its head facing forward. This arrangement will simplify servicing in the future.

Re: S1 ?lan Rebuild - My Story

PostPosted: Sun Jun 21, 2015 9:55 am
by Certified Lotus
Thanks Russ! Another bolt configuration I missed. Appreciate your observation. I will fix that today.

I wonder what else I have not gotten right..............

Re: S1 ?lan Rebuild - My Story

PostPosted: Sun Jun 21, 2015 12:45 pm
by CBUEB1771
Glen, I should have mentioned that you can see the correct fore/aft orientations of these bolts in both the Workshop Manual and Service Parts List.

Re: S1 ?lan Rebuild - My Story

PostPosted: Wed Jun 24, 2015 4:04 am
by Certified Lotus
Got my pilot bearing (well, its really a pilot bushing) from RD Enterprises today. I've got to give Ray a plug. He is very responsive and has had every part I have been looking for. He even responded back to me over the weekend. Thanks Ray! You have me as a customer for life!

So pilot bearings.......there are several DIFFERENT TYPES and you need to know whether you have four bolt or six bolt crank and then what type of gear box in order to know which pilot bearing you need. Or in my case, a pilot bushing.

It went in easy enough, but Drew and I knew that a brass bushing would compress and then the ID would be smaller and the gear box shaft wouldn't fit. Yes. The truth hurts! We needed to hone the inside of the bushing to fit the gear box shaft. Another step and another hour. Did I tell you it was already late at night on Tuesday?

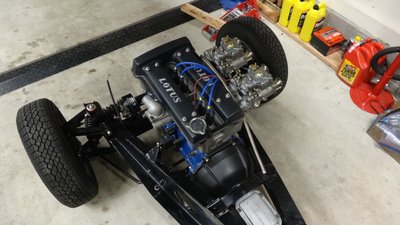
Never the less, we got it all to fit, bolted on the flywheel, torqued the studs, bolted on the clutch and pressure plate, made sure everything aligned and then slipped the gearbox on. Torqued all the bolts and lifted the engine to install in the chassis. It took a bit of wrangling with hydraulic jacks used for minor adjustments but got it all aligned and bolted in. You really need the front end of the chassis jacked up and put on jack stands to install the engine with the gear box attached. And don't forget to remove the shift lever for clearance.

Was getting late so we decided to wait for the weekend to start drilling holes in the chassis. First order is the gear box bottom mount. Need to align and drill four holes. I think I'm going to read some more before I start drilling holes in the chassis this weekend. Anyone have suggestions for drilling all the chassis hoes to fit the body to the chassis? I would like some insights from this that have done this as my 26R chassis requires almost all the holes drilled to fit.
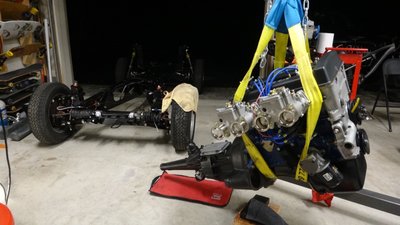
DSC05682.jpg and
TC and Gear box together - finally!

DSC05685.jpg and
Installing the engine and Gearbox

DSC05689.jpg and
It's starting to all come together!

DSC05693.jpg and
TC installed.

Re: S1 ?lan Rebuild - My Story

PostPosted: Wed Jun 24, 2015 9:43 am
by rgh0
I have fitted both my Plus 2 and Elan with new sub frames (chassis). it is a simple process to determine the holes location and easy as you have a hoist.

1. Drop the body down on the chassis
2. Make sure it is fitted down as far as possible and seated properly and square on the chassis. Fit the body to chassis padding your using before you do that.. There may be some of the underneath vertical bolt locations where the chassis does not contact the chassis due to local variations in the body or chassis . You will need to make up some shim plates to fill these gaps. I used aluminum plates of suitable size and thickness.
3. Fit the bonnet and ensure you have sufficient clearance to the cam cover of the engine. This is not normally a problem on the Elan but more an issue on the Plus 2. if you don't have sufficient clearance you may need to shim the body up a little
4. Once your comfortable the body is in the correct position then centre punch through the chassis bobbins to locate where to drill, and tap where required the various holes. I used suitable bolts that were a tight fit to the bobbins with a point turned on them to make the centre punch marks.
5. Remove the body
6. Drill the chassis holes and tap those that require tapping. Make sure you drill and tap to the correct size.
7. Drop the body back on and test fit all the bolts. They all should go in easily. If any problems you may need to remove the body and open out the bobbin or chassis hole.

cheers
Rohan

Re: S1 ?lan Rebuild - My Story

PostPosted: Wed Jun 24, 2015 12:15 pm
by billwill
Oh, it's easy-ish installing engine plus gearbox into a naked chassis. A lot more tricky with the body on. :?

PS: Don't forget to remove the carbs and maybe some other bits before you try to lower the body onto the chassis.

Re: S1 ?lan Rebuild - My Story

PostPosted: Wed Jun 24, 2015 1:23 pm
by CBUEB1771
elanner wrote:5/16-24 thread with 5/8" grip length, thread length sufficient for flat washer and full-height nylon locking nut.


AN5-10 bolts are too long. I use AN5-7 (7/16" grip) bolts with 0.063" thick AN washers under both the bolt head and nut. I also use MS21042 "jet" nuts for this application. With one thick AN washer under the bolt head the unthreaded shank passes through the plane dividing the drive shaft flange yoke and the pinion shaft flange. The transition from unthreaded shank to threaded section is located at about mid-thickness of the pinion shaft flange. The "jet" nuts have a reduced hex dimension (3/8" across flats, six-point) and allow me to get a ring spanner on the nut without fouling the pinion shaft or diff nose. No need to trim anything or to use multiple washers at either the bolt head or nut ends. I'll post some photos later.

Re: S1 ?lan Rebuild - My Story

PostPosted: Wed Jun 24, 2015 8:08 pm
by oldchieft
Shame you did not have the engine and clutch before you rebuilt the gear box.

It is nice to fit and align a clutch with the shaft that will be running in it when it is in service.

That way you can check the play in the spigot bush and align the clutch.

Also if the bush had been too big you would never have known till the first motion shaft bearing failed, so it worked out for the best.

Jon the Chief