Australia now has one more Elan
67 posts
• Page 2 of 5 • 1, 2, 3, 4, 5
I wondered what had happened to your import- keep us posted with developments please.
I hope that is not food you are storing in the car- although you do have the mouser on guard!
I hope that is not food you are storing in the car- although you do have the mouser on guard!
Cheers,
Pete.
http://www.petetaylor.org.uk
LOTUS ELAN flickr GROUP: https://www.flickr.com/groups/2515899@N20
flickr: http://www.flickr.com/photos/16096573@N02/sets/72157624226380576/
https://www.flickr.com/photos/16096573@N02/
Pete.
http://www.petetaylor.org.uk
LOTUS ELAN flickr GROUP: https://www.flickr.com/groups/2515899@N20
flickr: http://www.flickr.com/photos/16096573@N02/sets/72157624226380576/
https://www.flickr.com/photos/16096573@N02/
-

elansprint71 - Coveted Fifth Gear

- Posts: 2625
- Joined: 16 Sep 2003
Haven't posted in a while, not much progress but have collected a whole lot more parts for when I bite the bullet and start to dismantle
Have better storage arrangements for my thoroughbreds now. That's a new Spyder chassis in the bubble wrap.
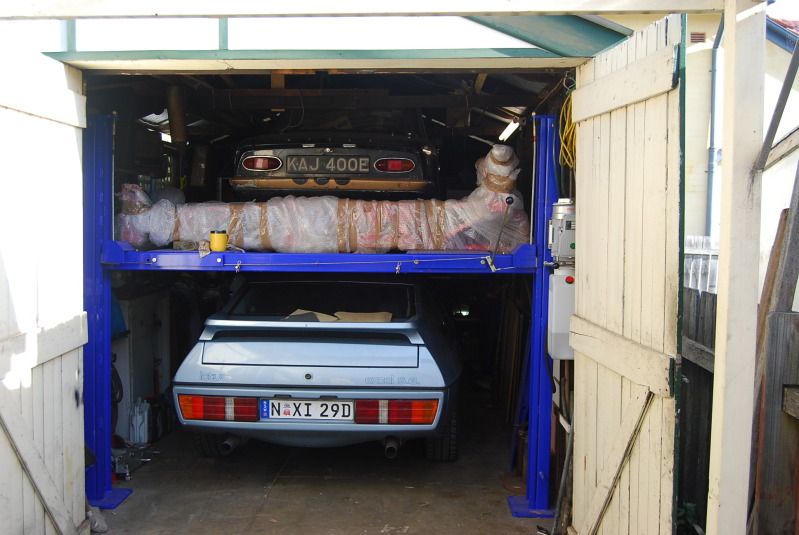
Have better storage arrangements for my thoroughbreds now. That's a new Spyder chassis in the bubble wrap.

- robertverhey
- Fourth Gear

- Posts: 694
- Joined: 20 Feb 2007
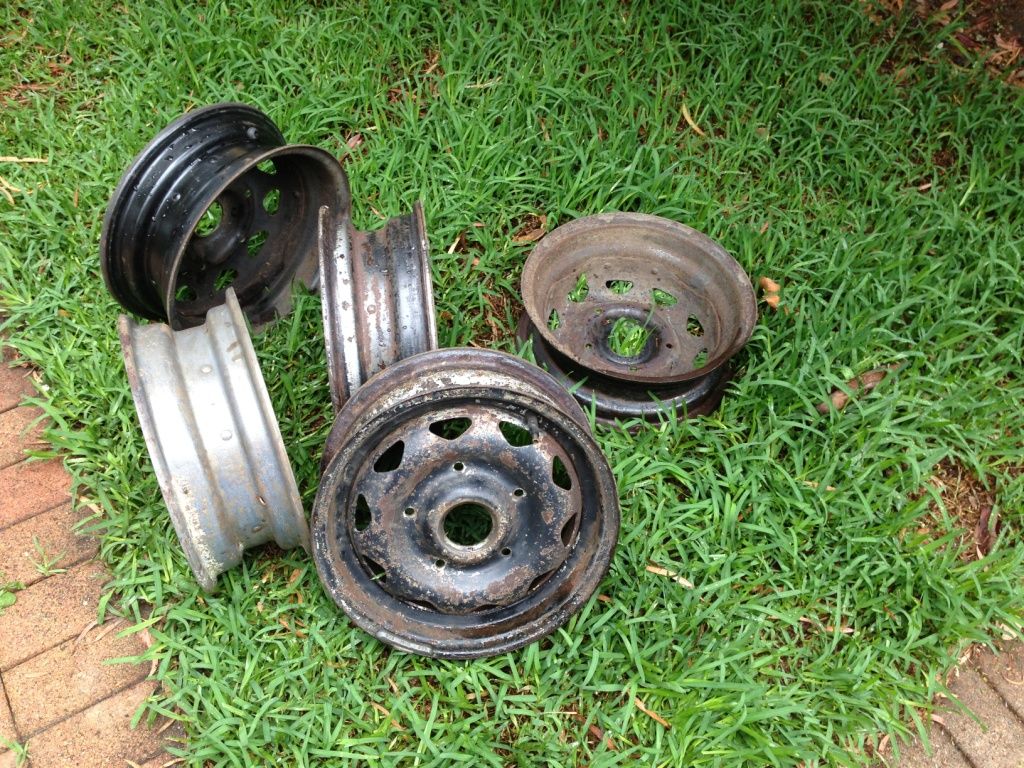
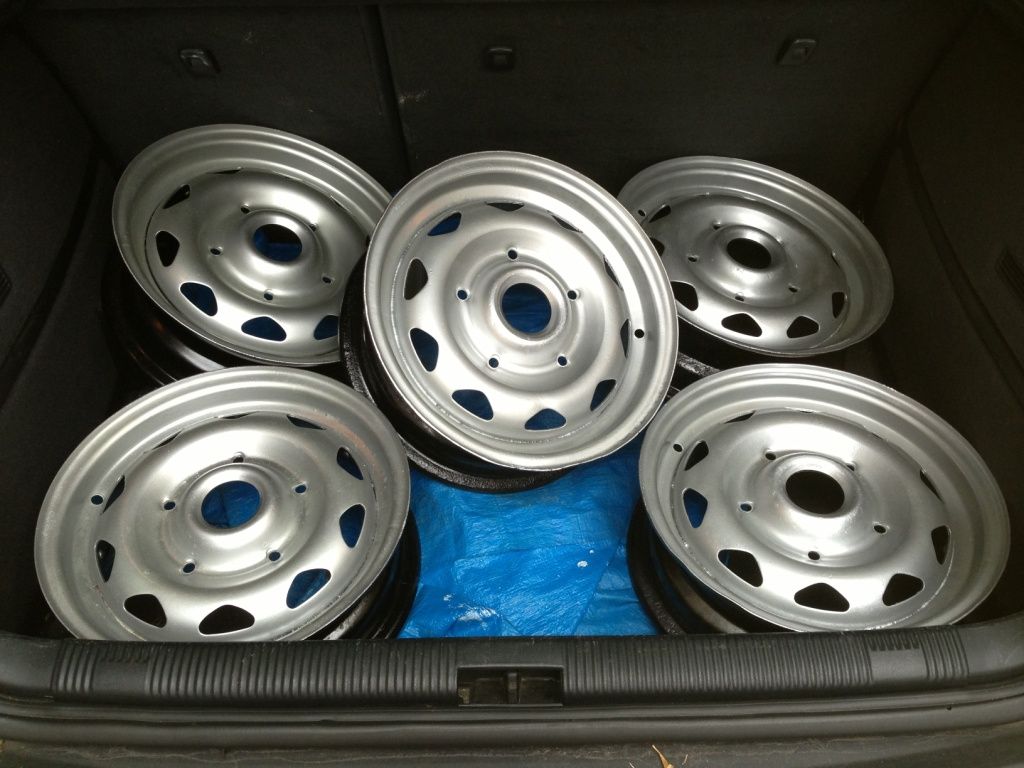
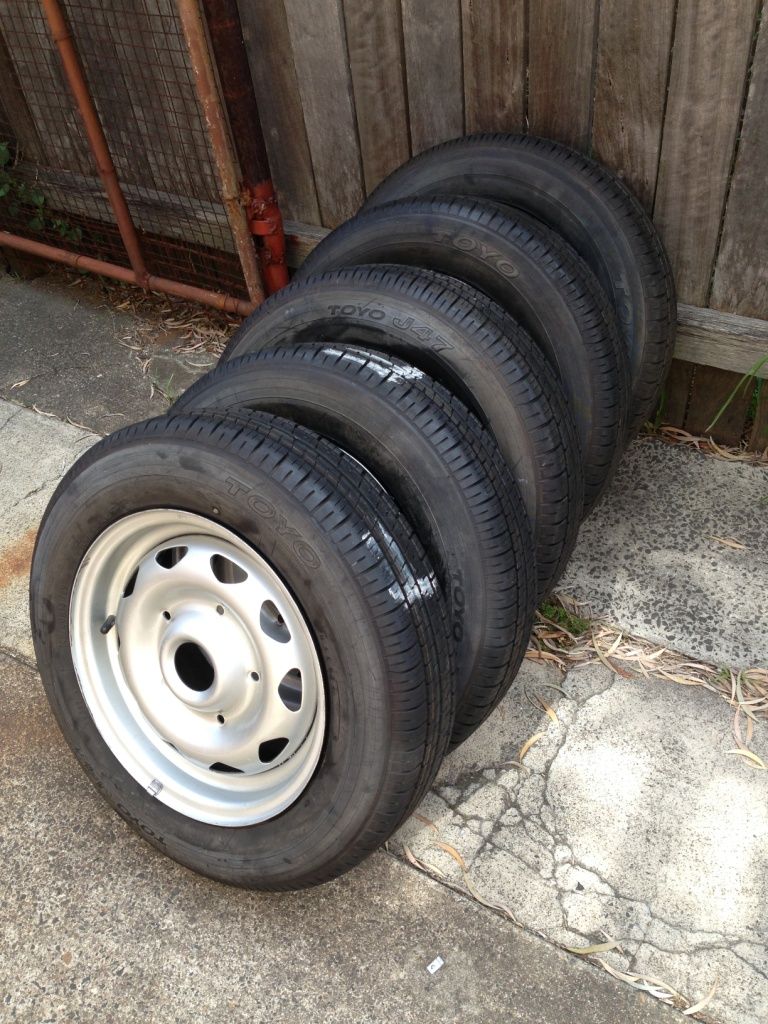
Finally a bit more to report, have refurbished and re-shod the wheels, they were in a sorry state indeed but sound and straight according to the tyre fitter. He had to go with tubes, because the old riveted rims won't hold air with tubeless, he said. But they ran true and needed very little weight
A sorry bunch:
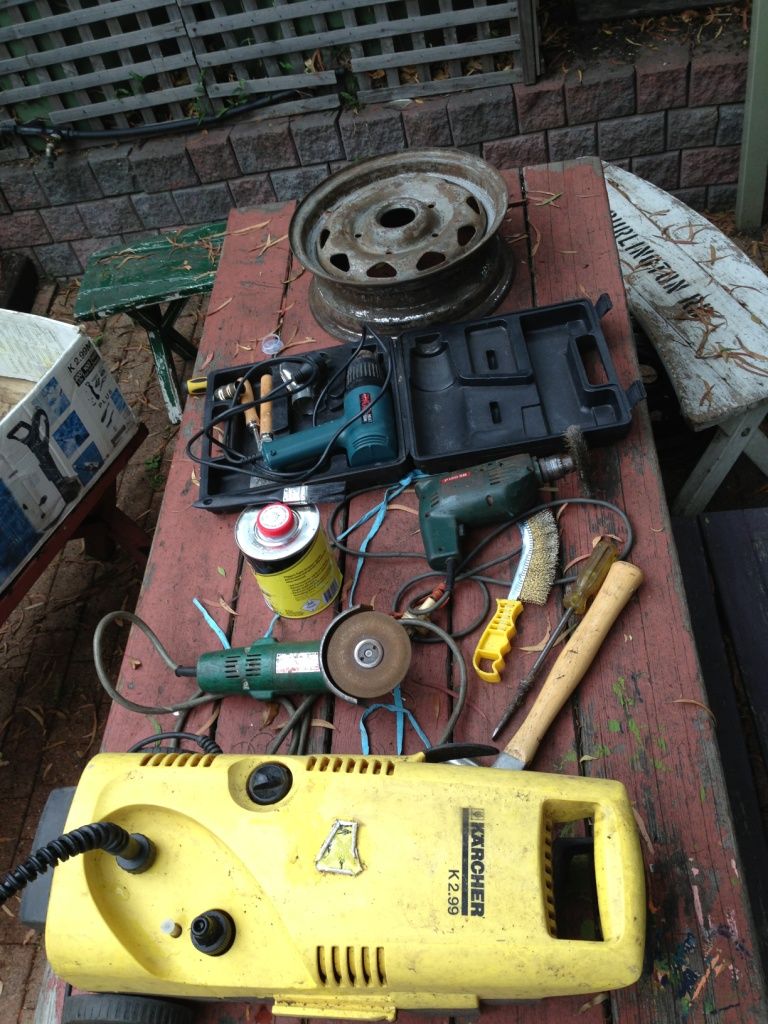
Just some of the tools (and the sandblasting cabinet which is out of frame):
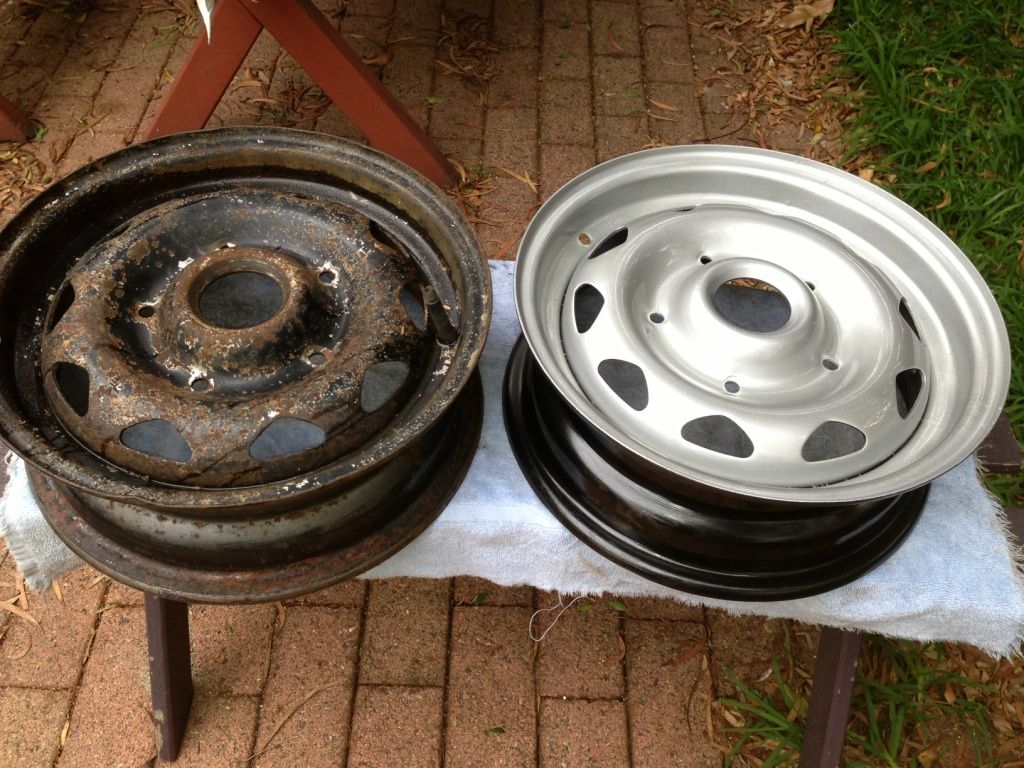
Before and after:
Ready to head for the tyre shop:
Done, 145/80/13 Toyos:
Not much more I can do now without taking the body off....so i guess it's time to get stuck in.....
A sorry bunch:

Just some of the tools (and the sandblasting cabinet which is out of frame):

Before and after:

Ready to head for the tyre shop:

Done, 145/80/13 Toyos:

Not much more I can do now without taking the body off....so i guess it's time to get stuck in.....
- robertverhey
- Fourth Gear

- Posts: 694
- Joined: 20 Feb 2007
Wow... And i think my door Button was a problem! You re a magician!
Cooled down by CliveyBoy!
-

Pistacchio sprint 72 - Fourth Gear

- Posts: 692
- Joined: 12 Sep 2012
just a small question. Why did you chose a spyder chassis and not a Lotus galvanised chassis to keep it original
Alan B
Alan B
Alan.b Brittany 1972 elan sprint fhc Lagoon Blue 0460E
- alan.barker
- Coveted Fifth Gear

- Posts: 3800
- Joined: 06 Dec 2008
No magic, just hard yakka, smelly chemicals, several applications of paint stripper and coarse steel wool, wire wheel on drill, basically everything you see in the pics until you have bare metal. Then rust converter, followed by more sanding and finally several rattle can applications of silver followed by clear enamel for depth. But yes happy with the finish. Yes there are pits in the metal, but they'll do the job, paint covers a lot of sins.
Why spyder chassis? No real reason: a NOS spyder frame came up on ebay and I grabbed it.
I wlll keep the old chassis, which should stay with the car in my view, but it looks well past it, many areas rusted right through. It will end up in the rafters, I daresay
Why spyder chassis? No real reason: a NOS spyder frame came up on ebay and I grabbed it.
I wlll keep the old chassis, which should stay with the car in my view, but it looks well past it, many areas rusted right through. It will end up in the rafters, I daresay
- robertverhey
- Fourth Gear

- Posts: 694
- Joined: 20 Feb 2007
congratulations on your purchase ---I put a large black board iup and listed all the jobs to be done cleaning each one off as completed . Very satisfying --I see the watch cat is on duty ---ed
dont close your eyes --you will miss the crash
Editor: On June 12, 2020, Edward Law, AKA TwinCamMan, passed away; his obituary can be read at https://www.friscolanti.com/obituary/edward-law. He will be missed.
Editor: On June 12, 2020, Edward Law, AKA TwinCamMan, passed away; his obituary can be read at https://www.friscolanti.com/obituary/edward-law. He will be missed.
-

twincamman - Coveted Fifth Gear

- Posts: 2453
- Joined: 02 Oct 2003
Dismantling has begun. It's only just started to dawn on me what a huge job restoring this little car represents...as everything I remove reminds me that every part will need to be individually refurbished.
The four poster hoist is an absolute godsend. With it set at about 600mm up, the lowest lockable setting, there's no need for lotus position, everything in driver's and passenger's footwell is an easy reach
Doors and windows off....
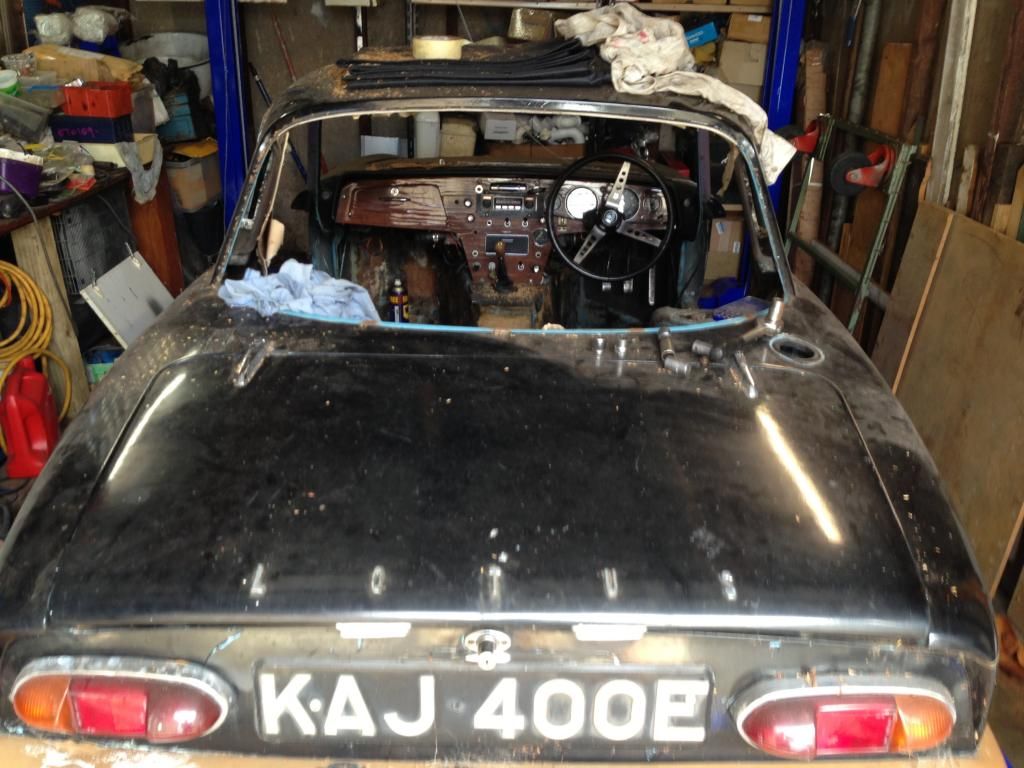
Interior gutted, ready to attack the dash.....
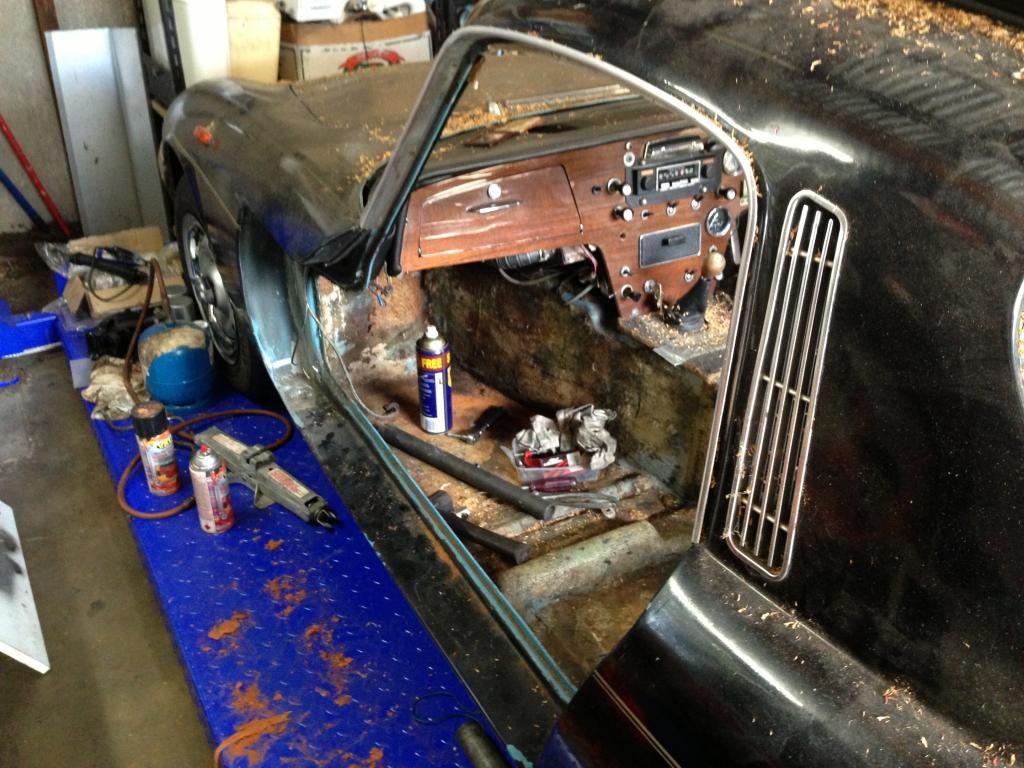
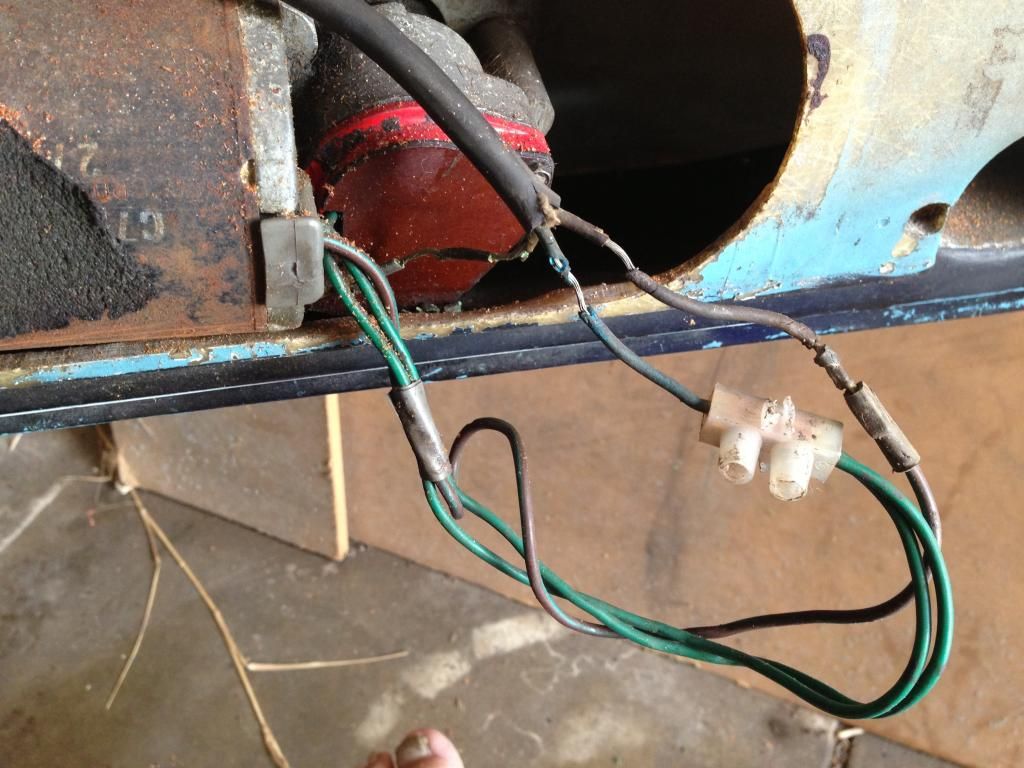
This was a fire waiting to happen..... and miraculously, the window worked a treat!
One thing has me stumped at the end of day 2.....the steering column. Have removed the pinch bolt, and undone all the mounts inside the cabin, but it simply will not budge, seems to be stuck on the spline at the end....any tips? According to workshop manual it should simply pull back, wheel, outer and inner column and all....
The four poster hoist is an absolute godsend. With it set at about 600mm up, the lowest lockable setting, there's no need for lotus position, everything in driver's and passenger's footwell is an easy reach
Doors and windows off....

Interior gutted, ready to attack the dash.....

This was a fire waiting to happen..... and miraculously, the window worked a treat!

One thing has me stumped at the end of day 2.....the steering column. Have removed the pinch bolt, and undone all the mounts inside the cabin, but it simply will not budge, seems to be stuck on the spline at the end....any tips? According to workshop manual it should simply pull back, wheel, outer and inner column and all....
Last edited by robertverhey on Sat Mar 09, 2013 12:40 am, edited 1 time in total.
- robertverhey
- Fourth Gear

- Posts: 694
- Joined: 20 Feb 2007
Thanks for advice, sorted quickly this morning with a hammer, "gently" tapping the universal joint forward while holding the steering wheel as far back as it would go.
Much easier to work down there with webers removed. A big day today, dash out, wiring labelled, varnish removed from dash. It was a mess behind the dash, lots of bodges and melted insulation.....the job continues to grow!
Much easier to work down there with webers removed. A big day today, dash out, wiring labelled, varnish removed from dash. It was a mess behind the dash, lots of bodges and melted insulation.....the job continues to grow!
- robertverhey
- Fourth Gear

- Posts: 694
- Joined: 20 Feb 2007
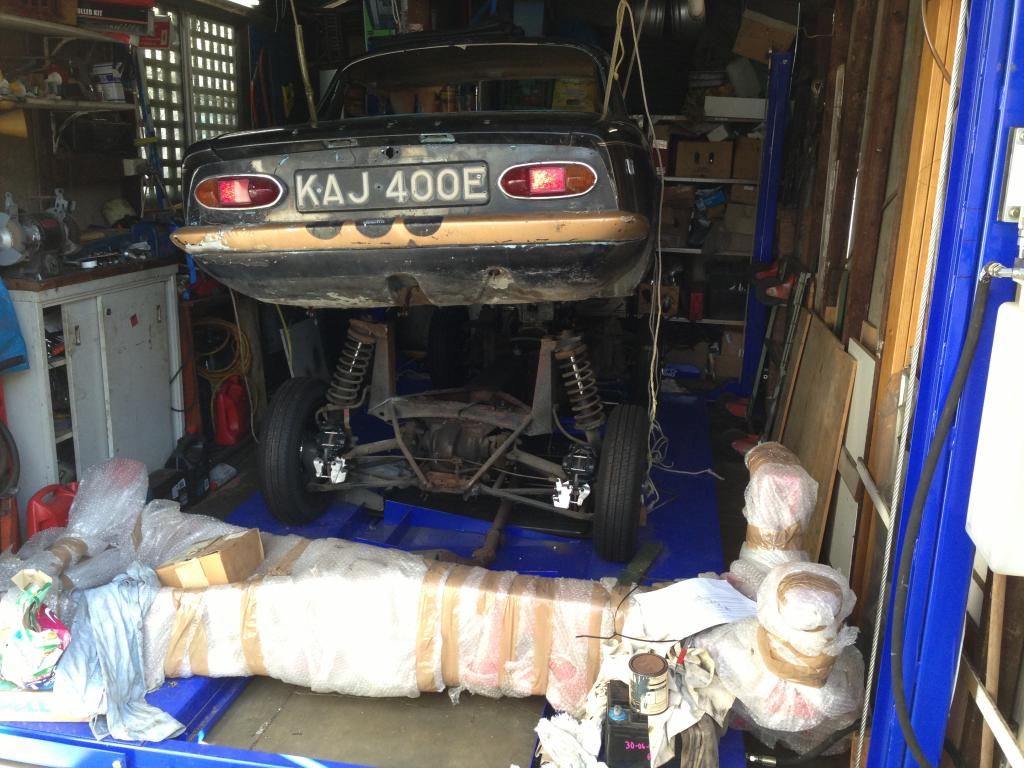
Okay we have liftoff. Followed the Spyder Chassis change instructions, which were fine apart from neglecting to mention the solenoid to starter motor cable......oops....
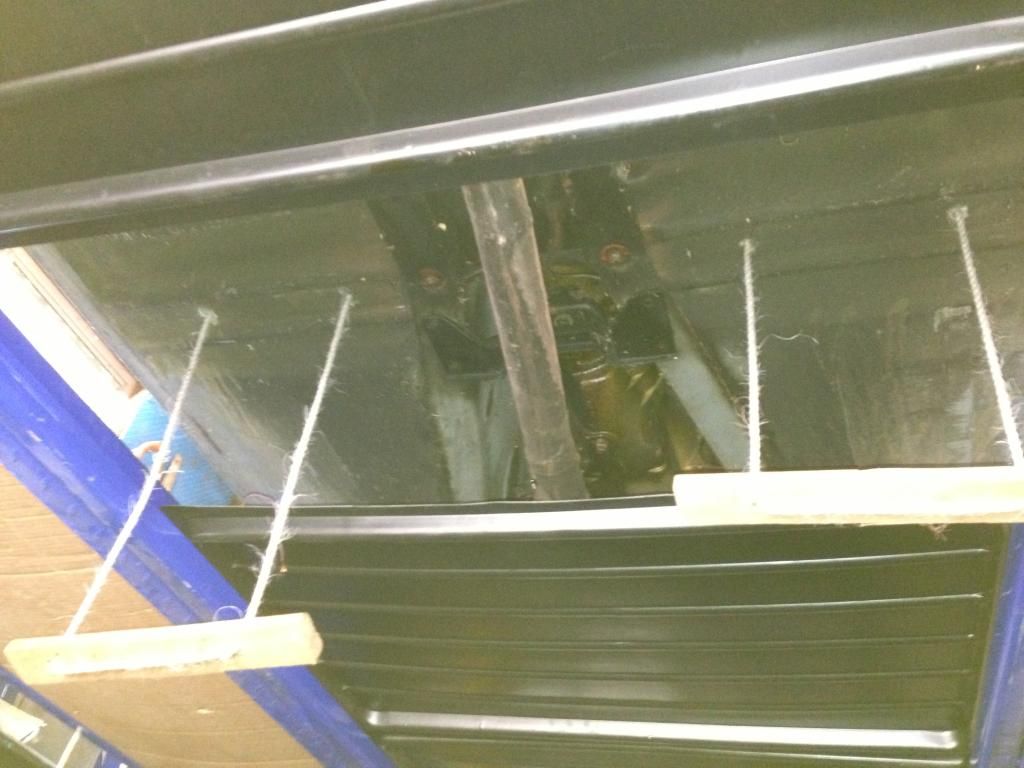
Attached the body to the roof rafters at four points, using side seat belt mounting bolts at rear and cradles under the seat mounting bolts at front, as this pic from under the shell displays
Balance wan't quite right, too much weight at front, so it didn't come off cleanly. plus three of the turret mounting bolts snapped off at the head with bolt shaft still in bobbin. Needed drilling out, very time consuming
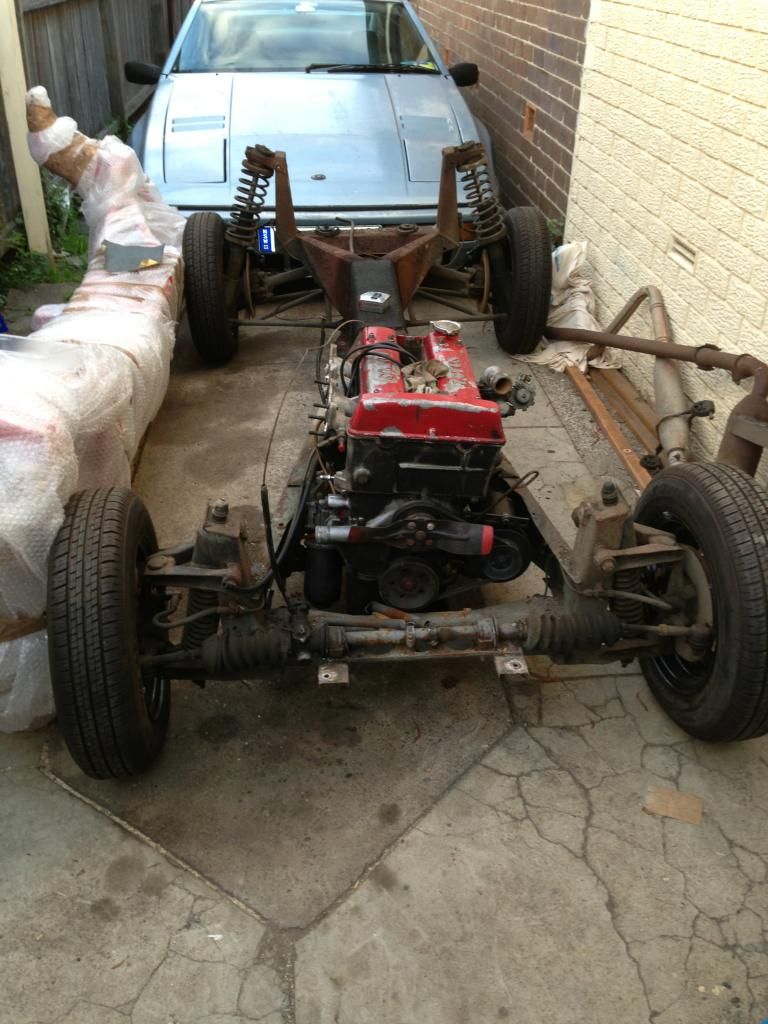
Anyway, there will be a long and growing parts list as I start to dismantle. The chassis is way beyond saving, rusted away in some areas and cracked in others....but nevertheless a brilliant design, even fifty years later
Attached the body to the roof rafters at four points, using side seat belt mounting bolts at rear and cradles under the seat mounting bolts at front, as this pic from under the shell displays

Balance wan't quite right, too much weight at front, so it didn't come off cleanly. plus three of the turret mounting bolts snapped off at the head with bolt shaft still in bobbin. Needed drilling out, very time consuming

Anyway, there will be a long and growing parts list as I start to dismantle. The chassis is way beyond saving, rusted away in some areas and cracked in others....but nevertheless a brilliant design, even fifty years later

- robertverhey
- Fourth Gear

- Posts: 694
- Joined: 20 Feb 2007
The chassis stripdown continues, and it's time to tackle the front suspension. I have an important question about this.....can anyone definitively describe the process for removing the front shock absorber / coil spring assembly? I've trawled through the posts on this, read factory manual and Autobooks manual and I'm still confused. Both manuals refer to the need to compress the spring in the removal process....how you'd get a compressor onto that spring remains a mystery. However I don't want to take a chance of having a highly compressed spring letting go unexpectedly.
this archived thread seems to imply that it can be done without compressor.....elan-archive-f16/replacing-elan-front-struts-t2652.html
My setup appears to have Konis fitted, and there doesn't seem to be anything on the threaded piston at the top (under the turret) that would stop the spring letting go when the top or bottom nuts are undone.....
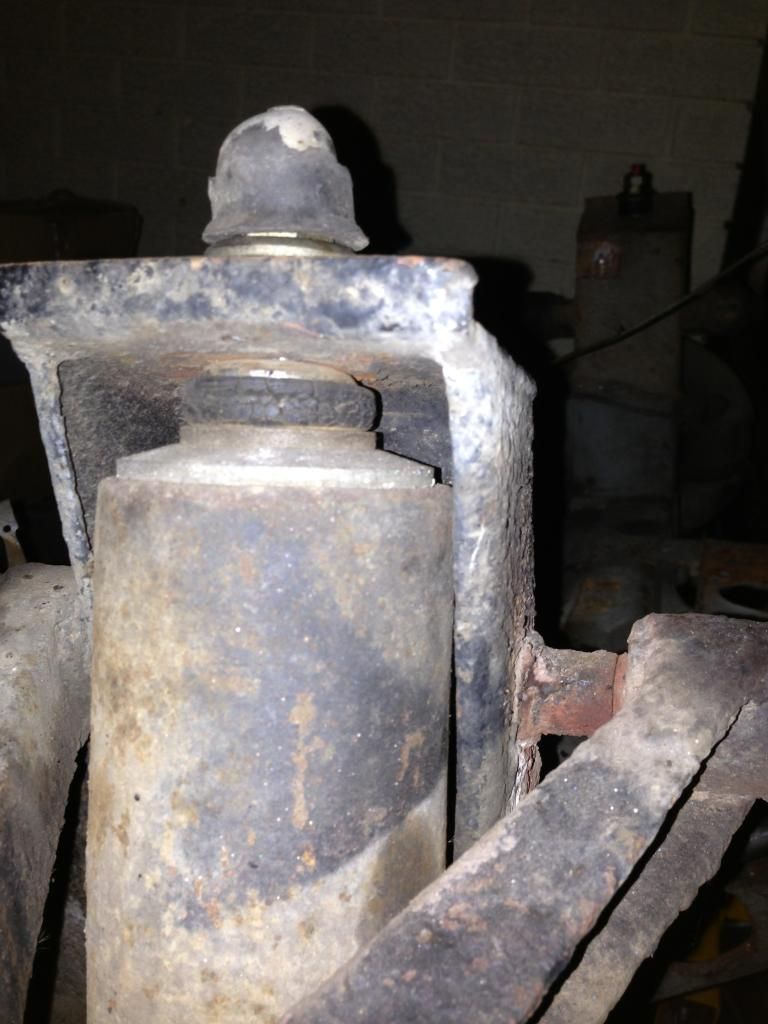
Any assistance / advice would be appreciated
this archived thread seems to imply that it can be done without compressor.....elan-archive-f16/replacing-elan-front-struts-t2652.html
My setup appears to have Konis fitted, and there doesn't seem to be anything on the threaded piston at the top (under the turret) that would stop the spring letting go when the top or bottom nuts are undone.....

Any assistance / advice would be appreciated
- robertverhey
- Fourth Gear

- Posts: 694
- Joined: 20 Feb 2007
Hi,
The front shock and spring are removed as a single unit, if you look at the parts diagram there is a collar fitted above the spring which keeps it in place on the shock. Once off the car you need to compress the spring to release the collar and then the spring. It is during this process that you have to be careful, people on here have described different methods to do this safely, with quite a few getting it done by a garage. You will need either small spring compressers, ones made for motorbikes have been mentioned, or as others including myself have done, fabricate a frame/press to remove the and replace the spring.
There is alot of tension in the spring and although I managed to do it, it was not one of the most relaxing tasks.
Chris.
-

tcsoar - Third Gear

- Posts: 305
- Joined: 01 May 2007
67 posts
• Page 2 of 5 • 1, 2, 3, 4, 5
Total Online:
Users browsing this forum: Elanman68, pharriso and 16 guests
