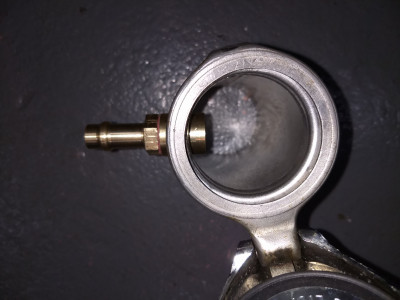
MX5 fuel filler valve not working very well
29 posts
• Page 1 of 2 • 1, 2
Hi
One of the small jobs I did over the weekend was to fit the MX5 filler valve mod. This is supposed to prevent fuel sloshing out of the cap on right hand bends but it doesn't work so well on my car.
The Plus 2 has a very short filler elbow (rubber tube connecting the filler tube to the tank inlet tube) and as a result I had to cut the MX5 tube so that it is not much longer than the valve, and fit it into the elbow very close to the curve. It's reasonably snug but on filling her up and "giving it the beanz" on a roundabout I was disappointed to discover fuel all over the rear wing again. I did notice when I tried to blow through the valve that it isn't a perfect seal but I suppose this is normal.
I also noted that using the recommended reducers I wasn't able to put the valve into the tank inlet pipe. It's just a tad too tight to get it all in there. A pity, because it would not have been necessary to have the valve at the edge of the elbow's bend.
Now I am wondering what's gone wrong. I admit that I haven't put a jubilee clip around the elbow, but I thought it was pretty snug. It's possible the valve has turned slightly - I did check and it seemed OK...
-

JonB - Coveted Fifth Gear

- Posts: 2357
- Joined: 14 Nov 2017
Assuming that you haven?t mounted the device the wrong way round,which would cause big problems refuelling there are only a couple of things that would stop the device working.
Is the device you have fitted a new one or was it already in the mx5 filler neck? If not new it could be one of the earlier designs or just plain faulty.
The device should be clamped in place to ensure a good seal around it but also it could potentially move If not clamped and Could end up in the tank.
When I fitted mine I measured the distance that the tank inlet pipe went into the flexible hose and fitted the device to just allow sufficient room for the inlet pipe to fit as before.The device should then be clamped with a jubilee clip.
Ed
-

EPA - Second Gear

- Posts: 167
- Joined: 08 May 2011
How to tell if it's an earlier design?
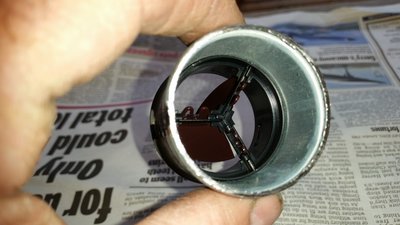
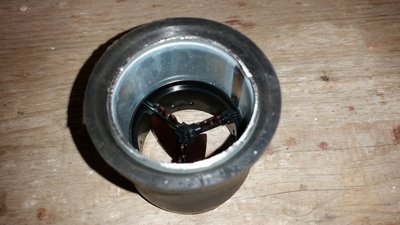
There are three flaps that come together to close the valve off, if that helps. I wonder if the way they are hinged is indicative of revision? Each flap is one piece of plastic, with the "hinge" being part of the moulding. They clip into the plastic surround directly and there are no other parts. Maybe one of them has come loose or stuck in the open position.
Anyway, I'll fit a clip.
Cheers
JonB
-

JonB - Coveted Fifth Gear

- Posts: 2357
- Joined: 14 Nov 2017
I fitted mine in the tank spigot where it works well so may be worth moving it.
Dougal
Dougal
- dougal9887
- Third Gear

- Posts: 244
- Joined: 23 Aug 2013
JonB wrote:How to tell if it's an earlier design?
There are three flaps that come together to close the valve off, if that helps. I wonder if the way they are hinged is indicative of revision? Each flap is one piece of plastic, with the "hinge" being part of the moulding. They clip into the plastic surround directly and there are no other parts. Maybe one of them has come loose or stuck in the open position.
Anyway, I'll fit a clip.
Cheers
JonB
I haven?t actually seen the earlier version but I read somewhere that the new ones are an improved design to resolve issues with the older design. The one I fitted looked exactly like the one in Dougals pictures.
Ed
-

EPA - Second Gear

- Posts: 167
- Joined: 08 May 2011
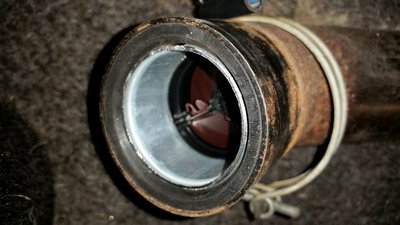
I used one of the recommended reducers. If you look closely, you'll see it's actually the collar of the reducer that fits the spigot. Nice tight fit.
Dougal.
Dougal.
- dougal9887
- Third Gear

- Posts: 244
- Joined: 23 Aug 2013
An afternoon of jacking, unbolting and yanking later, and I've got the tank out. It's in very good condition. Lots of shaking needed to get the valve out of it, but done, and with the tank out there is more access to the filler pipe. I've whanged the very tight assembly (valve plus two rubber reducers) into the end of the pipe and I do not think it'll be coming loose any time soon. Yeah, filler valve is correct way round! 
Then, refit with the filler elbow turned round so the split bit is well onto the tank pipe where it cannot leak.
Not a terribly difficult job I have to say, especially with the Huco fuel pump providing tank draining services.
Just looking at the breather pipes and contemplating the "club mod".
Then, refit with the filler elbow turned round so the split bit is well onto the tank pipe where it cannot leak.
Not a terribly difficult job I have to say, especially with the Huco fuel pump providing tank draining services.
Just looking at the breather pipes and contemplating the "club mod".
-

JonB - Coveted Fifth Gear

- Posts: 2357
- Joined: 14 Nov 2017
Well done Jon,
go for it and fix it once and for all.
MX5 + Club Breather Mod the full job

Alan
go for it and fix it once and for all.
MX5 + Club Breather Mod the full job
Alan
Alan.b Brittany 1972 elan sprint fhc Lagoon Blue 0460E
- alan.barker
- Coveted Fifth Gear

- Posts: 3754
- Joined: 06 Dec 2008
I think some people use Plumbing fittings to make up a Spigot for the Breather Hose from Filler Tube to Tank.
If you braze a brass nut on the inside of the Filler Tube it's possible also then to screw in Spigot.
For sure you don't want anything brazed to the outside of Filler Tube or it will be impossible to fit the Filler Tube Grommet.
Alan
If you braze a brass nut on the inside of the Filler Tube it's possible also then to screw in Spigot.
For sure you don't want anything brazed to the outside of Filler Tube or it will be impossible to fit the Filler Tube Grommet.
Alan
Alan.b Brittany 1972 elan sprint fhc Lagoon Blue 0460E
- alan.barker
- Coveted Fifth Gear

- Posts: 3754
- Joined: 06 Dec 2008
JonB wrote:Thanks Alan.
Regarding the club breather mod, I am not sure about welding or braising the spigot to the filler neck. My welding skills are pretty poor - could it be soldered instead (using plumber's solder)?
I would be very cautious if welding or brazing as the heat may un-solder the filler cap fitting.
I soldered a brass 1/2" to 3/8" reducer on the inside of the filler pipe using a butane torch carefully with the assistance of a 60W soldering iron. I used lead solder.
You need to clean up the filler pipe carefully and use a good flux. Paint tippex (solvent type) to prevent the solder running where you do not want it to go.
Steve
- Mudmouse
- First Gear

- Posts: 16
- Joined: 15 May 2019
I didn't like the idea of soldering or welding an adaptor into the pipe. It is appeared to me to be zinc coated steel which is horrible stuff to weld anyway.
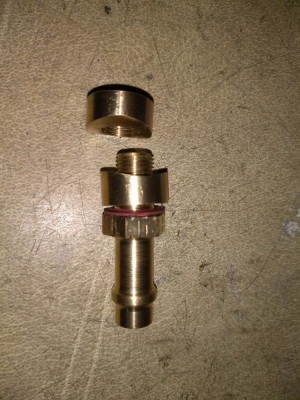
So I asked a friend with a lathe to make me a 2 piece shaped adaptor from a piece of solid brass.I then just screwed it together sealing it with Loctite 567.
Alan
So I asked a friend with a lathe to make me a 2 piece shaped adaptor from a piece of solid brass.I then just screwed it together sealing it with Loctite 567.
Alan
Alan
'71 +2 S130/ 5speed Type9.
'71 +2 S130/ 5speed Type9.
- alanr
- Coveted Fifth Gear

- Posts: 1026
- Joined: 14 Sep 2018
29 posts
• Page 1 of 2 • 1, 2
Total Online:
Users browsing this forum: No registered users and 5 guests

