Elan Flairs - Marsh Motors begins a new season
7 posts
• Page 1 of 1
The pile of Elan bodies is getting a bit tall and the budget this year isn't allowing me to do a lot so I thought I wold continue with one of the Low dollar investments that I will call no-budget racng Elan.
8 or so years ago I met Mike Braun. This started as Mike had a S3 tail section that he never used on his Elan and he put it up on the internet for sale. Mike drove about 3 hours east and I drove 6 hours west, The date was in early October and the fall foliage was peak. I set off at 5 am and headed west, by the time the sun had risen the swamp maples were a brillient red and the colors were the best I can ever remember. I met Mike in Snow Shoe, Pa. at around noon, after a brief chat about Elans and a few photos we parted company and I returned along the same route. The sun now at my back the colors only improved along the way home. Every corner opened up on a jaw dropping vista of color. This was a trip I would have made just for the site seeing but had a new twist to it.
Fast forward a few years and I was at Dave Comeau house get an old title straighted out and inspecting some derilect Elans and he offered me a smashed Coupe, the front was gone as was the top and most of the back too but it had a set of pedals and a VIN tag so I said lets load it up.
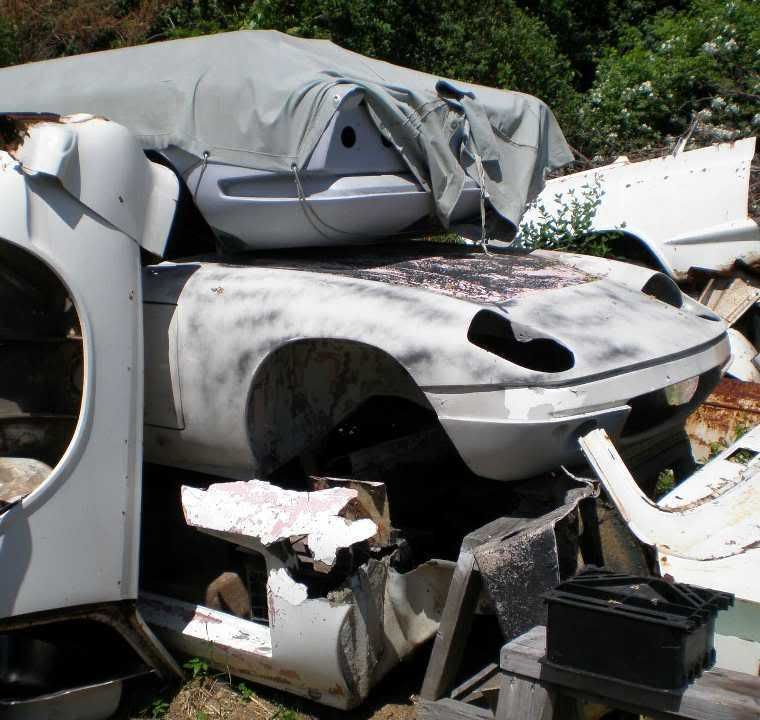
I now had the makings of tub with the front end cut off, all it needed was a splice at the seat pan (well maybe a little more). My friend was moving and gave me a 5 gallon pail of polyester resin (with a two gallon jellyfish in it) along with a bit matt. I also had a junk Elan chassis so out came the Sawsall and a bit of glue later I had what was on top of the "cordwood" photo.
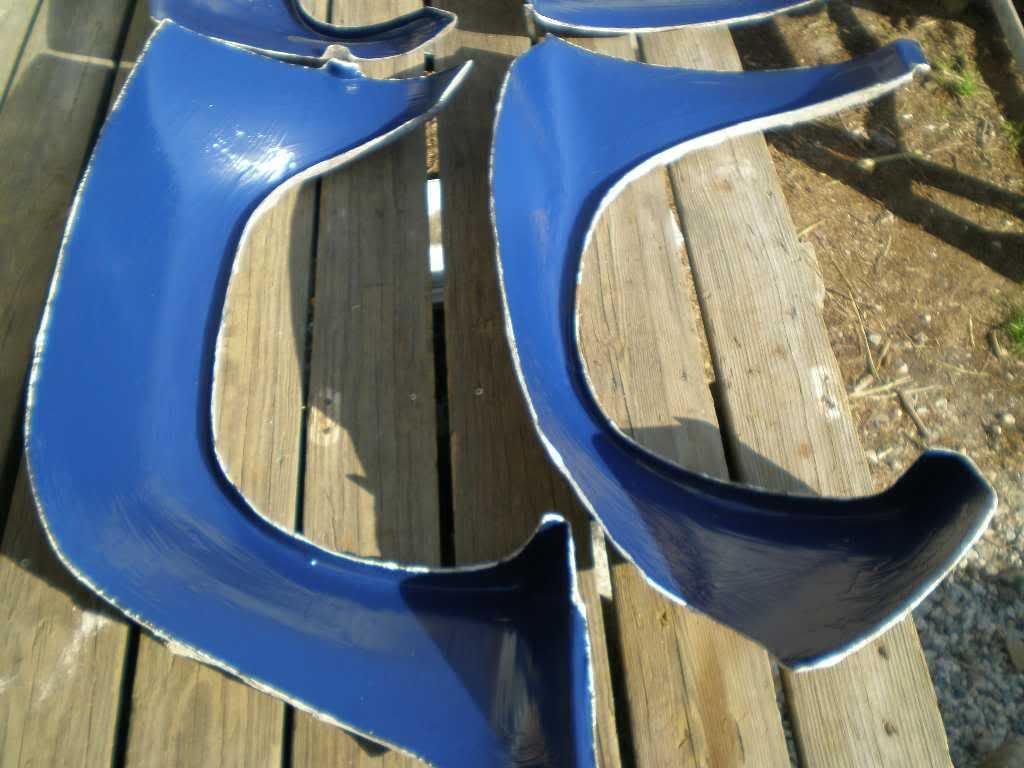
I week ago I was over at my friends Bill Hough, Bill has been molding fiberglass parts for Lotus and other racing cars for over 40 years and has some old molds in stock. He is curently molds up the bodies of GT40's and Lola T70's. I asked about the Elan flair molds that I used before on another project and I left with the set of 4 freshly waxed flair molds, along with a pail of old gelcoat, matt scraps, some old vinyl ester resin and hardner. What you see in the following photos are the rear arches being molded and installed. there is a front section for this project that Bill donated a couple years ago but that is still away at the moment.
no-budget Racer on the top of the Cordwood pile, a good storm tide will flood the bottom Elan
A week ago Thursday, gelcoat applied at 50 degrees F.
The next day it got to 55 degrees so I got the matt out and glassed up the rear flairs. Two layers of glass is pretty thin, works out to about 1/16 of an inch.
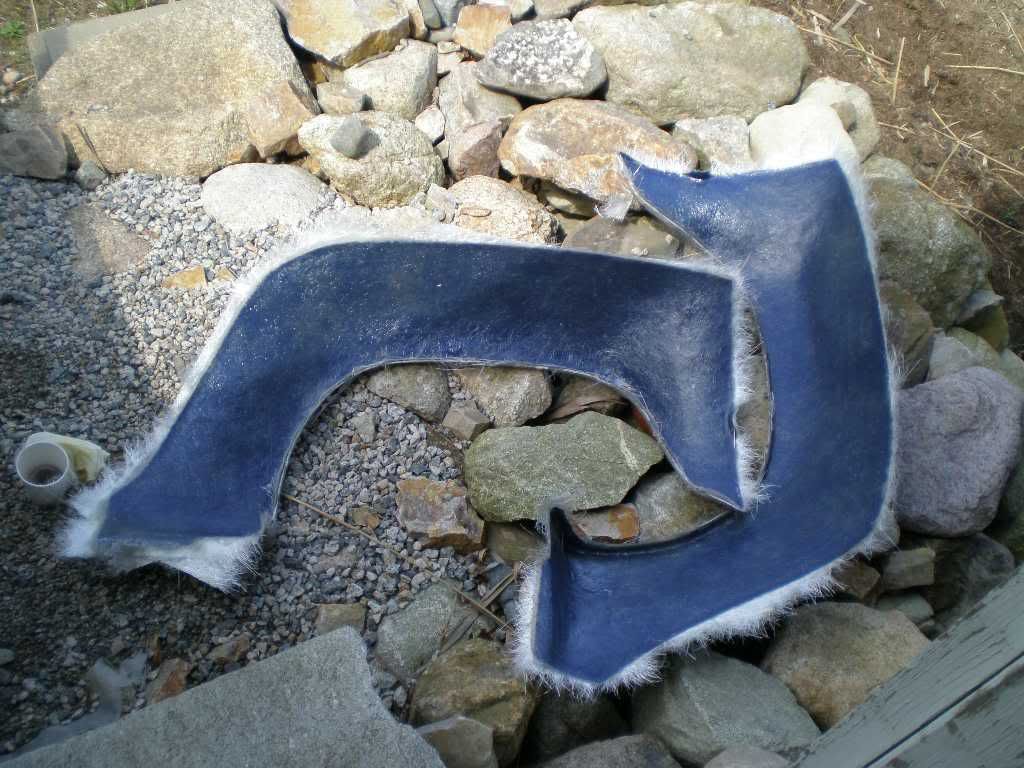
I gave it almost 24 hours and pulled and trimmed the flairs
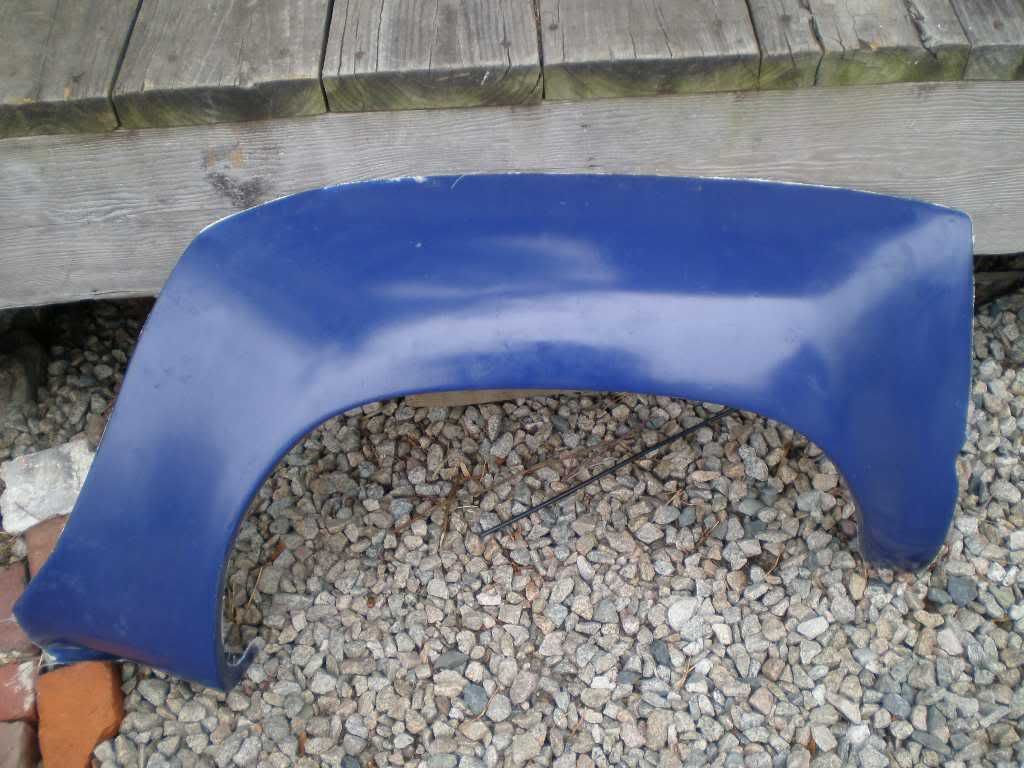
Offering up the flair, I took the weekend off, I had a cold and it was raining both Saturday and Sunday so nothing done.
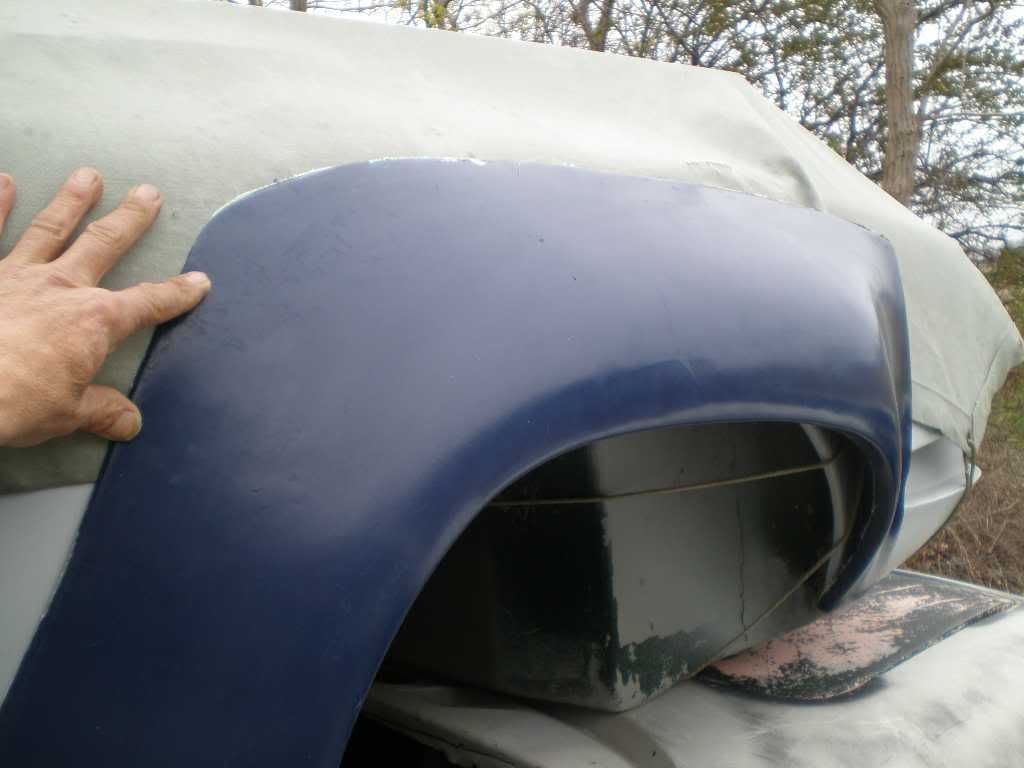
Monday morning the sun came back out and I started the new season out in "Marsh Motors"
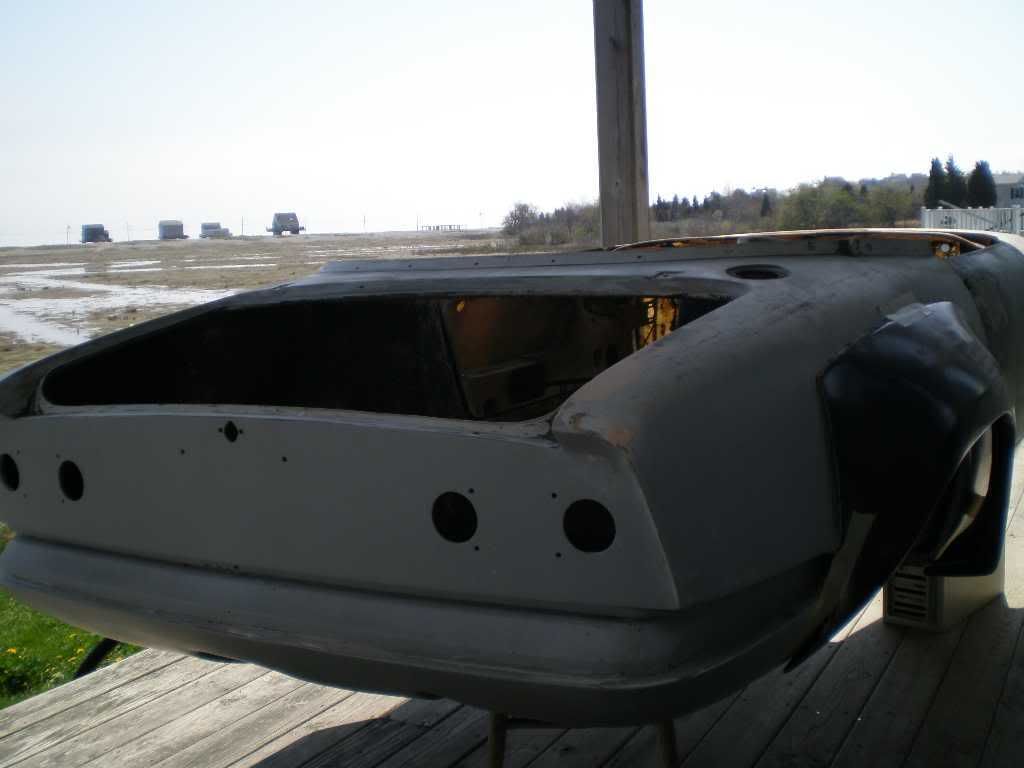
The flair taped in place and ready to start the installation

With the Flairs taped in place, I outlined the perimeter of the flair
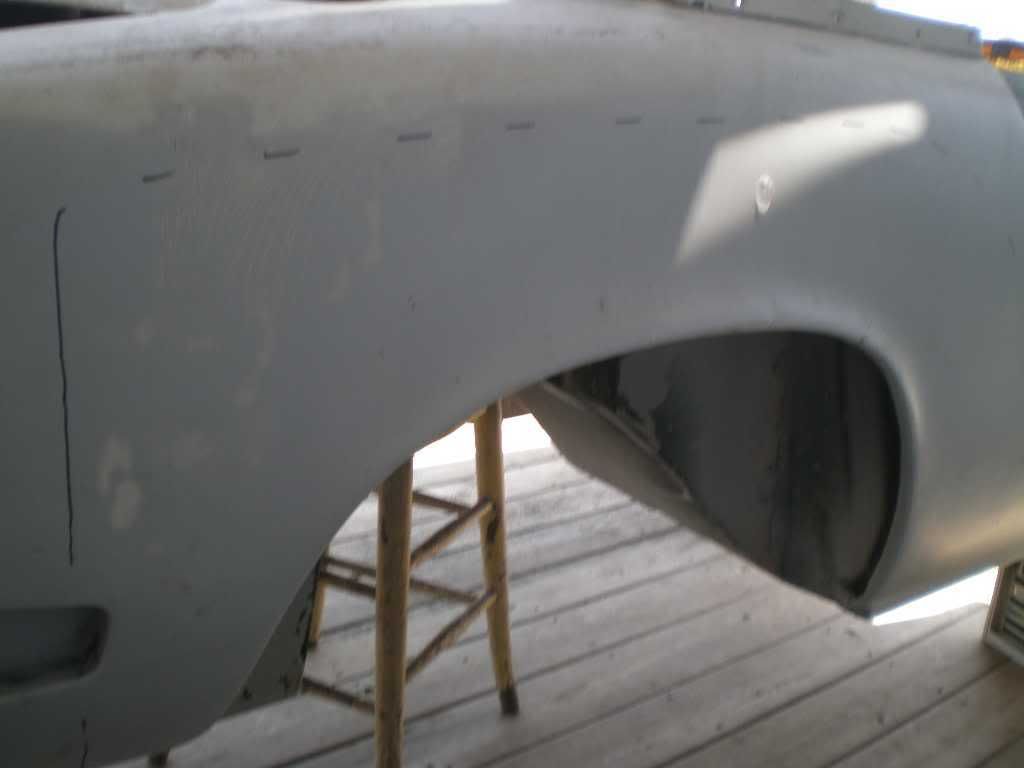
same on the other side.
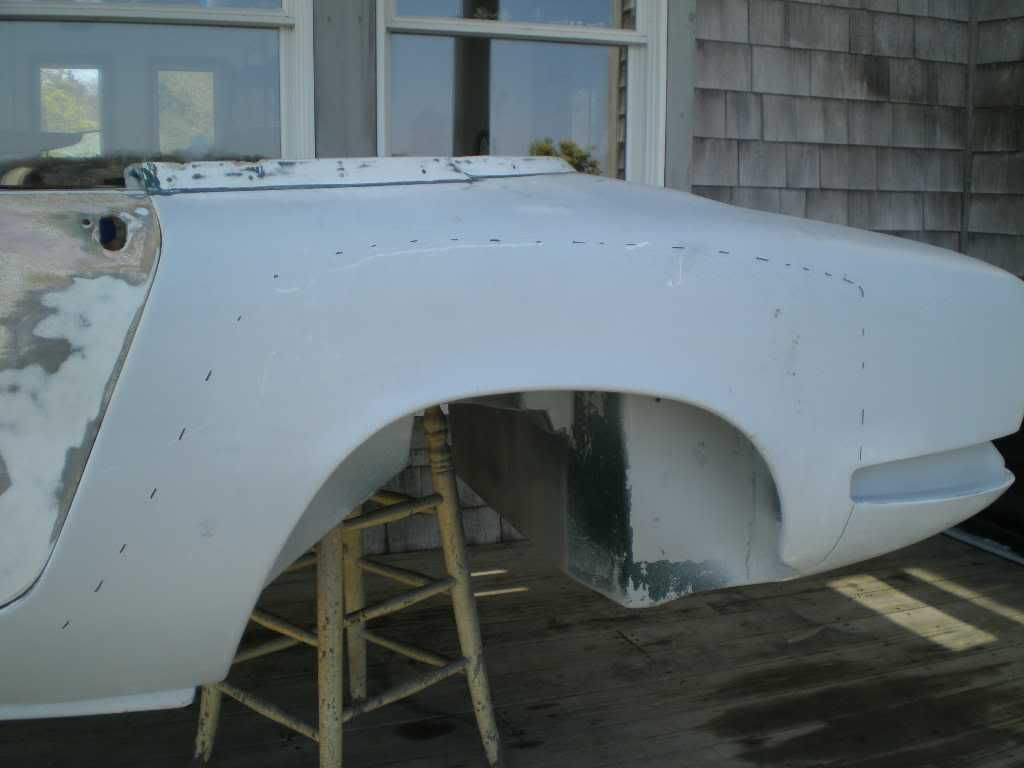
I used the wiz wheel to cut the old arch off and raised the arch to within an inch of the flair. Then got the grinders out to prep the surface for the 2 layers of 1 inch wide matt that will bond the flair to the body.
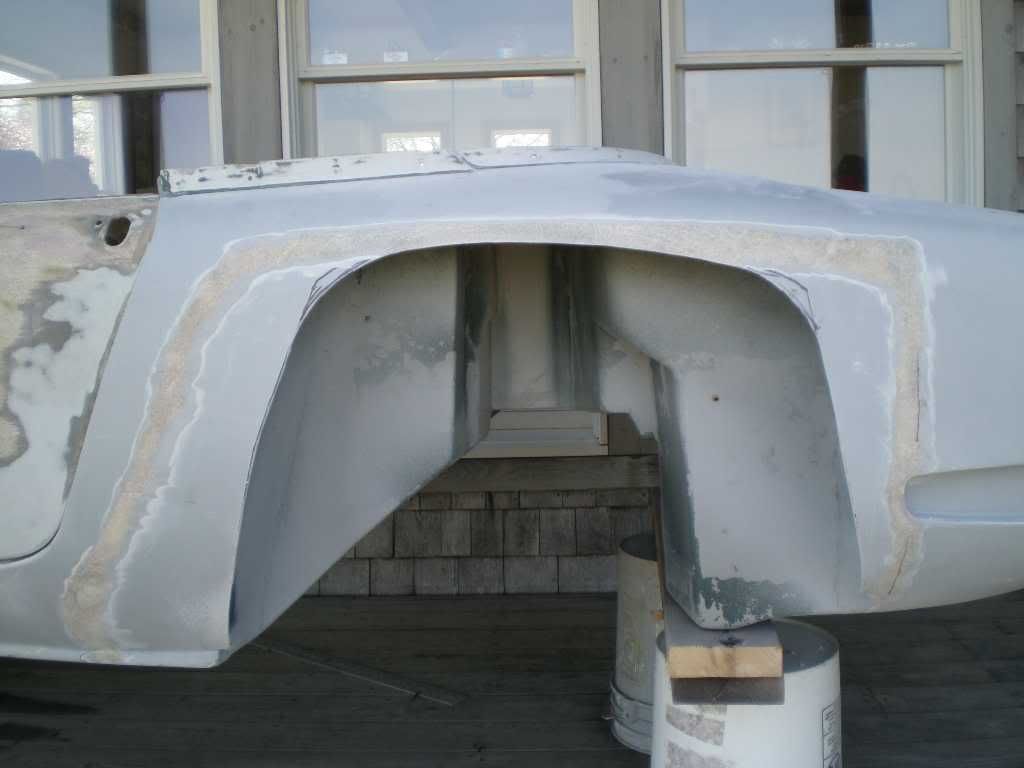
After grinding, I offered up the flair and drilled and screwed it into position and took the perminent marker and re-drew the outline of the flair. I needed the mark as I would be applying two layers of matt to the body and it would obscure the drill holes and I needed it back in the original loction for the screws to go into the same holes.
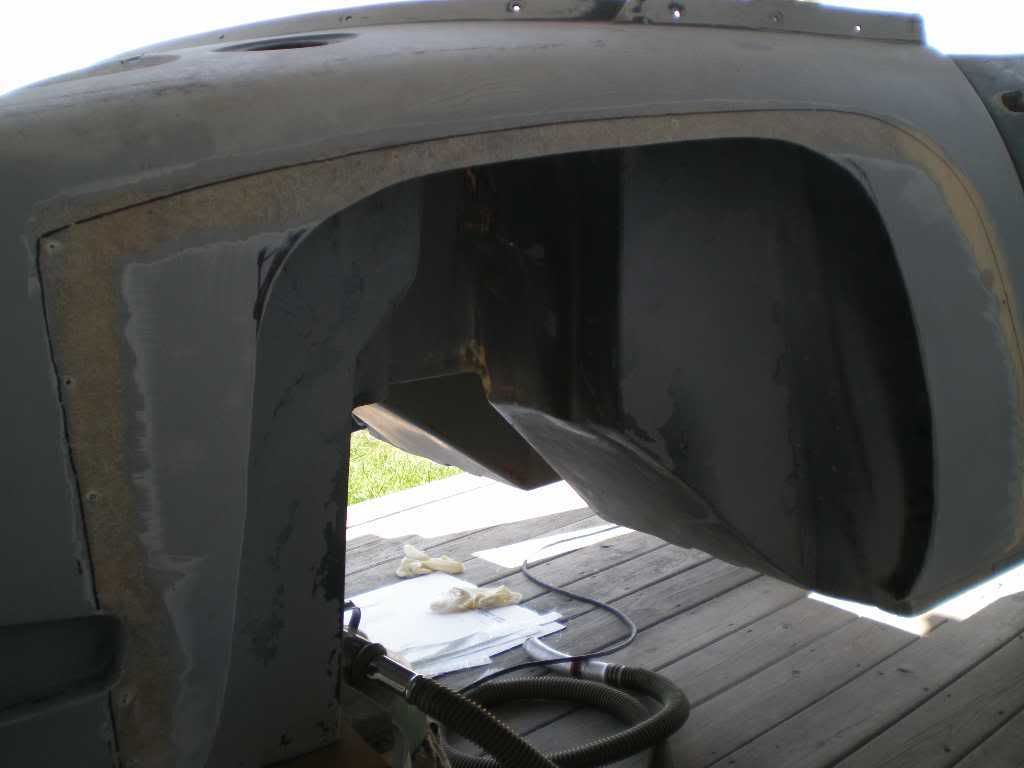
Positioned, glassed and screwed - Left side
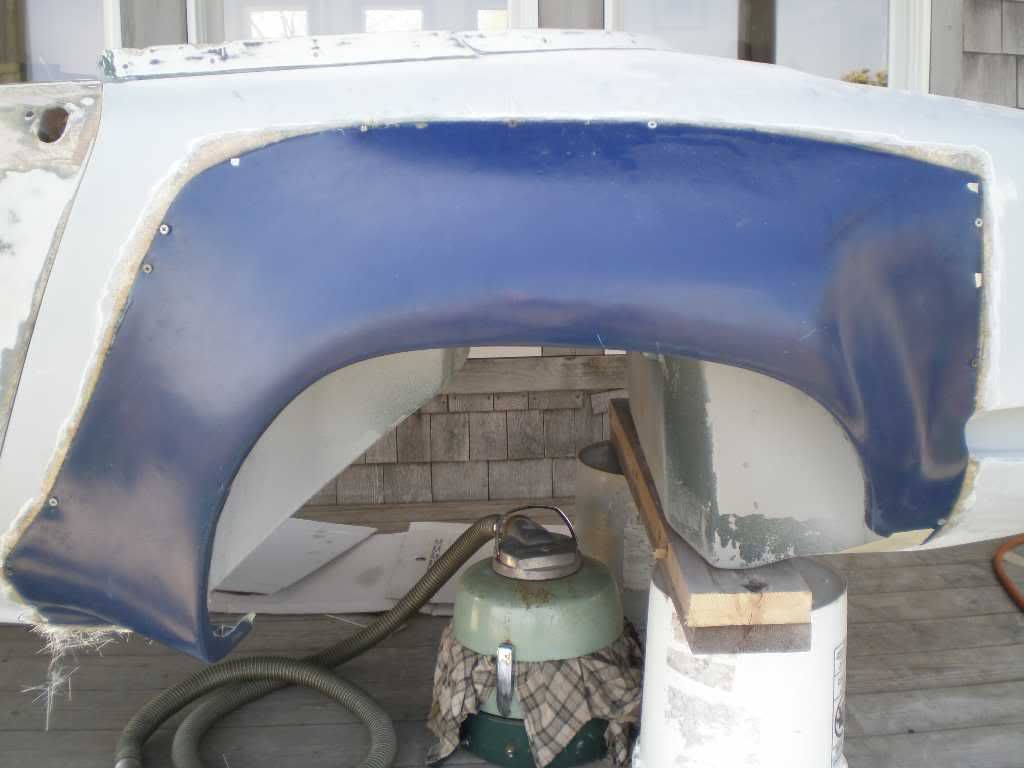
Positioned, glassed and screwed - Right side
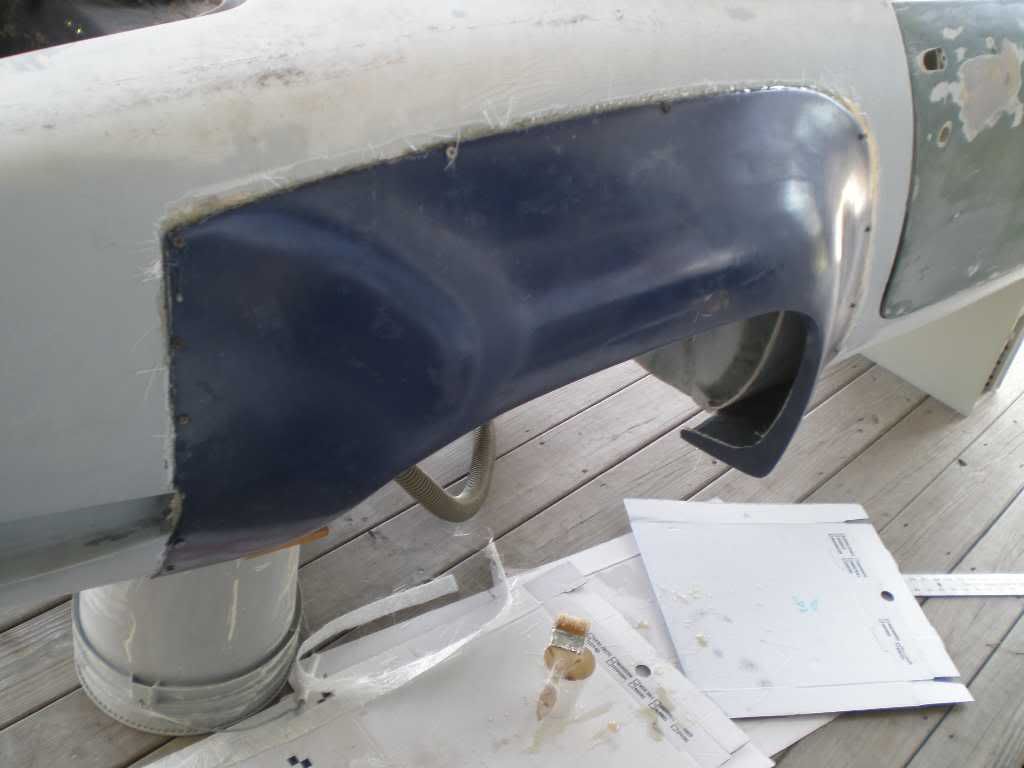
A new day dawns - glass has curred and ready to grind
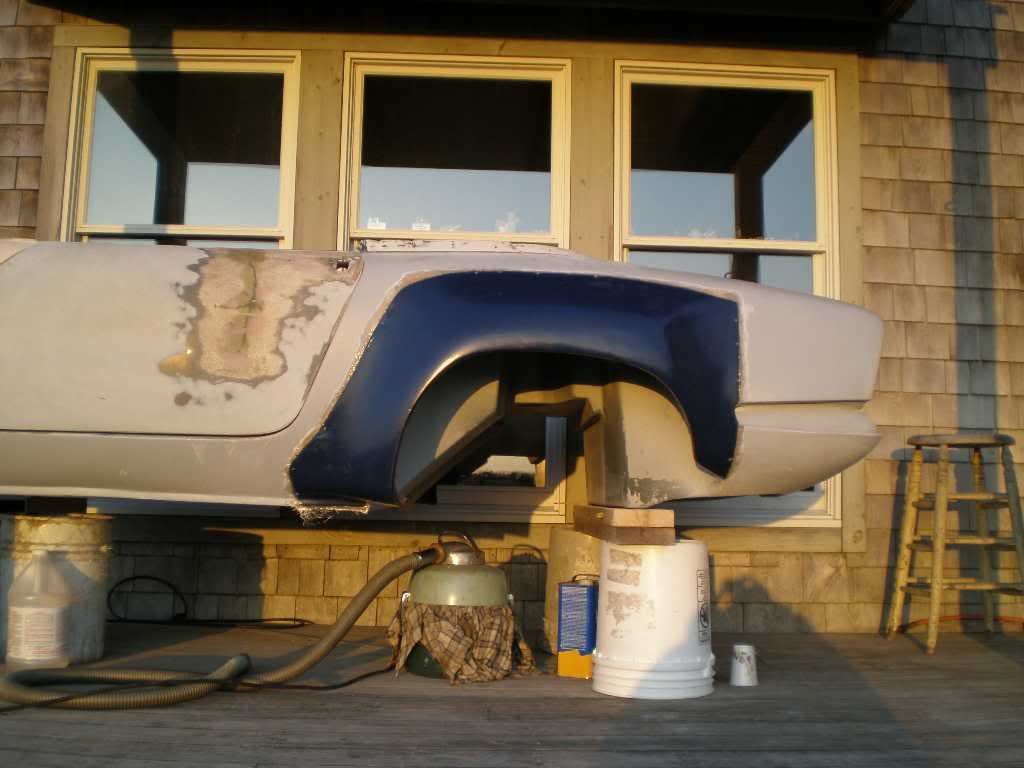
Doing the flip-side, got a little more room for a bit larger tire.
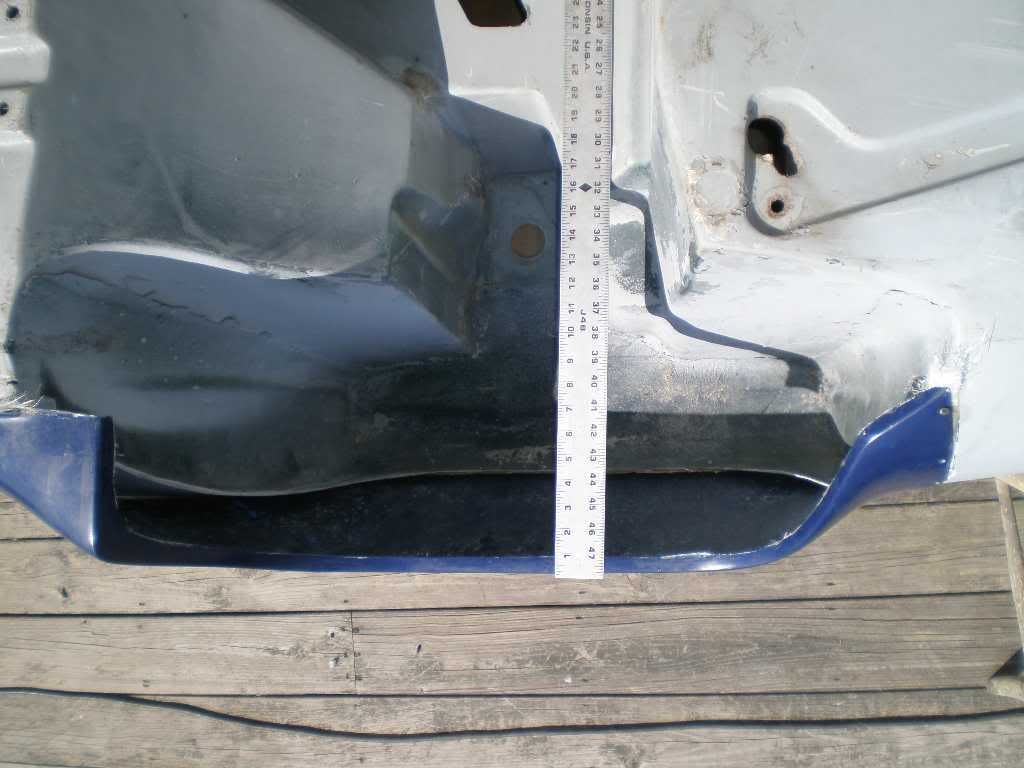
The inside of the arch was ground to the top edge of the flair and 2 layers of matt added for more room and better attachment.
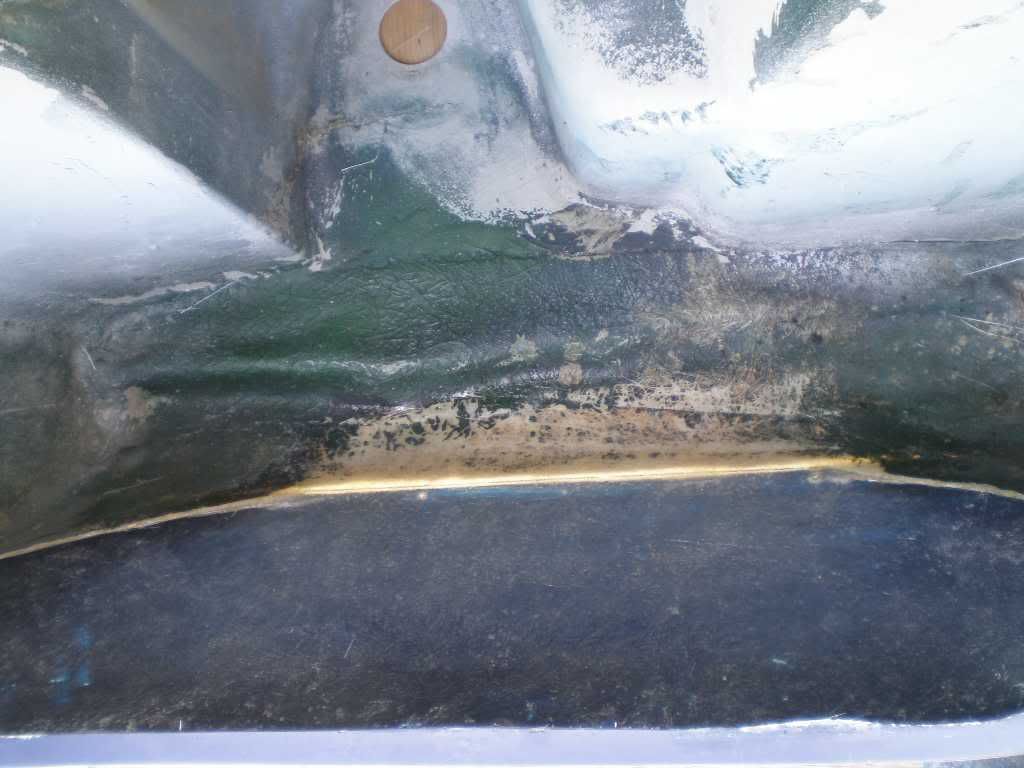
More to follow as thing progress, it started off raining this morning so I figured it was a good chance to post this.
Gary
8 or so years ago I met Mike Braun. This started as Mike had a S3 tail section that he never used on his Elan and he put it up on the internet for sale. Mike drove about 3 hours east and I drove 6 hours west, The date was in early October and the fall foliage was peak. I set off at 5 am and headed west, by the time the sun had risen the swamp maples were a brillient red and the colors were the best I can ever remember. I met Mike in Snow Shoe, Pa. at around noon, after a brief chat about Elans and a few photos we parted company and I returned along the same route. The sun now at my back the colors only improved along the way home. Every corner opened up on a jaw dropping vista of color. This was a trip I would have made just for the site seeing but had a new twist to it.
Fast forward a few years and I was at Dave Comeau house get an old title straighted out and inspecting some derilect Elans and he offered me a smashed Coupe, the front was gone as was the top and most of the back too but it had a set of pedals and a VIN tag so I said lets load it up.
I now had the makings of tub with the front end cut off, all it needed was a splice at the seat pan (well maybe a little more). My friend was moving and gave me a 5 gallon pail of polyester resin (with a two gallon jellyfish in it) along with a bit matt. I also had a junk Elan chassis so out came the Sawsall and a bit of glue later I had what was on top of the "cordwood" photo.
I week ago I was over at my friends Bill Hough, Bill has been molding fiberglass parts for Lotus and other racing cars for over 40 years and has some old molds in stock. He is curently molds up the bodies of GT40's and Lola T70's. I asked about the Elan flair molds that I used before on another project and I left with the set of 4 freshly waxed flair molds, along with a pail of old gelcoat, matt scraps, some old vinyl ester resin and hardner. What you see in the following photos are the rear arches being molded and installed. there is a front section for this project that Bill donated a couple years ago but that is still away at the moment.
no-budget Racer on the top of the Cordwood pile, a good storm tide will flood the bottom Elan

A week ago Thursday, gelcoat applied at 50 degrees F.

The next day it got to 55 degrees so I got the matt out and glassed up the rear flairs. Two layers of glass is pretty thin, works out to about 1/16 of an inch.

I gave it almost 24 hours and pulled and trimmed the flairs

Offering up the flair, I took the weekend off, I had a cold and it was raining both Saturday and Sunday so nothing done.

Monday morning the sun came back out and I started the new season out in "Marsh Motors"

The flair taped in place and ready to start the installation

With the Flairs taped in place, I outlined the perimeter of the flair

same on the other side.

I used the wiz wheel to cut the old arch off and raised the arch to within an inch of the flair. Then got the grinders out to prep the surface for the 2 layers of 1 inch wide matt that will bond the flair to the body.

After grinding, I offered up the flair and drilled and screwed it into position and took the perminent marker and re-drew the outline of the flair. I needed the mark as I would be applying two layers of matt to the body and it would obscure the drill holes and I needed it back in the original loction for the screws to go into the same holes.

Positioned, glassed and screwed - Left side

Positioned, glassed and screwed - Right side

A new day dawns - glass has curred and ready to grind

Doing the flip-side, got a little more room for a bit larger tire.

The inside of the arch was ground to the top edge of the flair and 2 layers of matt added for more room and better attachment.

More to follow as thing progress, it started off raining this morning so I figured it was a good chance to post this.
Gary
Last edited by garyeanderson on Thu Feb 05, 2009 10:27 pm, edited 4 times in total.
-

garyeanderson - Coveted Fifth Gear

- Posts: 2626
- Joined: 12 Sep 2003
garyeanderson wrote:I week ago I was over at my friends Bill Hough, Bill has been molding fiberglass parts for Lotus and other racing cars for over 40 years and has some old molds in stock.
Willy Hough! He owns one of the layers of paint on my car. Applied mid-70's I guess, red (my idea) with yellow-gold swoopy stripes running from the corners of the cockpit to the front and rear corners of the car (his idea, and a complete surprise to me). I miss those stripes... wonder if I have an old picture somewhere?
Andrew Bodge
'66 Elan S2 26/4869
I love the sound of a torque wrench in the morning. Sounds like... progress.
'66 Elan S2 26/4869
I love the sound of a torque wrench in the morning. Sounds like... progress.
-

RotoFlexible - Fourth Gear

- Posts: 624
- Joined: 01 Sep 2005
Hi Mike
I had a close look at the (free) chassis I was going to use today, I think I'll save it for parts. I am going to take a look at another I have, it's not that bad and the rust between the spot welds isn't nearly as swolen. I just need to move a couple of cars out of the shed to get it down from the rafters, it might take all week to do that.
Gary
-

garyeanderson - Coveted Fifth Gear

- Posts: 2626
- Joined: 12 Sep 2003
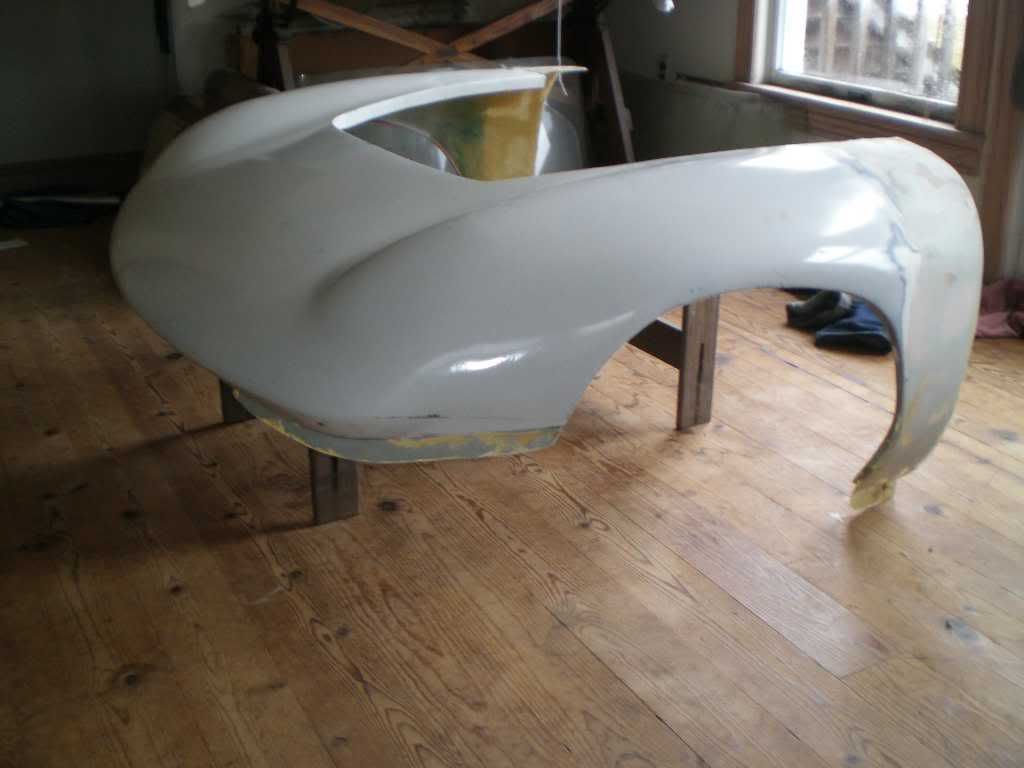
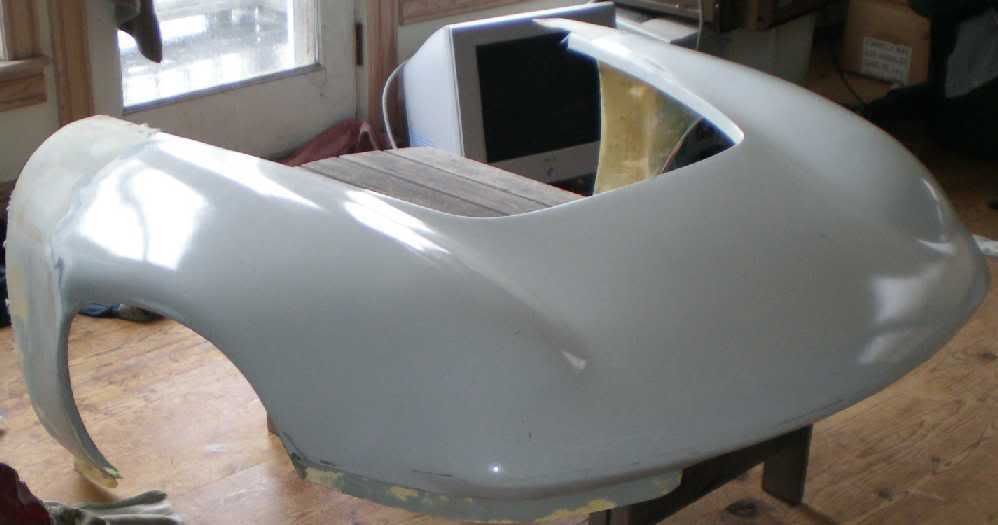
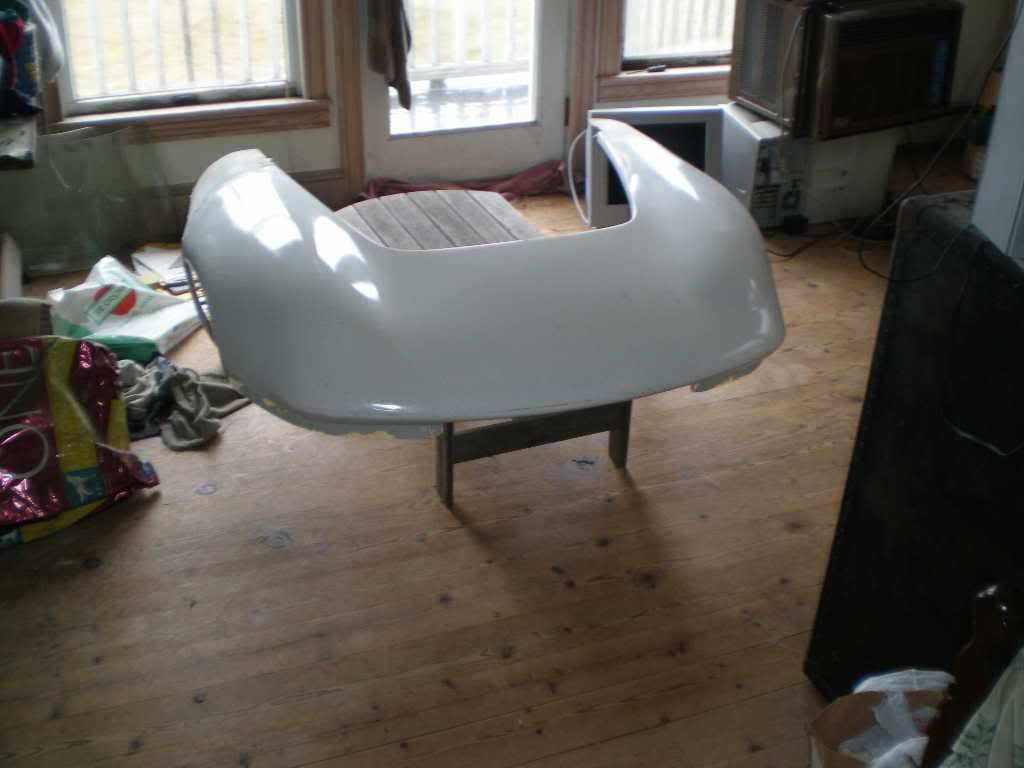
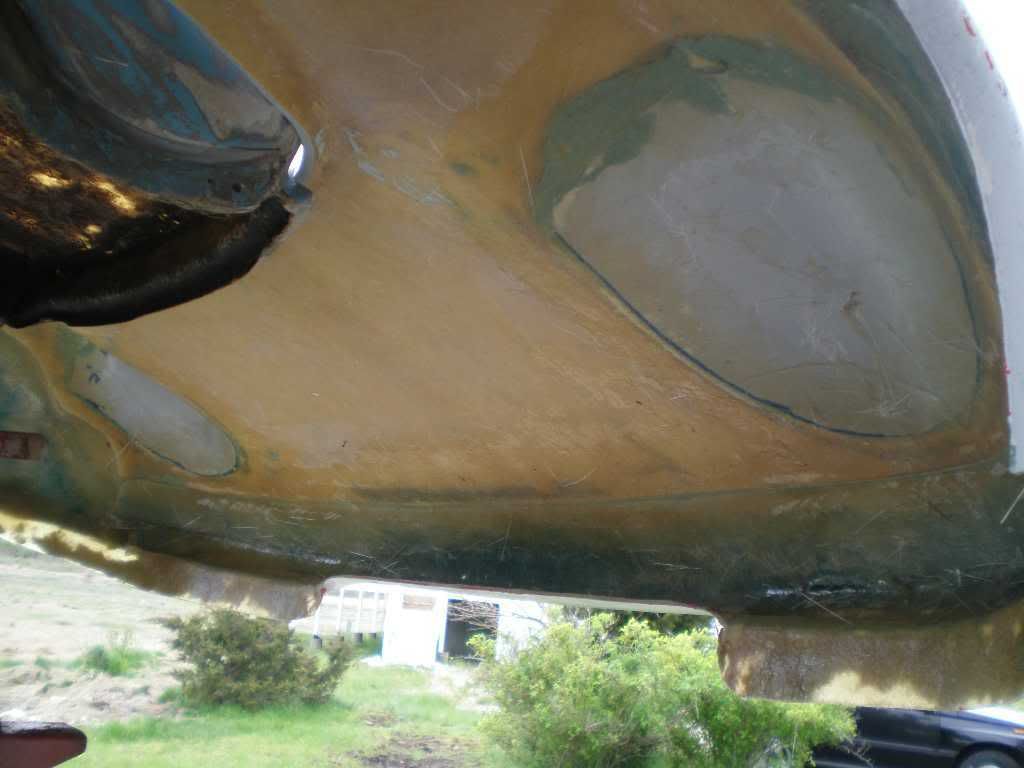
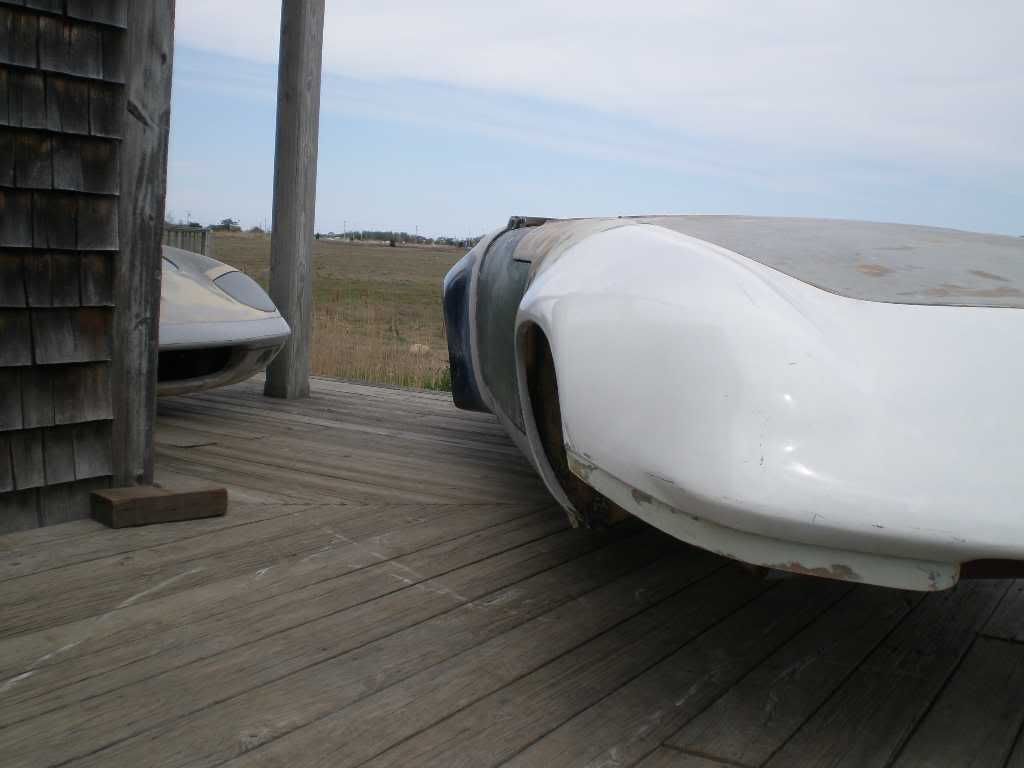
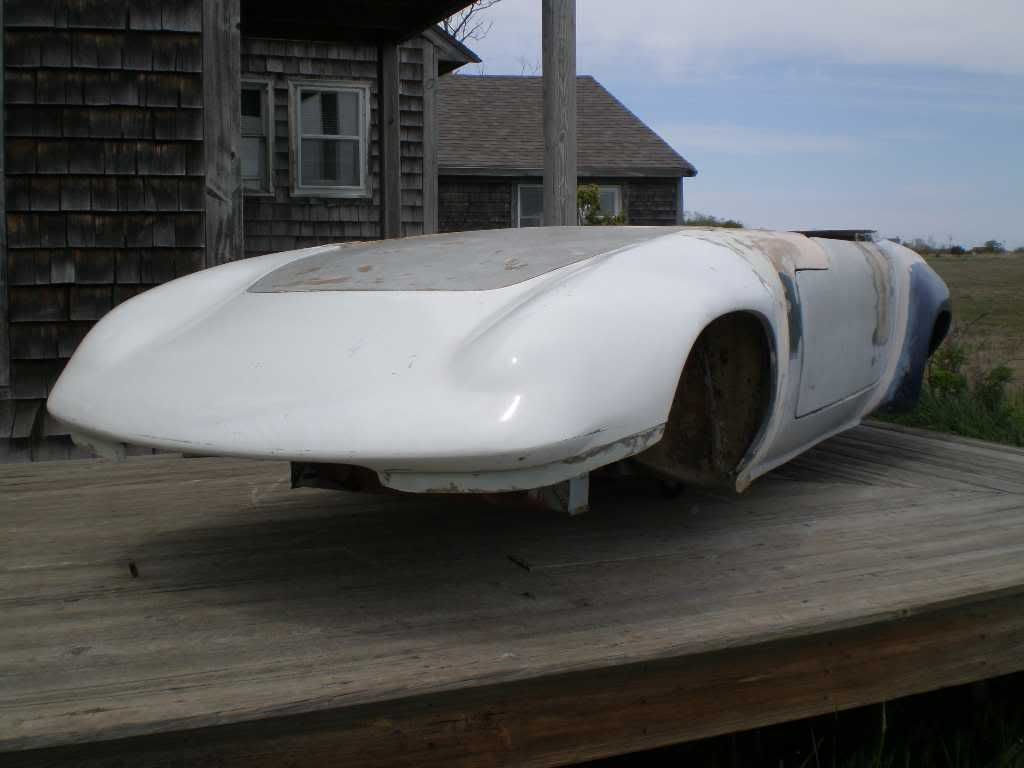
I had a few questions off list about the nose that I was going to use on this project, more to do with the arch flairs. well its tough to describe so I pulled the nose out of the attic and proped it up on my bedroom table and took a couple of photos. Its been raining again and not much accomplished this morning. I opened up a can of polyester filler and worked it around with a paint stick, good enough for this project. I managed to get on the first coat and sand it before the drips on the back of my neck said enough...


-

garyeanderson - Coveted Fifth Gear

- Posts: 2626
- Joined: 12 Sep 2003
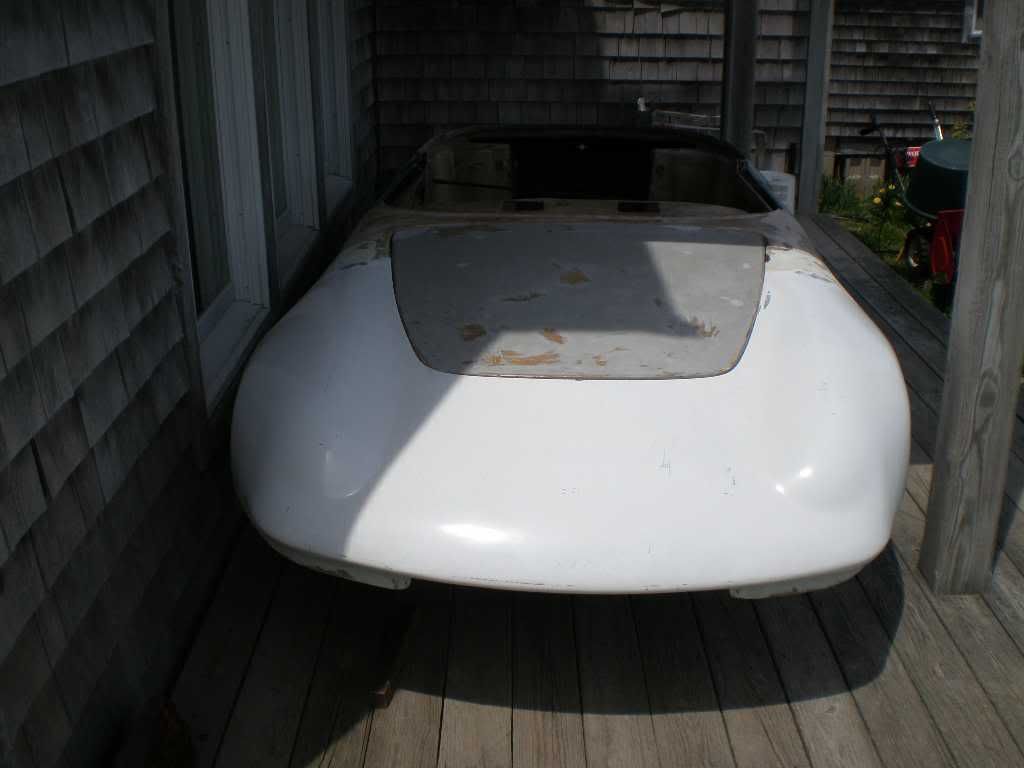
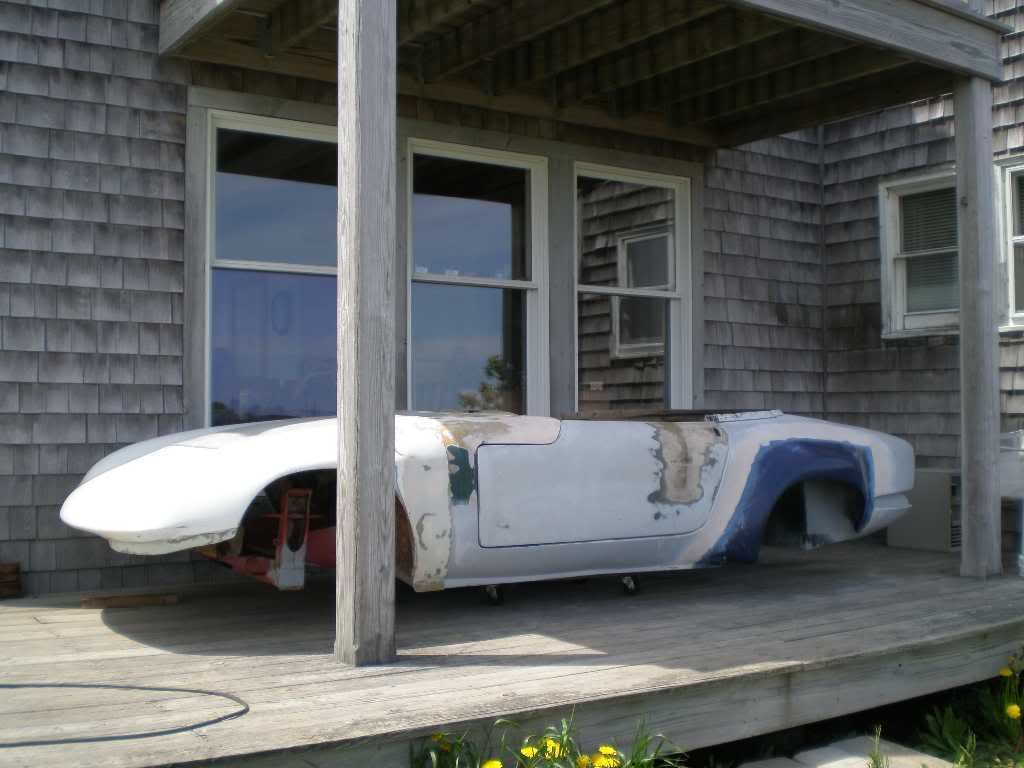
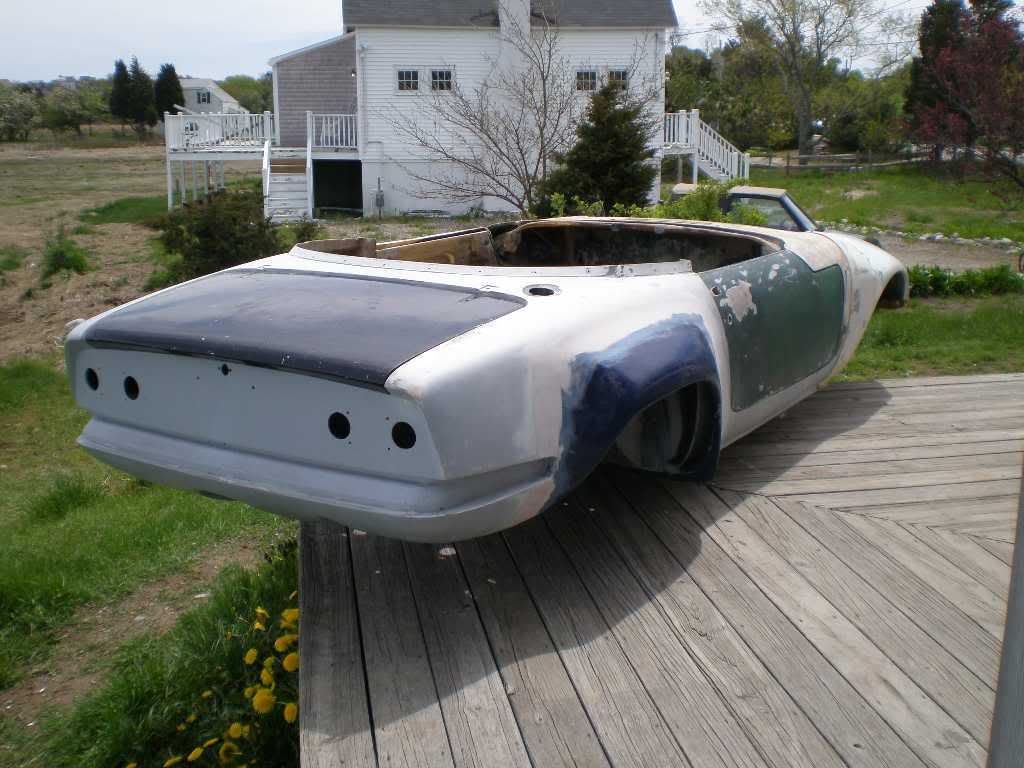
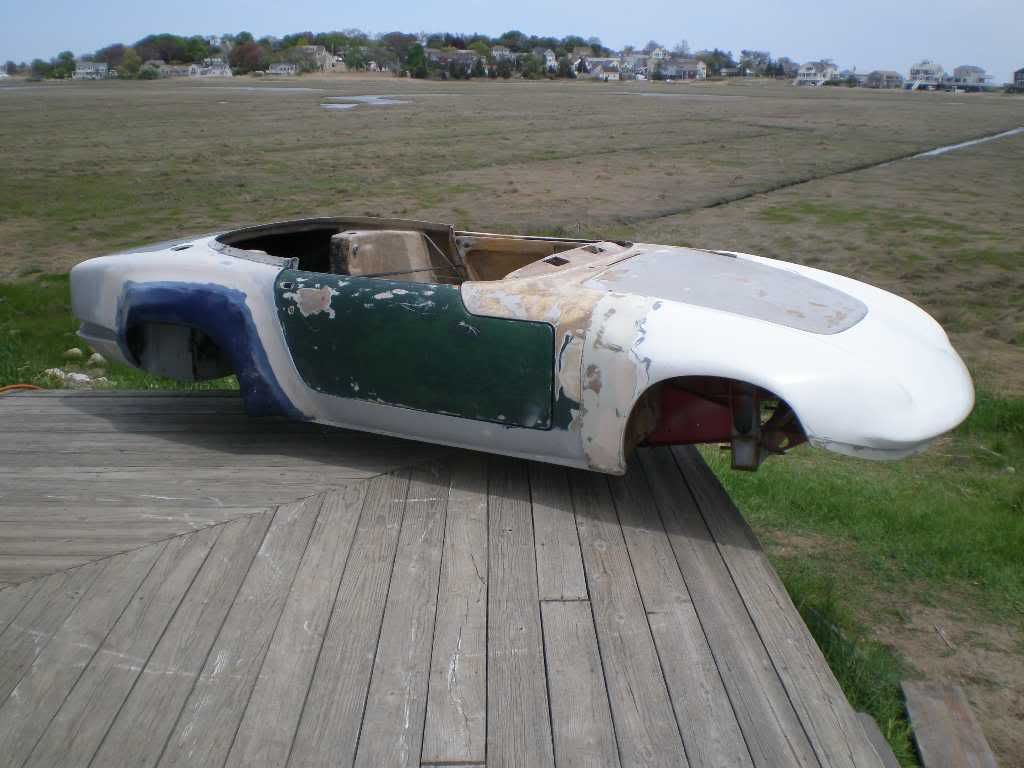
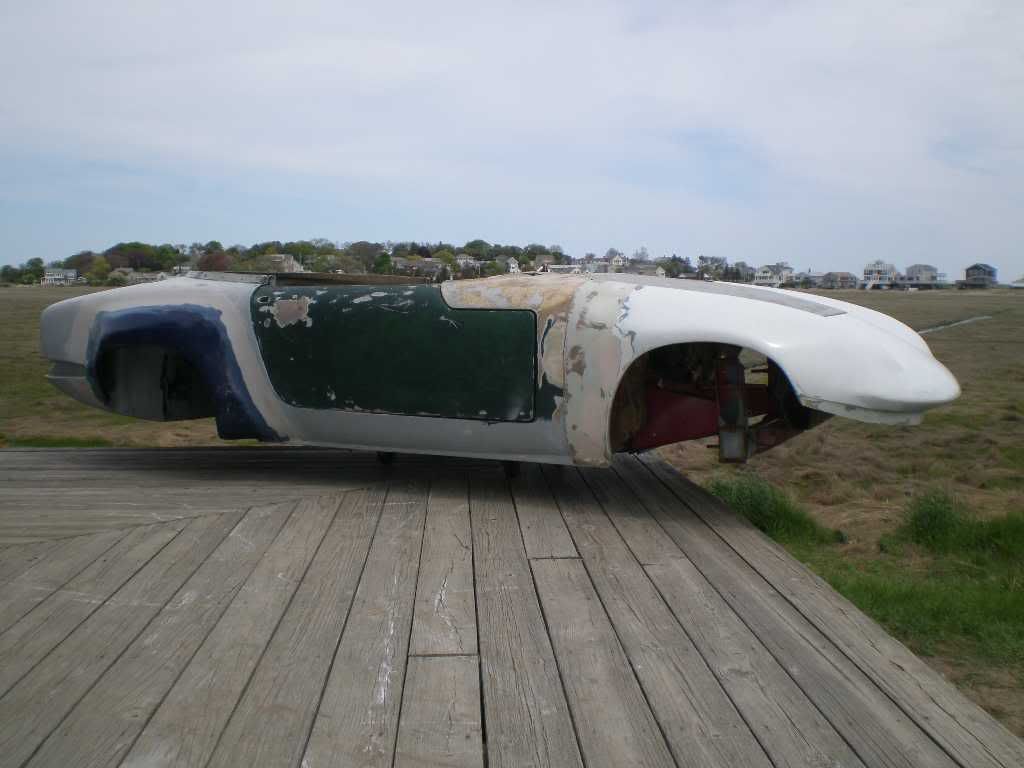
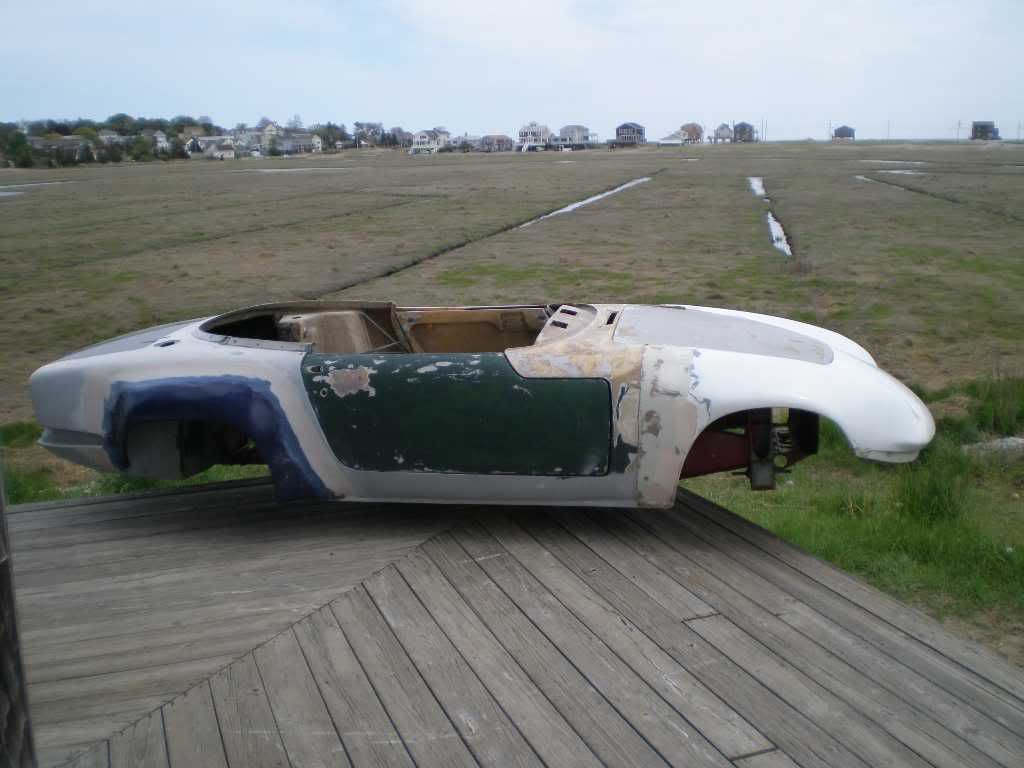
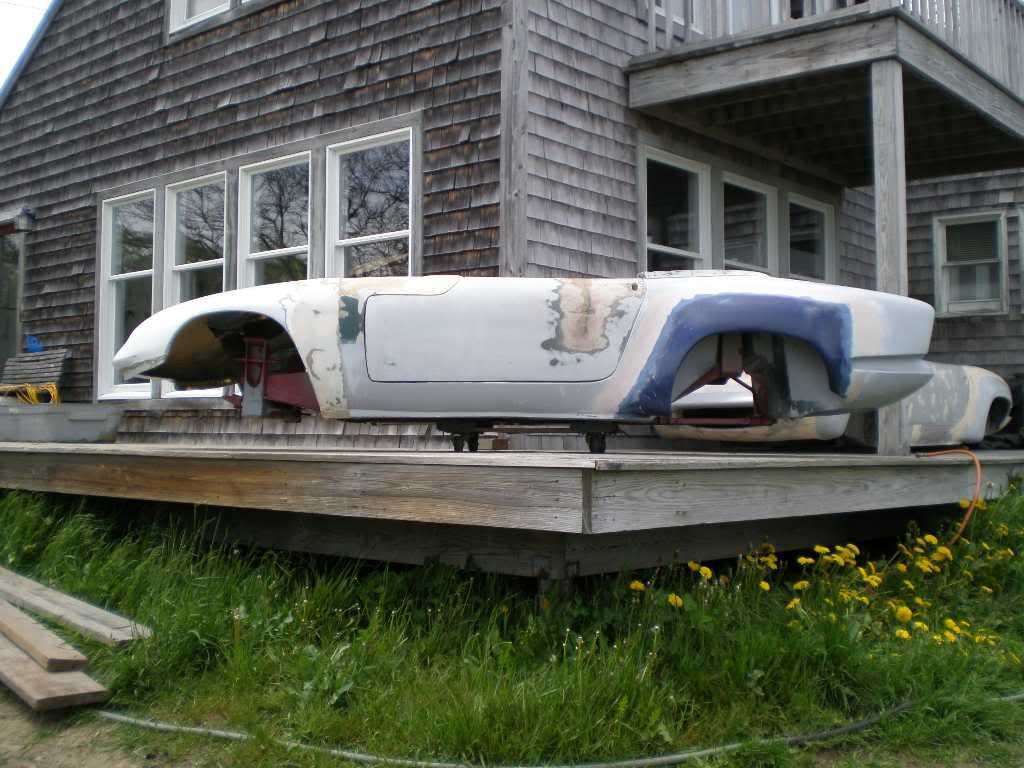
Its been kind of quiet here this week so I thought I would post a few more photos of the minimal progress that I have made. I got the free junk chassis off the back porch and put it under the body shell. Then I pulled the nose out and tried to line it up, its been a couple years but I had it mocked up before so I thought it would fit. It came close but it needs a bit more work to make it look right, at the moment its a 20 footer at best. Anyway have a good laugh, I am into this Elan for $150 the way it sits plus a bit of time so It should be O.K.
Gary
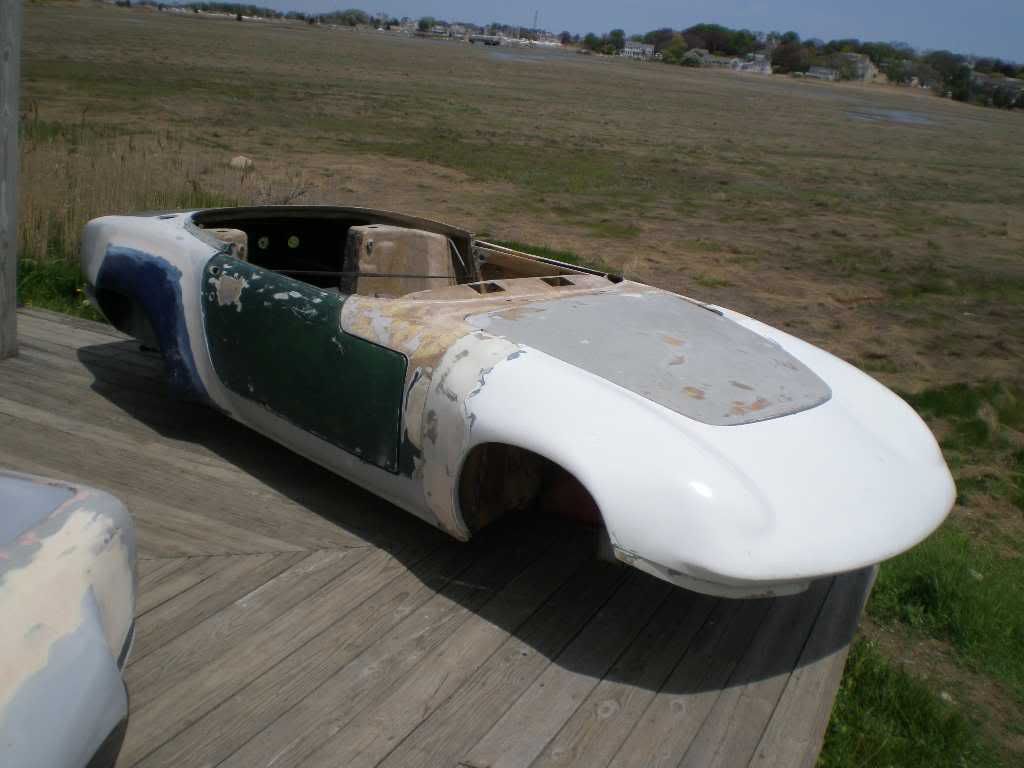
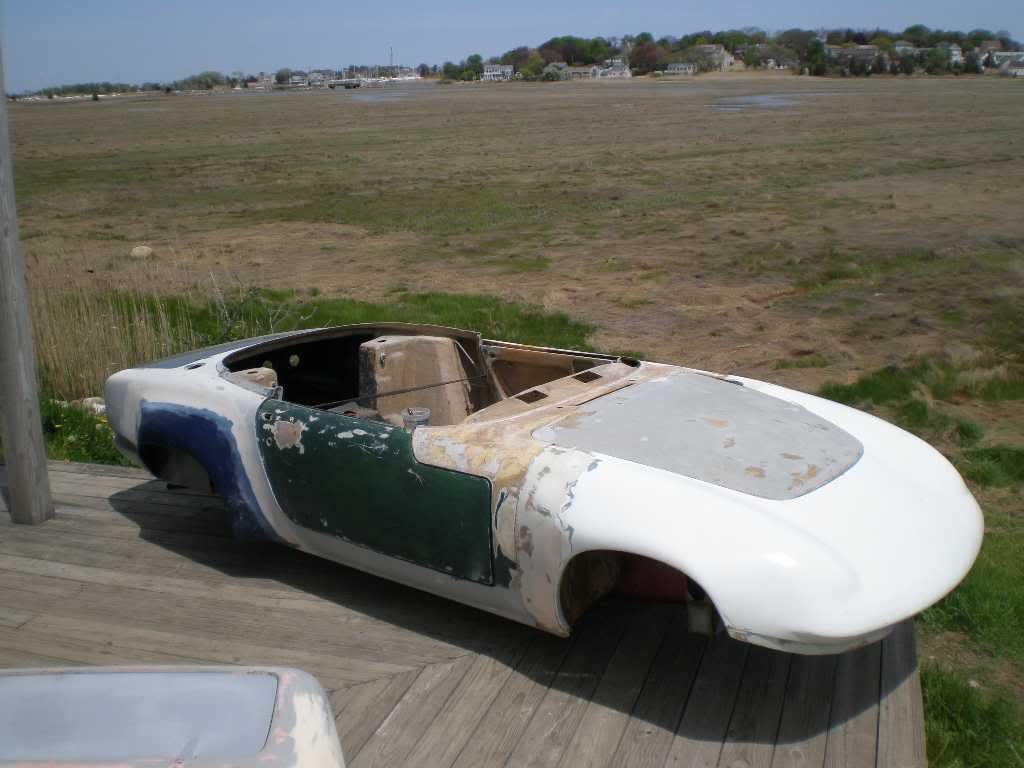
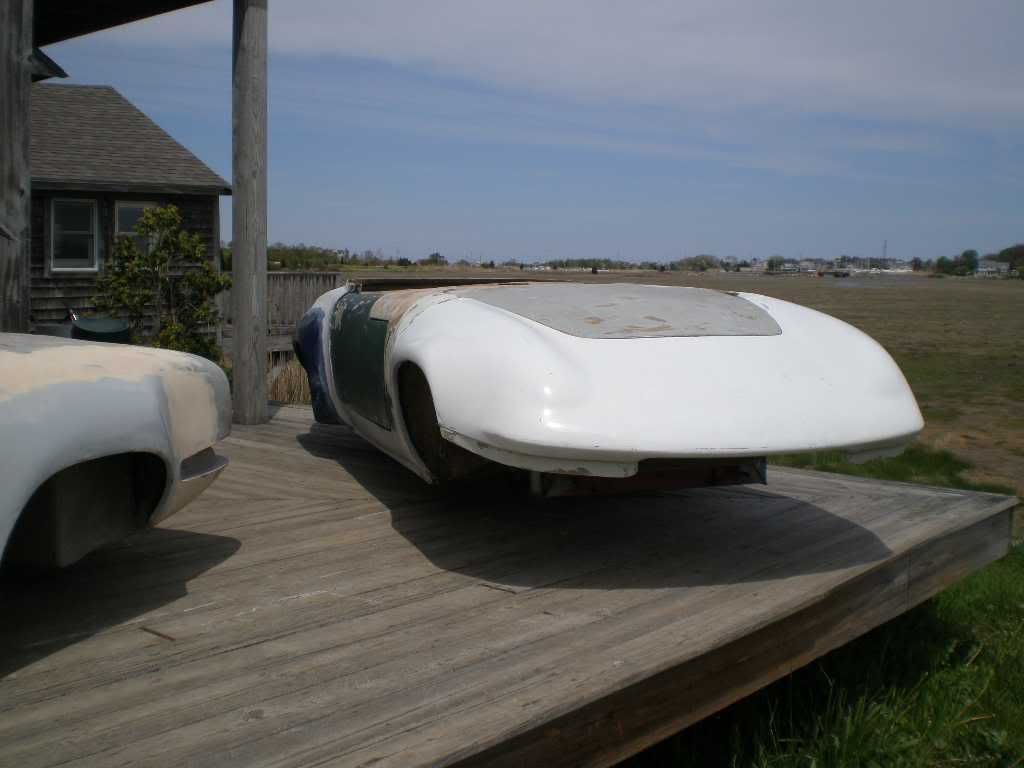
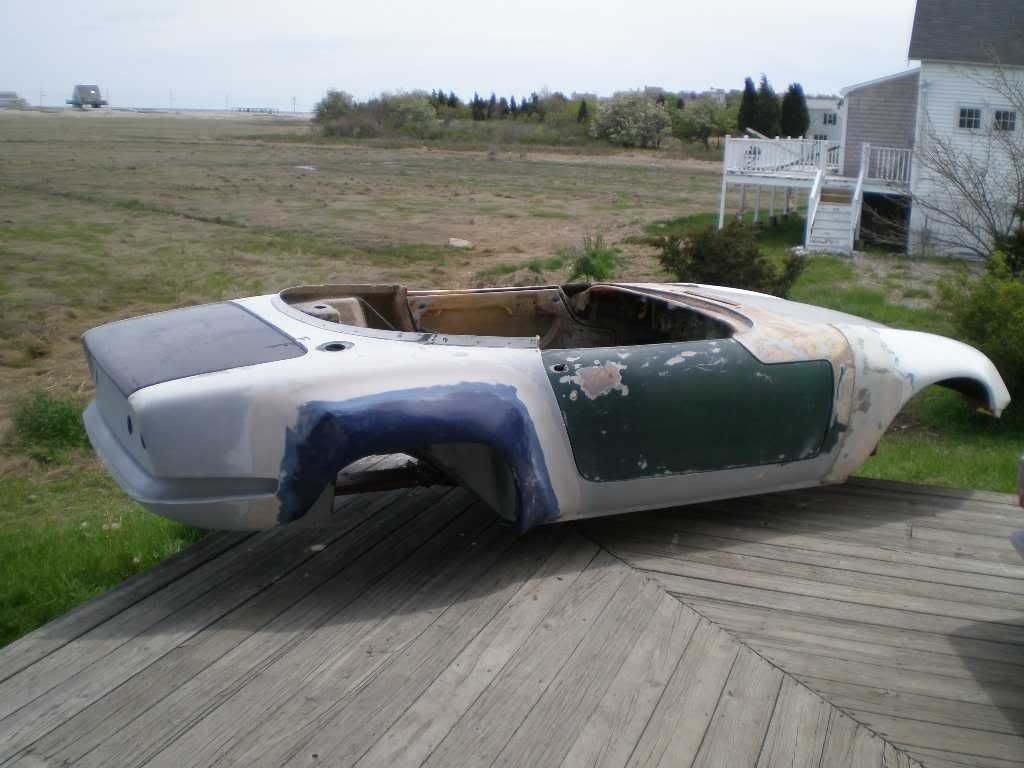
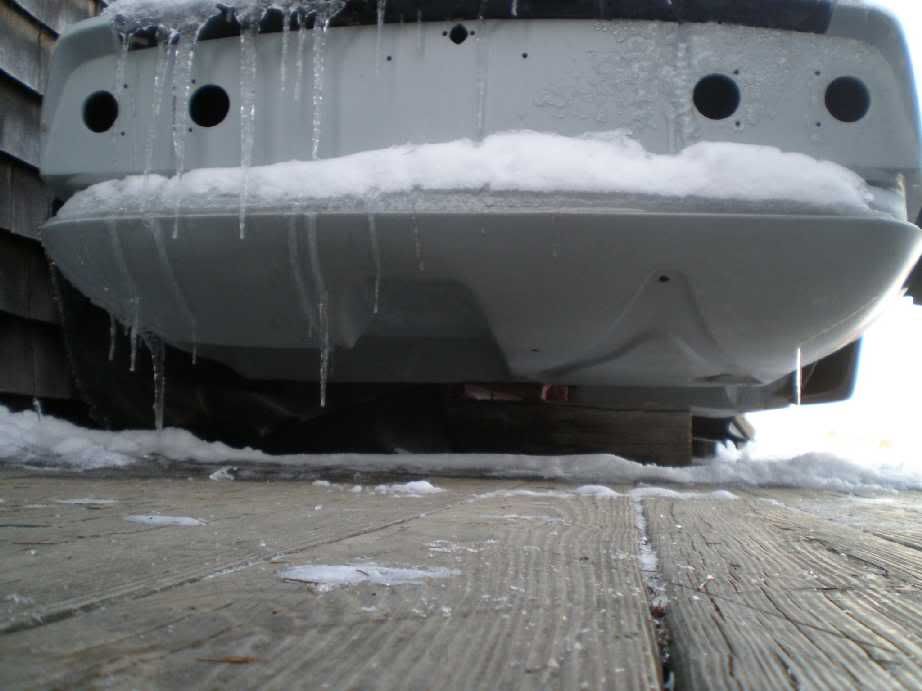
Brrrrrrur February 5th 2009
S3 tail with S4 twin tailpipe cutout
Gary


Brrrrrrur February 5th 2009
S3 tail with S4 twin tailpipe cutout

Last edited by garyeanderson on Thu Feb 05, 2009 10:13 pm, edited 2 times in total.
-

garyeanderson - Coveted Fifth Gear

- Posts: 2626
- Joined: 12 Sep 2003
7 posts
• Page 1 of 1
Total Online:
Users browsing this forum: No registered users and 27 guests

